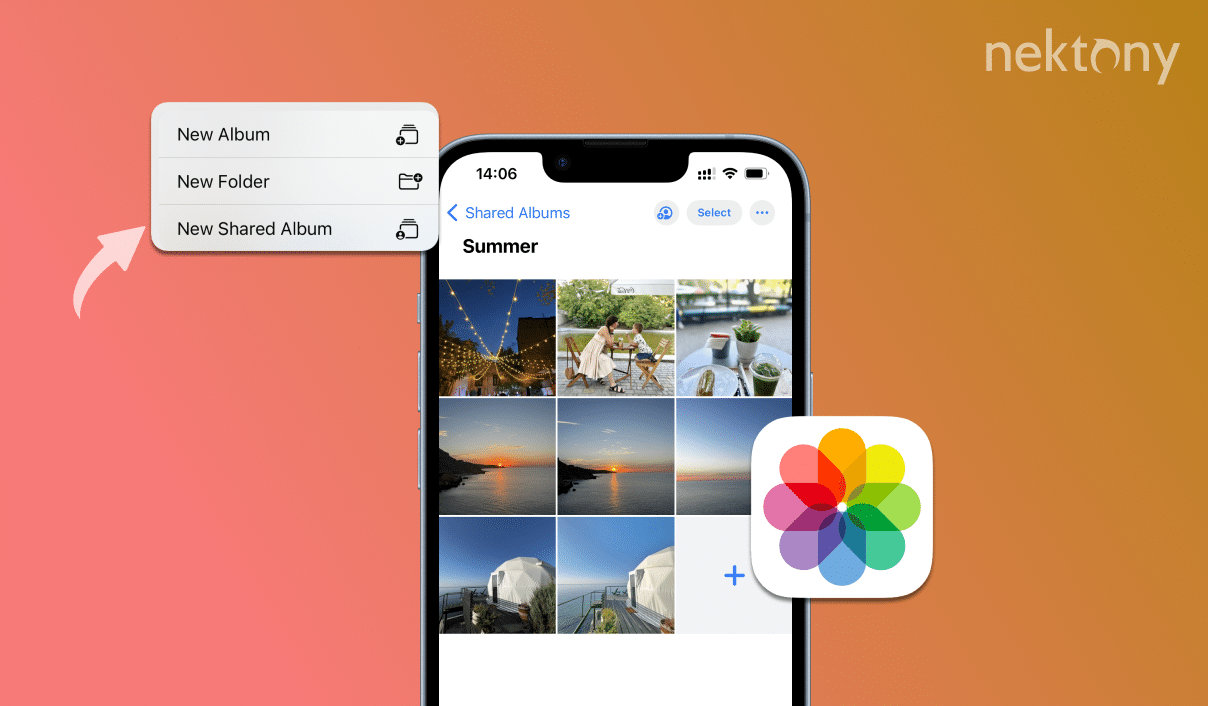
The Shared Albums option on iPhone allows you to share your photos with friends and family in an easy way. This article explains how to share an album on iPhone, and manage and delete it so that your memories are always available to the album subscribers.
Contents:
- What is a Shared Album
- How to create and manage Shared Album on iPhone
- How to accept a Shared Album on iPhone
- Gow to delete Shared Album
- How to clear similar photos on an iPhone
Before we start
If you have tons of similar and duplicate photos, this phone cleaning app will help you easily find and get rid of them. It also detects the largest media files and helps you free up storage space in minutes.
Phone Cleaner for Media Files
What is a Shared Album
The Photos app on iPhone and iPad is an Apple feature that lets you share photos and videos with friends and family. Instead of sending files via messenger or email, you can create an album that a specific group of people can access.
The main benefits of Shared Albums:
- A possibility to add photos and videos in one place and participants can view them at any time.
- An option to leave comments, and give likes.
- Shared Albums use the iCloud cloud without taking up space on your device.
- Only invited people have access to the album.
This feature is especially useful for family events, vacations, or collaborative projects where everyone can contribute.
How to make a Shared Album on iPhone
Creating a shared album is a process that only takes a few minutes. Follow the step-by-step instructions below:
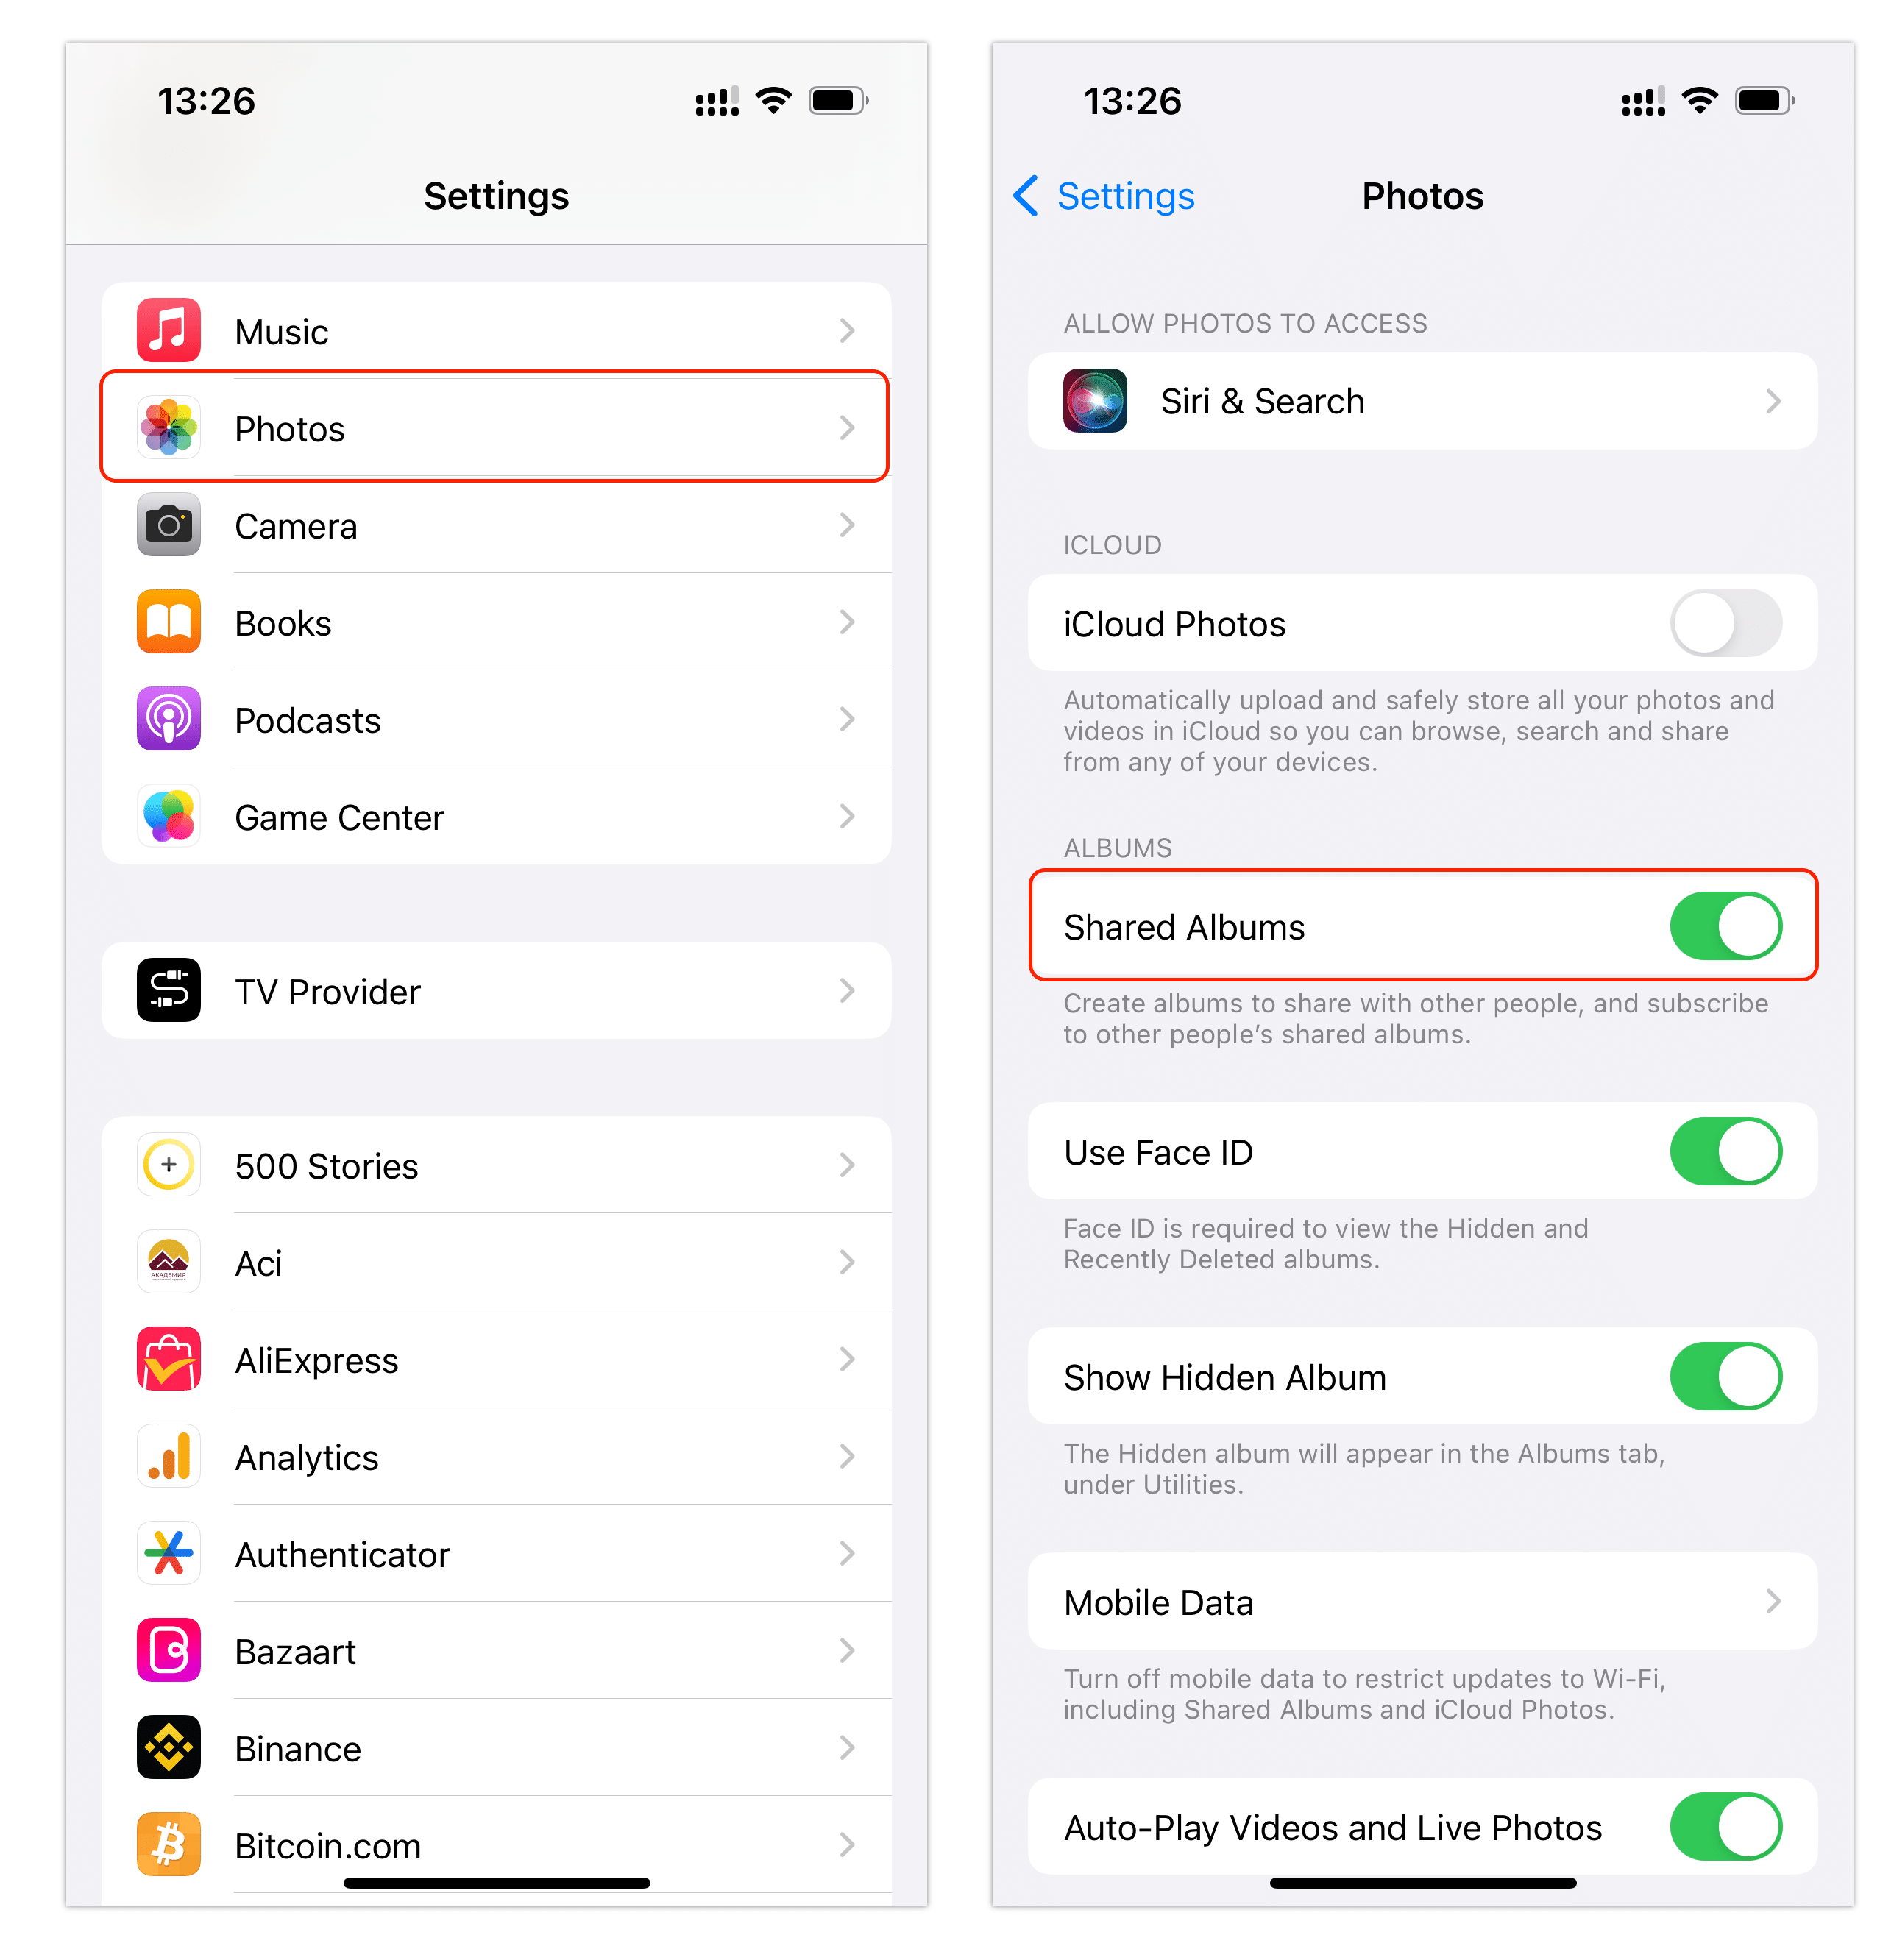
- Make sure the feature is enabled. For this, open Settings on your iPhone → go to Photos → enable the toggle next to Shared Albums.
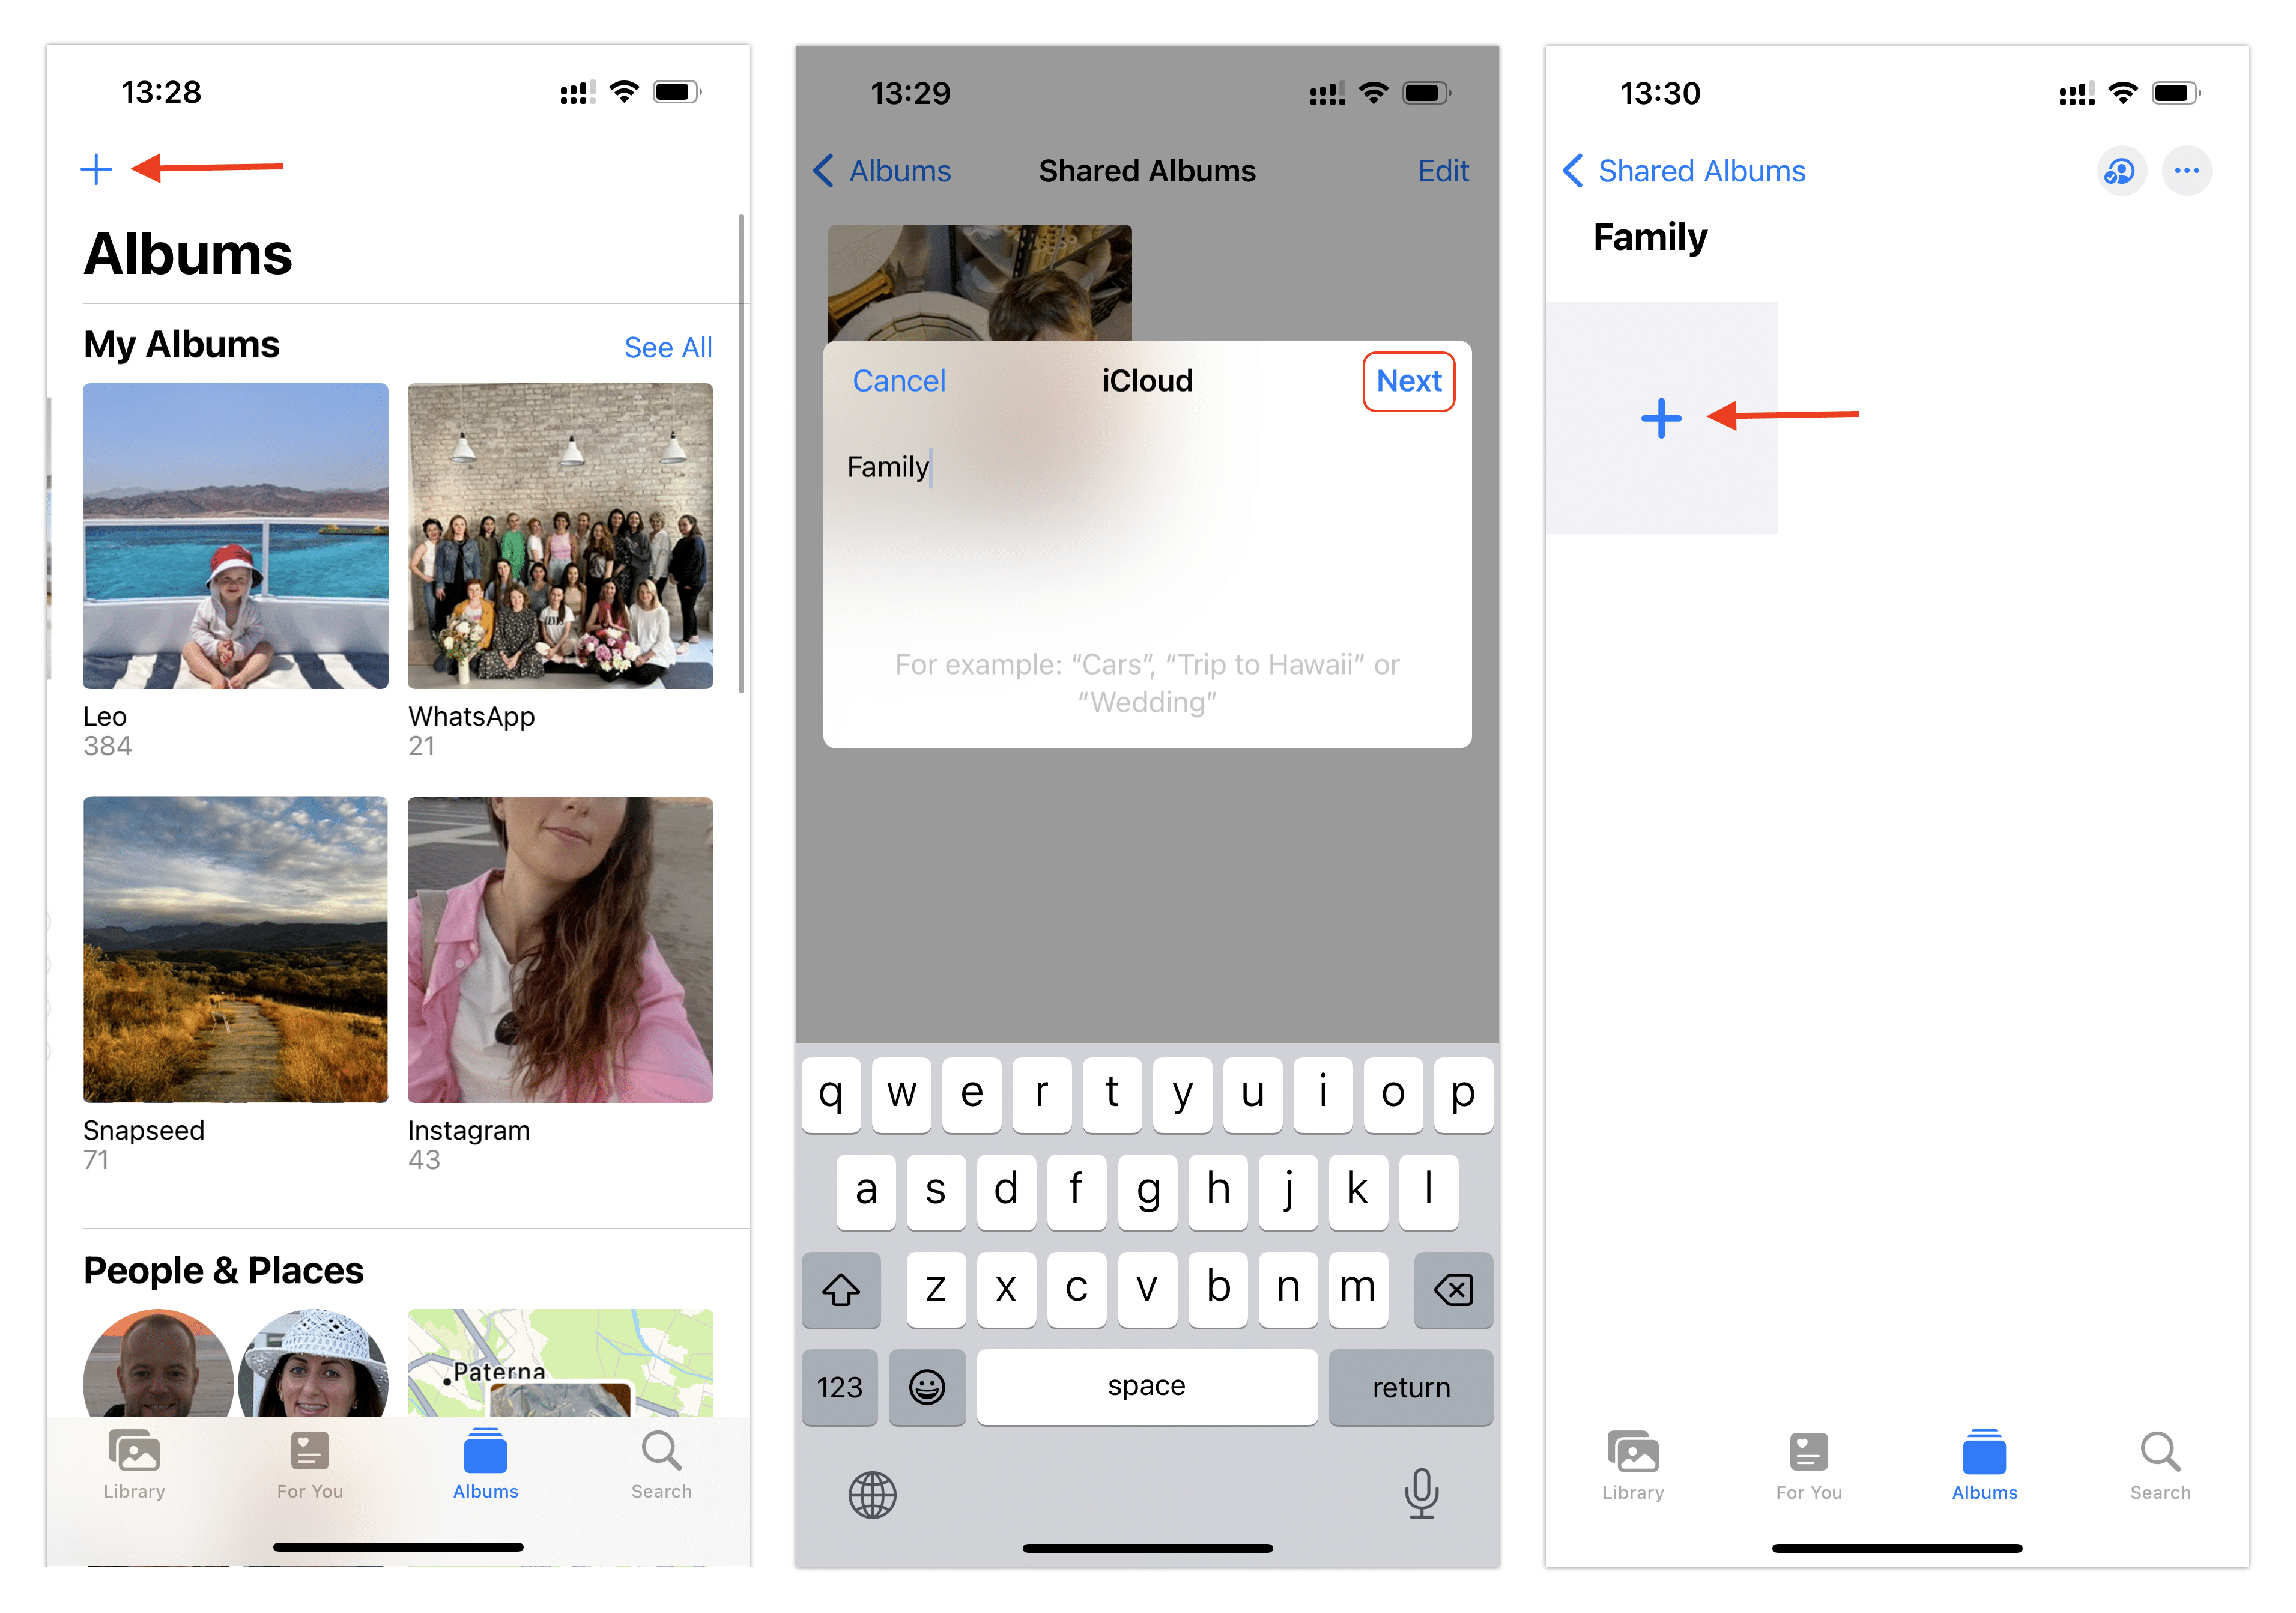
- Open the Photos app and tap Albums at the bottom of the screen.
- Scroll down and select “+” at the top of the screen.
- Select New Shared Album and enter a name for it.
- Tap Next and select the contacts you want to share with.
- Tap Create.
- To add media files to the album, tap the “+” icon.
- Select photos and videos from your gallery and tap Add.
- Album members will now receive a notification and can view the added files.
How to manage members of Shared Album
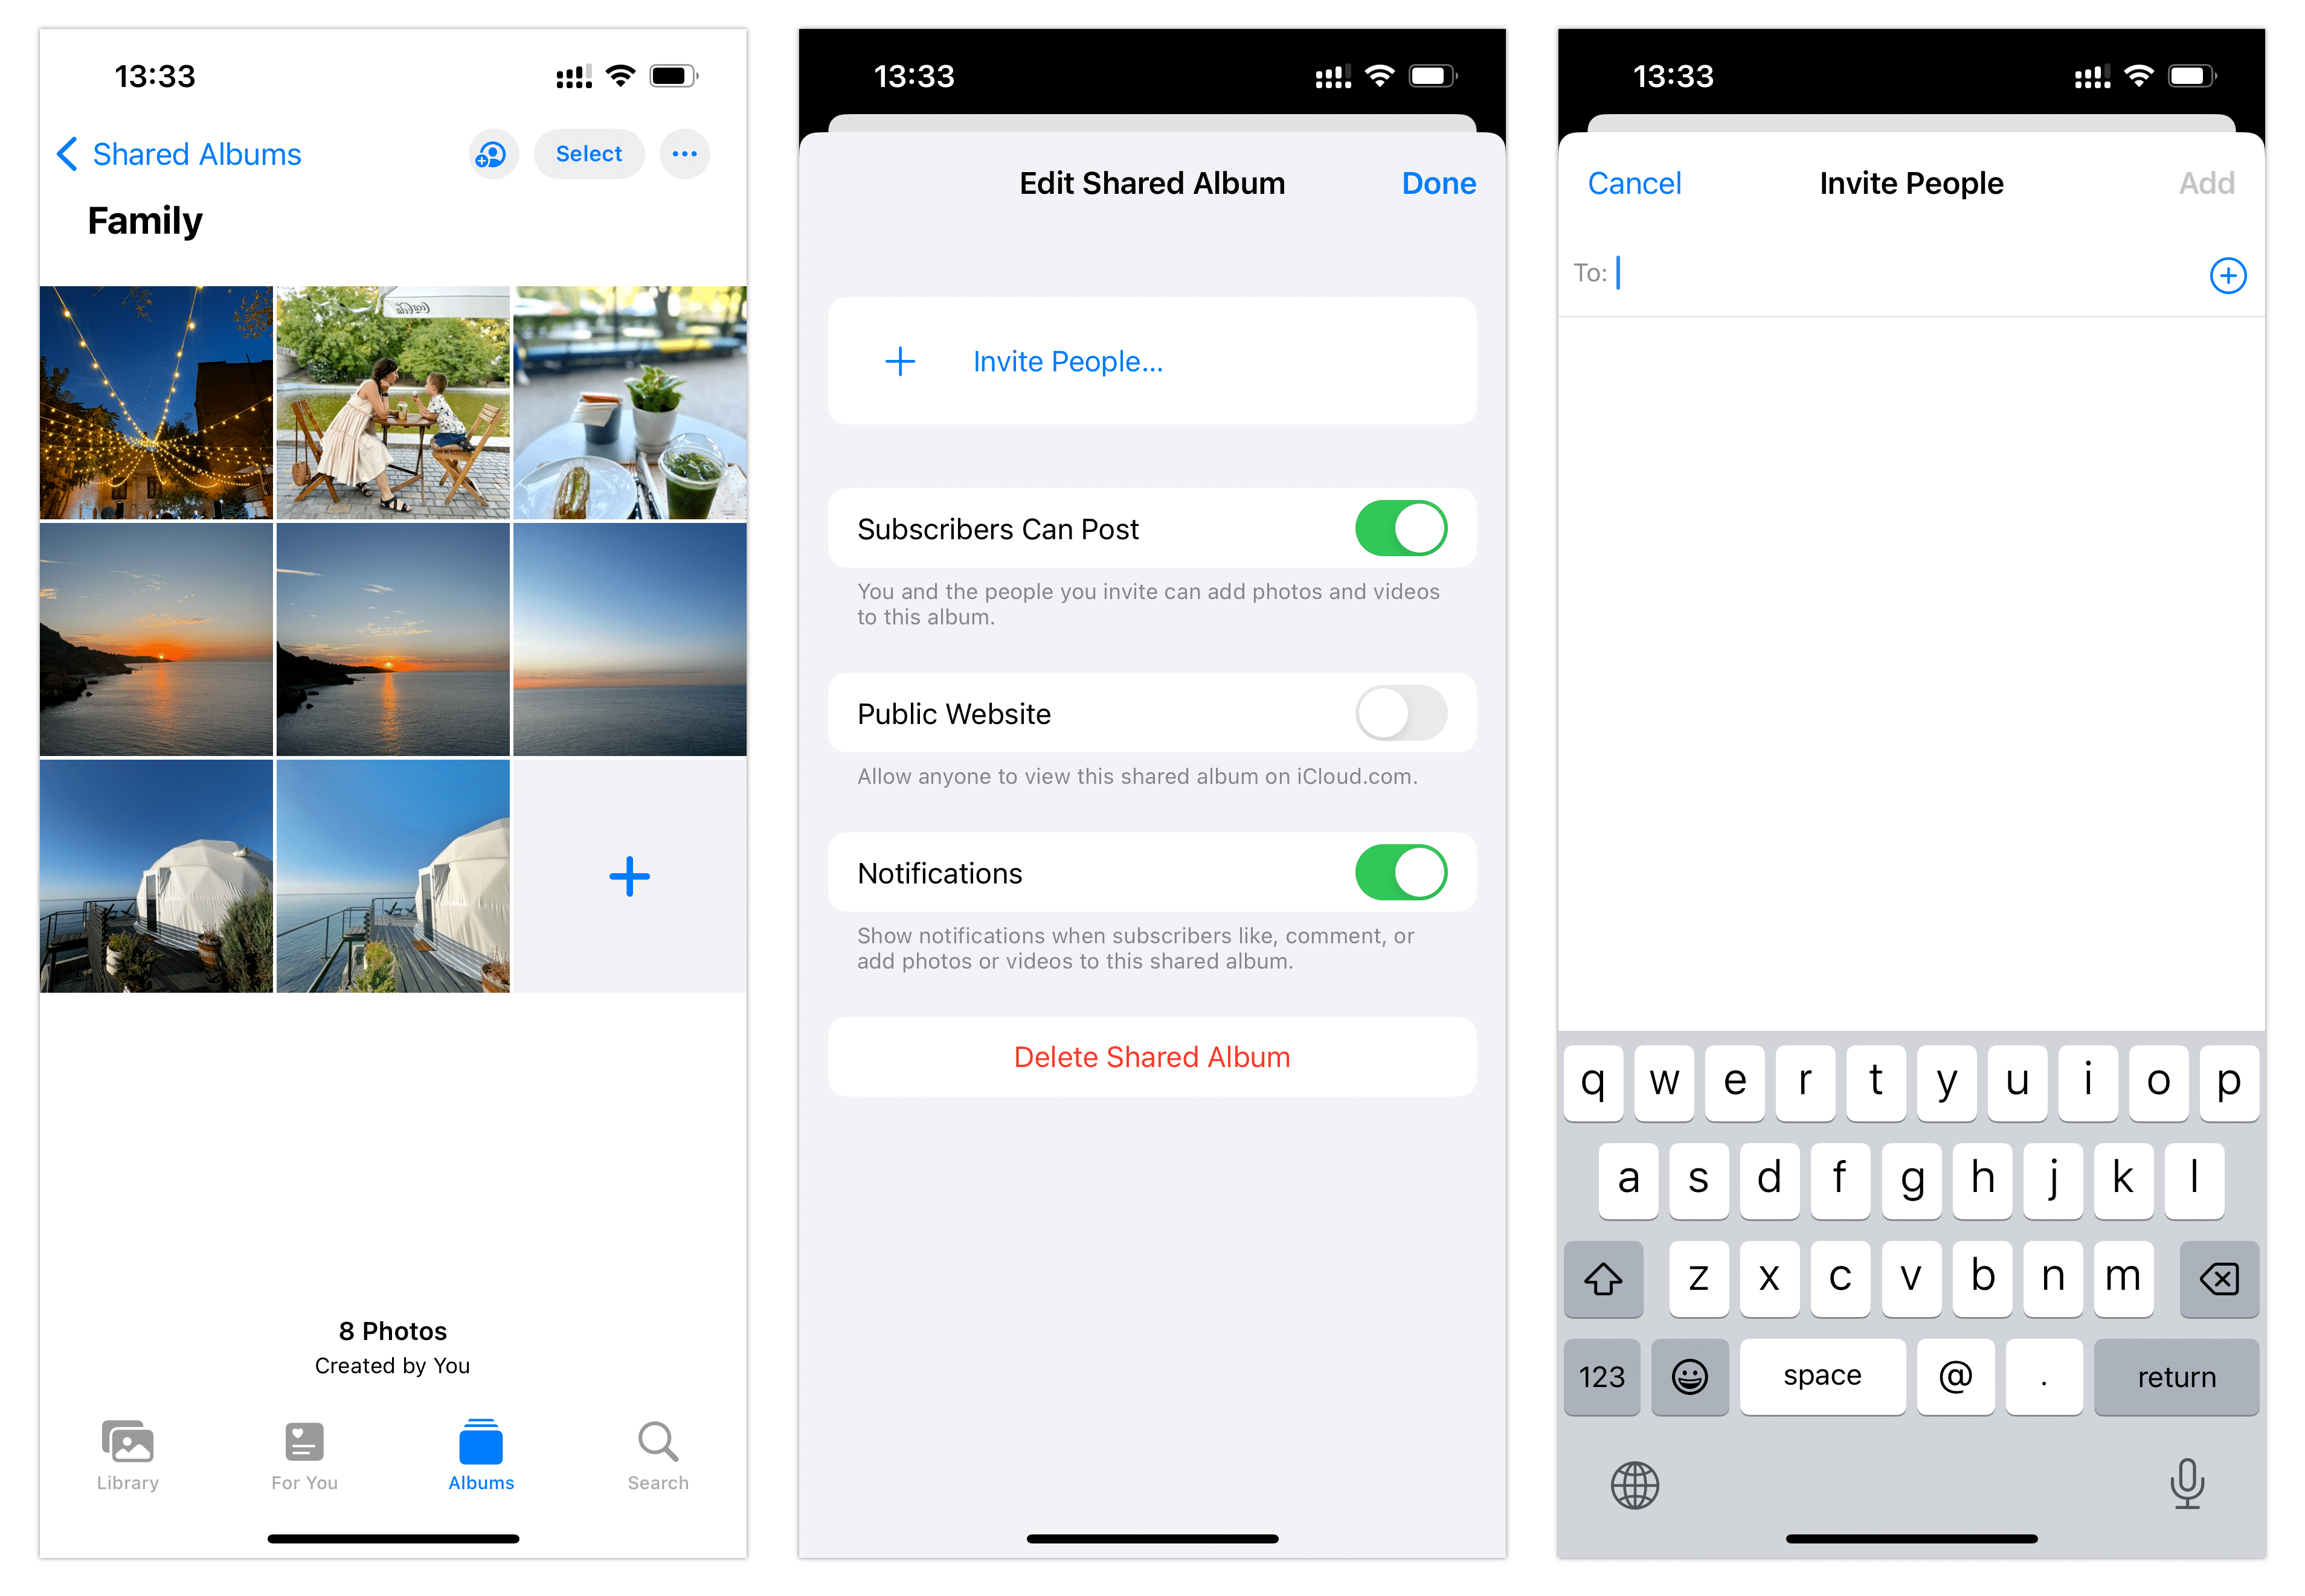
- Open a shared album.
- Click the People icon in the upper right corner.
- In the Subscribers section, you can invite new people, remove existing people, or change settings (allowing subscribers to add their files).
- Every time someone adds new files, likes or comments, you will receive a notification. This option is enabled by default, but you can turn it off in the album settings.
How to accept a Shared Album on iPhone
When someone invites you to a shared album, you’ll receive a notification. It will appear in the Photos app or in the notifications section on your device.
If the notification is missed, the invitation will also be available in the Photos app.
Accepting an invitation
- Open the Photos app and tap the Albums tab.
- Scroll down to the Shared Albums section.
- Here you’ll see an invitation. Tap the invitation, then select Accept.
- Once you accept the invitation, the album will become available in the Shared Albums section.
You will now be able to view photos and videos added by the author, as well as leave comments or add your own files if the album settings allow it.
How to delete a shared album
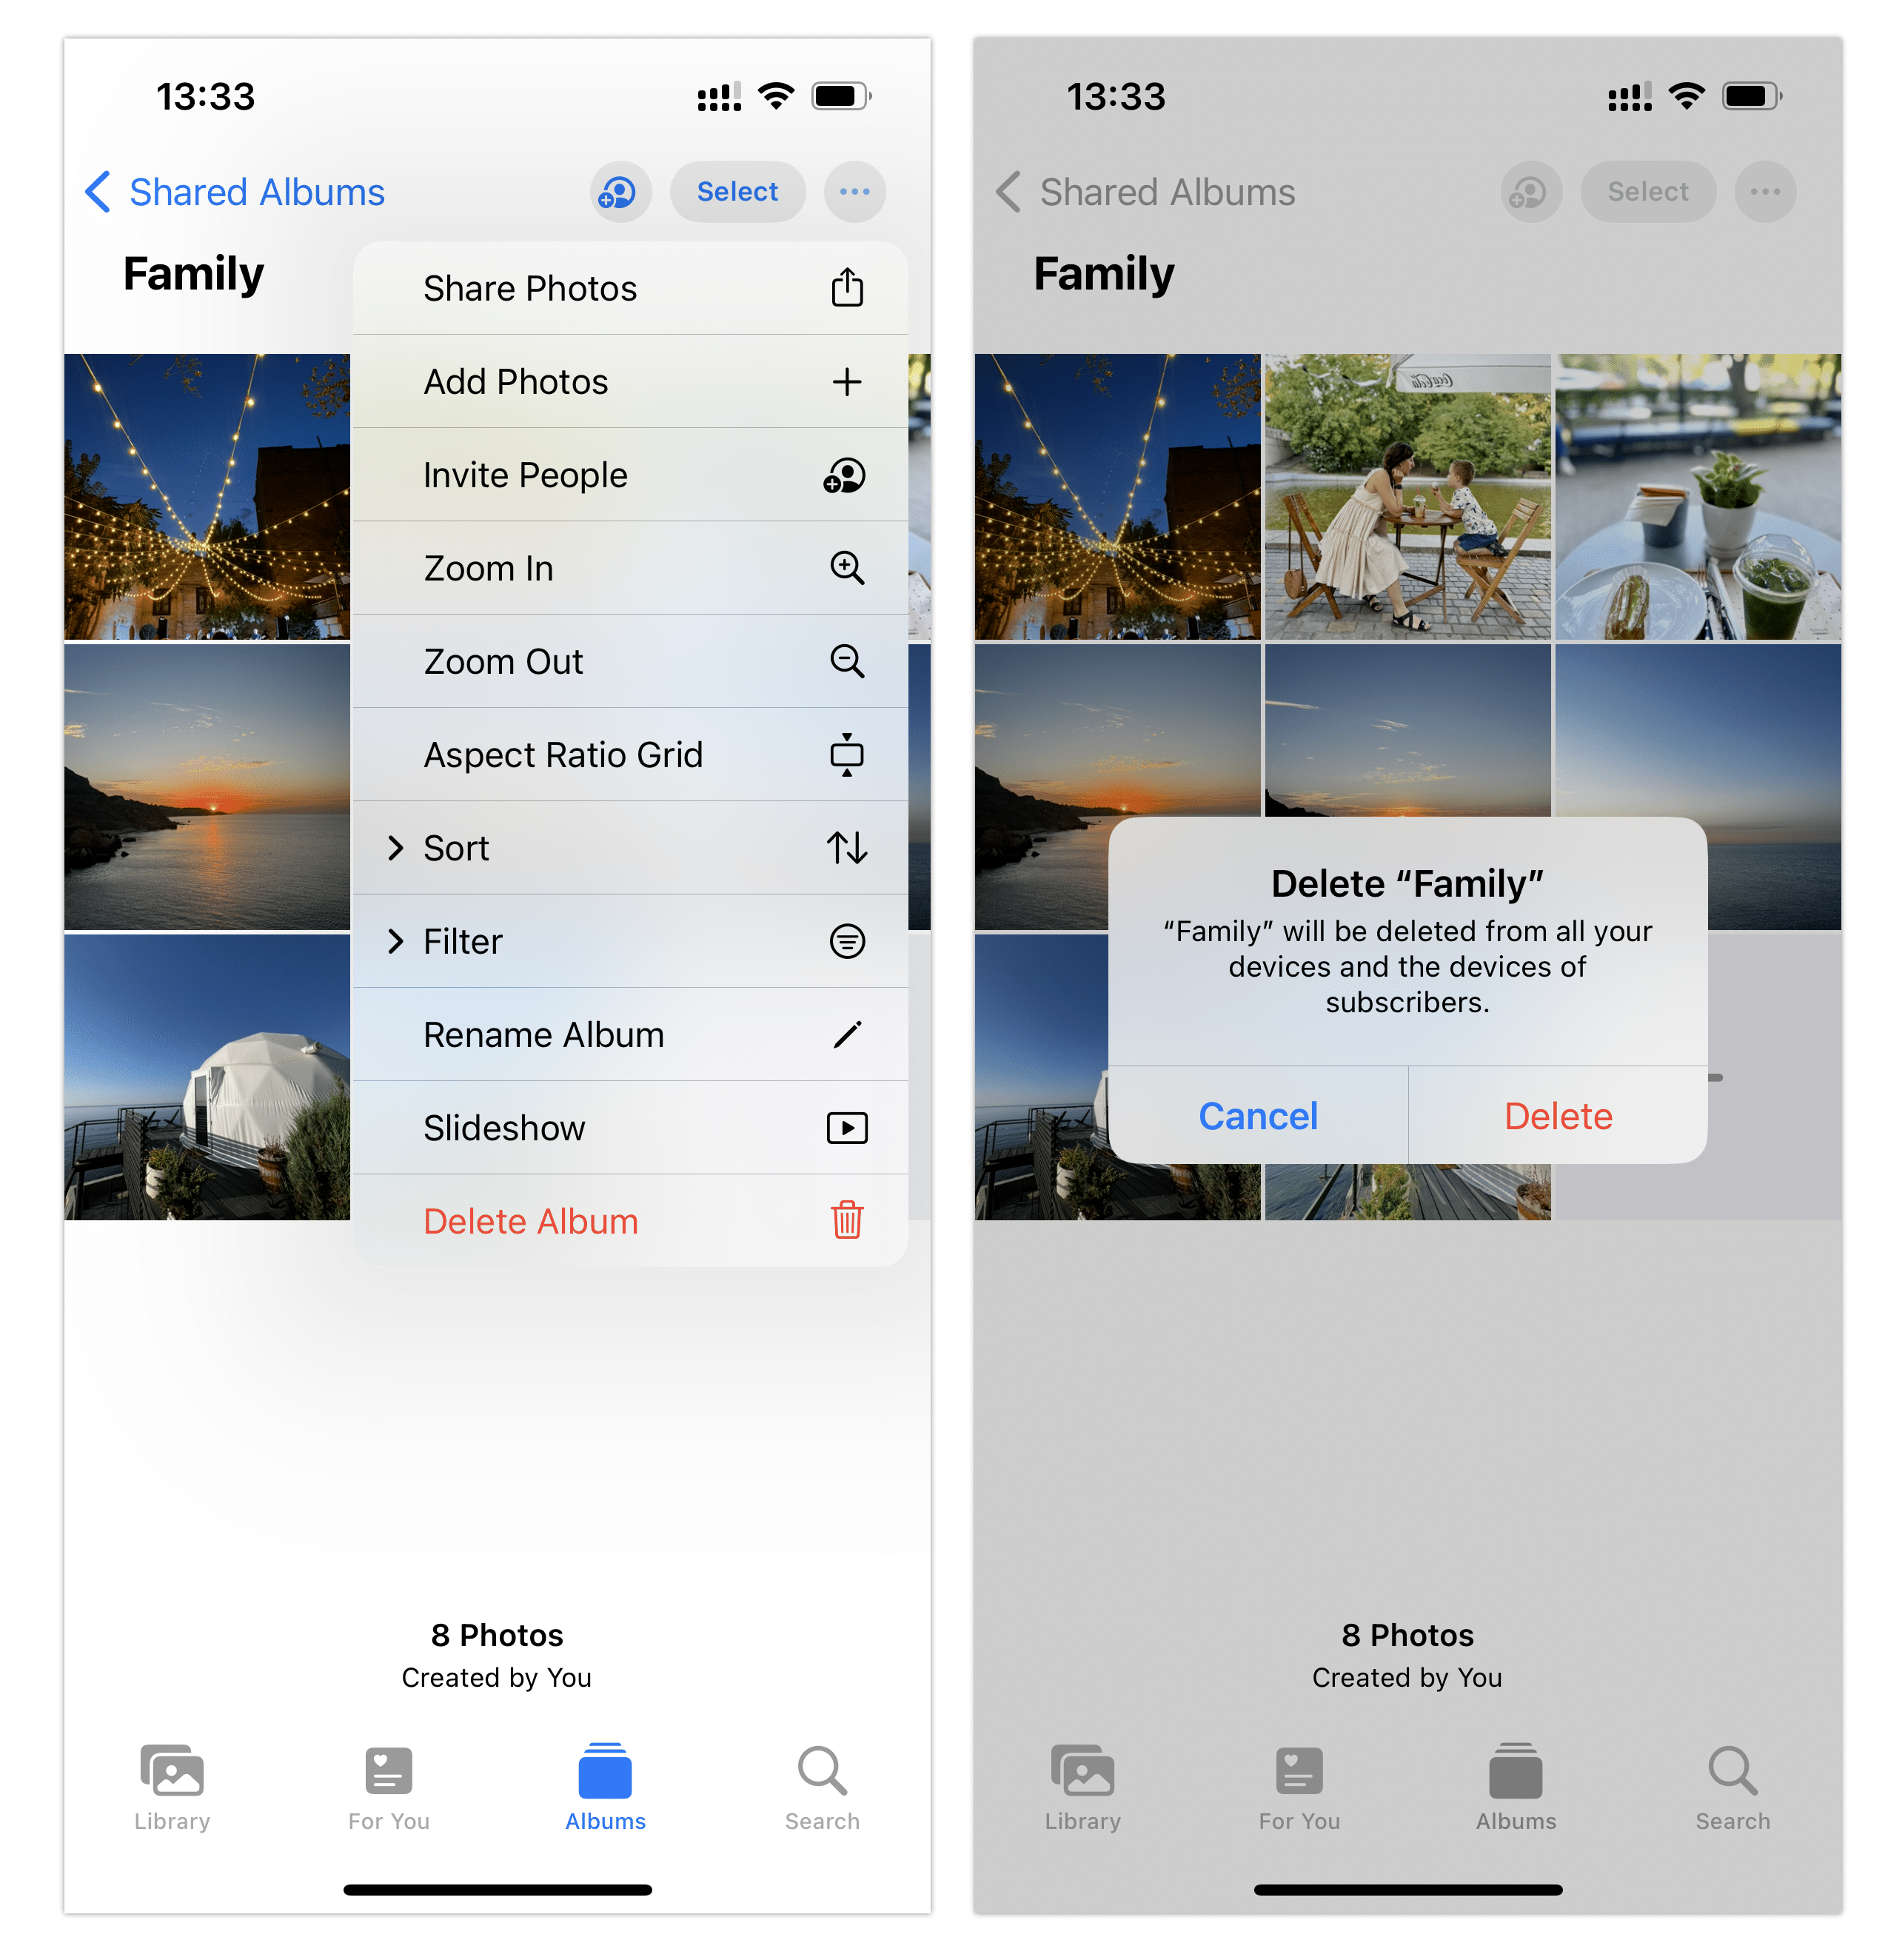
Before you delete an album, note that all files and comments from the album will be inaccessible to members.
Follow these steps to delete a Shared Album:
- Open the Photos app.
- Tap the Albums tab.
- Find the shared album you want to delete.
- Tap it, then select People in the upper-right corner.
- Scroll down and select Delete shared album. Confirm the action.
- The album will then disappear from the Photos application for all participants.
How to unsubscribe from someone else’s album
- Open a Shared Album.
- Tap People.
- Select the Unsubscribe from the album option.
How to delete similar photos and free up space on your iPhone with Phone Cleaner for Media Files
Shared albums may not take up much memory on your device, but the iPhone gallery itself eventually fills up with duplicate or similar photos, screenshots, and failed shots. Deleting such files manually can be time-consuming and tedious. This is where the Phone Cleaner for Media Files app from Naktony comes to the rescue.
What is Phone Cleaner for Media Files?
Phone Cleaner for Media Files is a handy app that helps you find and remove duplicate and similar photos, optimizing space on your device. The app also allows you to quickly analyze your media files and free up valuable space for new pictures.
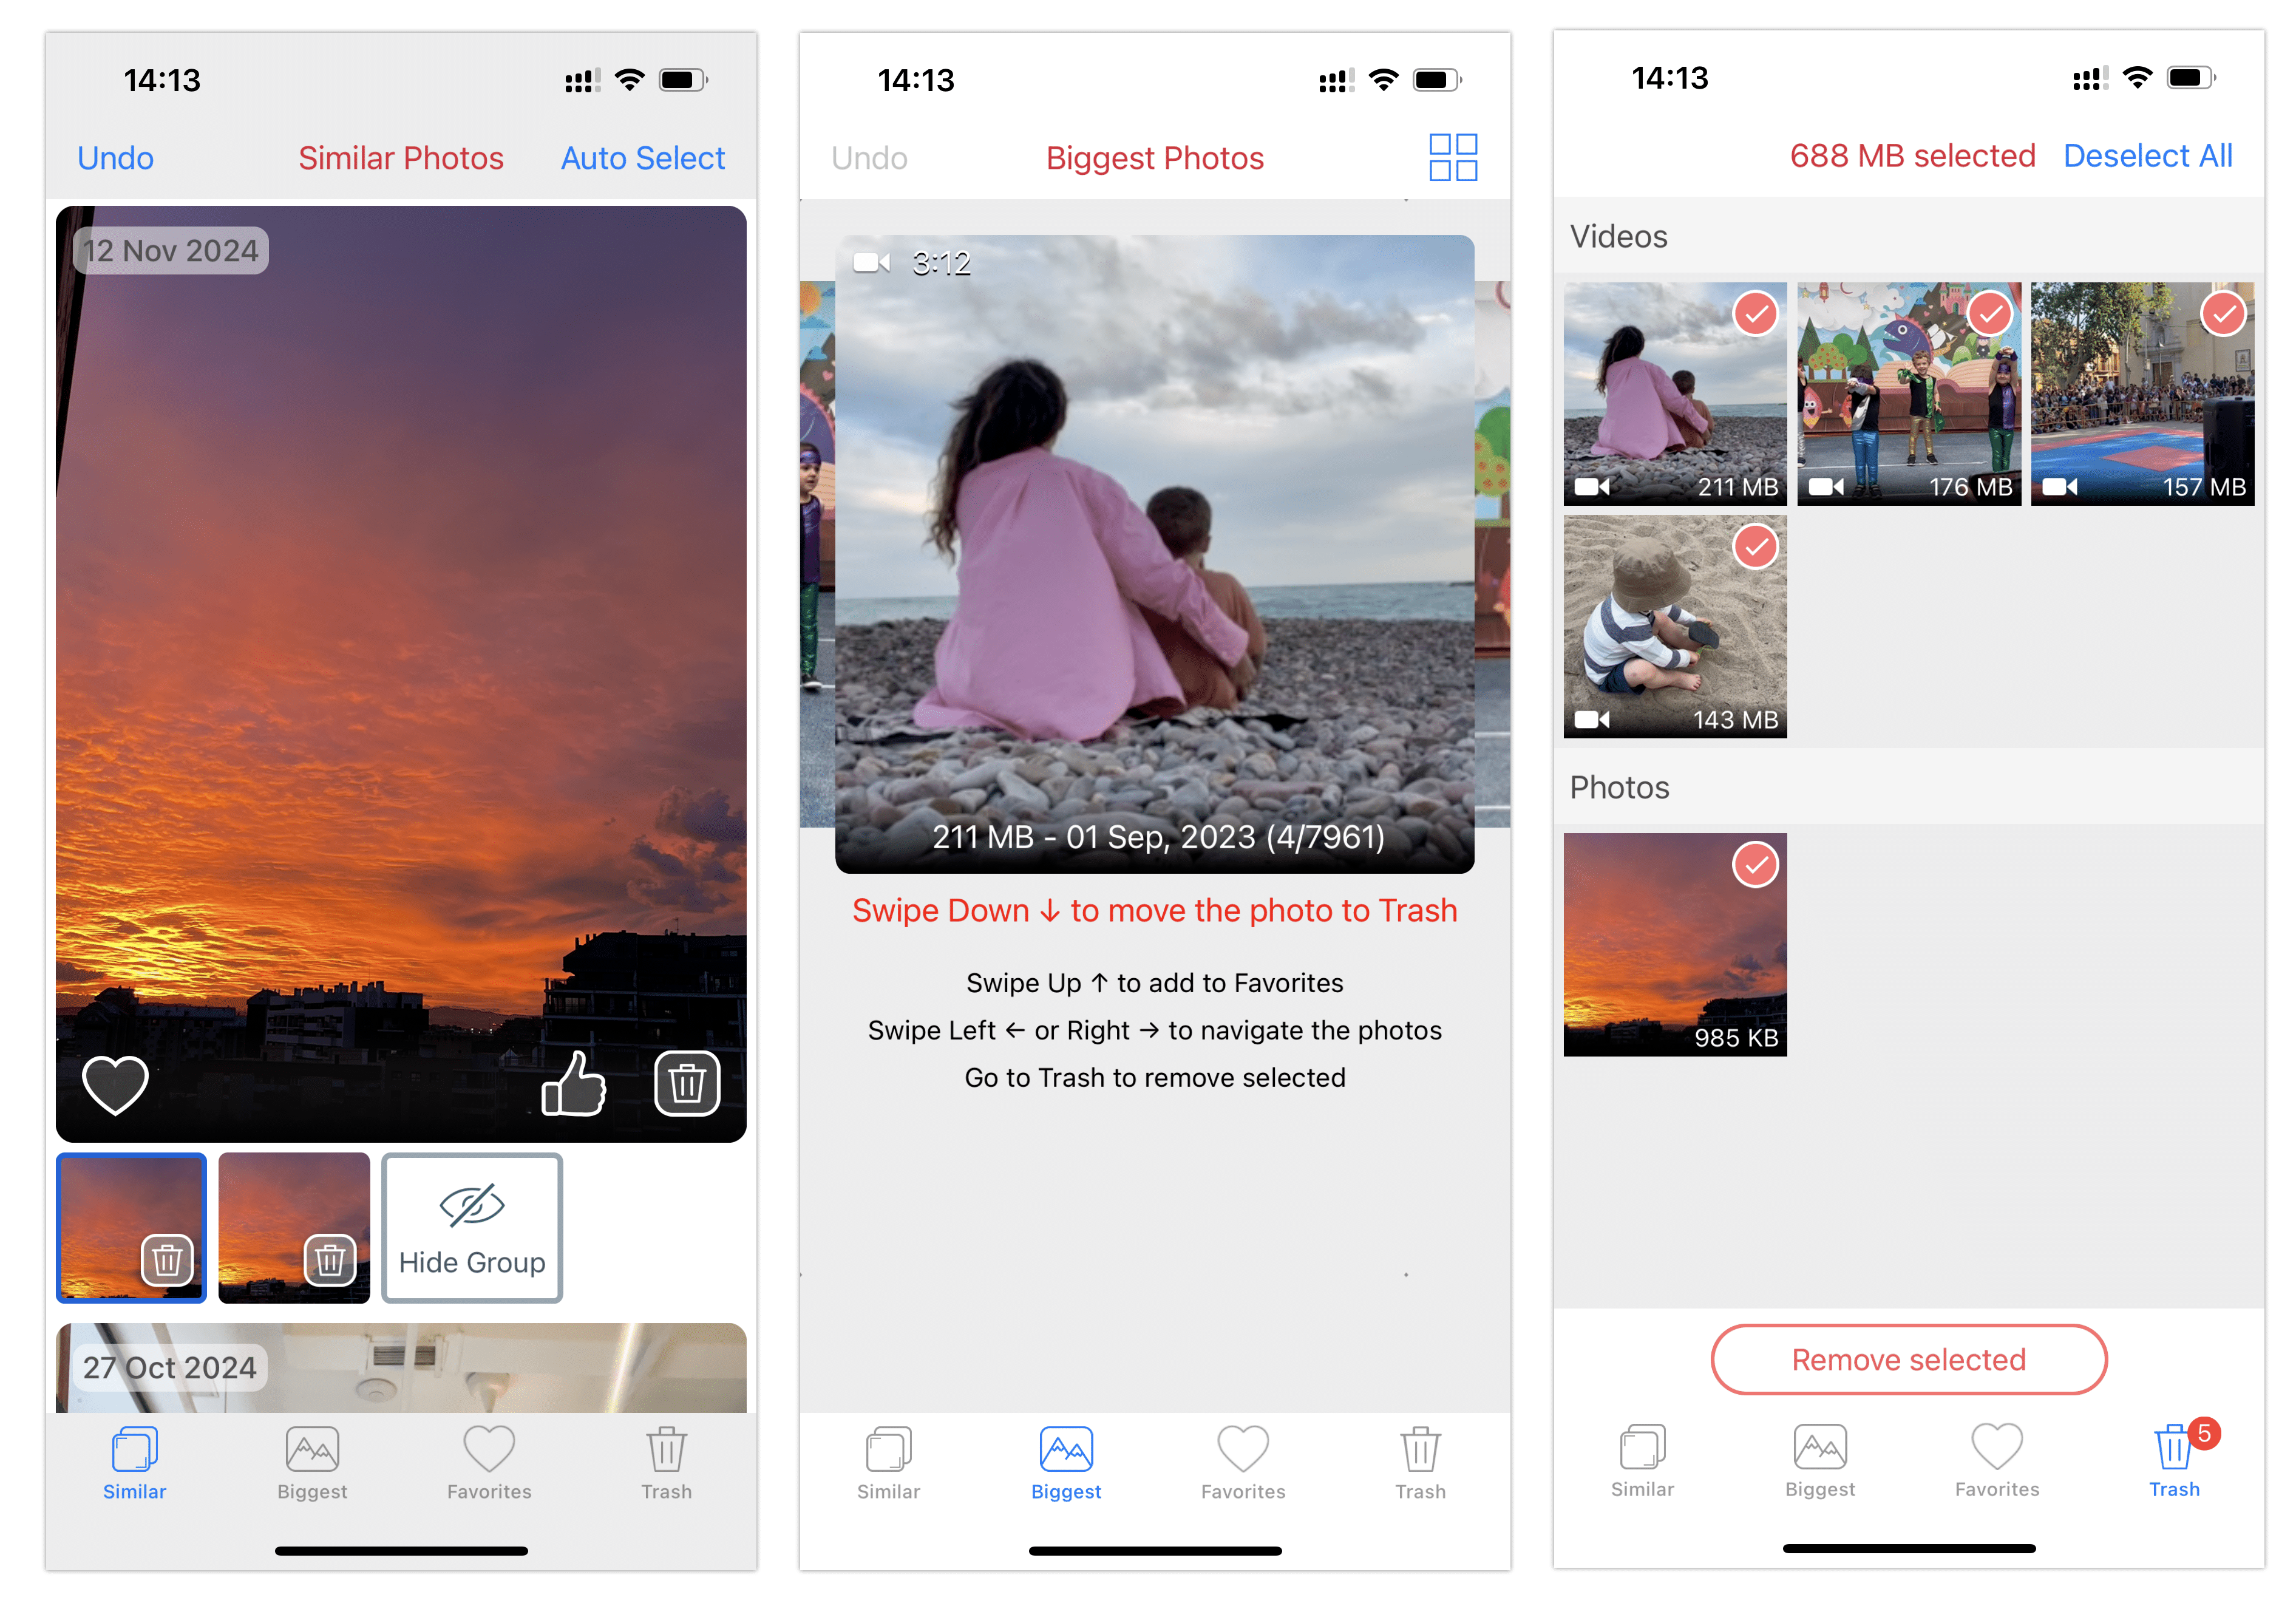
To clean your gallery using the app, follow these steps:
- Download Phone Cleaner for Media Files from the App Store.
- The app will start searching for similar photos and the largest media files.
- Once the scan is complete, go to the Similar tab.
- Select unneeded similar photos.
- Switch to the Biggest section and select the largest unneeded photos or videos for removal.
- Tap the Trash tab and remove all selected files.
By using Phone Cleaner for Media Files, you not only simplify the management of your gallery but also free up memory for more important data. This is an indispensable tool for anyone who values order and convenience on their iPhone.
Regular memory clearing helps you avoid overflowing your device and keeps it running smoothly. In addition, the freed-up space comes in handy for new photos and videos, especially if you actively use the Shared Albums feature.
Conclusion
The Shared Albums feature on iPhone is a convenient way to share photos and videos with your loved ones. It is easy to use, interactive and saves space on your device. Creating, managing and deleting an album takes just a few minutes, and the convenience you get makes this feature indispensable in your daily life.
Now, by following the instructions, you can create your first shared album and enjoy a convenient way to share your memories.
