Apple gives users 5GB of free iCloud storage space for all possible purposes. However, all Mac owners may face the problem of duplicate photos filling up their storage space. Day after day, these identical and similar photos take up a lot of space on your cloud storage.
This article will explain how to find duplicate photos in iCloud and free up space.
Contents:
- What is iCloud?
- How to find duplicate photos in iCloud on Mac
- How to delete duplicates of other file types in iCloud
What is iCloud?
iCloud is an online storage service from Apple that includes iDrive, Photo Stream, Photos Library, and even Apple Music. Not only does it store multiple file types, but it also automatically syncs your contacts, documents, music, photos, and videos across all your devices.
The more files you have in iCloud, the more space you need to buy for new ones. But before you upgrade your storage subscription, check it for duplicates and remove all unneeded files. This might free up significant space in your cloud storage.
How to find and delete duplicate photos in iCloud on Mac?
To find duplicate photos in iCloud, use Duplicate File Finder. It is a free application that finds and removes dupes on a Mac, as well as on any external storage source.
Steps delete duplicate photos in iCloud Photos library
Before you search for duplicate photos in iCloud, ensure you have cloud photos downloaded to your Photos library.
- Open the Photos app on your Mac.
- Go to its settings.
- Switch to the iCloud tab.
- Enable the iCloud Photos option.
- Enable the Download Originals to this Mac option.
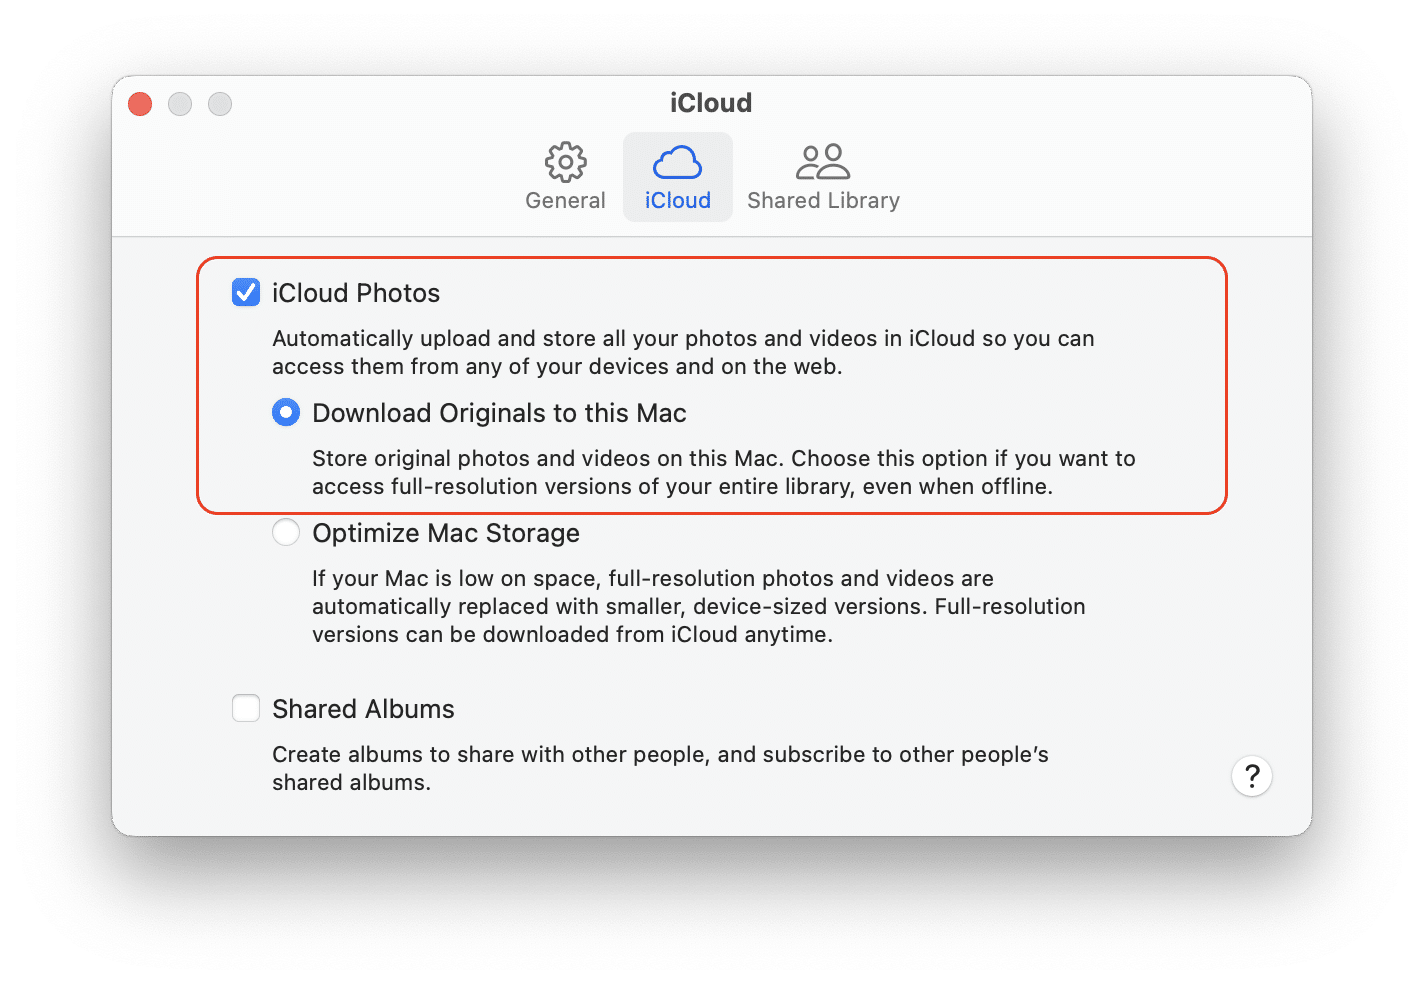
- Wait until the Photos app finishes downloading all the iCloud photos to your Mac.
Now, you can use Duplicate File Finder to remove duplicate photos. Here’s how:
- Launch the app.
- Click Add folders to scan and add the Photos Library.
- Click Find Duplicates.
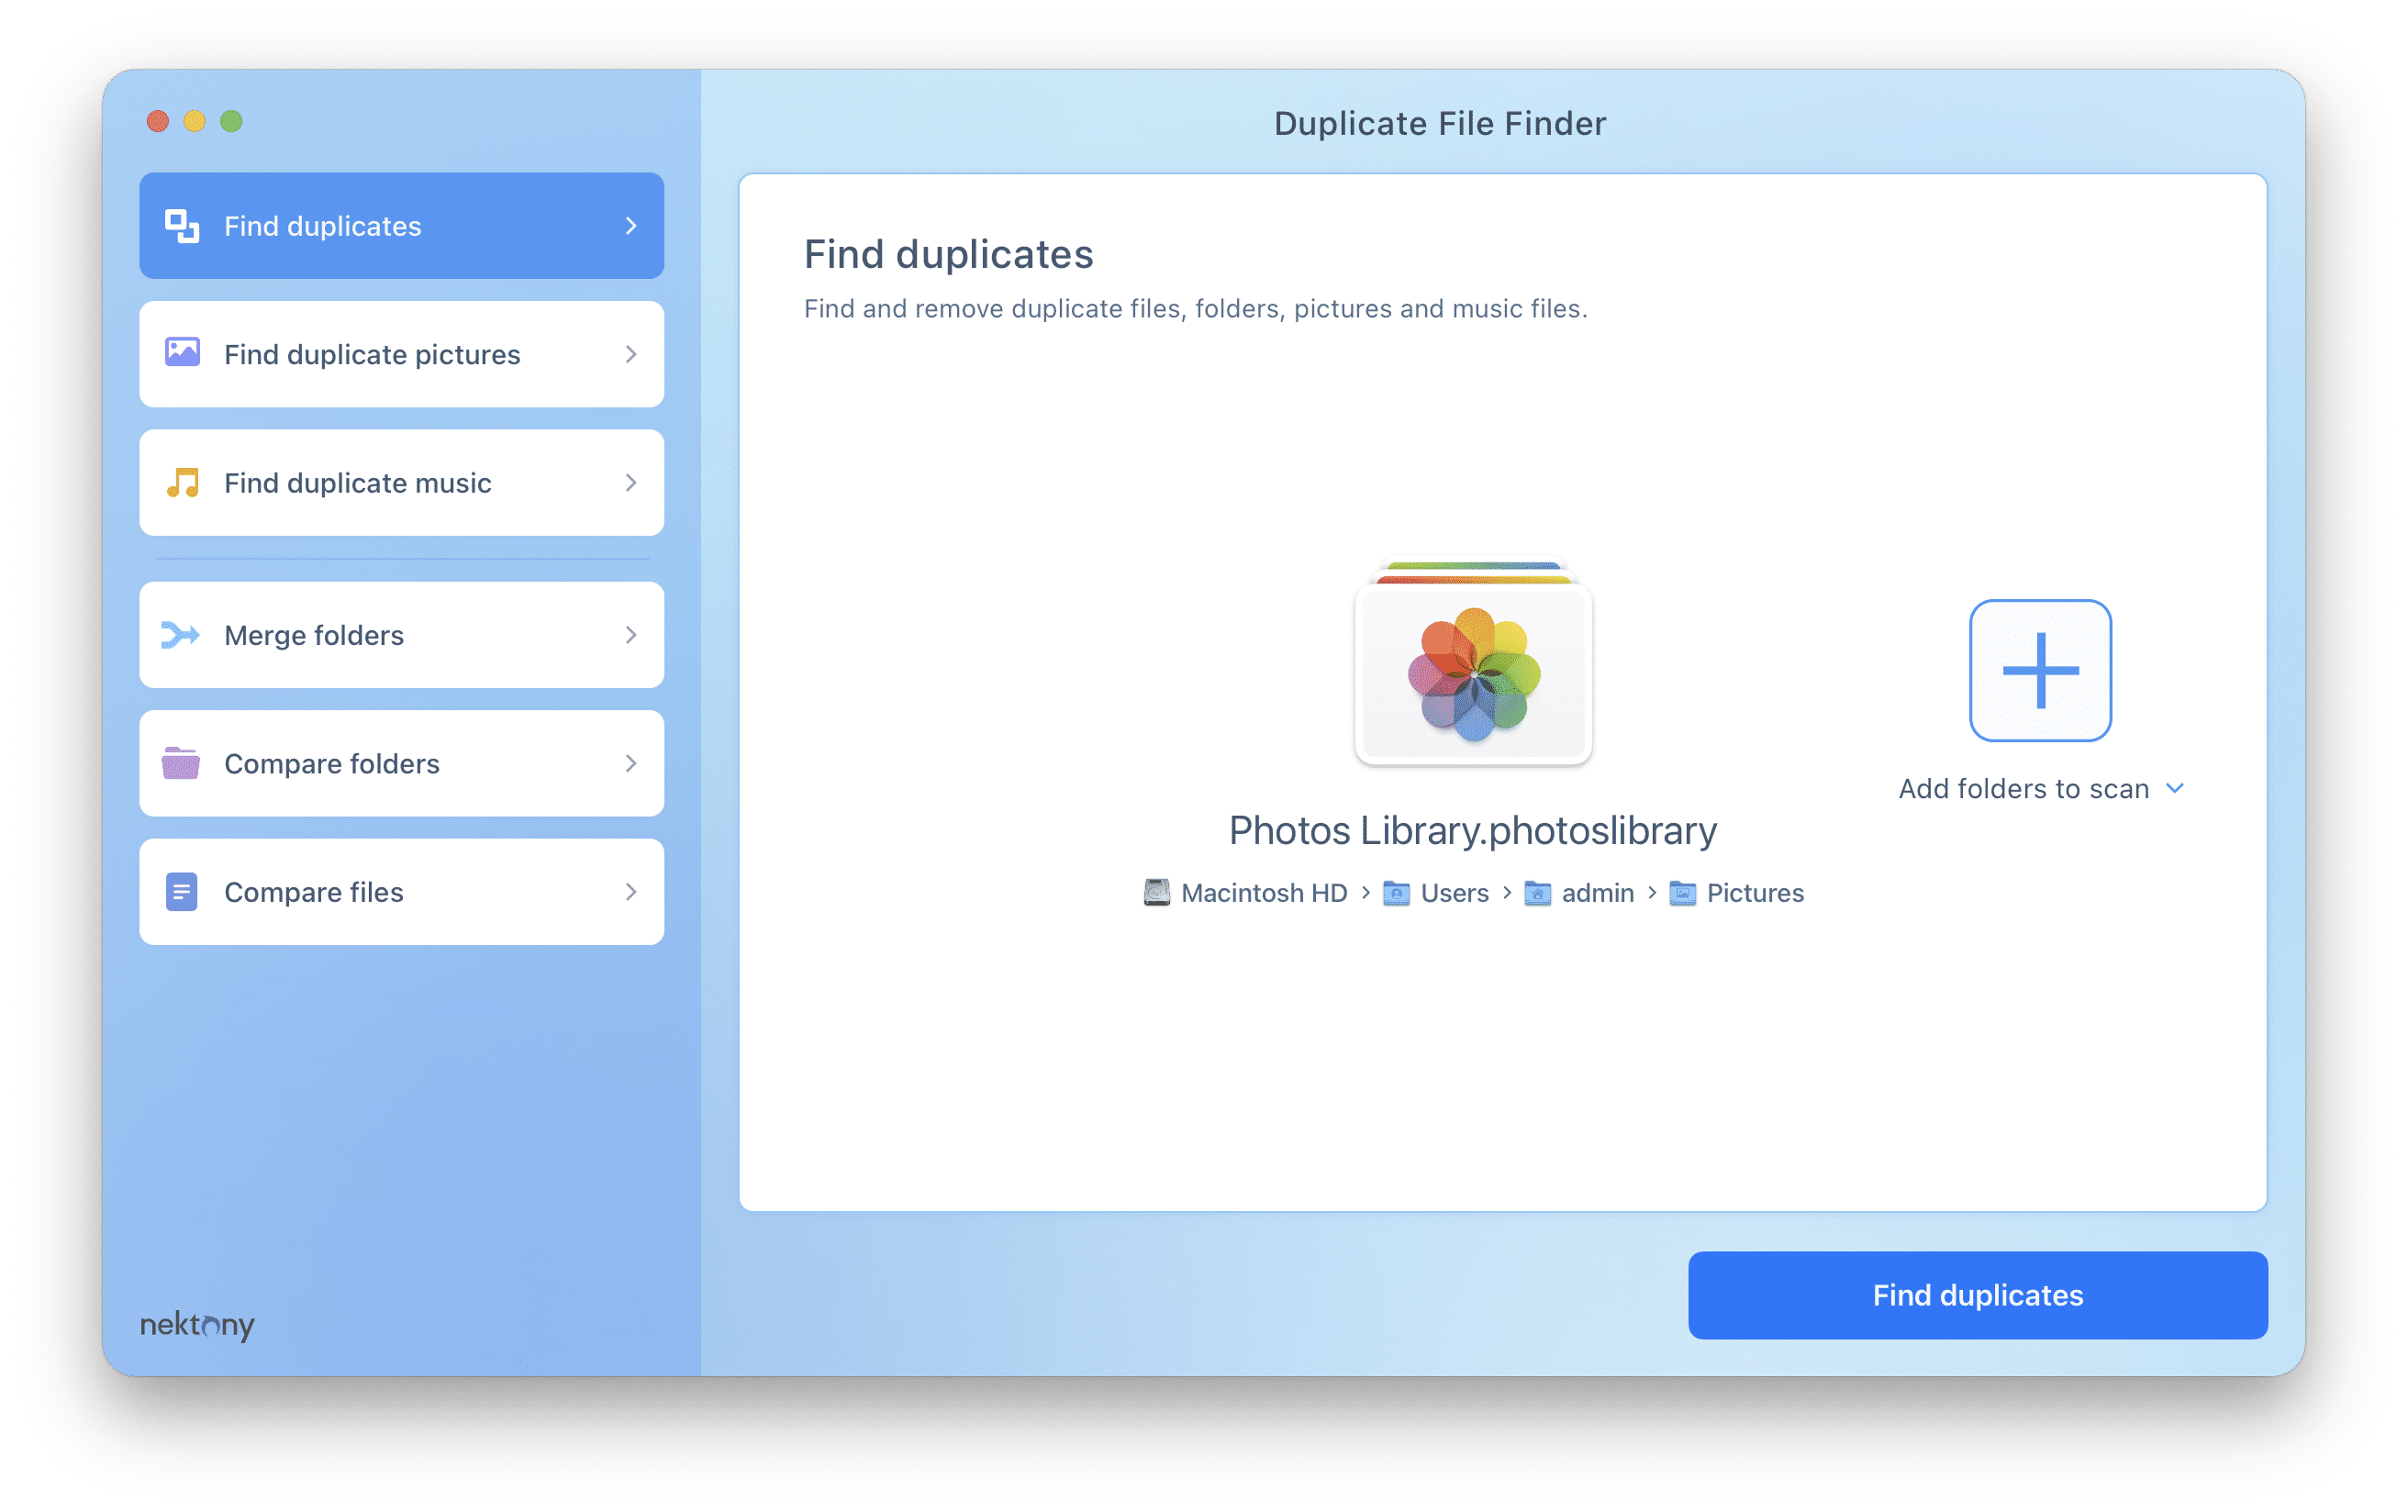
- Within a short time, you will see the list of all duplicates in your Photos library.
- Select unneeded files.
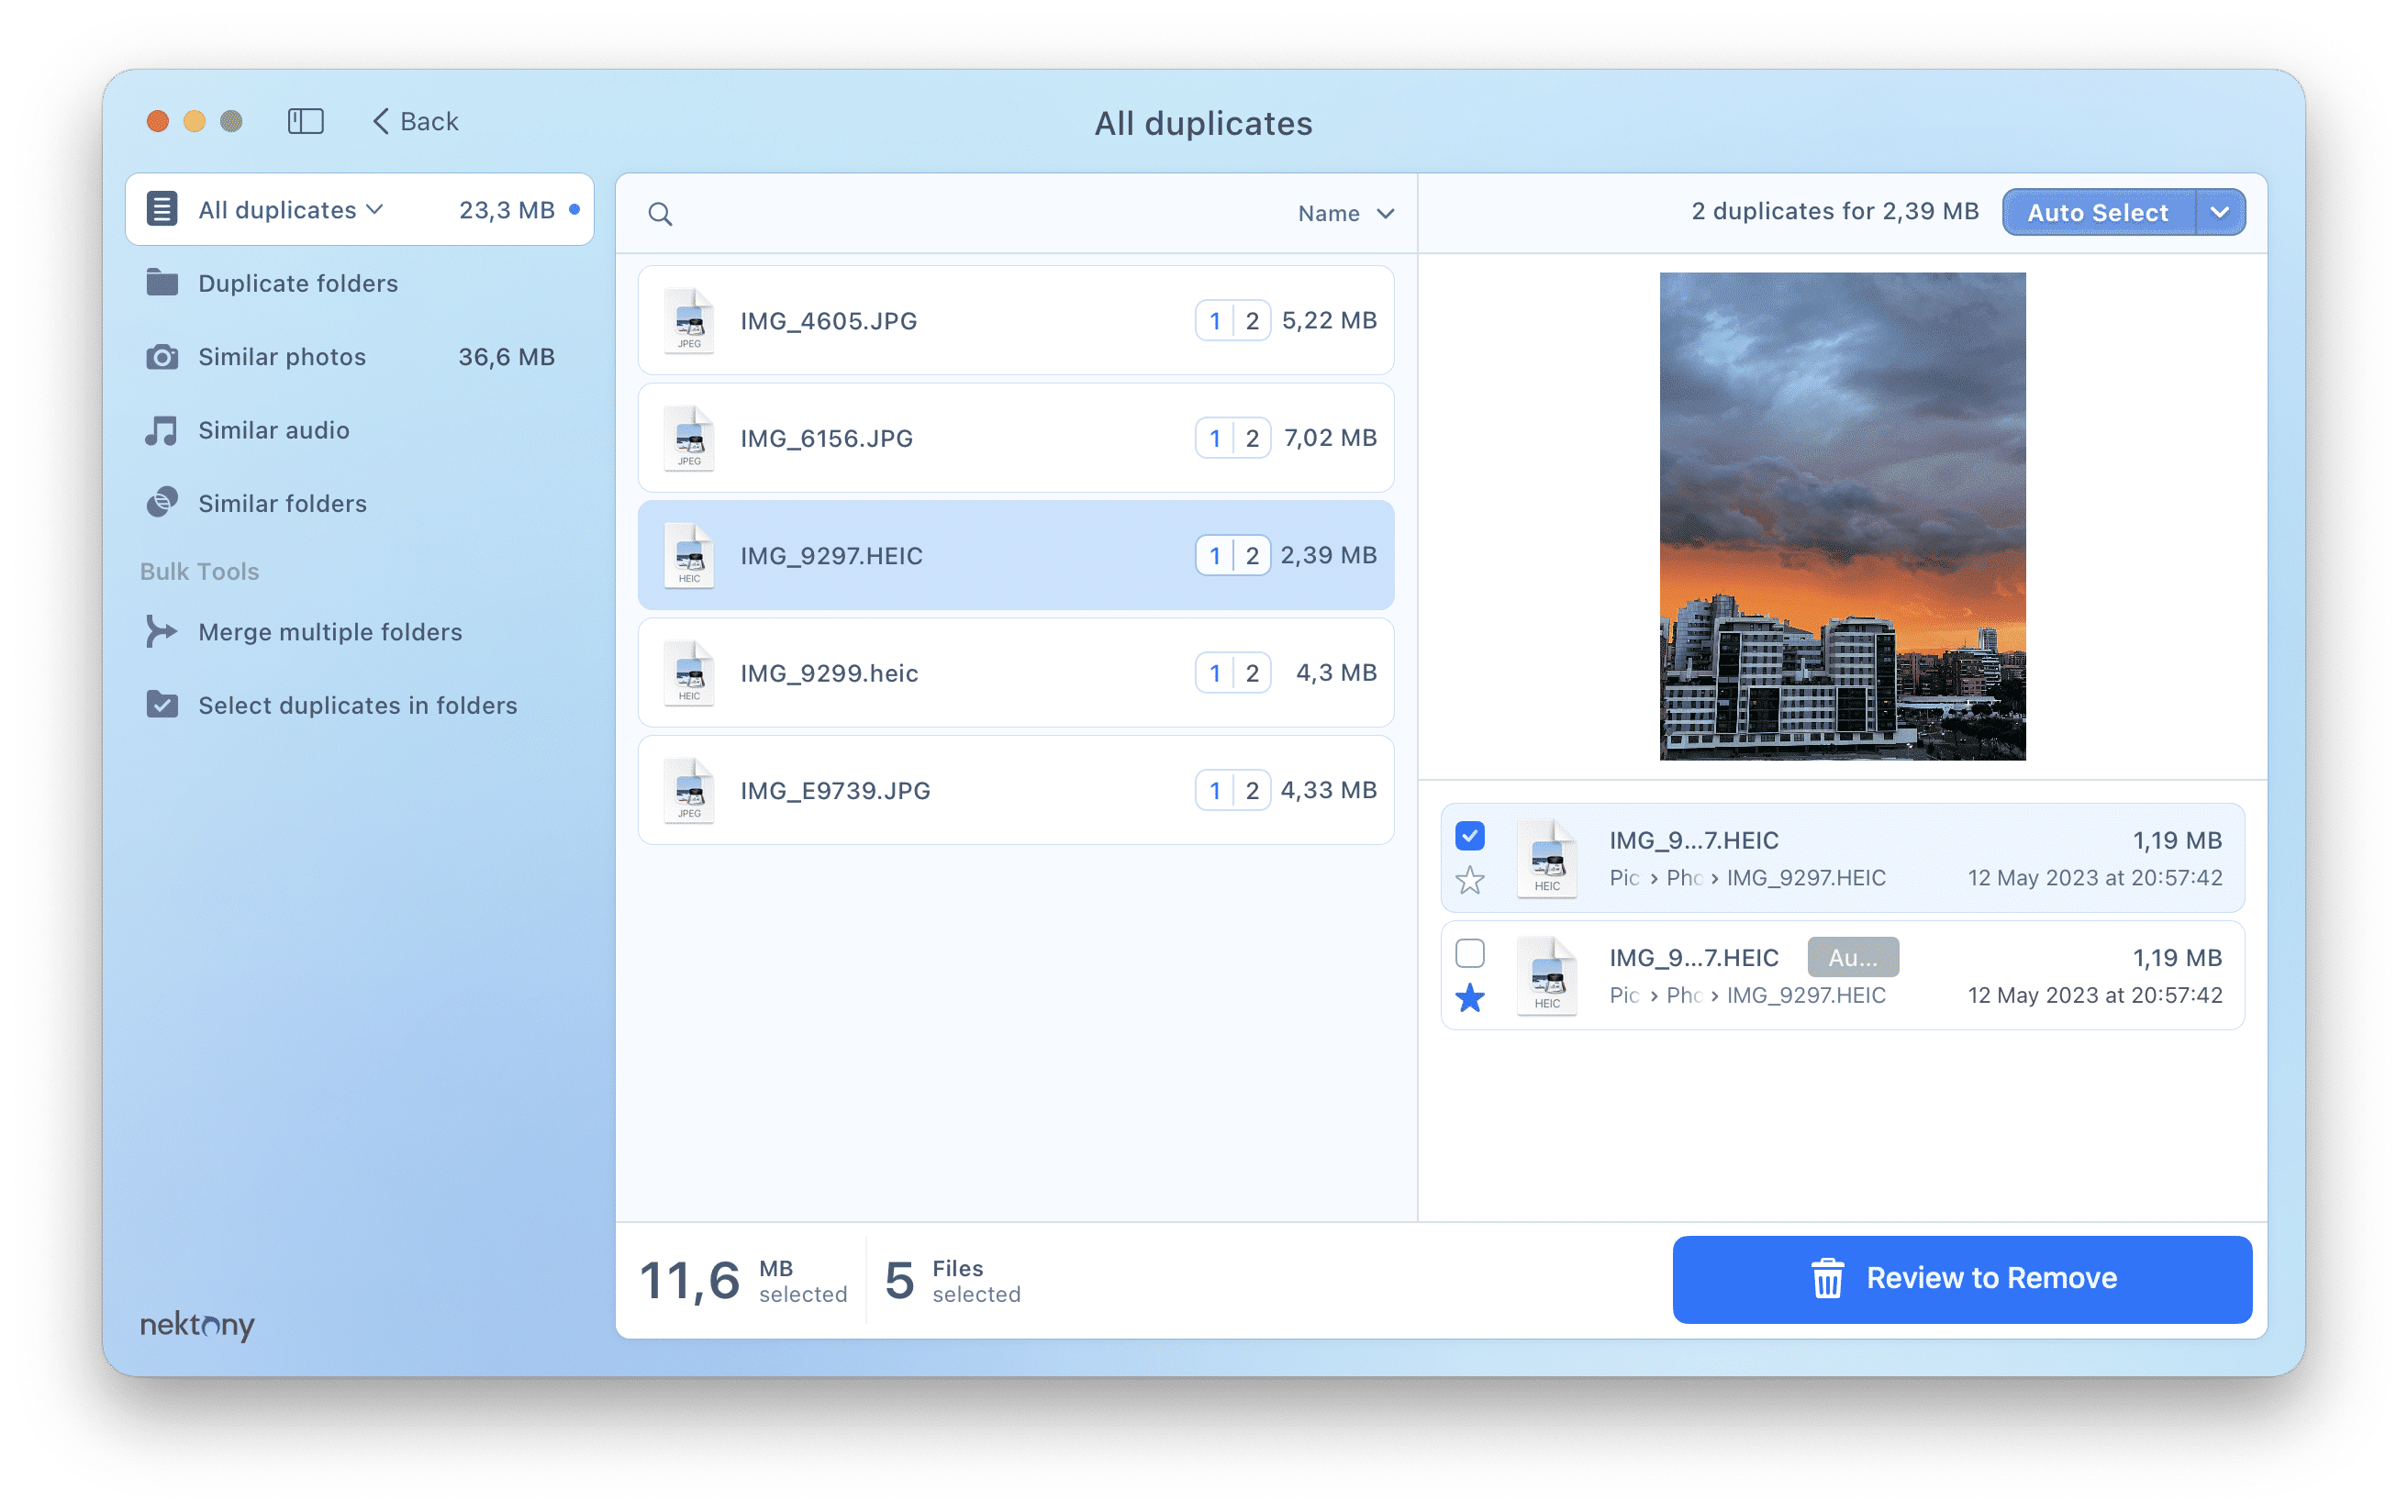
- Once you have selected all unneeded copies, click Review to Remove.
- Confirm their removal.
- You will see the pop-up window asking to grant Duplicate File Finder access to Photos. Click OK.
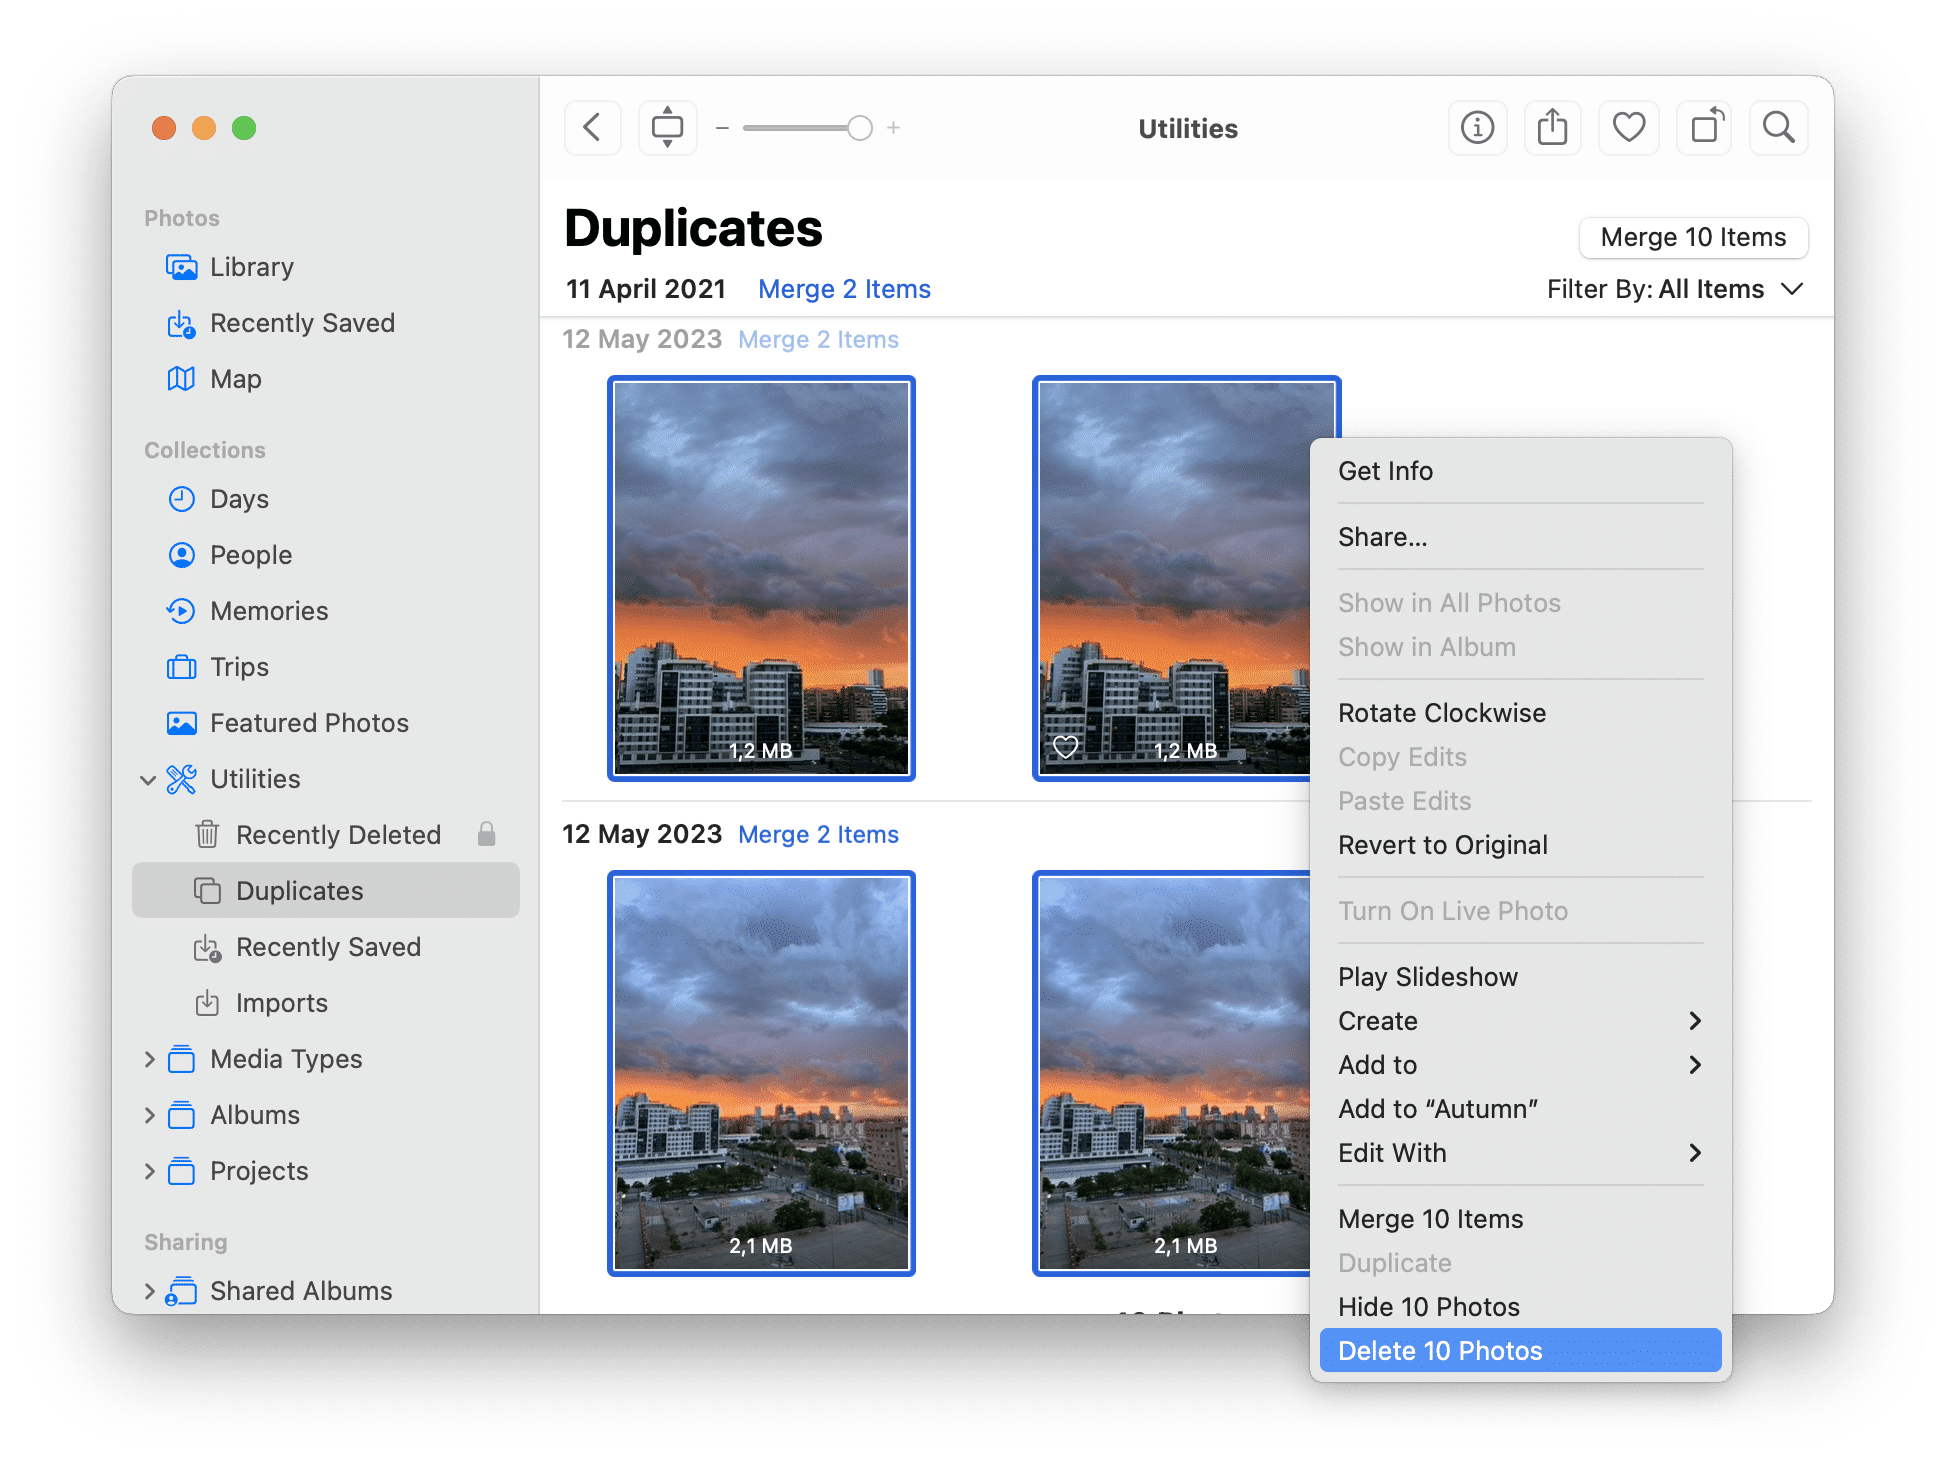
- The application will move all photos selected for removal to the Duplicates album in the Photos app.
- Open the Photos app.
- Go to the Duplicates album in the sidebar.
- Select all photos in that album.
- Right-click on any selected item and click Delete Photos from the context menu.
How to delete duplicates of other file types in iCloud
iCloud works in a special way. Every application that synchronizes with it creates a separate folder and stores files in that folder. For example, you can’t store TextEdit files in the Pages folders in iCloud.
Applications do not have access to the folders of other applications in iCloud. That’s why you need to download all the files to your disk so that Duplicate File Finder can scan these files for duplicates.
To find and remove duplicates of any file type in iCloud, follow the steps below:
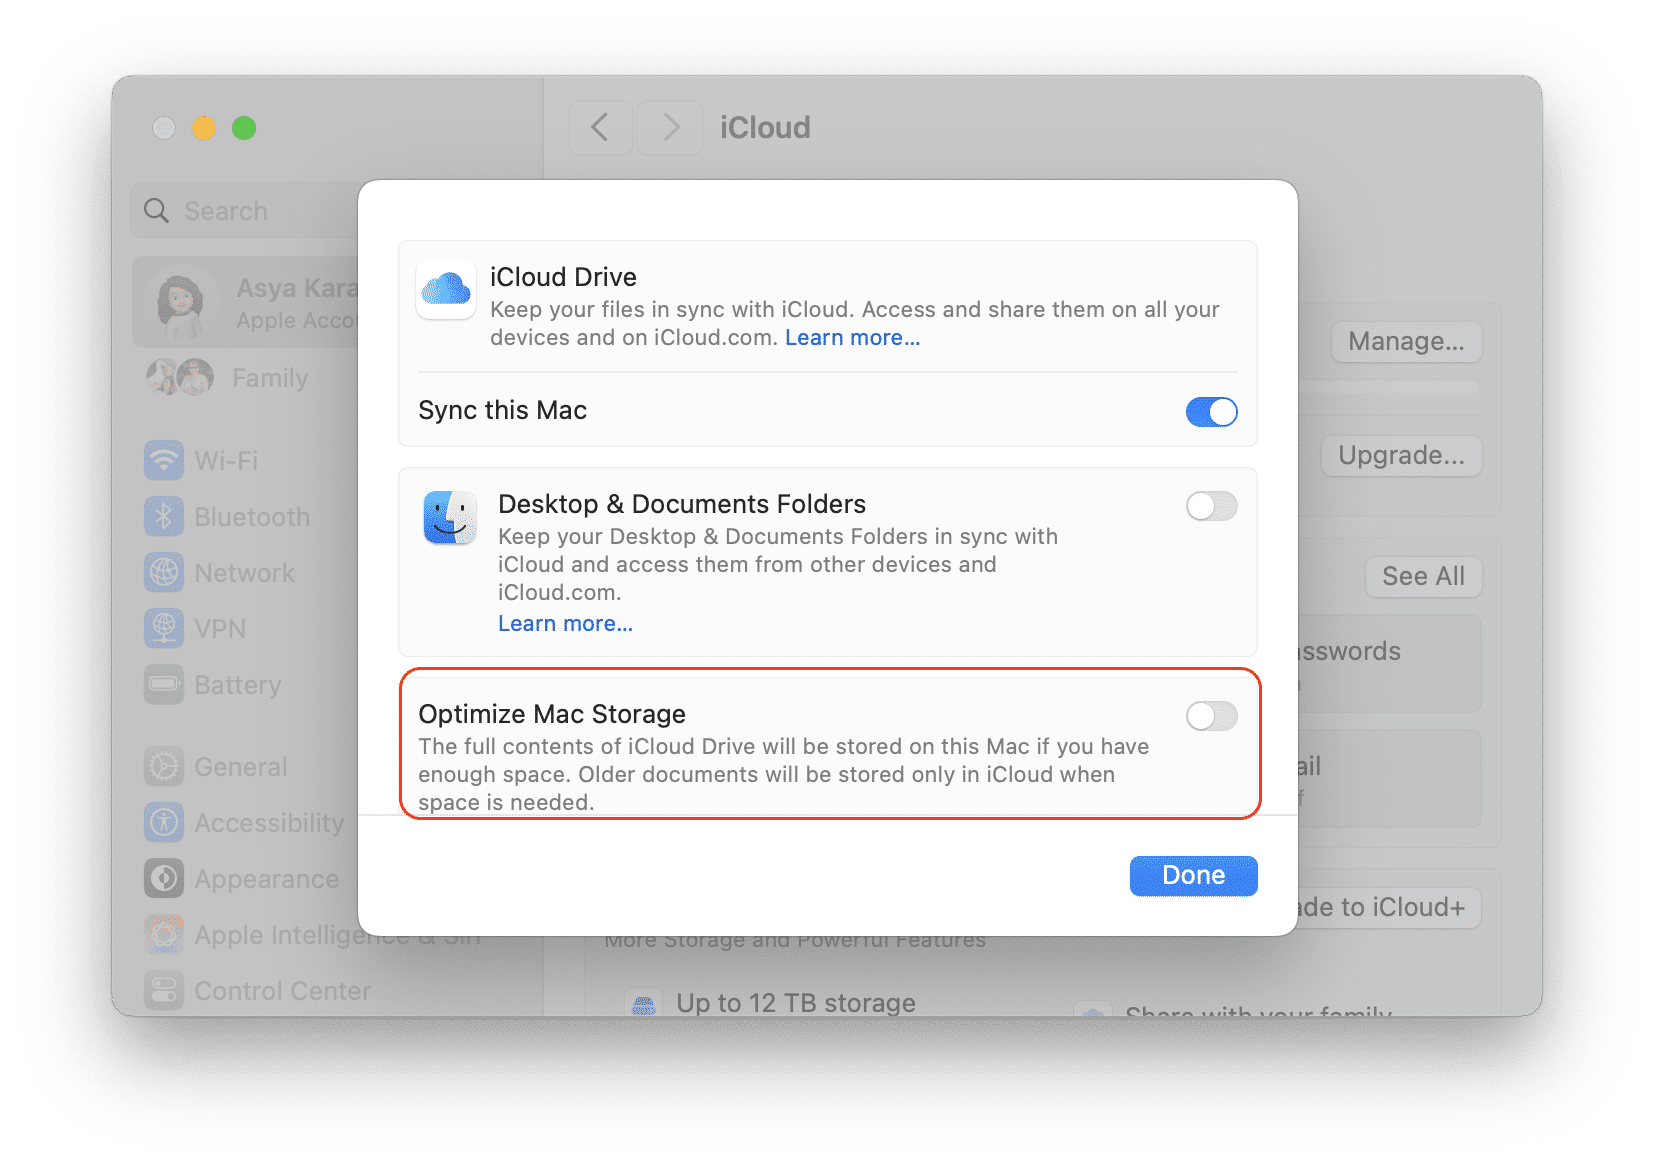
- Open System Settings.
- Click your Apple ID.
- Click iCloud in the right panel.
- Click iDrive.
- Disable the Optimize Mac Storage option.
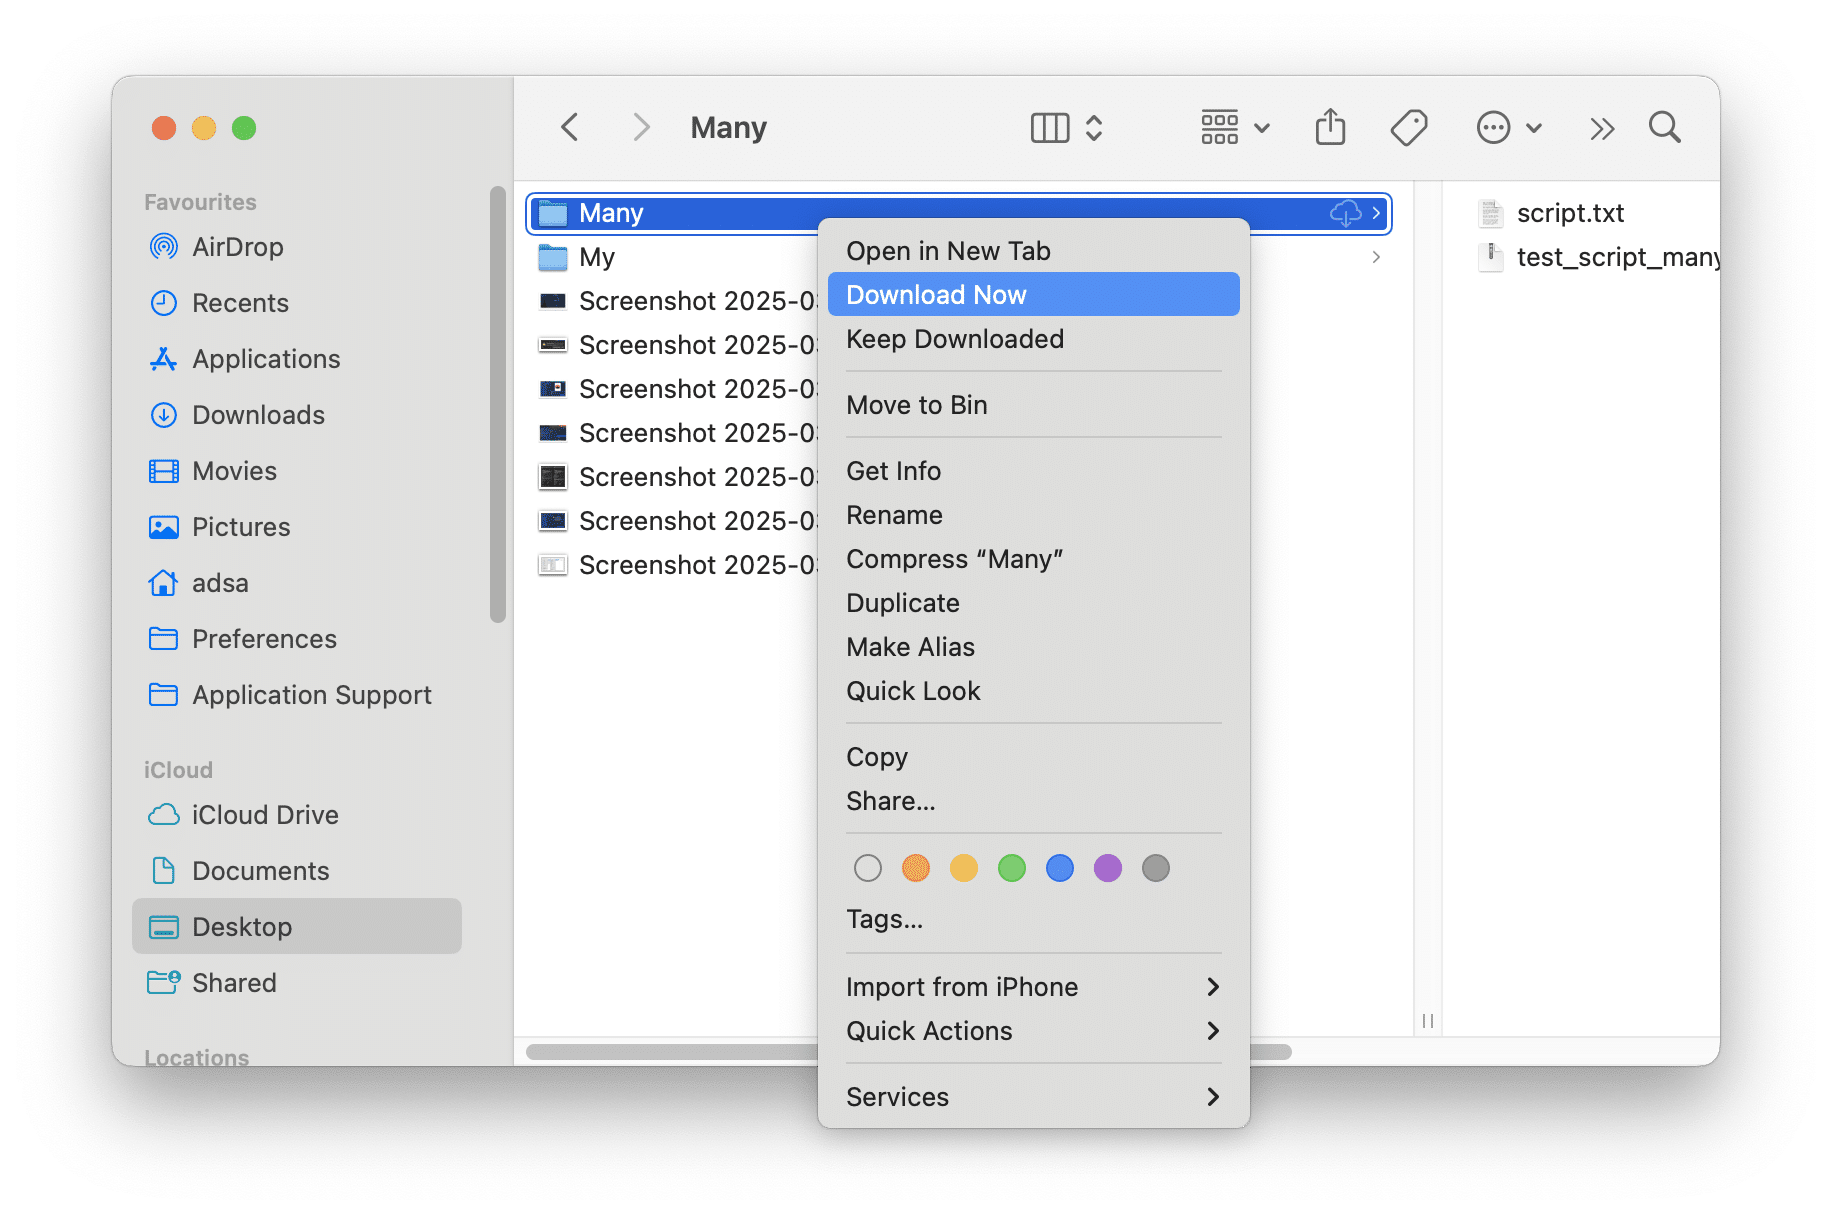
To check whether the files and folders are downloaded, look at the icon located on the right of the item in Finder. If you see this icon , the item hasn’t been downloaded to your Mac. To download a file from iCloud, follow the steps below.
- Go to your iCloud folder in Finder.
- Right-click on an item you want to download and select Download Now.
Now, you can use Duplicate File Finder to find duplicates in iCloud.
- Run the app.
- Add the iCloud drive or its separate folders to the app’s start window.*
- Click Find Duplicates.
- Select and remove unneeded dupe files from iCloud.
* Please note that when you drag and drop folders to the Duplicate File Finder window, don’t drag folders from the Finder’s sidebar. In this case, you just stop the folder from being displayed in the sidebar.
That’s all. Before too long, all changes will sync to your iCloud Photo Library, and all duplicate media files will disappear from your cloud storage as well as if the Photos app did. If photos on your iPhone are also synchronized with iCloud, then when you remove duplicates from there, these photos also get removed from your iPhone.
Using Duplicate File Finder to scan your synchronized Photo Library or other files in iCloud is the easiest and fastest way to find identical data.