iCloud Photos is Apple’s service which automatically backs up all your media files in their original size to a single library for remote access from any of your devices. In this article, we will show you how to turn on iCloud Photo Library synchronization on different devices.
Contents:
1. How to backup iPhone/iPad photos to iCloud Photo Library
2. How to enable iCloud Photos on a Mac
3. How to enable iCloud Photos on a Windows PC
Before we start
If you would rather save time instead of manually cleaning your cloud storage account, we suggest getting more free space with our Phone Cleaner app. It is a removal tool for iPhone or iPad users that helps you clean your phone from the biggest, similar and duplicate files.
But if you are looking for a Mac software solution that will get rid of numerous duplicates on your iCloud storage and save you a bunch of time, feel free to give the Duplicate File Finder a try. This tool is designed to help you locate, remove and even organize your duplicate files.
Duplicate File Finder
How to backup iPhone/iPad photos to iCloud
iPhone and iPad devices are the most popular for taking photos, due to their high image quality. Unlike the popular digital cameras of the past, these devices do not require special knowledge and skills to use.
By enabling the iCloud Photo Library on your devices, all new iPhone and iPad photos will immediately be synchronized to iCloud storage. Later the photos can be viewed on your Mac or on another device. Read how to view iCloud Photos.
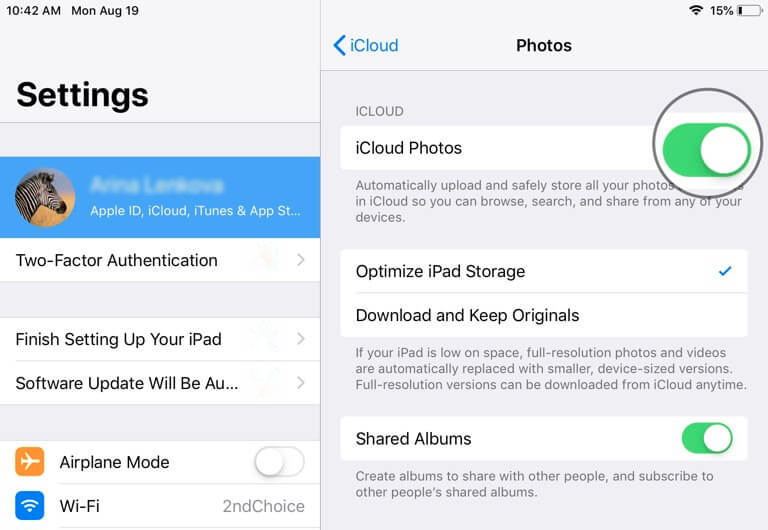
To backup iPhone and iPad photos to iCloud, only four steps are needed. Let’s see how to complete them:
- Go to Settings.
- Tap .
- Select and go to
- In the Photos section, just turn on iCloud Photos.
After enabling the iCloud Photo Library, you will see the “All Photos” album instead of the usual “Camera Roll” in your Album tab. The “All Photos” caption means you have your photos in iCloud storage.
If you still see “Camera Roll,” this means that iCloud photo sync is not enabled and you can only view the photos stored on your particular device.
How to enable iCloud Photos on a Mac
As long as iCloud Photos is enabled the storage service backs up every photo or video you add to your Photos App. In addition, it synchronizes your new files across all the devices in which you have logged in with the same iCloud account.
Complete these steps to activate the immediate uploading of your Mac photos and videos to iCloud.
- Click on the and select .
- Click the user icon on the top.
- Select iCloud.
- Turn on syncing iCloud Photos to Mac.
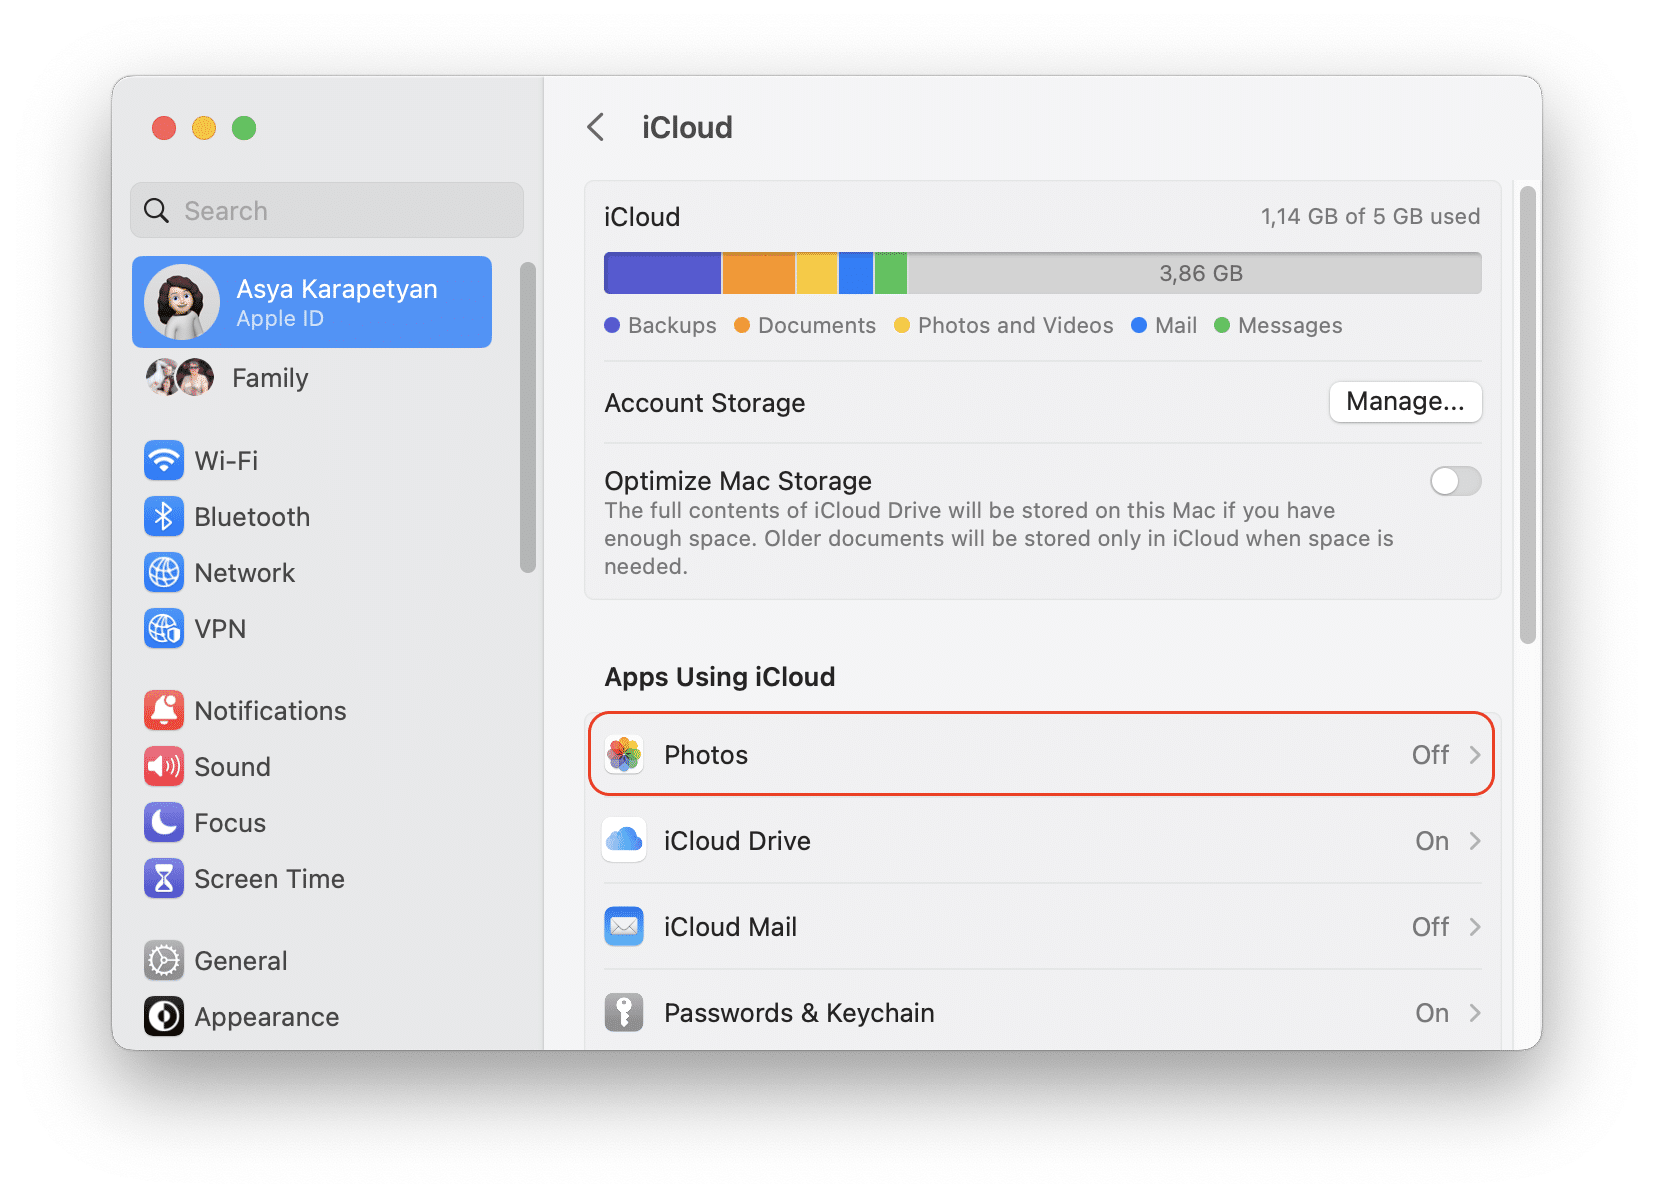
After the iCloud Photos option is turned on, some photos and videos from your Photo app may disappear. You can find them in your Recently Deleted album.
More details about the possible way to restore missing photos read in the section “What if some of my photos and videos are missing after I turn on iCloud Photos?”.
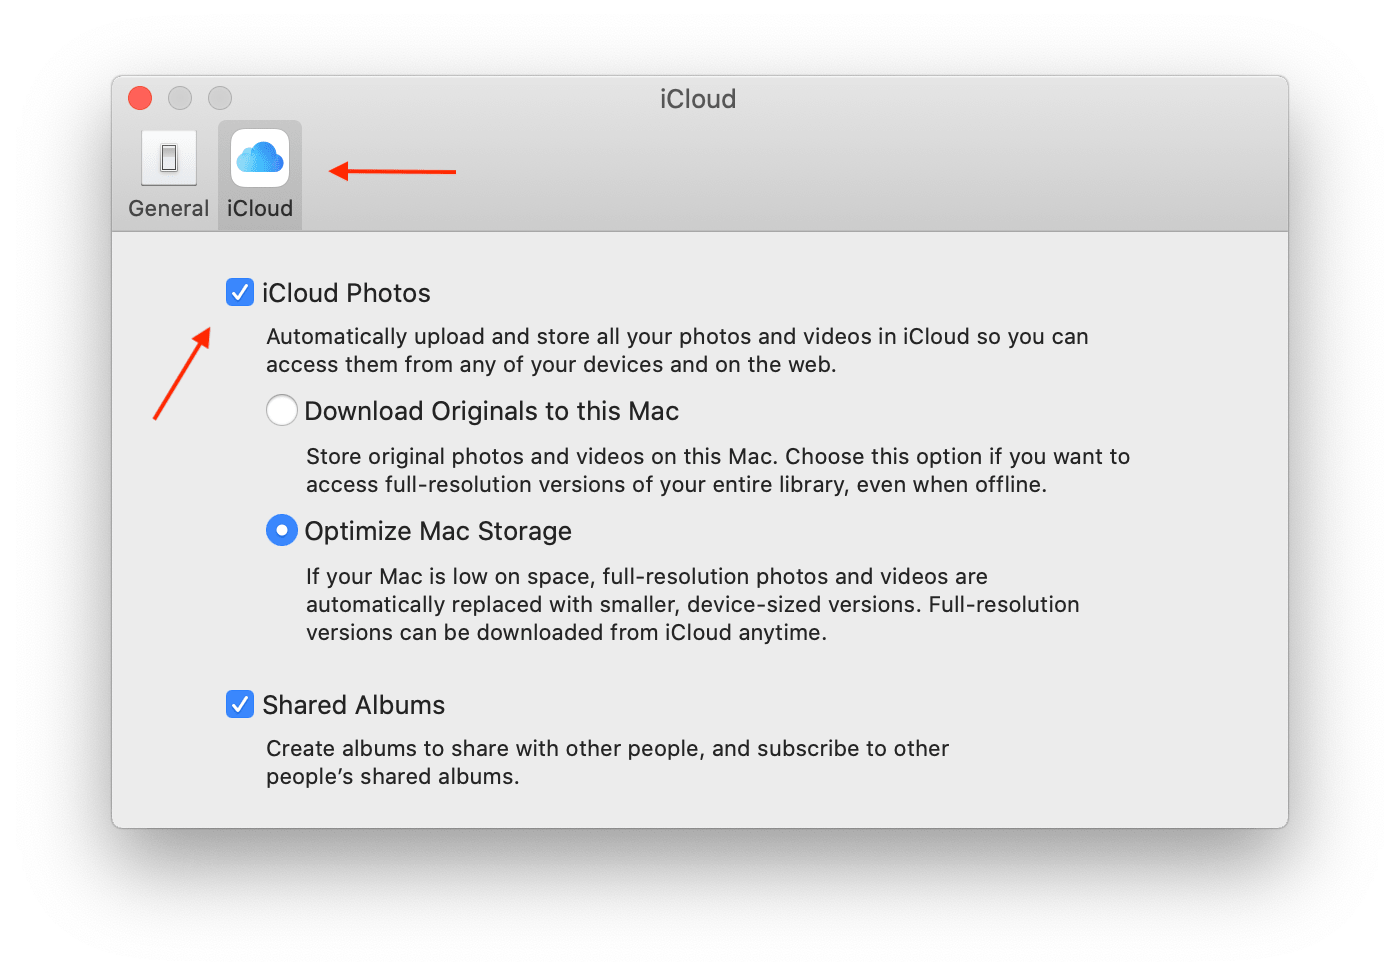
How to enable iCloud Photos on macOS 10.15
If you use macOS 10.15 the steps to enable iCloud Photo Library would be slightly different. Here is how to turn on iCloud Photo Library on macOS Catalina:
- Launch the Photos app
- Click on Photos in the menu bar and select Preferences
- Switch to the iCloud tab
- Enable the iCloud Photos option by ticking the necessary checkbox
How to enable iCloud Photos on Windows PC
There are plenty of people who love to take pictures on their iPhone but prefer Windows to a Mac. Even though iCloud is Apple’s service, it is also available for Windows users.
To turn on iCloud sync on your Windows PC, complete these steps:
- Download the iCloud for Windows application and install it (don’t forget to restart your PC after installation).
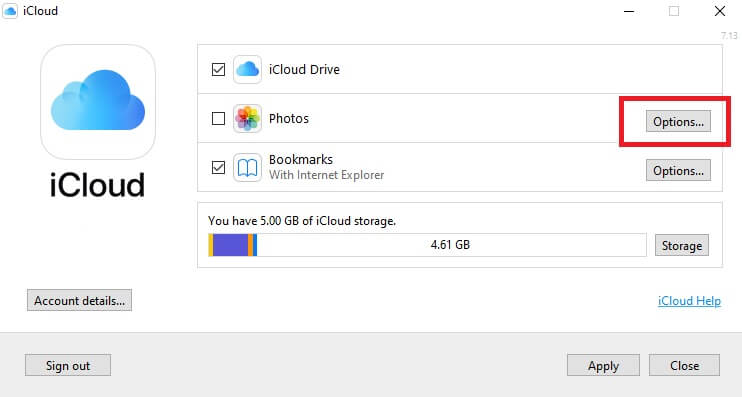
- Open iCloud for Windows on your PC and sign in with your Apple ID.
- Click next to Photos.
- Select click . Then click .
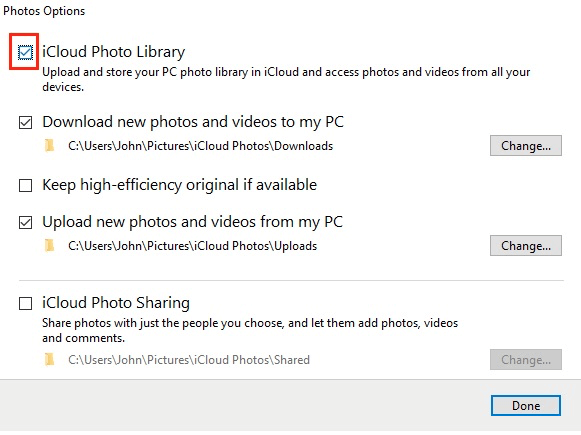
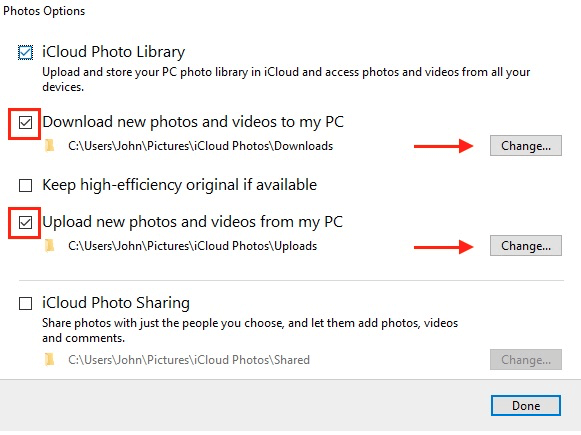
When you click next to Photos, you can select these options in the window which appears:
- Upload new photos and videos from my PC and then change the path to the folder where you will collect photos for uploading to iCloud. It means that after selecting this option files that you save to the selected folder automatically appear on your other devices (where iCloud Photos is enabled under the same Apple ID).
- Download new photos and videos to my PC and then change the path to the folder where all new iCloud Photos will appear. It means that after selecting this option the selected folder will show you all new media files which will be synchronized to iCloud Storage from other devices.
Conclusion
It should be said that photos are some of the most important files we own. They contain memories that are impossible to restore if they are lost. That is why it is much better to backup your media files to cloud storage.
In this article we explained how to turn the iCloud Photo Library on from your devices. You can use this service on any of your Apple devices and even on Windows PCs.
Storing your media files in iCloud allows you not only to optimize your device storage space, but also share, search and browse all your photos from different devices.
