Movavi provides a set of applications for video editing, screen recording, photo managing and more. However, if you need to delete any application from Movavi from your Mac, then this article is for you. We will explain how to completely uninstall Movavi Photo Manager from Mac. The same guide you can use to uninstall any other Movavi application.
Contents:
- What is Movavi Photo Manager?
- How to uninstall Movavi from Mac manually?
- How to uninstall Movavi from Mac automatically?
What is Movavi Photo Manager?
Movavi Photo Manager 1 is an application that was created to help you manage your photos on Mac. Moreover, with Movavi Photo Manager, you can crop, rotate and open images in the Movavi Photo Editor.
You can find an uninstalling guide for Movavi on its official help page. However, in our guide you will find a more detailed step-by-step guide that will help you to get rid completely from all of its remaining files.
We will explain two ways on how to delete Movavi entirely and adequately so there are no service files left on your system – manually and automatically.
How to uninstall Movavi from Mac manually?
Deleting applications on Mac is not that easy, as you can imagine. Unfortunately, you have to do more than just drag and drop it into the Trash.
The manual uninstallation of any application is a tedious process that requires a lot of time and patients. You will have to do the following steps:
- First, quit the application you want to uninstall.
- Then, drag and drop it into the Trash.
- After, find its support files, also known as leftovers.
- Delete the leftovers.
- Empty your Trash.
Keep on reading for a detailed and visual explanation of the steps above.
Step-by-step guide on Movavi manual uninstallation
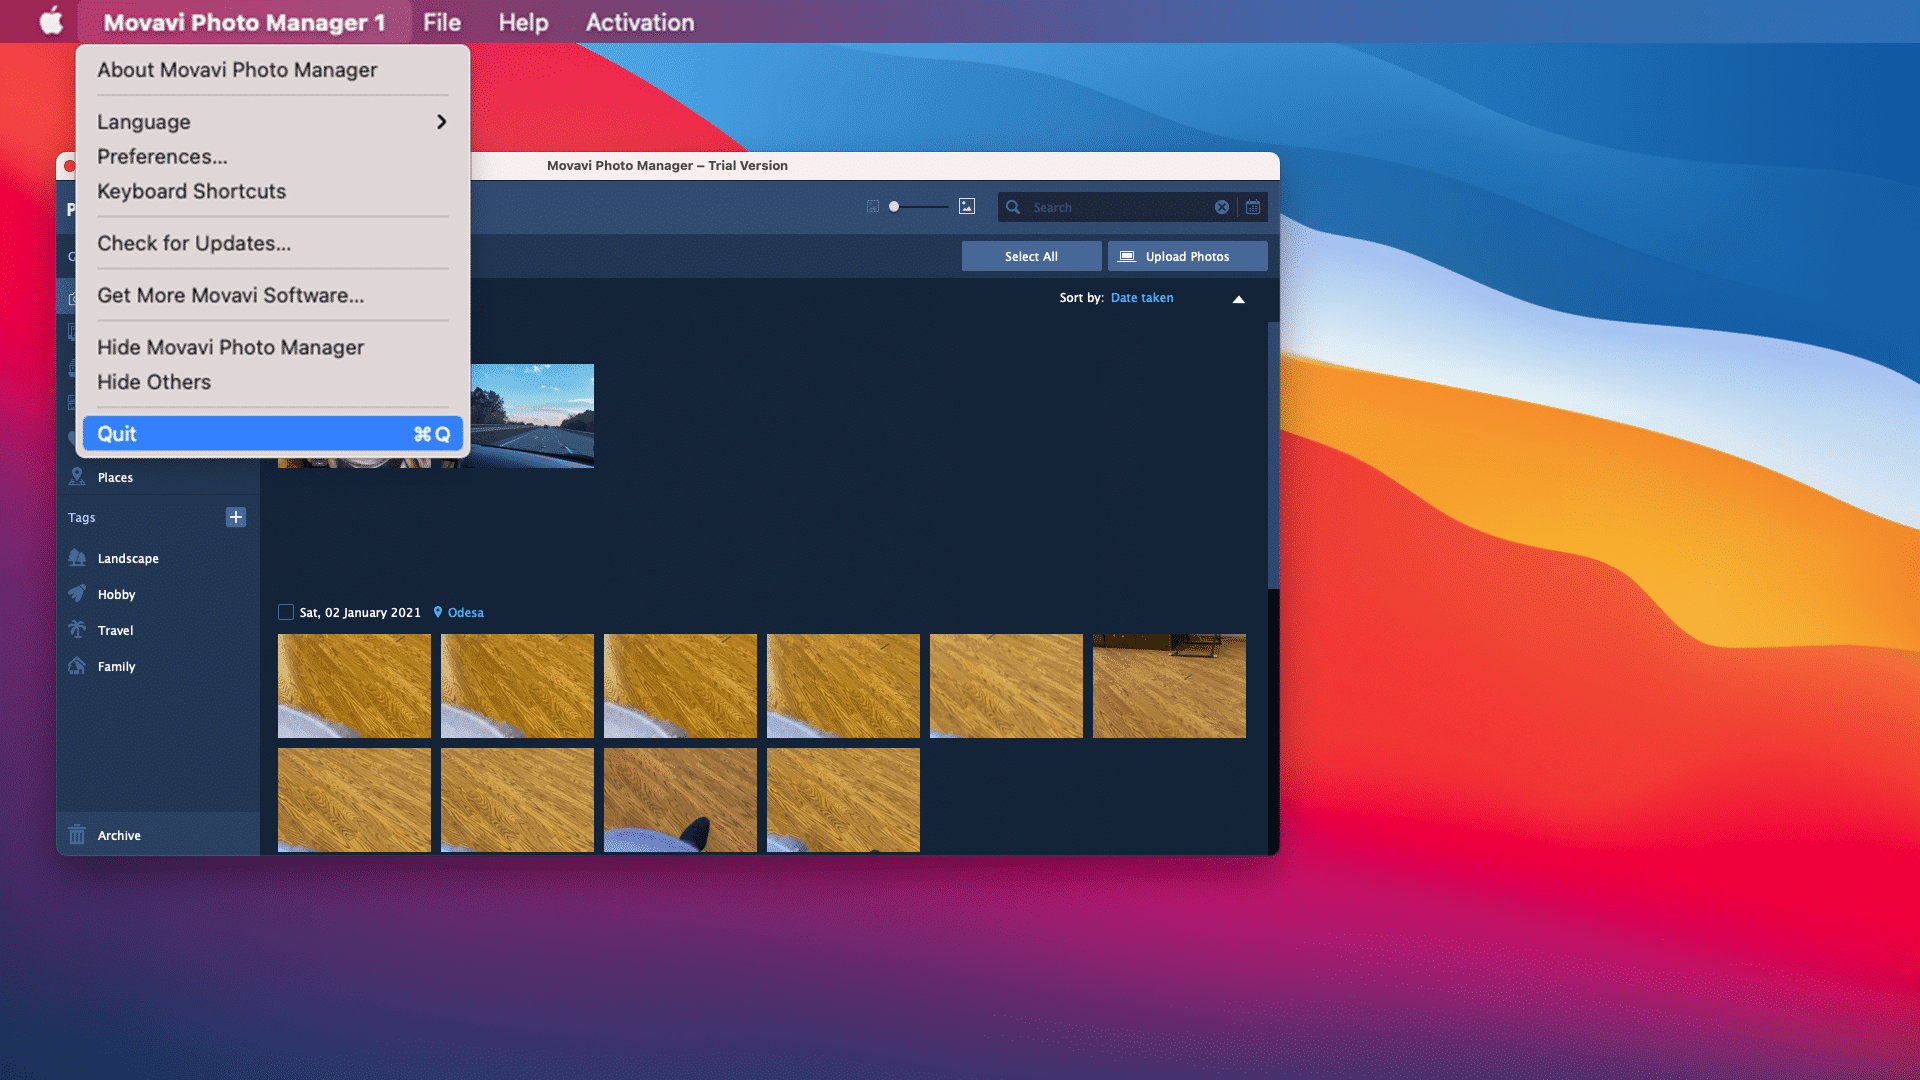
- Quit Movavi Photo Editor. This can be done by selecting the Movavi Photo Editor tab in the menu on the top of your screen or pressing the COMMAND+Q shortcut.
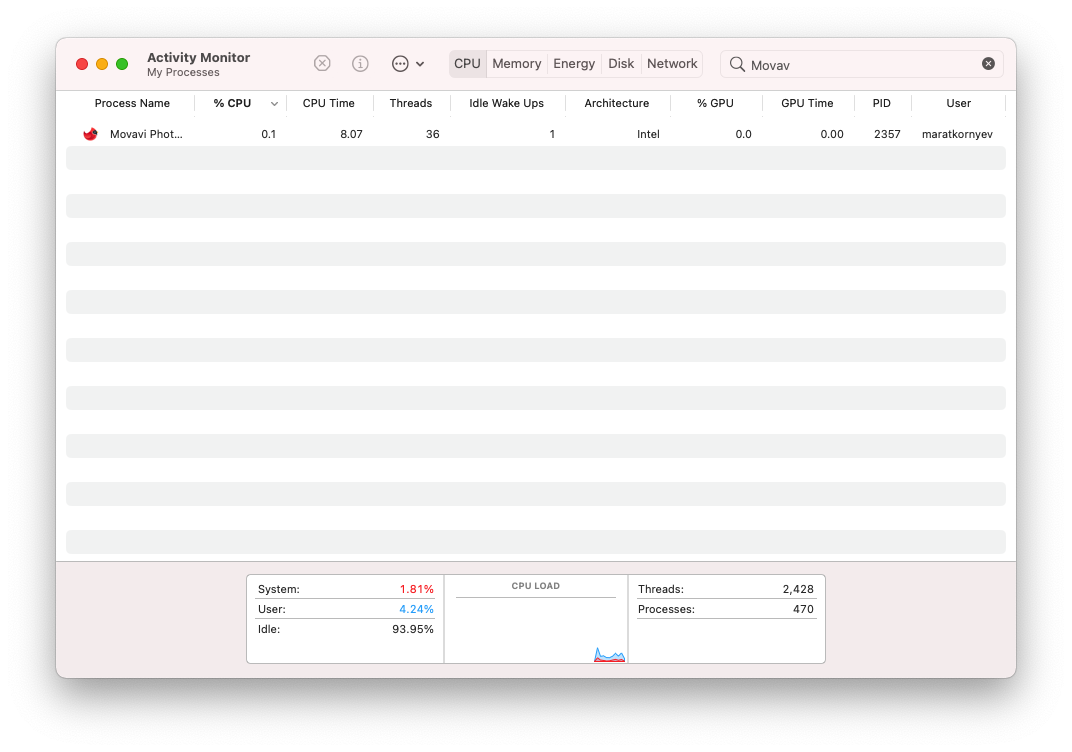
- Check for ongoing background processes. This can be done using the Activity Monitor. If there are any ongoing processes, quit them by pressing the “X” sign on the top of the application window.
- Open the application folder in Finder and delete Movavi Photo Editor from there by right-clicking on the icon and then selecting the “Move to Trash” option.
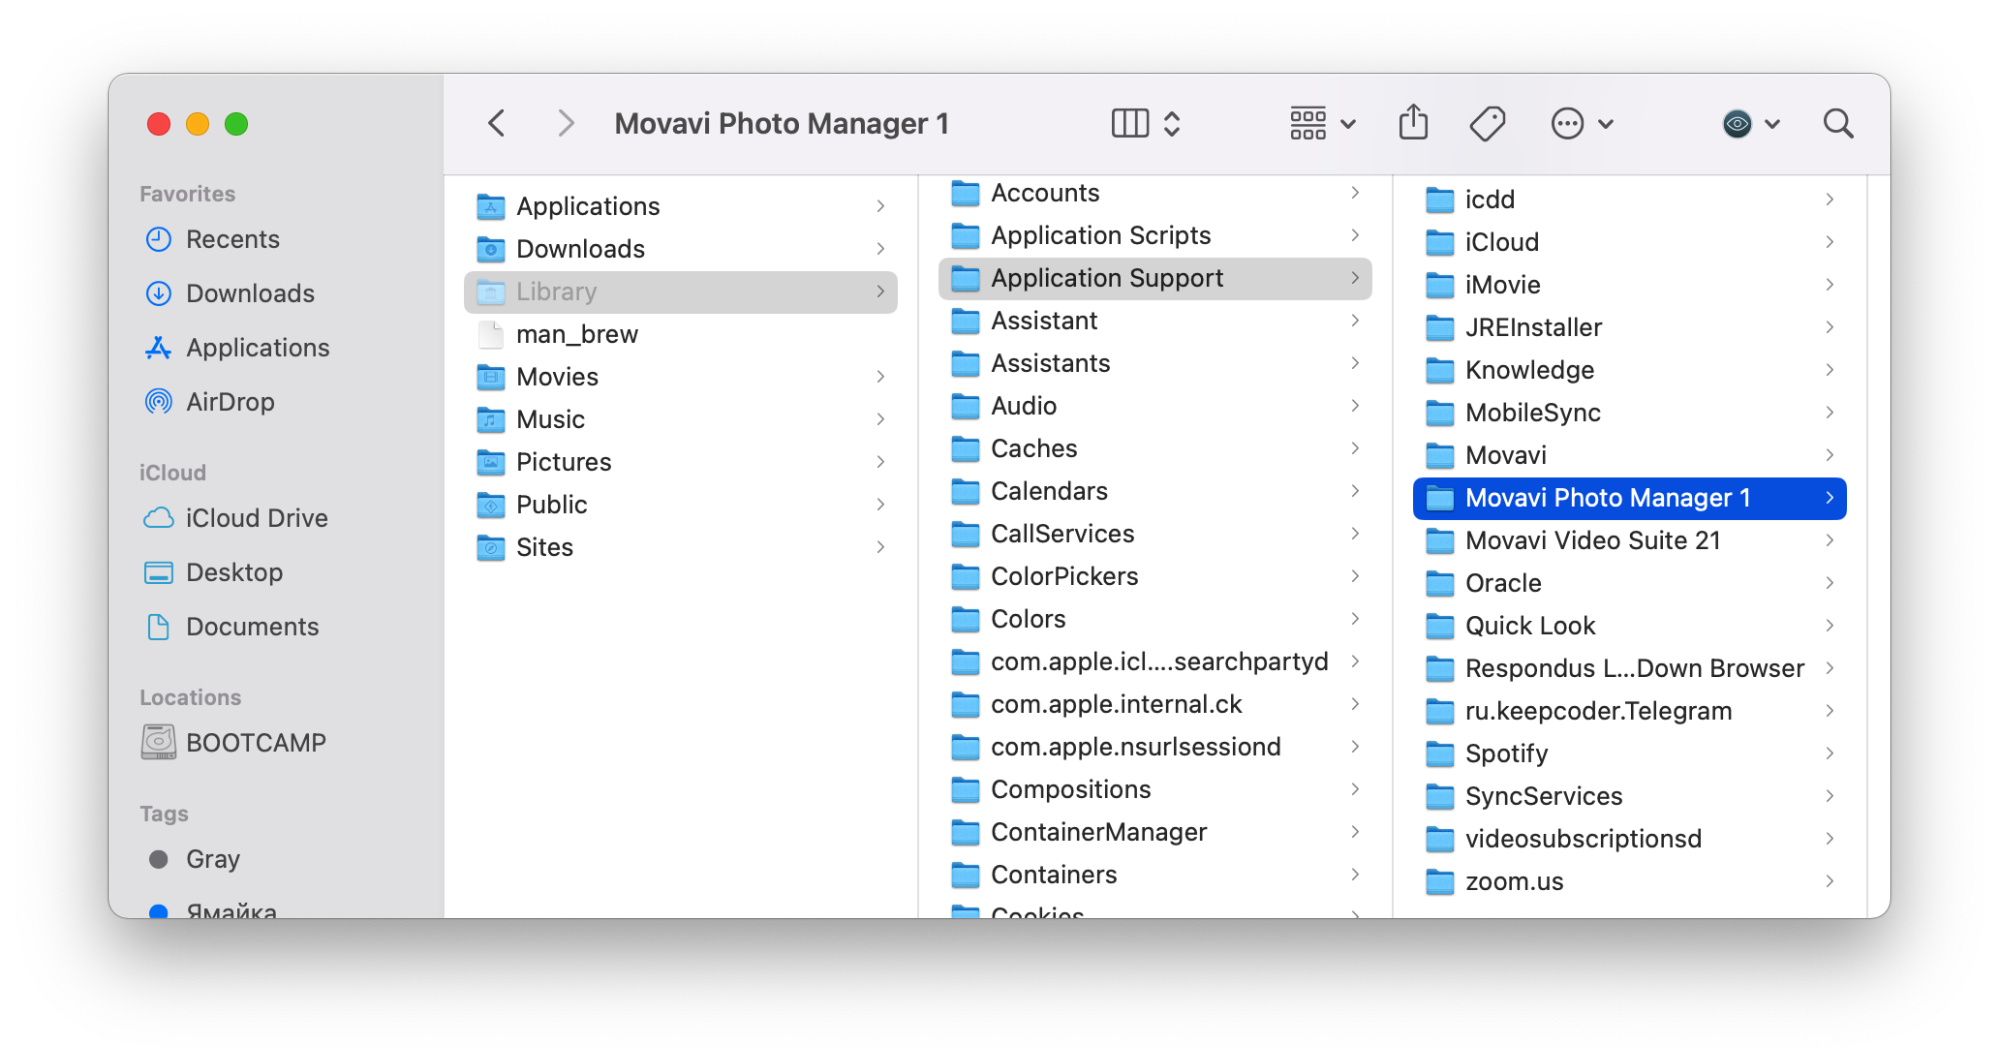
You are not done yet. Now it is the part where it gets tricky. The time has come. You have to search for all the service files that the app left there for you to delete. The applications usually store their support files in the Library or ~/Library folder of your computer. You have to get there and delete the leftovers. - Open Finder again and search for leftovers. You can do this by pressing the Command+Shift+G shortcut to get to the ~/library folder.
-
You have to go into different folders and look for subfolders with the name Movavi in them. Here are a few suggestions where you should look for the leftover files:
- ~/Library/Application Support
- ~/Library/Saved Application State
- ~/Library/Logs
- ~/Library/Containers
- ~/Library/Application Scripts
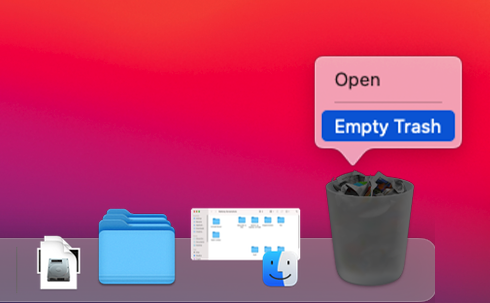
- Empty your Trash.
After you are done with the steps above, technically, you should have deleted the app completely. However, now it gets better. In the next part of this article, we will explain how to automatically get rid of Movavi Photo Manager without spending hours finding service files. Automatic uninstallation is possible because of the app called App Cleaner & Uninstaller. This is a unique utility that helps you to uninstall any application on your Mac.
How to uninstall Movavi from Mac automatically?
Again, the automatic method of uninstallation is practical and comfortable. App Cleaner & Uninstaller is continuously updated, meaning that its database is updated. It can uninstall any application or any app leftovers from a Mac in just a few clicks. Here are the steps on how to uninstall it.
Step-by-step guide on Movavi automatic uninstallation
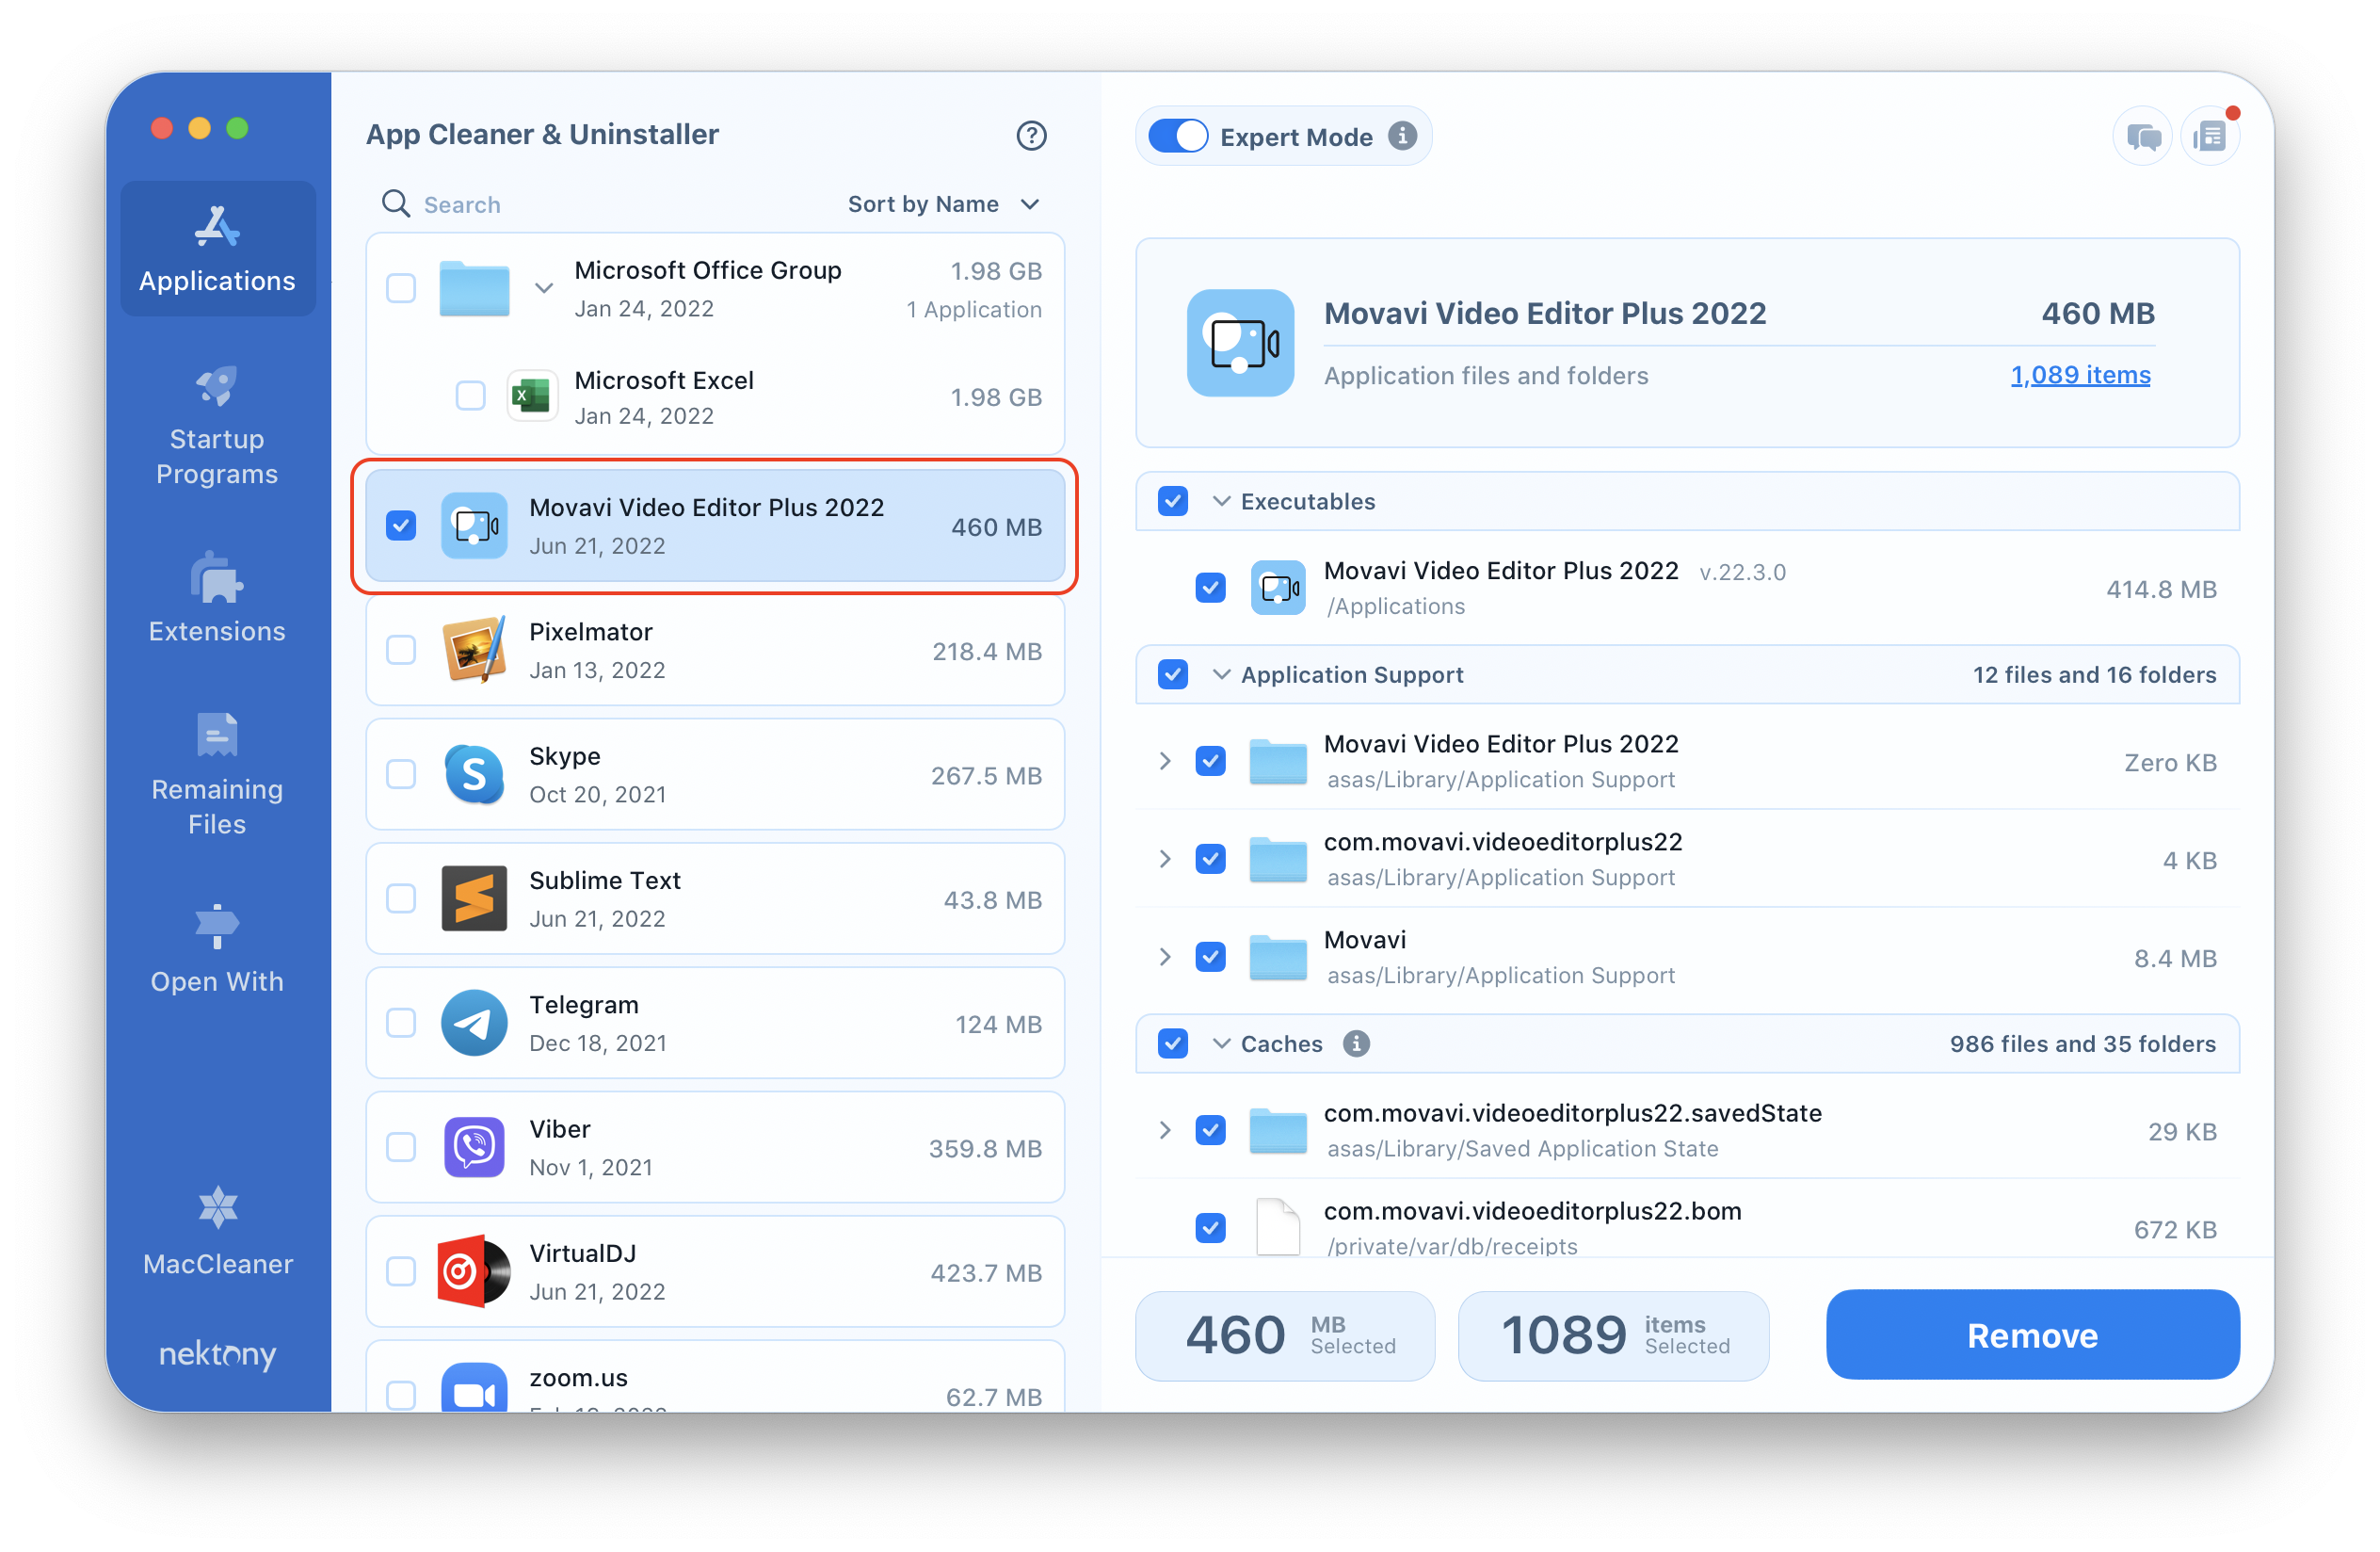
- Launch App Cleaner & Uninstaller. The app will scan your application folder and display all the apps you have on your computer.
- Choose Movavi Photo Manager by checking off the box next to it.
- Click the Remove button and confirm the action.
- Empty your Trash.
Congratulations, you are done! The app was deleted. Now, your computer is free from Movavi Photo Manager and its leftover files in just a few clicks.
Conclusion
Now that you have read this article tell us which way you think it is easier to uninstall Movavi Photo Editors?
It is easier to use App Cleaner & Uninstaller than going around the hidden Library and trying to find all the leftovers from our perspective. The best thing is that App Cleaner & Uninstaller makes sure that there are no service files left on your computer. Moreover, App Cleaner & Uninstaller allows you to change login items, delete browser extensions, manage other Mac extensions, and change default applications. All of those fantastic features are available to you with the seven-day trial period.
Frequently asked questions about Movavi
Is Movavi safe?
Movavi Photo Manager would be a safe tool, however, if it was downloaded from trusted resources.
Where can I install Movavi?
You can officially download the application either from the Mac AppStore or from the Movavi official website. It is not recommended to download the application from untrusted resources.
What is Movavi Photo Manager used for?
Movavi Photo Manager is used for the management of all the images you have on your computer. It also has limited tools for editing pictures. You can crop, rotate and automatically adjust the light.
What is the price for a Movavi Photo Manager?
The official price for Movavi Photo Editor, as of February 2021, is $12.99 on Mac AppStore.
What is Movavi?
Movavi is a developer company that has created different tools for photo and video editing. As well as different design tools, like presentation creators.
