If you need to uninstall Webroot SecureAnywhere antivirus from the Mac, you have found the right article. Here, we will explain two different ways to uninstall Webroot and get rid of its service files.
Contents:
What is Webroot SecureAnywhere antivirus
Webroot SecureAnywhere Antivirus is an antivirus application by Webroot, a cybersecurity software company that provides Internet security for consumers and businesses. Webroot antivirus and other applications’ main difference is that Webroot SecureAnywhere antivirus looks at the unknown files’ behavior before deleting them. After analyzing files/services actions, the application deletes the attacker and reverses any damage that was done by the virus.
How to manually uninstall Webroot
Firstly, deleting antivirus on Mac is not as easy as just dragging and dropping it into the Trash. It is simply not enough. This might cause some complications while uninstalling antivirus from Mac.
To remove the antivirus developed by Webroot from the Mac, use the official Webroot uninstall tool. However, we recommend that you then check your computer for its leftovers. Please, carefully follow this webroot uninstallation step-by-step guide to learn how to completely delete it from your Mac.
Read also “How to uninstall any antivirus software from Mac.”
Steps on how to uninstall Webroot SecureAnywhere manually:
- Launch the Webroot application.
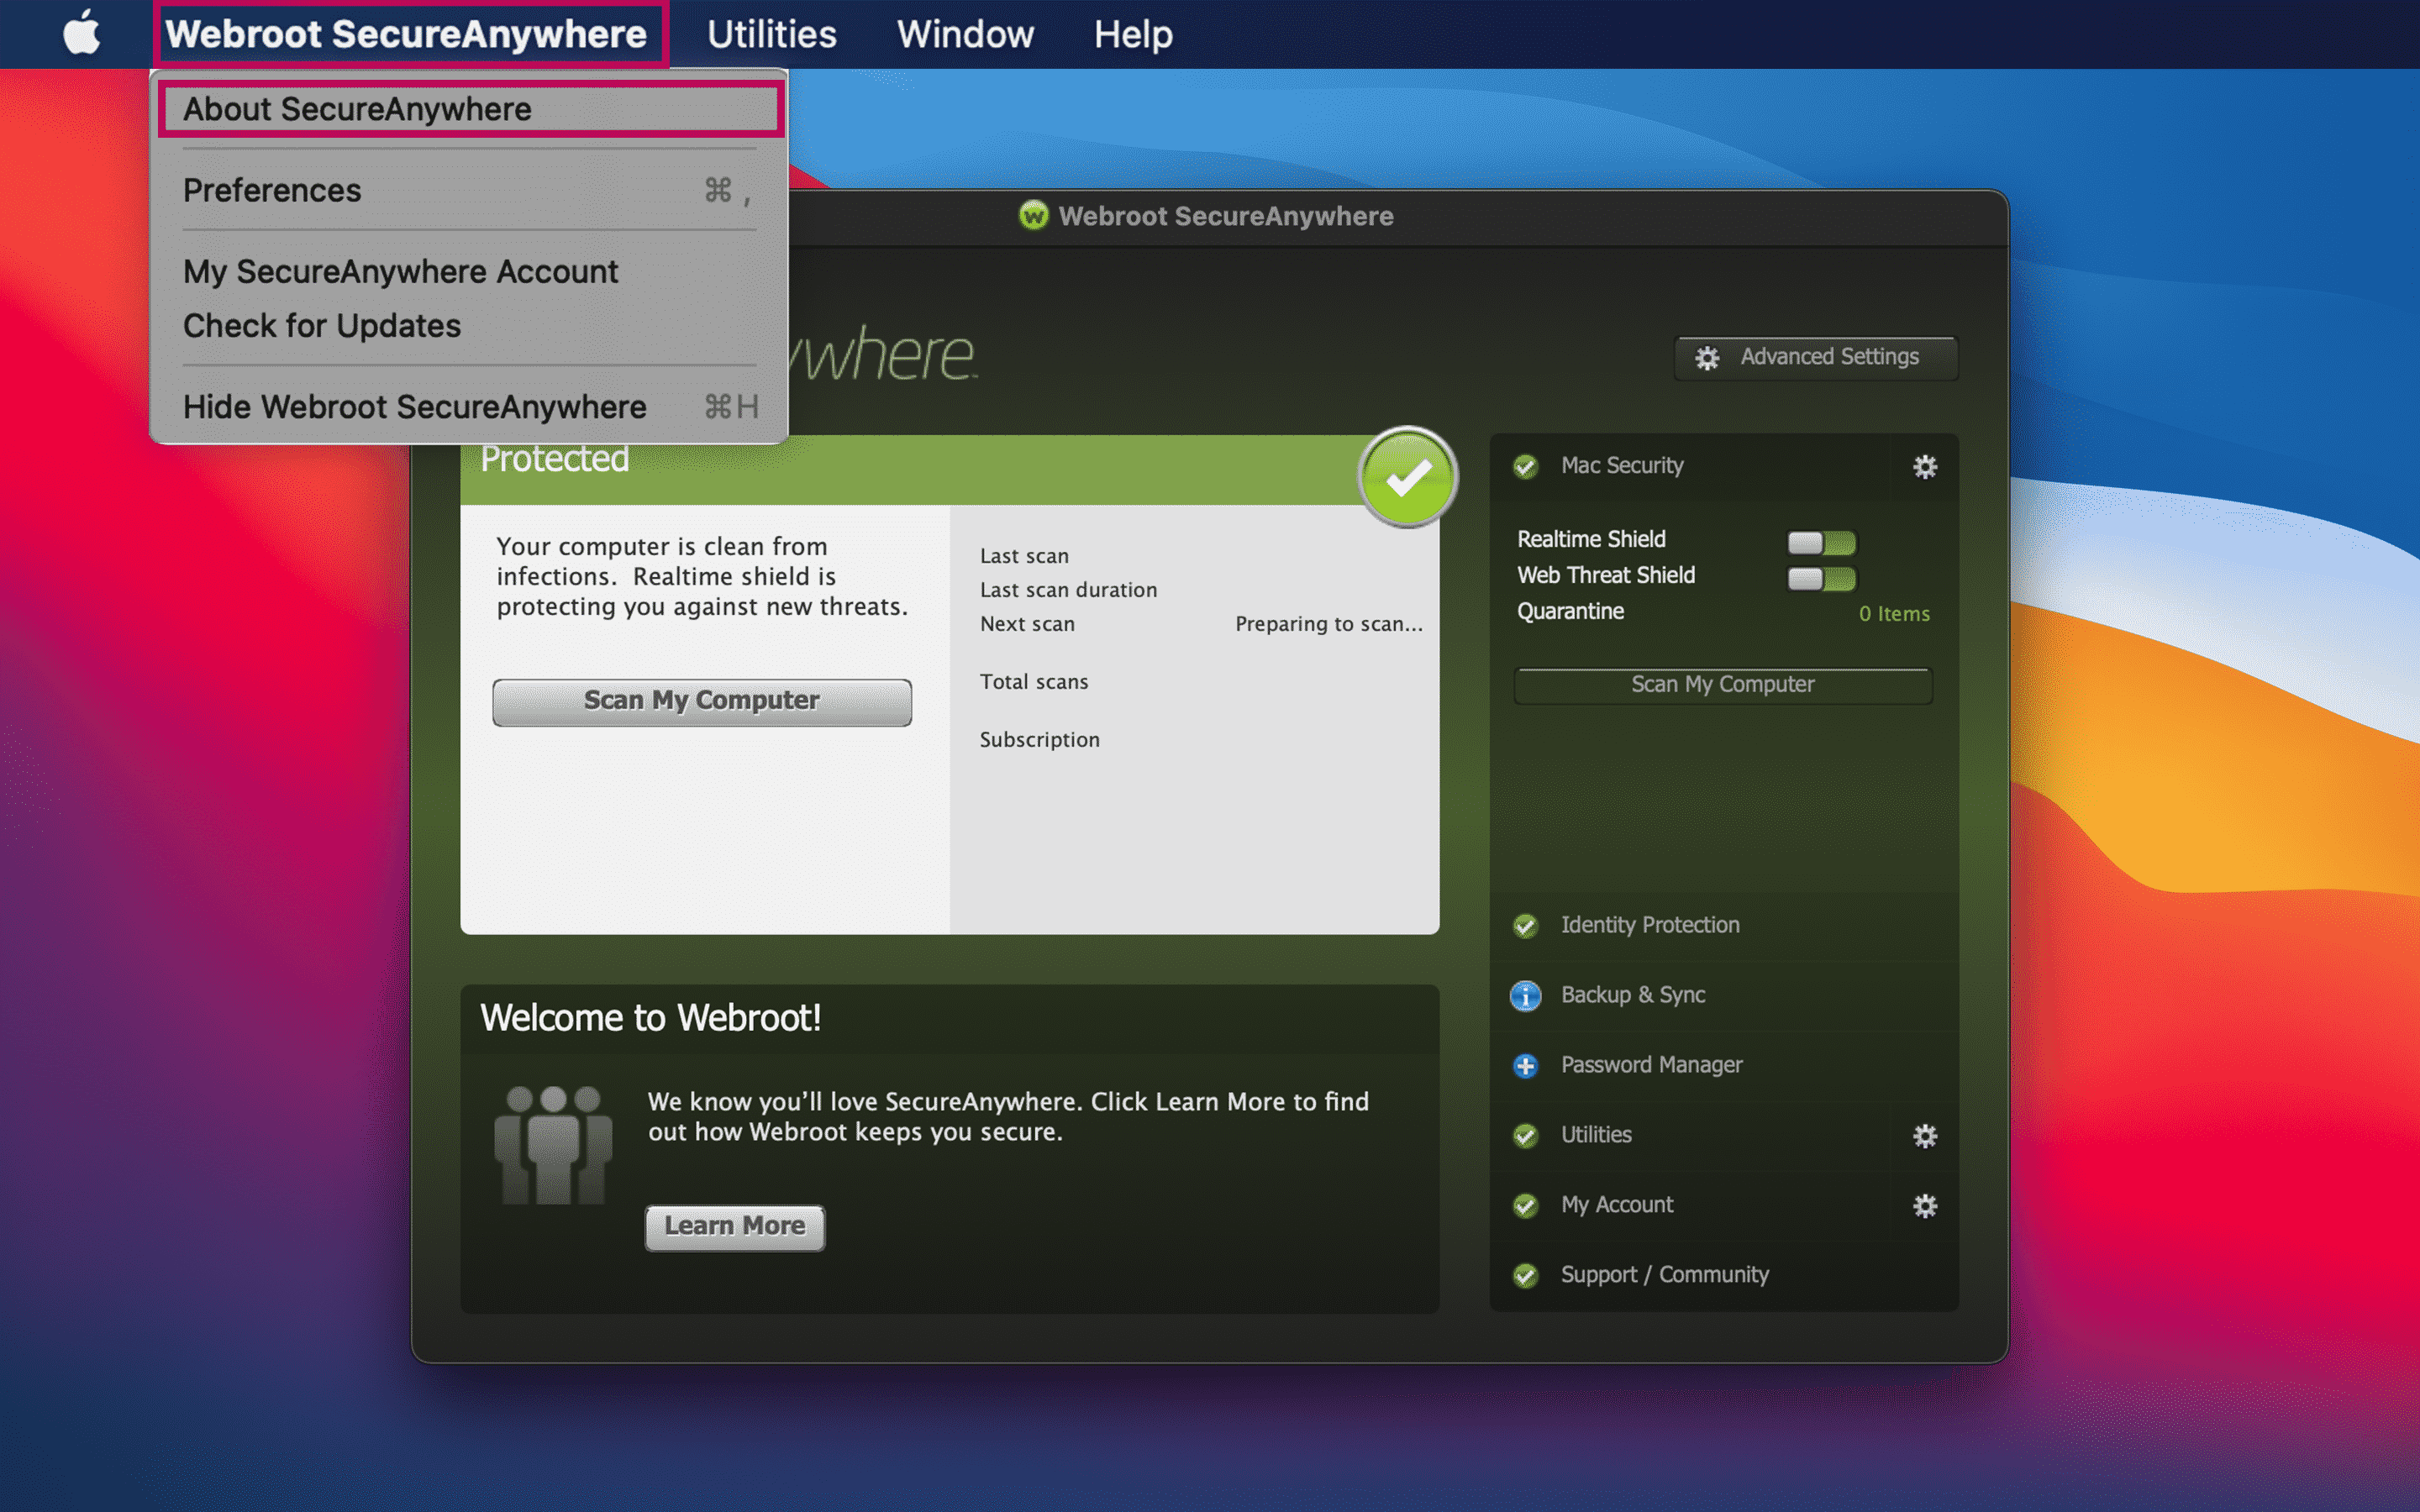
- Select Webroot SecureAnywhere in the top-left corner of your desktop.
- In the appeared window, select About Webroot SecureAnywhere.
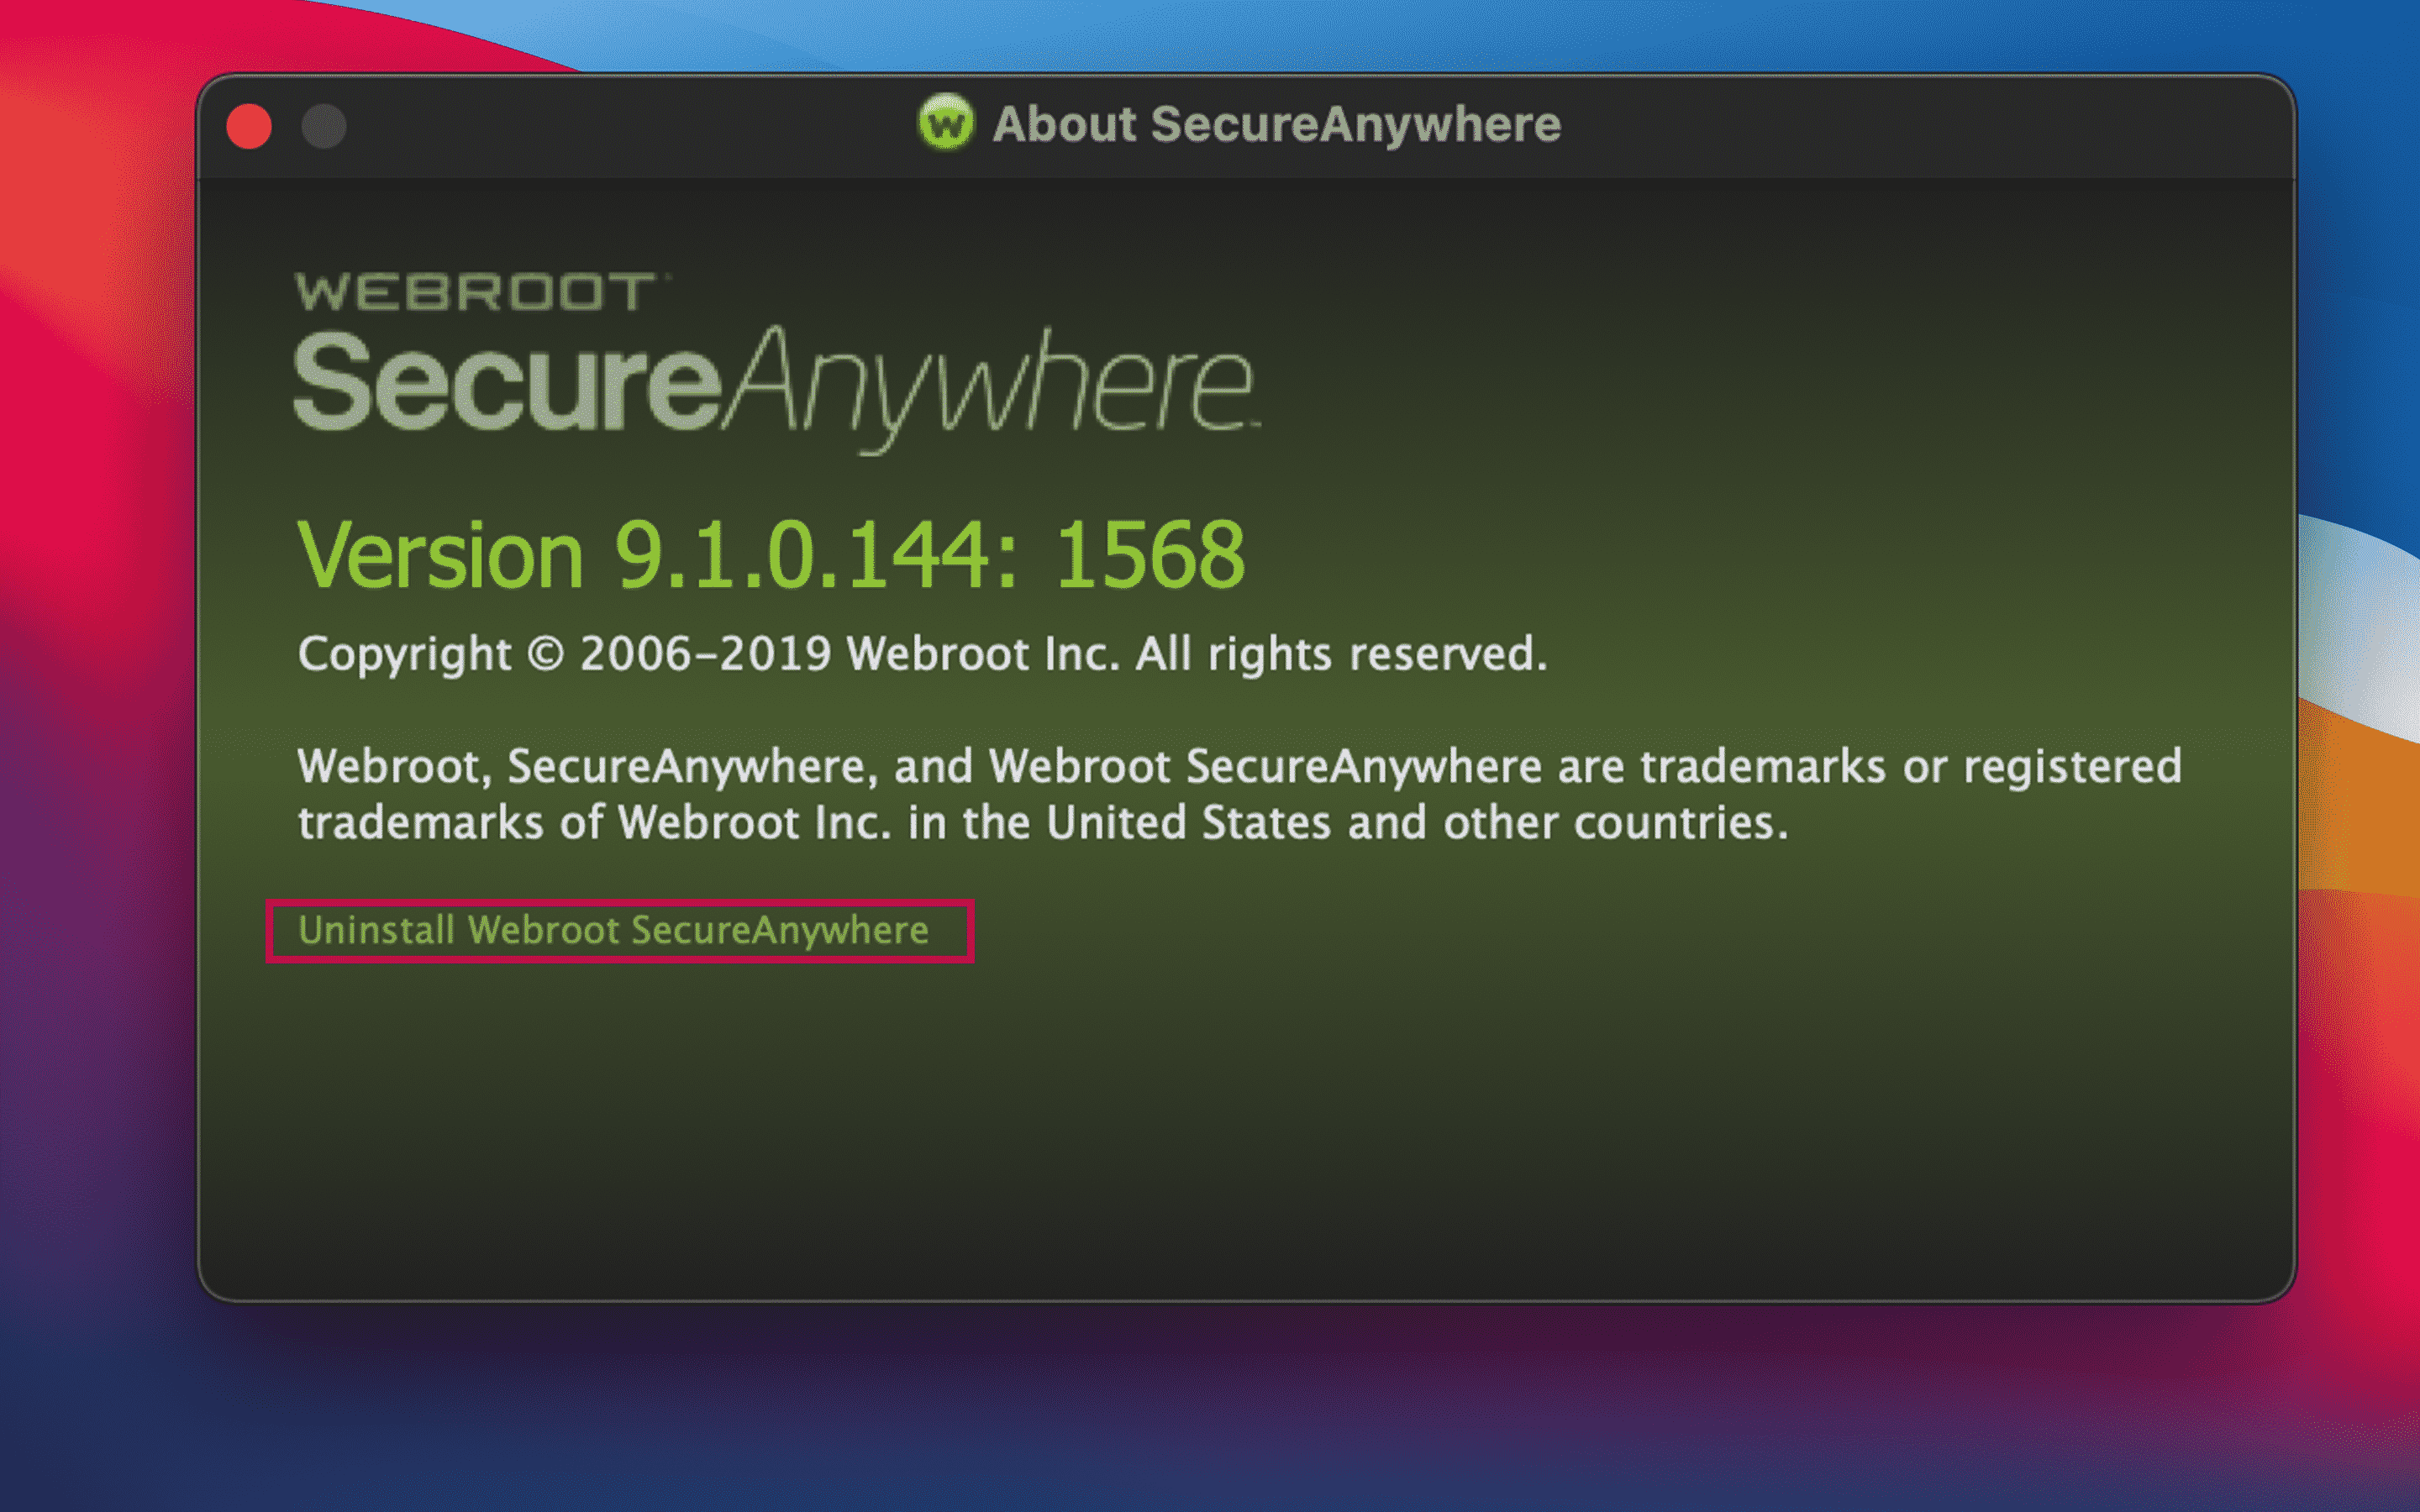
- In the recently pop-up window, click on the link that says Uninstall Webroot SecureAnywhere.
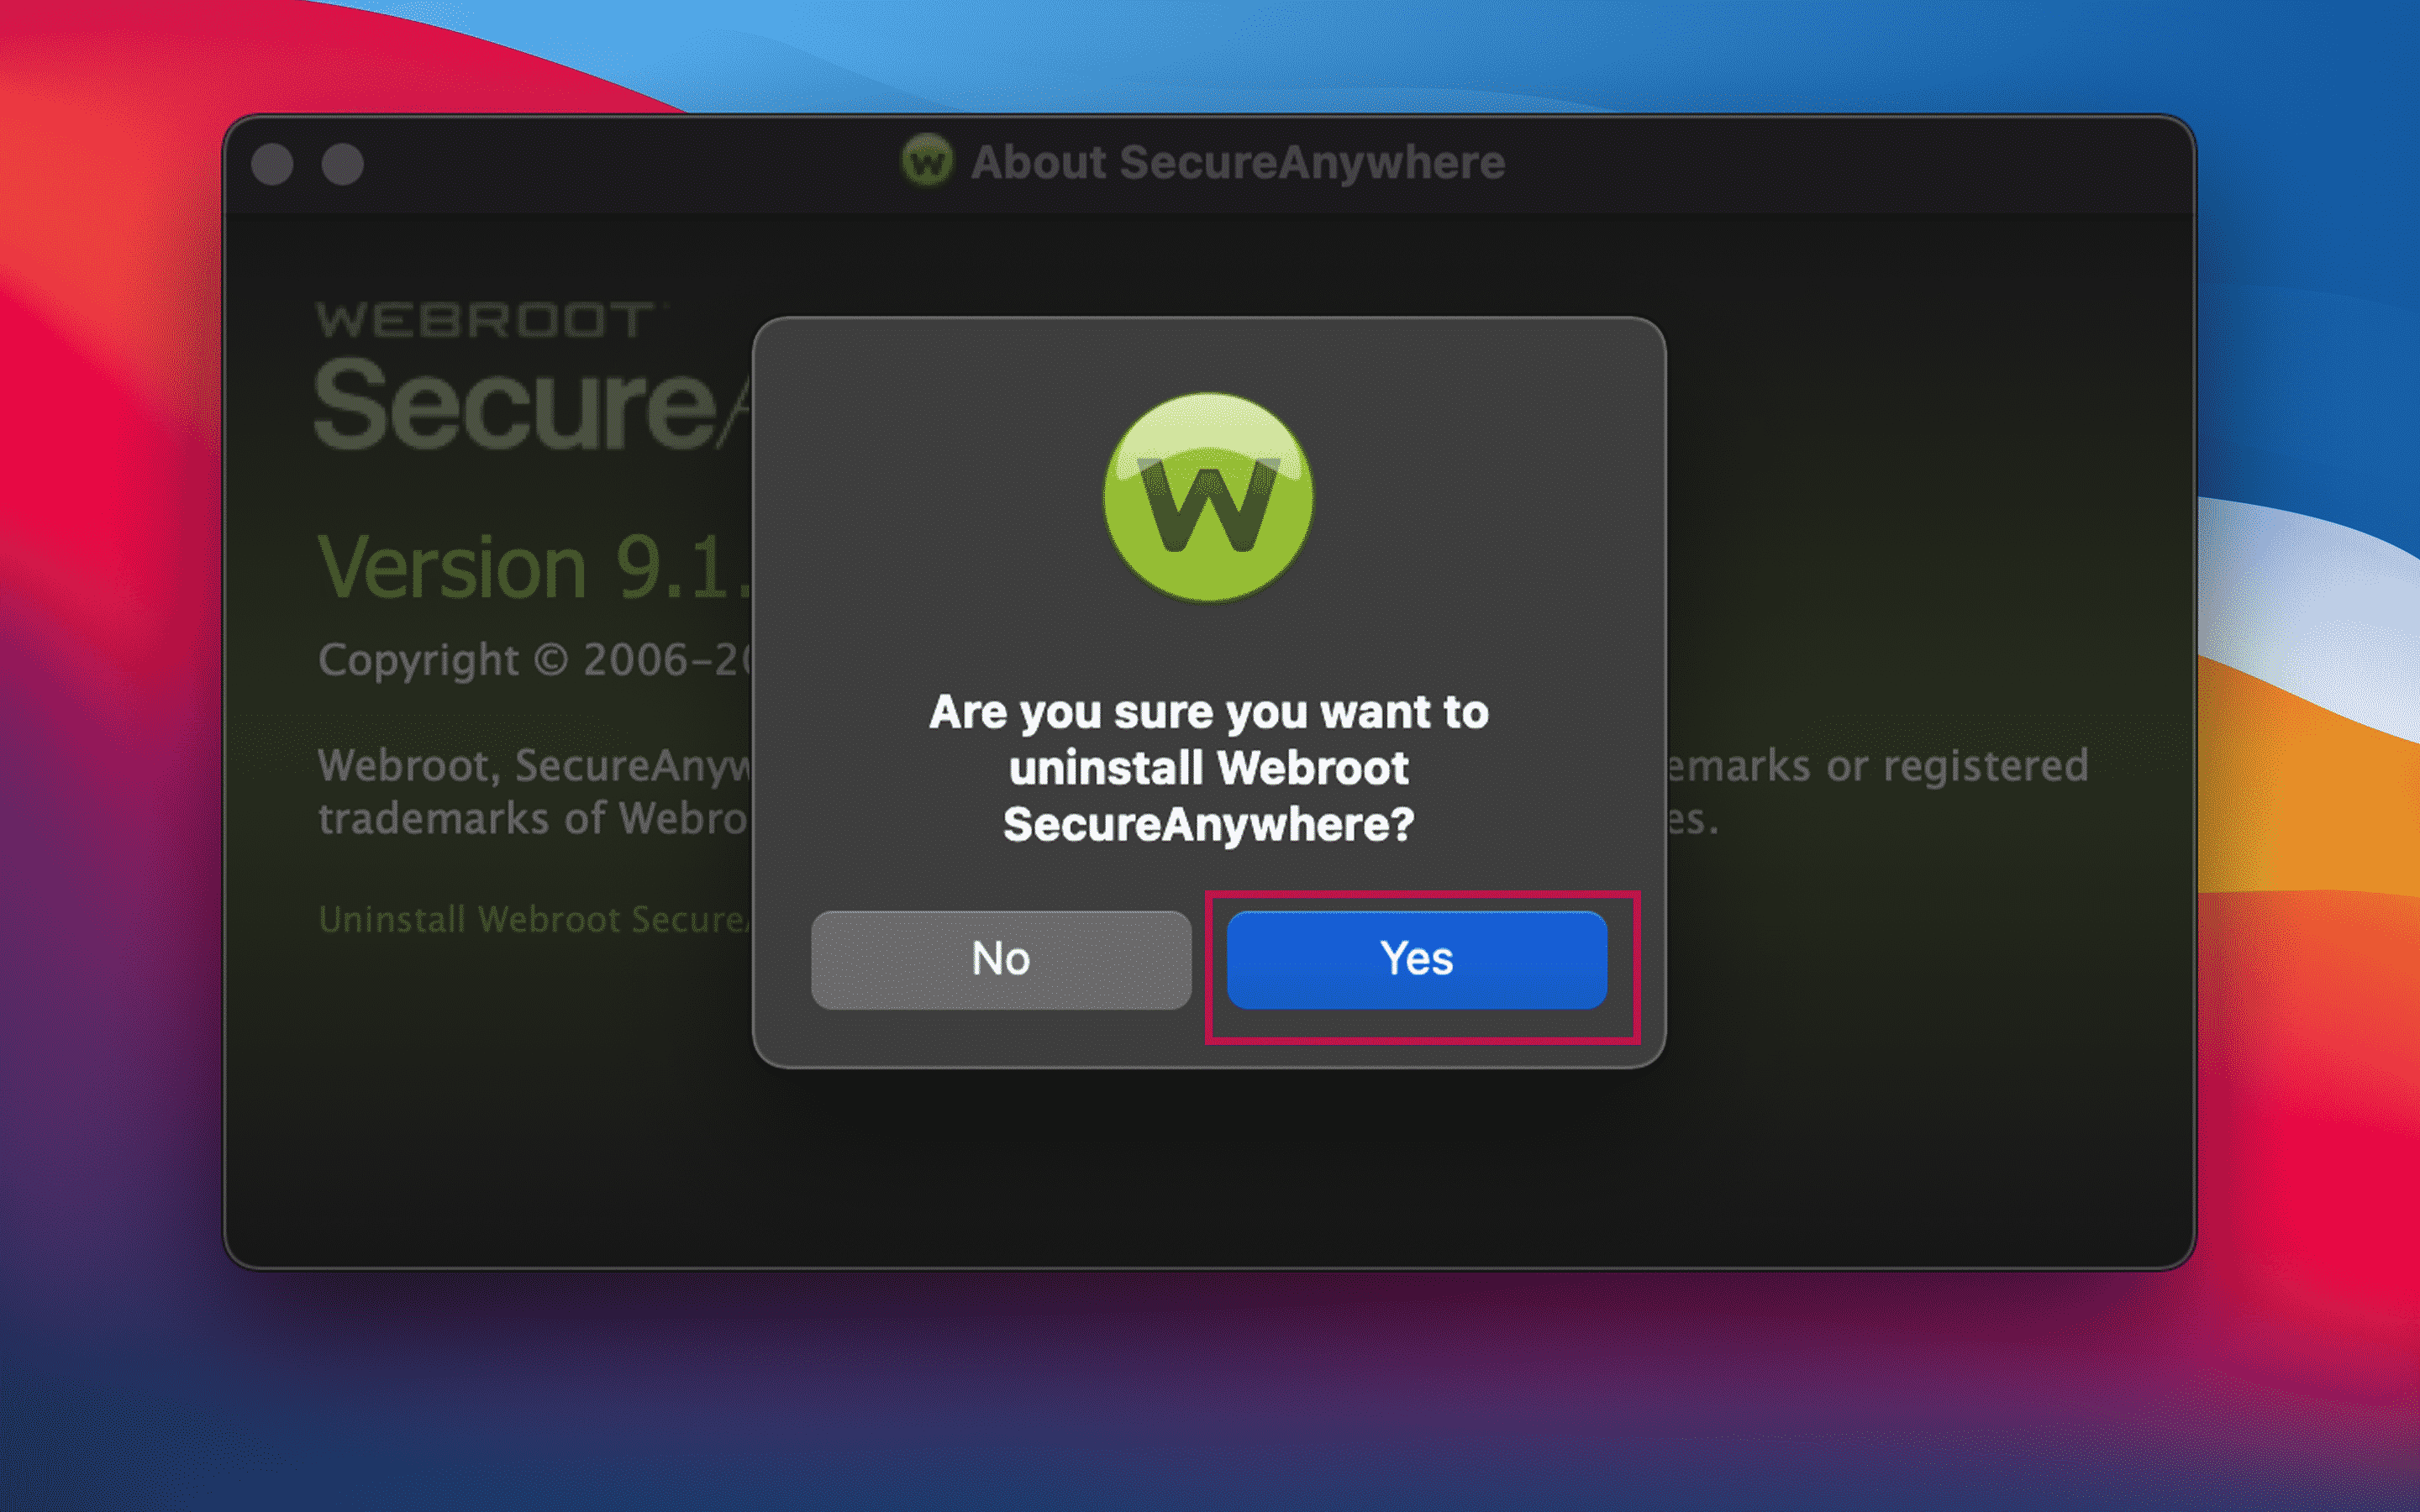
- Another yet critical pop-up window will appear. Click YES to confirm the application’s removal.
- If the Webroot SecureAnywhere icon was pinned in your dock, drag it into the Trash.
- Different applications store their support files, such as: caches, preferences, etc. in the system’s hidden Library folder. To find those files, open Finder, press the Command+Shift+G, and in the search field, type ~/Library, and press Enter.
-
In the Library folder, remove all those no longer needed files and folders that are associated with Webroot SecureAnywhere application. In our case, we found those files and folders in the following sections:
- ~/Library/Application Support
- ~/Library/Saved Application State
- ~/Library/Logs
- ~/Library/Containers
- ~/Library/Application Scripts
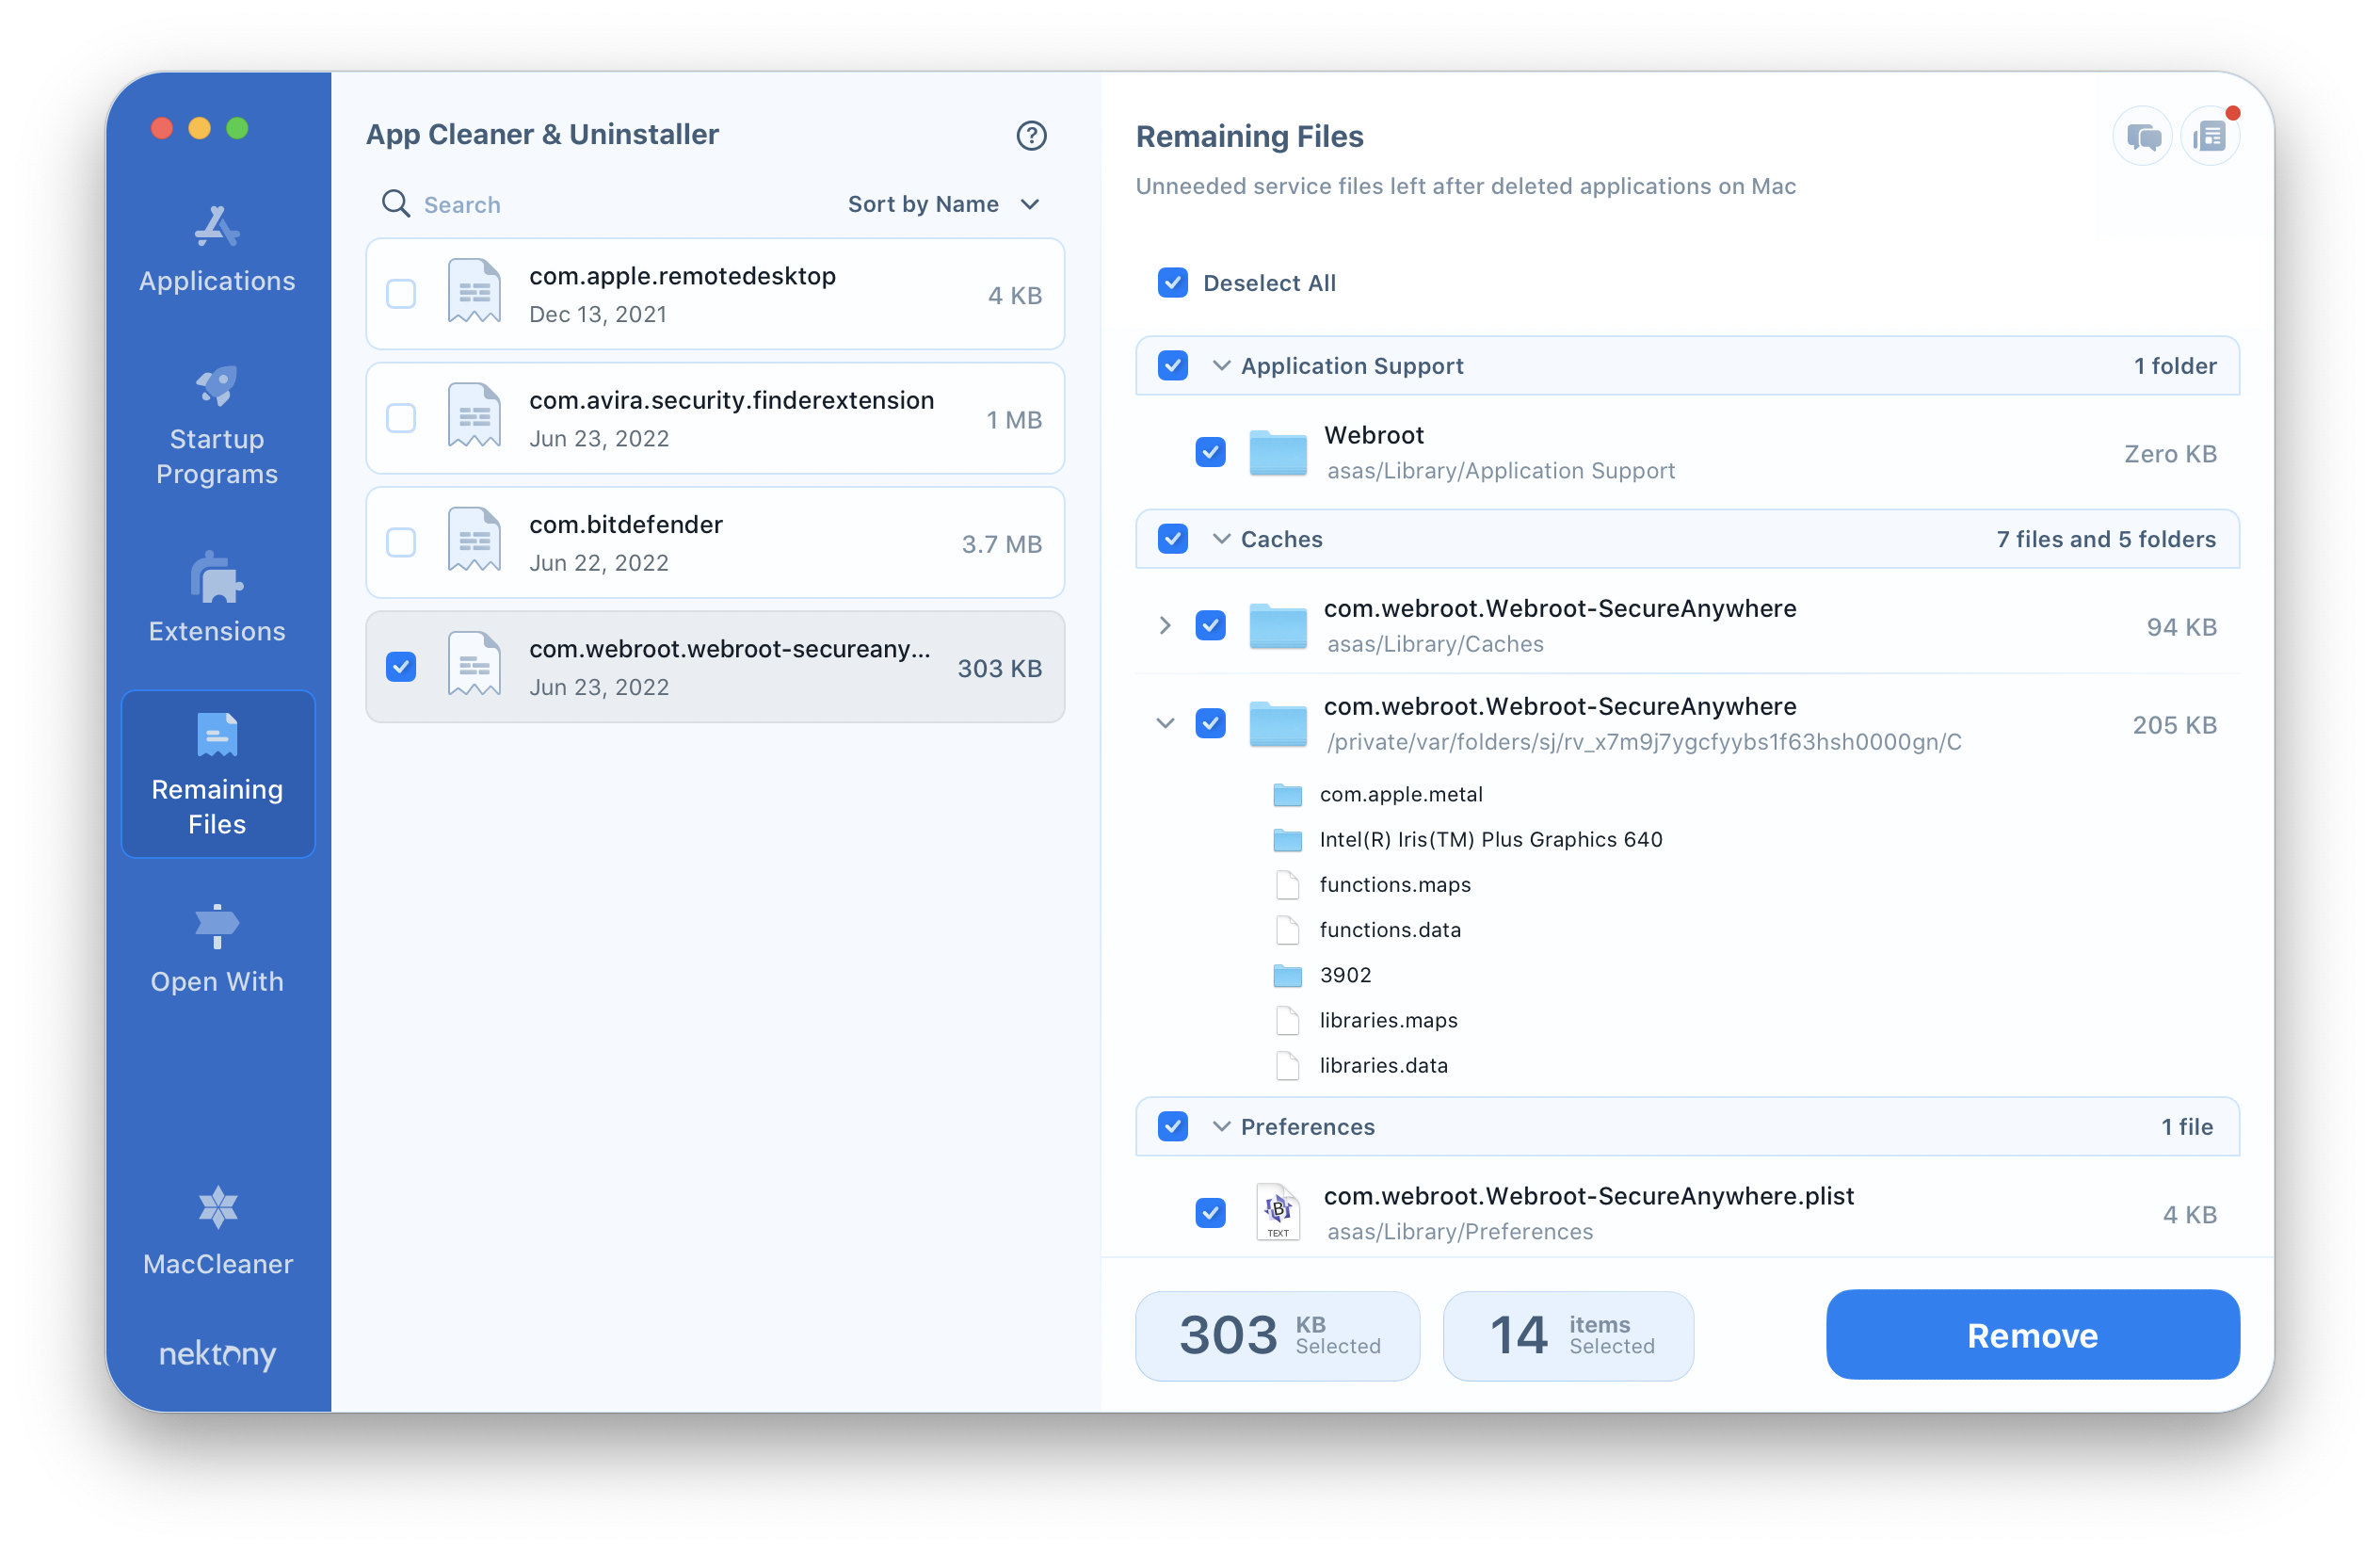
However, we are not quite done yet. After the deletion of the Webroot SecureAnywhere, we went back and checked the hidden library for its support files (leftovers) and found that they were still there. Thus, now we have to go and delete those files. Thankfully, there is an application called App Cleaner & Uninstaller that lets you delete the leftovers of already deleted apps.
If you prefer to manually find and remove the Webroot’s leftovers, the next steps will explain how to do this.
You can have more or fewer service files left, depending on the period you have been using the Webroot SecureAnywhere. Unfortunately, service files can potentially be all over your drive, and it can be extremely challenging to find them. Thus, we recommend you use a special utility that was created for apps removal.
In the next part of the article, you will learn how to use App Cleaner & Uninstaller to delete apps from your Mac completely and correctly. Continue reading to learn how to use the App Cleaner & Uninstaller to remove the Webroot antivirus app from your Mac.
Uninstalling Webroot with App Cleaner & Uninstaller
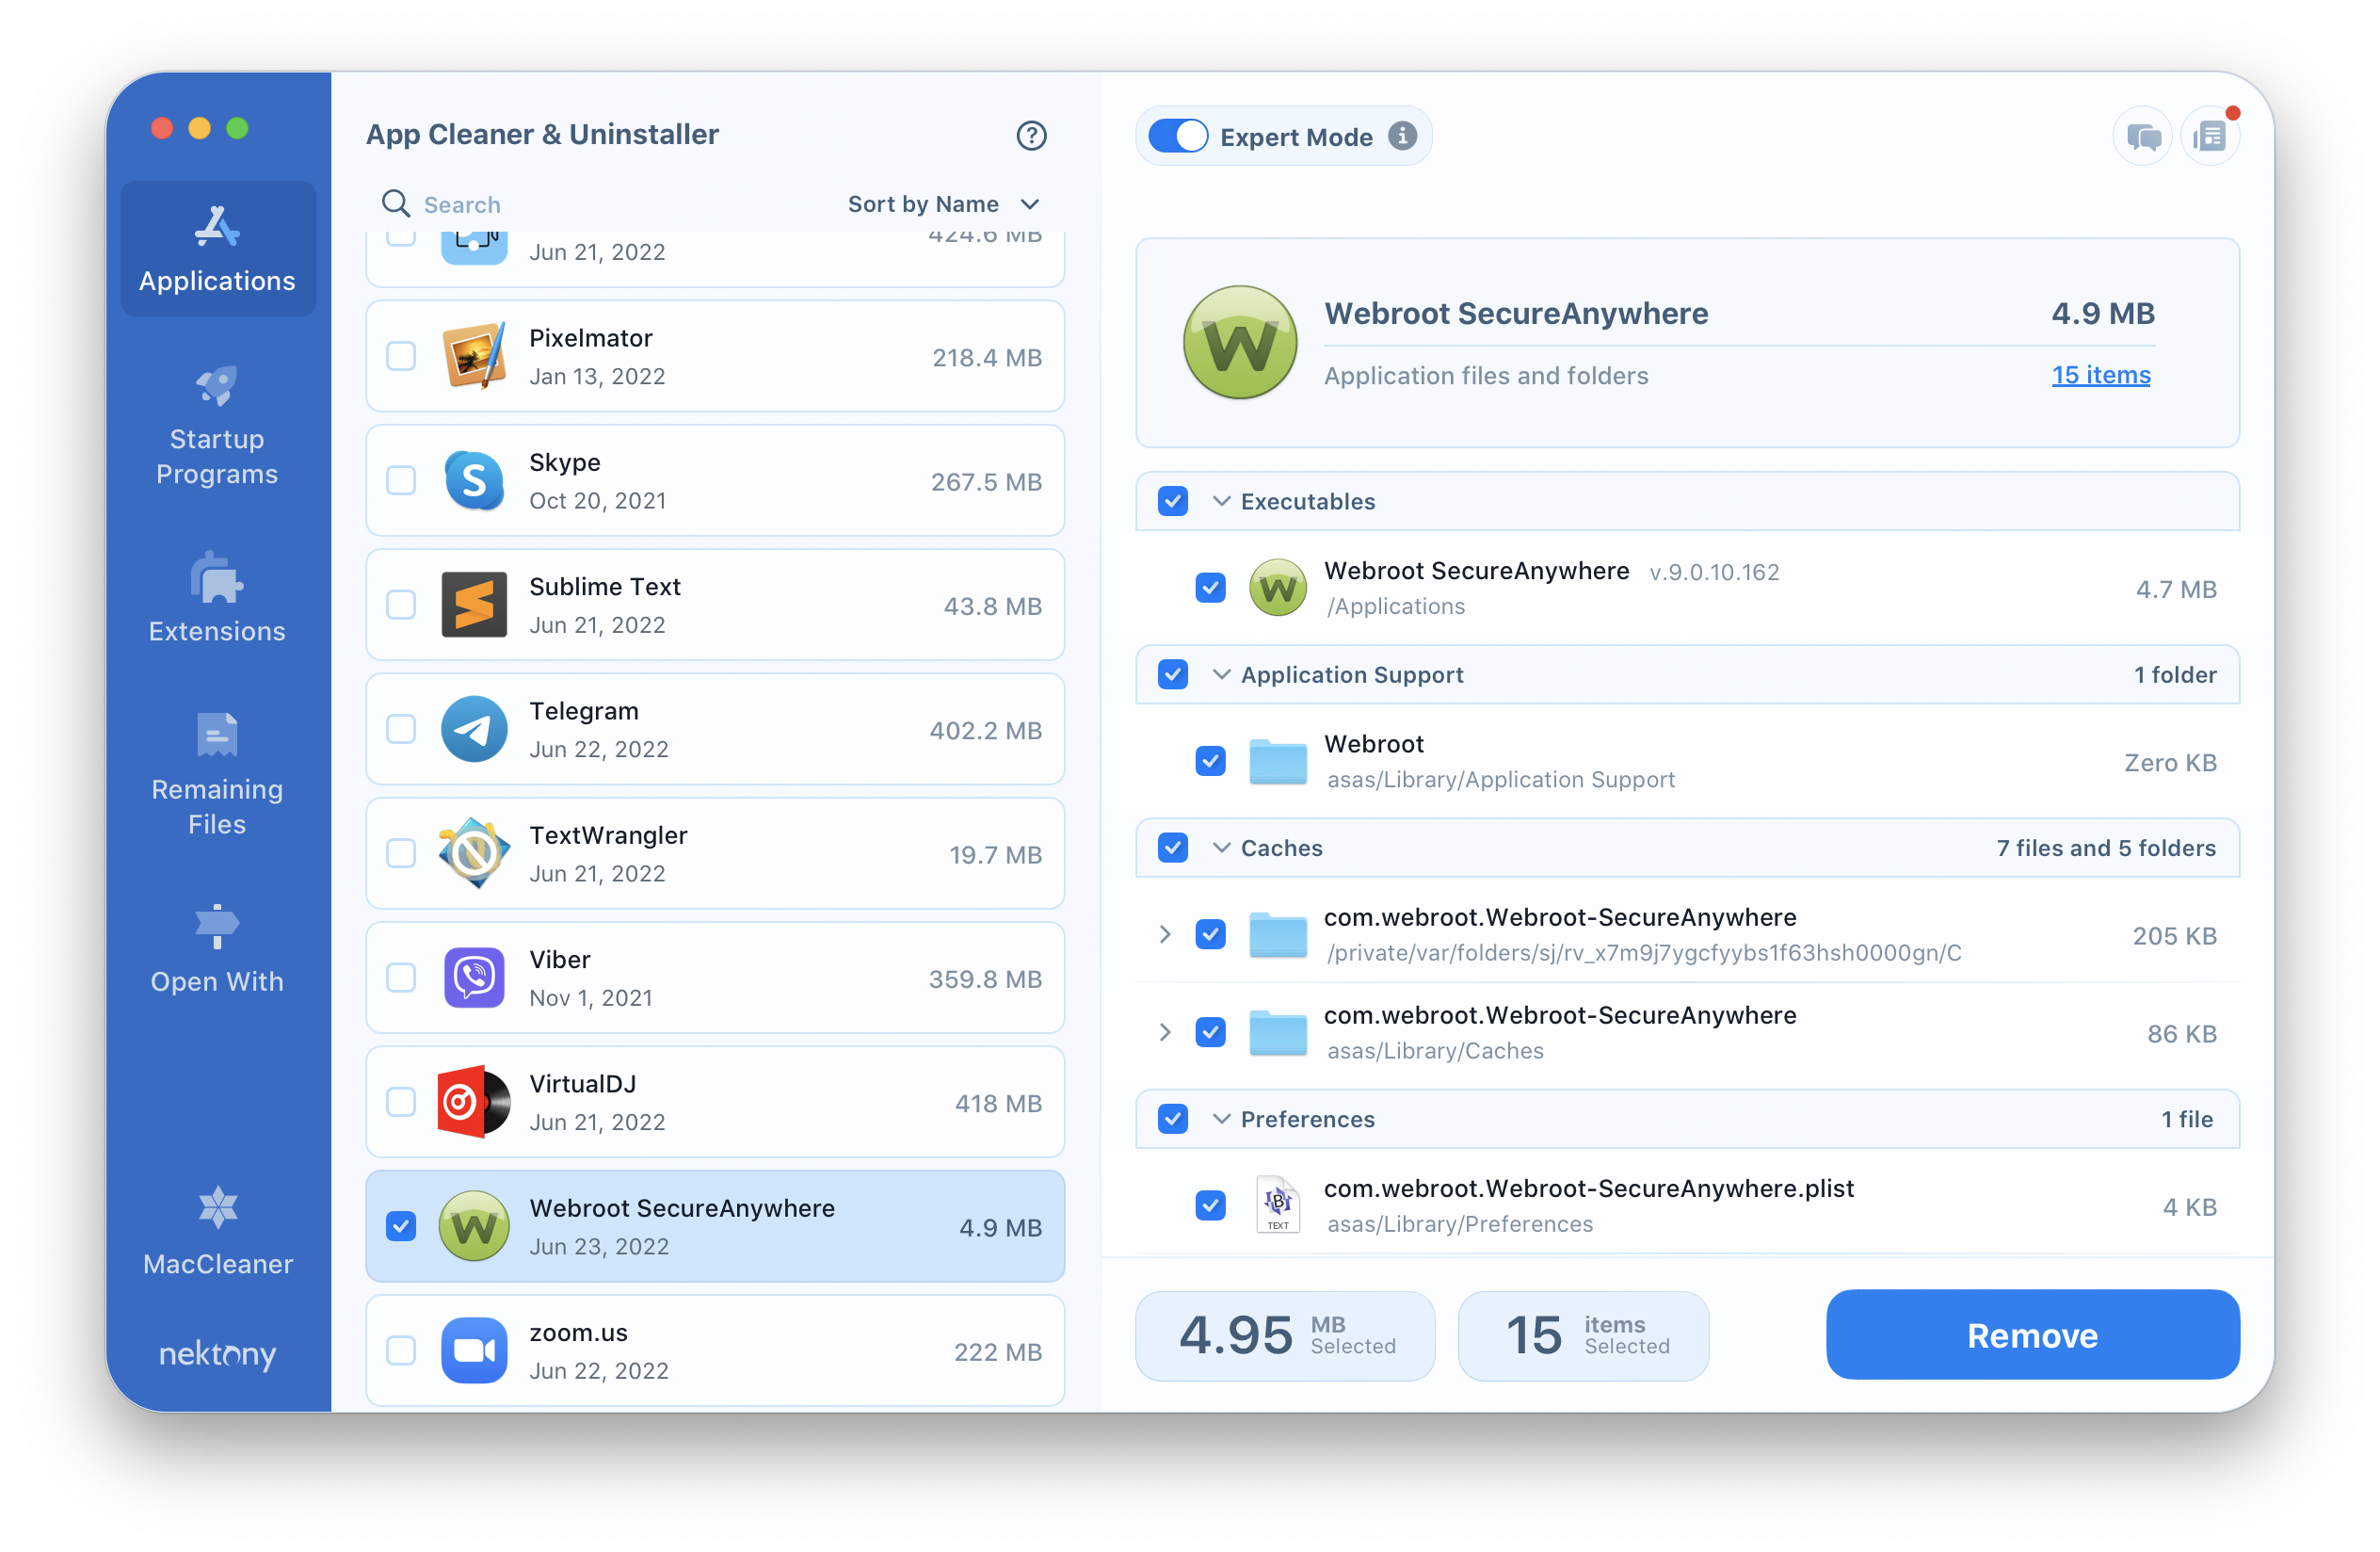
App Cleaner & Uninstaller is a special utility designed to help Mac users easily delete unneeded applications. It allows you to quickly uninstall applications from Mac and it does it completely and 100% safely without damaging other applications files.
Follow this method to easily uninstall Webroot with App Cleaner & Uninstaller:
- Launch the App Cleaner & Uninstaller application.
- Select Webroot SecureAnywhere from the list of the apps that are installed on your Mac.
- Click the Remove button, and the app will proceed to the uninstallation.
Thus, now you do not have to waste your time searching for the leftovers of Webroot SecureAnywhere and then spending even more time deleting them. You can just use App Cleaner & Uninstaller.
App Cleaner & Uninstaller’s great thing is that it finds all the service files, so after the removal, there are no leftovers left on your Macs drive. Moreover, if you already deleted the app due to App Cleaner & Uninstaller, you can easily delete the leftover in the Remaining Files section of the menu.
Conclusion
After reading this article, we can answer, what is the easiest way to uninstall Webroot software?
From the two ways mentioned in this article, we recommend that you, our reader, use App Cleaner & Uninstaller. It is easier and safer than going around the hidden library and trying to find all the leftovers. The best thing is that App Cleaner & Uninstaller makes sure there are no leftovers left on your computer.
Moreover, App Cleaner & Uninstaller allows you to change login items, delete browser extensions, manage other Mac extensions, and change default applications.
