
Sometimes, Mac users need access to specialized Mac boot modes to troubleshoot issues on macOS or perform specific tasks. In this article, we’ll explore some of the most common Mac boot modes and how you can use them to get the most out of your machine.
Contents:
Tip: How to prevent issues on a Mac
To keep your Mac always clean of junk and corrupted files, use MacCleaner Pro. This all-in-one software helps clean up your Mac’s hard drive and optimize its performance. MacCleaner Pro offers a free trial that you can download today.
MacCleaner Pro
Mac Recovery Mode
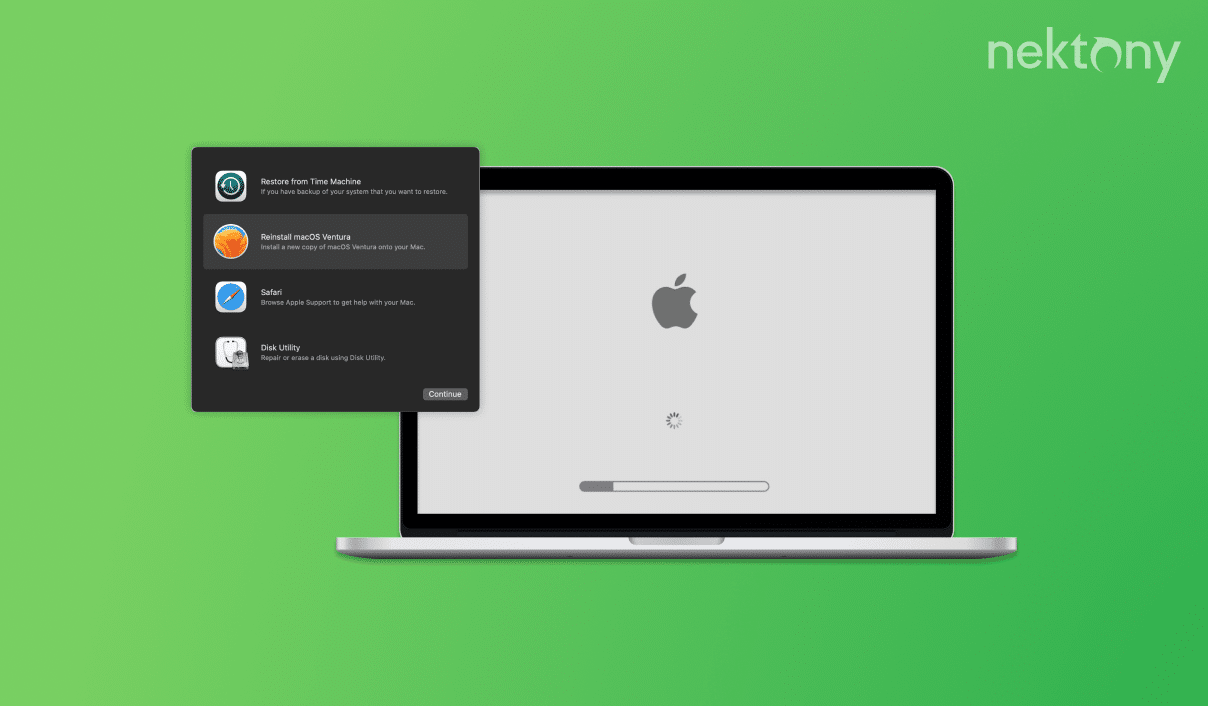
macOS Recovery Mode is a built-in feature that can be used to troubleshoot and recover your Mac’s operating system in case of a problem. It provides tools to restore your system from a Time Machine backup, receive online assistance, reinstall macOS, wipe your hard drive, and much more. Whether you need to fix disk errors, erase and reformat disks, or manage partitions, your Mac’s Recovery Mode can help you with this.
The process of booting a Mac into Recovery Mode differs based on whether the Mac has an Intel or Apple Silicon processor.
How to boot an M1 Mac in Recovery Mode
- Shut down your Mac.
- Press and hold the power button to boot it again. Do not release the button until the loading screen with the Apple logo appears.
- Select Options and click Continue.
- Provide your admin user password.
- When you’re logged in, the Recovery Mode Utilities window will appear.
How to boot an Intel-based Mac in Recovery Mode
- Shut down your Mac.
- As you press the power button to turn on your Mac, hold down one of the following key combinations depending on your needs:
- Cmd+R – reinstall the latest version of macOS.
- Opt+Cmd+R – reinstall macOS and update it to the latest version compatible with your Mac.
- Opt+Shift+Cmd+R – reinstall the macOS version that came with your Mac or the closest one available.
- You will see the Recovery Mode Utilities panel.
Mac safe mode
When you start your Mac in Safe Mode, it launches a stripped-down version of macOS that can be used for diagnosing and troubleshooting a variety of problems. In Safe Mode, all third-party software is turned off.
The steps to start a Mac in Safe Mode will vary depending on whether your Mac has an Apple Silicon or Intel chip. In this guide, we’ll show how to boot Mac in Safe mode for both types of processors.

How to boot an M1 Mac in Safe Mode
- Shut down your Mac and wait for 2–3 seconds.
- Press and hold the power (Touch ID) button. Keep holding it, even after the Apple logo appears.
- Once the message “Loading startup options” appears on the screen, release the Power button.
- The boot disk and options will appear. Click Continue (hover your mouse cursor over the startup disk to see this option).
- Press Shift, hover your mouse over the startup disk, and click Continue in Safe Mode.
- You’ll see the login screen with the Safe Mode indicator in the right corner of the desktop.
How to boot an Intel-based Mac in Safe Mode
- Shut down your Mac.
- Press the power button to turn on your Mac and immediately hold down the Shift key.
- You’ll see the Mac login window with a red Safe Mode label on the top.
Mac boot from USB
Booting a Mac from a USB drive means starting up the computer using the operating system installed on the USB drive rather than the internal hard drive. The specific steps to boot your Mac from a USB drive will depend on the model of your Mac and your version of macOS. The instructions below are for macOS Ventura.
How to boot your Mac from a USB drive
Step 1: Create a bootable USB using Terminal
- Open Terminal on your Mac (you can find it in the Applications folder or in Launchpad).
-
Copy and paste the following into the Terminal window and press Enter:
sudo/Applications/Install\ macOS\ Ventura.app/Contents/Resources/createinstallmedia –volume /Volumes/MyVolume
*If you have another Mac operating system, change the appropriate name in the command. Also replace MyVolume with the name of your USB drive.
- If prompted, provide your user password.
- Type Y and press Enter to confirm to erase the USB drive.
- The Terminal will create a bootable USB drive. Please note that the data on this drive will be erased.

Step 2: Boot Mac from the USB drive
- Insert the USB drive into an available USB slot on your Mac.
- Restart your Mac.
- Once you hear the startup sound, press and hold the Option key until the Startup Manager appears.
- The utility will automatically search for any available drives that contain bootable content.
- Double-click on the USB drive to boot it.
Note that the Apple Startup Manager displays only the drives that include bootable content, so don’t worry if there are other USB devices connected – it won’t try to boot from them.
PRAM or NVRM reset on Mac
PRAM stands for parameter random-access memory, and NVRAM refers to nonvolatile random-access memory. Resetting the NVRAM or the PRAM clears and resets certain system settings that are stored in your Mac’s memory, and it can help resolve problems with the display, audio, startup process, and more. Settings that will be reset include things like volume level, time zone, display resolution, and startup disk selection. The method to reset the NVRAM and PRAM is the same.
How to reset PRAM on Mac
- Shut down your Mac.
- Press the power button to turn it on and immediately press and hold the Option+Cmd+P+R keys.
- Hold the keys for about 20 seconds, then release them.
- Your Mac will restart, and in System Settings, you’ll see that the settings have been reset.
Conclusion
Booting a Mac in different modes can help troubleshoot and resolve some macOS issues. We hope this guide has provided valuable information on how to help your Mac start up and run properly. However, preventing issues from occurring in the first place is always the best approach. That’s where MacCleaner Pro comes in.


