August 11, 2025
How to uninstall Adobe Photoshop and clear leftover files on Mac
If you’ve decided it’s time to part ways with Adobe Photoshop on your Mac, you’re not alone.
In my case, I found that Figma covers most of my personal and commercial design tasks just fine. And with Apple completing the acquisition of Pixelmator Pro in February 2025, it long felt like the right moment to declutter.
In this guide, I’ll show you step by step how to fully uninstall Photoshop from your Mac so you can free up space and start fresh.
Why remove Adobe Photoshop
Before we jump into the uninstallation steps, it helps to be clear about your reason. Some users want to reinstall Photoshop to fix persistent errors, while others need to uninstall it completely after ending their subscription.
If you’re here because Photoshop isn’t working properly, a full reinstall is often the most effective way to resolve stubborn issues. Here are common cases when reinstalling helps:
-
Frequent crashes on startup or file opening
Photoshop may close unexpectedly and display errors about CoreFoundation or GPU problems. This often happens because of damaged plugins, corrupted font caches, or outdated panels. A clean reinstall resets all settings and components to default. -
Program error when saving or exporting
If you see the message “Could not complete your request because of a program error,” even after resetting preferences, reinstalling clears broken export modules and hidden conflicts. -
Laggy or unresponsive drawing tools
Brushes or the Pen Tool can behave unpredictably or crash Photoshop altogether. These glitches are usually linked to GPU cache issues, damaged presets, or tablet driver conflicts that a fresh installation can resolve. -
Creative Cloud sync doesn’t work
Errors while saving to the cloud or accessing Adobe Stock often point to broken sync modules. Reinstalling ensures all Creative Cloud components are refreshed. -
Update failures (Error 1002)
If you can’t update Photoshop and see error 1002, Adobe recommends reinstalling the app.
Also, a number of more outdated problems, like the inability to launch Photoshop as discussed on Apple forums, might bring you here. Keep on reading how to uninstall Photoshop the other way around.
Ways to uninstall Photoshop on Mac
Depending on your Photoshop version and how thorough you want to be, there are three ways to remove it from your Mac:
-
Using Creative Cloud App
In older versions, Adobe included a separate uninstaller app located in the same folder as Photoshop itself (for more details, see the FAQ section below). In the latest releases, according to Adobe’s guide, the removal happens directly through the Creative Cloud app. This method is fast but often leaves behind caches, preferences, and plugin folders. -
Manual removal
Dragging Photoshop to the Trash removes only the main application. All your settings, caches, plugins, and some Creative Cloud components remain on your disk. Manually deleting these files ensures a cleaner slate, but takes more time and care. -
Automatic removal with a Third-Party Tool
Utilities like App Cleaner & Uninstaller scan your system for all related files and delete them in one go. This combines thoroughness and simplicity, making it the easiest way to ensure nothing is left behind.
Below is a quick comparison to help you choose your removal method:
| Method | Ease of use | Removes all files | Recommended for |
|---|---|---|---|
| Creative Cloud app | ★★★★☆ | ★★☆☆☆ | Quick removal if you plan to reinstall or don’t mind leftover files |
| Manual removal | ★★☆☆☆ | ★★★★☆ | Full cleanup if you prefer doing it yourself |
| Third-party uninstaller | ★★★★★ | ★★★★★ | The easiest way to remove Photoshop completely |
Below, we’ll explain the manual removal method and how to uninstall Photoshop with App Cleaner & Uninstaller.
Note:
If you consider reinstalling Adobe Photoshop later, it makes sense to save your personal presets and settings before uninstalling. Copy these folders somewhere safe (Replace “20xx” with your Photoshop version, e.g., 2025.):
~/Library/Application Support/Adobe/Adobe Photoshop 20xx/Presets/
Copy
~/Library/Preferences/Adobe Photoshop 20xx Settings/
Copy
~/Documents/Adobe/Photoshop Cloud Associates
Copy
Once you have Adobe Photoshop reinstalled, you can place this copy back to restore your personal presets and settings.
How to remove Photoshop with Creative Cloud
- Quit Photoshop if you have it open.
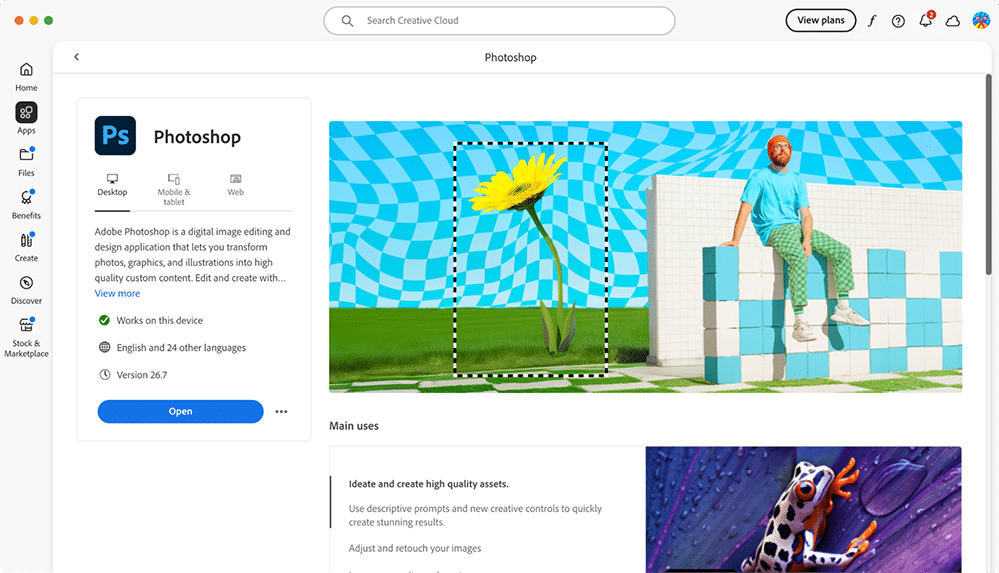
- Open Creative Cloud.
- Find Photoshop in the list of installed apps.
- Click … (three dots next to the Open button).
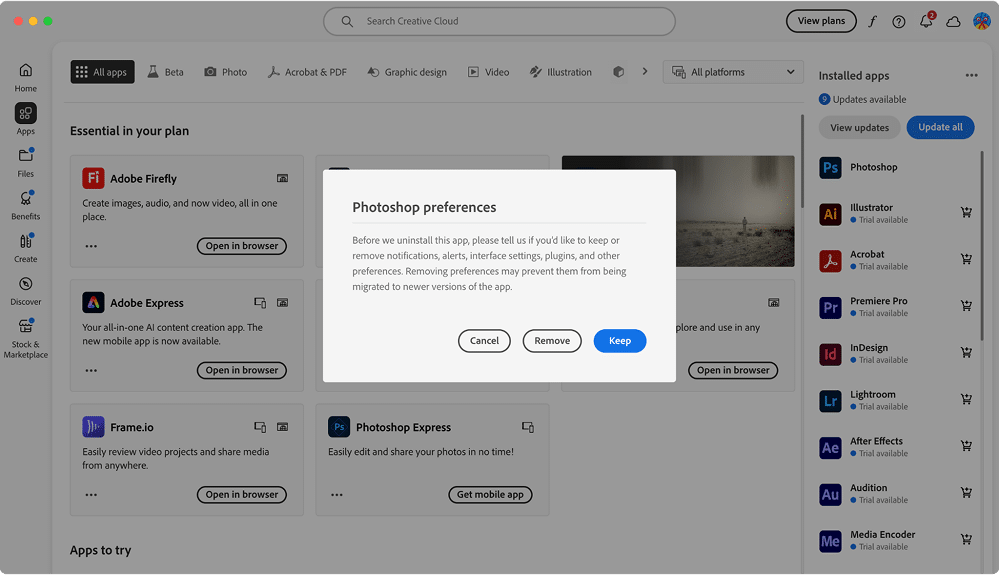
- In the dropdown menu, select Uninstall.
- The app will ask you if you want to keep settings, plugins, and other files that you used to customize your Photoshop experience. If you do not intend to install and use this app later, you can click Remove.
Keep in mind
Even if you choose Remove, Creative Cloud may still leave behind leftover files such as caches, preferences, and plugin folders. Below, we’ll show you how to locate Photoshop’s service files. We’ll provide a complete list of these files so you can check which ones are still present on your system.
-
Now you’ll want to remove all leftover files.
For this, first, proceed to thefolder.~/LibraryCopy
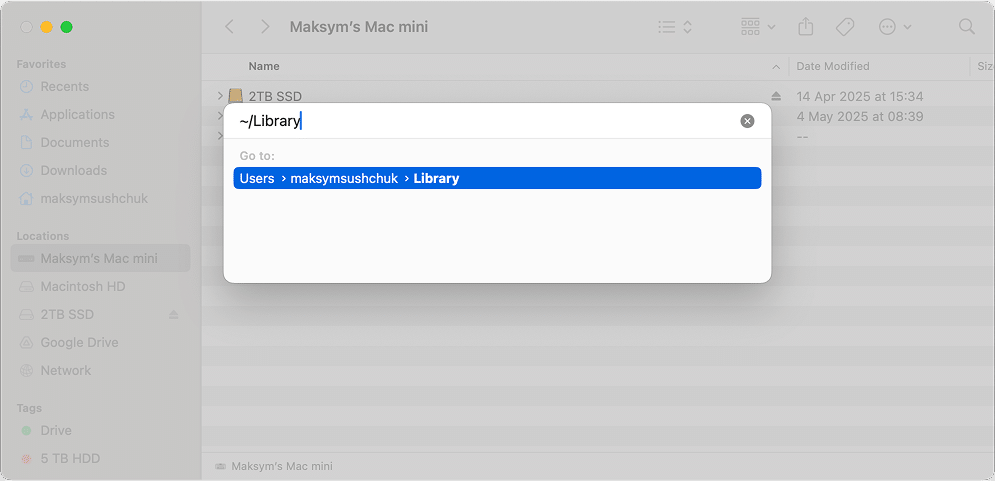
How to use path
- In Finder, press Command + Shift + G on your keyboard.
- Type ~/Library in the search field and press Return to open the folder.
Delete these folders and files if they exist:
Note:
If your version of Photoshop is different, and the names I mention below include the Photoshop version, look for the folder/file that mentions your version.
~/Library/Caches/com.adobe.PhotoshopCopy
~/Library/Saved Application State/com.adobe.Photoshop.savedStateCopy
~/Library/PhotoshopCrashesCopy
~/Library/Logs/Adobe/Adobe Photoshop 2025Copy
~/Library/Logs/NGLClient_Photoshop1.ngllogcontrolconfigCopy
~/Library/Logs/NGL/NGLClient_Photoshop121.0.2.logCopy
~/Library/Logs/NGL/NGLClient_Photoshop123.3.2.logCopy
~/Library/Application Support/Adobe/Adobe Photoshop 2025Copy
~/Library/Application Support/Adobe/RTTransfer/Filters/CC_PHOTOSHOP_17.0.0.filtersCopy
~/Library/Application Support/Adobe/Extension Manager CC/EM Store/PhotoshopCopy
~/Library/HTTPStorages/com.adobe.PhotoshopCopy
~/Library/HTTPStorages/com.adobe.Photoshop.binarycookiesCopy
~/Library/Preferences/Adobe Photoshop 2025 SettingsCopy
~/Library/Preferences/Adobe Photoshop 2025 PathsCopy
~/Library/Preferences/com.adobe.Photoshop.plistCopy
~/Library/Preferences/com.adobe.Photoshop.uxp_com.adobe.ccx.start.plistCopy
~/Library/Preferences/com.adobe.Photoshop.uxp_com.adobe.ccx.lrimporter.plistCopy
~/Library/Preferences/Adobe/PSCopy
~/Library/WebKit/com.adobe.PhotoshopCopy
Now go to the system’sand delete the following folders:~/LibraryCopy
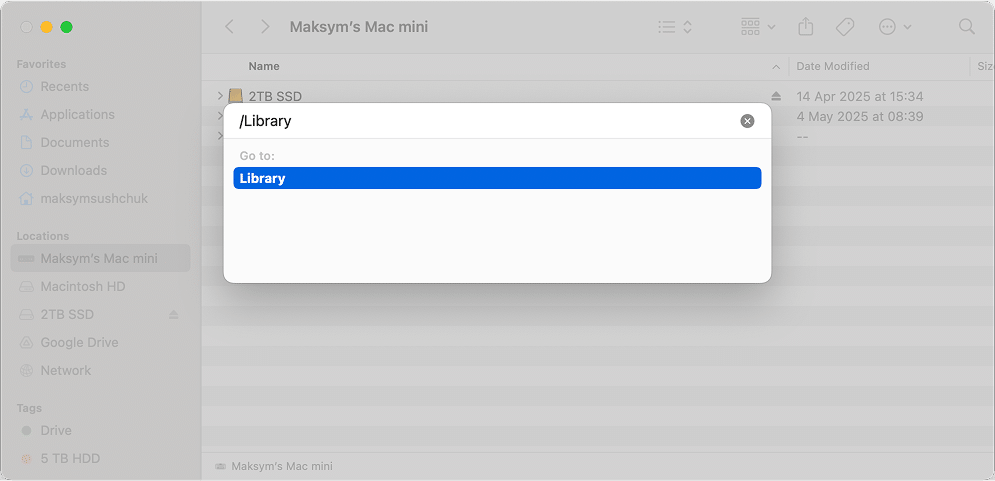
How to use path
- Open Finder and select Go → Go to Folder from the menu bar.
- Type /Library and hit Enter to view the folder.
/Library/Application Support/Adobe/Adobe Photoshop 2025Copy
/Library/Application Support/Adobe/Startup Scripts CC/Adobe PhotoshopCopy
/Library/Application Support/Adobe/Scripting Dictionaries CC/photoshopCopy
- Empty your Trash and restart your Mac.
That’s it!
How to remove Photoshop without Creative Cloud
Note:
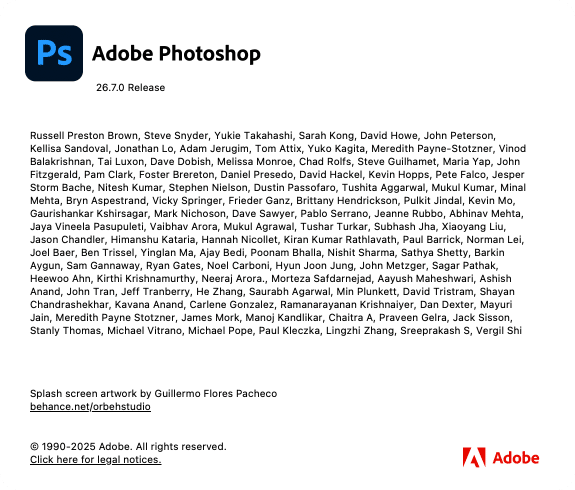
This method was tested on macOS 15 with Adobe Photoshop 2025, version 26 (as shown in About Photoshop). If you have a different version, the file list may vary slightly, but the process remains the same.
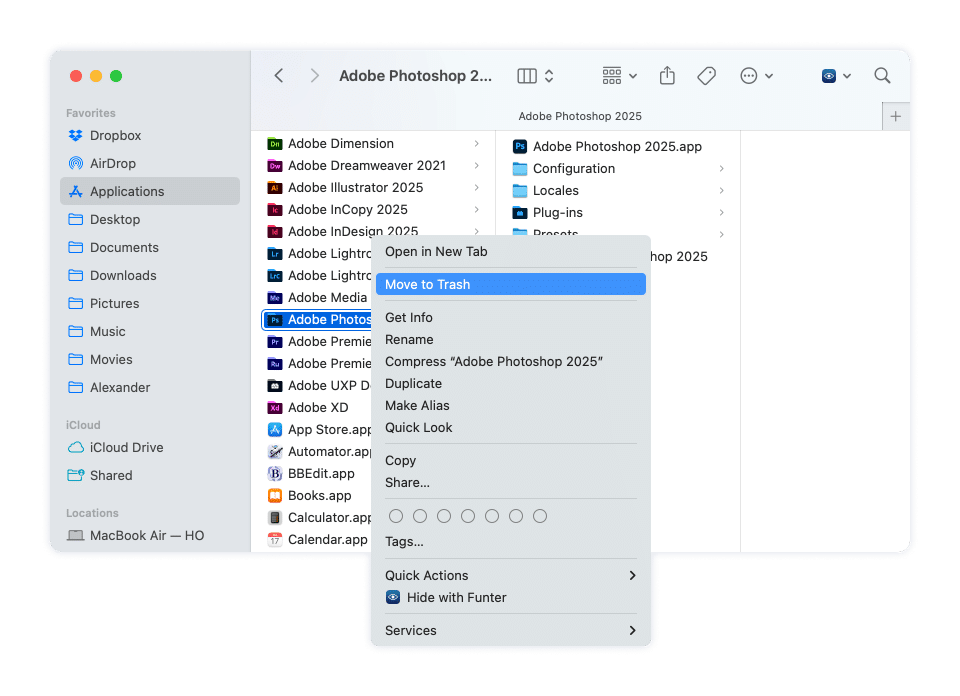
- Quit and delete the main application.
Before you start uninstalling Photoshop, make sure you quit the app first.
Then, open Finder → go to Applications folder → Drag the Adobe Photoshop 2025 folder to the Trash.
- Remove all leftover files.
See the instructions on how to manually remove the remaining files in Step 7 of the “Remove Photoshop using Creative Cloud” section above.
- Restart your Mac.
Once you’ve removed everything, restart your computer to complete the cleanup.
Automatically remove Photoshop with App Cleaner & Uninstaller
If you want the easiest and most thorough way to get rid of Photoshop and all its support files, a specialized tool like App Cleaner & Uninstaller by Nektony is the best choice.
This method is especially helpful if:
- You don’t want to search your Library for hidden files, as required by the manual method.
- You’ve already dragged Photoshop to the Trash and want to clean up leftovers.
- You need to fix an issue with Photoshop, so resetting it fully might be a quicker solution than manual reinstallation.
Below, I’ll show you how to uninstall, clean up, or reset Photoshop step by step.
Steps to remove Photoshop completely:
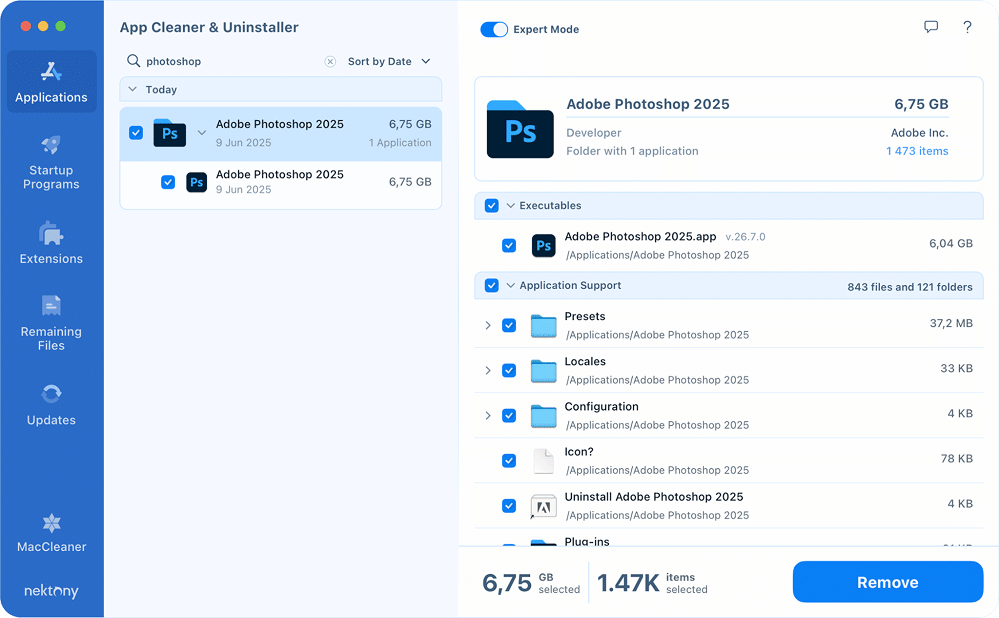
- Download and open App Cleaner & Uninstaller.
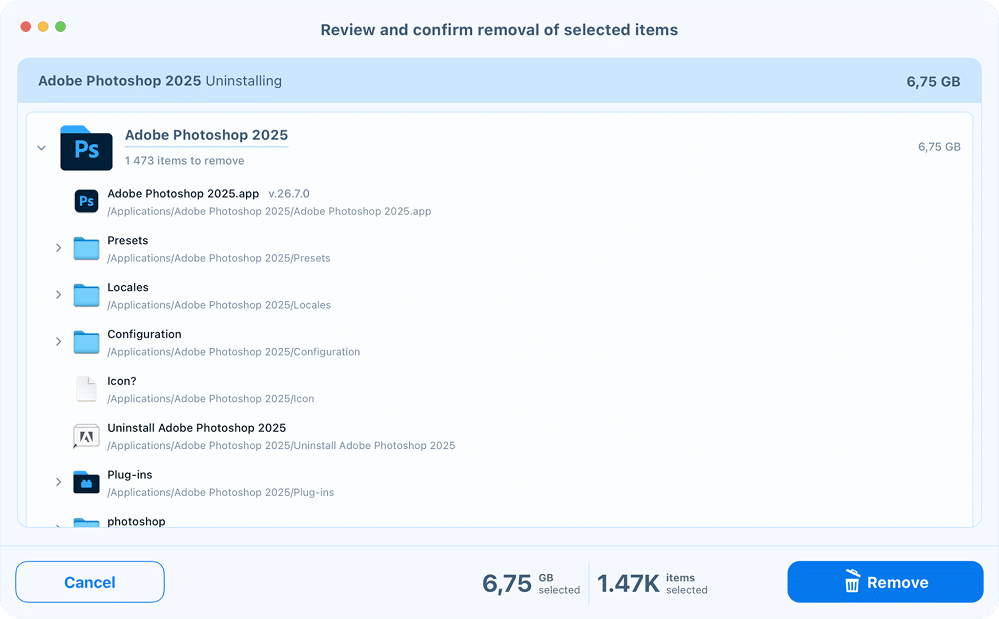
- Find and check the box next to Photoshop. The app will automatically select all related service files.
Note:
You can toggle the Expert mode in the upper part of the screen to be able to see the list of service files (caches, logs, preferences, etc.)
- Click the Remove button.
- In the next window, confirm the deletion.
This process erases the app along with all supporting components in just a few clicks.
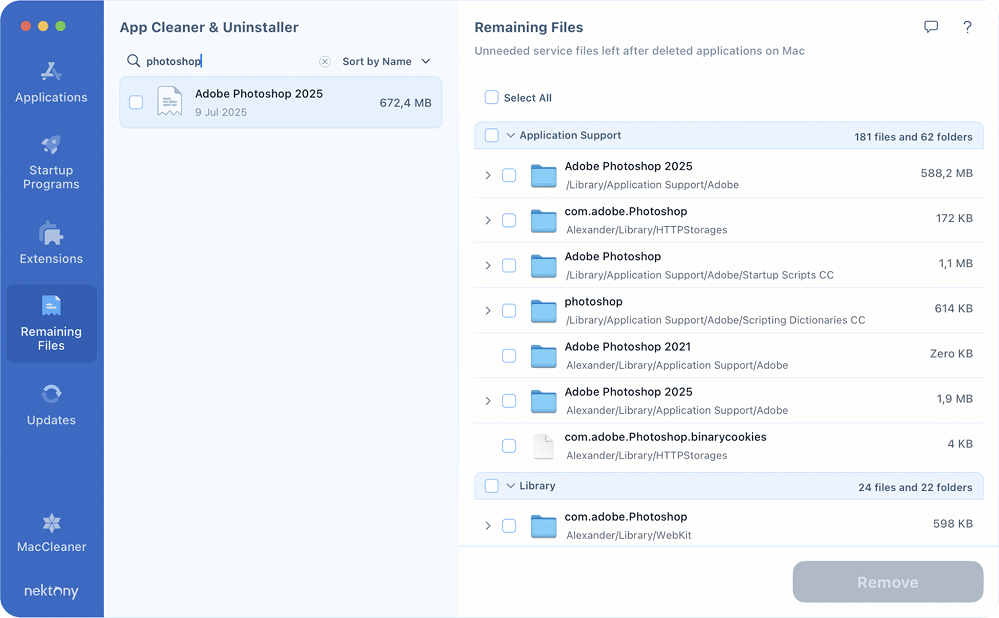
Remove leftovers if Photoshop was deleted manually
If you previously deleted Photoshop manually (for example, by dragging it to the Trash), you can still remove all remaining files:
- Open App Cleaner & Uninstaller.
- Switch to the Remaining Files section in the sidebar.
- Find and select all unnecessary Photoshop items.
- Click Remove to clean up leftovers.
This ensures no residual files remain on your Mac.
Reset Photoshop instead of reinstalling
If Photoshop is misbehaving but you don’t want to fully uninstall it, you can reset the application first. This option reverts the app to its initial post-installation state by removing all settings, caches, and preferences.
This is useful when:
- The app is crashing or glitchy.
- You suspect settings or plugins are the cause.
- You want to avoid a full reinstallation.
To reset Photoshop:
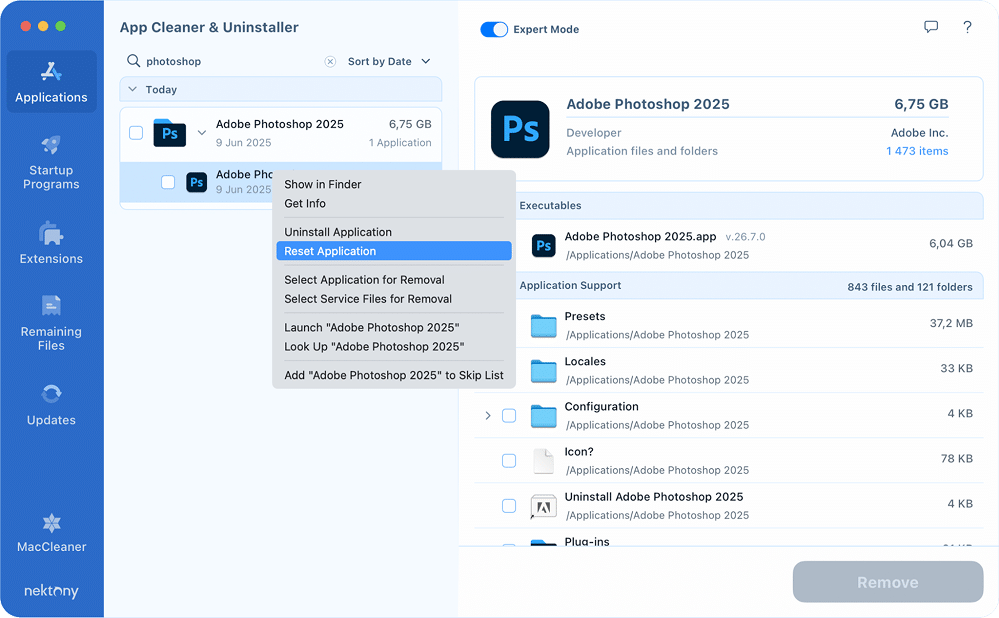
- Open App Cleaner & Uninstaller.
- In the Applications list, select Adobe Photoshop.
- Right-click the item and select Reset Application.
- Restart Photoshop.
If the issues persist after resetting, you can proceed to uninstall and reinstall the app as a last resort.
That’s it. Automatic removal is by far the fastest and most complete method to declutter your Mac and start fresh.
A personal note before you go
Adobe does its best to keep its suite of tools up to date and running smoothly. Personally, I find the AI features recently introduced in Photoshop and other Creative Cloud apps absolutely stunning. Still, for many of us, Photoshop can feel like overkill or be simply too expensive, especially with Adobe’s move to a subscription-based model.
Whatever your reason for removing Photoshop from your Mac, doing a proper uninstallation will help ensure your system stays clean, fast, and ready in case you decide to reinstall Photoshop down the road.
And if your specific issue wasn’t covered in this guide, be sure to check out our FAQ section below for more answers.

