June 30, 2025
How to uninstall Node.js on a Mac
Are you confused about how to remove Node on Mac? 🤔 No stress. We’ve got you covered because our team is pro at uninstalling apps completely on macOS, and Node is no exception.
Keeping in mind that Node is atypical, removing it the wrong way can mess with your dev setup, and a simple drag-to-trash won’t cut it, we’ve got the full uninstall process clearly explained in this guide so you don’t miss a thing, including all hidden leftovers.
This Article Contains
Shortcut ahead!
If you’d rather skip the steps and get apps uninstalled with all their leftover files in a flash, App Cleaner & Uninstaller is your best tool. It finds and removes all traces of any app on your Mac from hidden caches and configs to leftover extensions in just a few clicks.
Video Guide: Uninstalling Node on Mac
1:40

What is Node.js?
Node.js is an open-source, cross-platform runtime environment that allows you to run JavaScript outside the browser, directly on the server side. Thanks to its ability to handle multiple connections simultaneously with high performance, Node.js is used for building:
- scalable web applications
- CLI (Command Line Interface) tools
- automation scripts
- real-time chat applications
- RESTful APIs and microservices
- streaming services
- IoT (Internet of Things) solutions
Node often comes bundled with NPM (Node Package Manager), which helps manage scripts, modules, libraries, and project dependencies.
Interesting fact
According to Radixweb’s report, Node.js powers over 6.3 million websites with big names on board like Spotify, Netflix Node.js powers our web applications and helps us scale Netflix to millions of users.
, PayPal Node.js helps us unify our engineering talent around a single language, JavaScript.
, GitHub, and more. And no wonder nearly 42.73% of developers rely on Node’s frameworks, libraries, tools, and IDEs for app development.
How to check what version of Node you have
Given how popular Node.js is, it’s likely on your system already. And it’s a good idea to check what version you’re working with. This helps you know exactly what you’re uninstalling, especially if you’ve got multiple versions installed. Here is how you can check Node.js version:
-
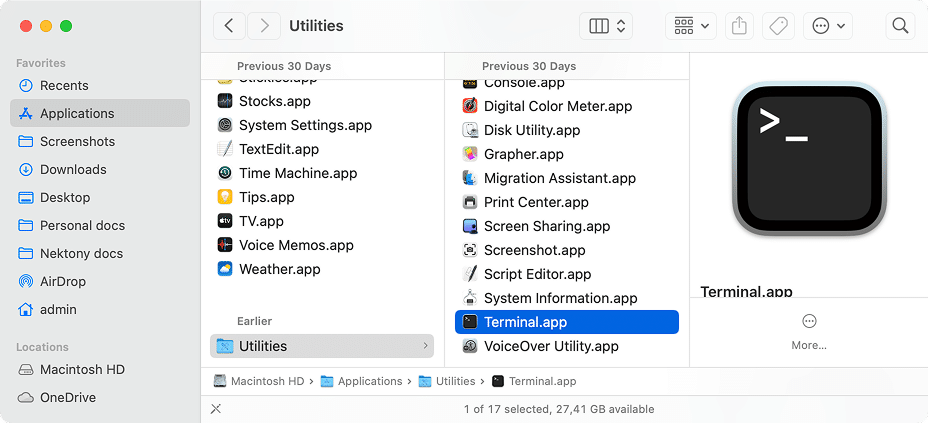
In Finder, go to Applications folder → Utilities → open Terminal.
Alternative
Use Spotlight (Command + Space) → type Terminal → press Return
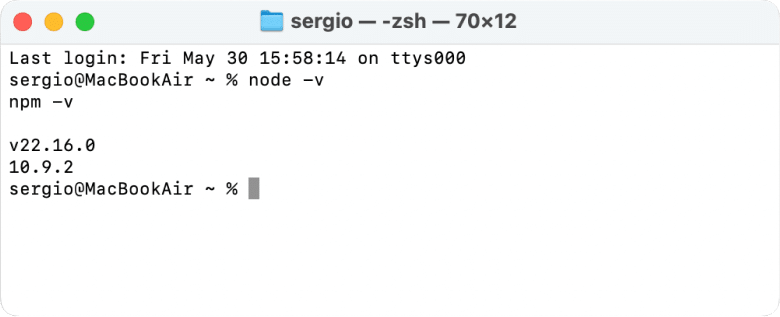
- Copy and paste the following commands and press Return after each one to see which Node version is installed on your system.
node -v
npm -v
Copy
* Last command refers to the Node Package Manager’s version.
In our case, it is Node.js v.22.16.0 and Node Package Manager 10.9.2 running on macOS Sequoia 15.3.1.
Where is Node installed on your Mac?
There are times when a clean uninstall is necessary, whether you’re debugging, switching versions, or doing a full reset. First step? Find out where it’s installed. To uncover where Node.js is installed on a Mac, first, it’s good to remember how you installed it.
You might’ve installed Node through several methods on macOS, such as Homebrew, the official installer, or NVM (Node Version Manager), all of which affect where Node and its components live on your system.
If you downloaded and installed Node using the official installer from the website, which is often the case, here’s what to look for:
/usr/local/binCopy
/usr/local/libCopy
/usr/local/includeCopy
/usr/local/lib/dtraceCopy
/usr/local/share/docCopy
/usr/local/share/man/man1Copy
/usr/local/systemtap/tapsetCopy
- If you used NVM to install Node:
You’ll find its support files in the .nvm hidden folder inside your Home folder. At this point, you may need to show hidden files to see it. -
If you installed Node via Homebrew, to check where Node is installed using Homebrew, run in Terminal:
which nodeCopy
For your information, Node and its associated files typically reside in:
Node binary:
- On Apple Silicon (M1, M2):
/opt/homebrew/bin/nodeCopy
- On Intel Macs:
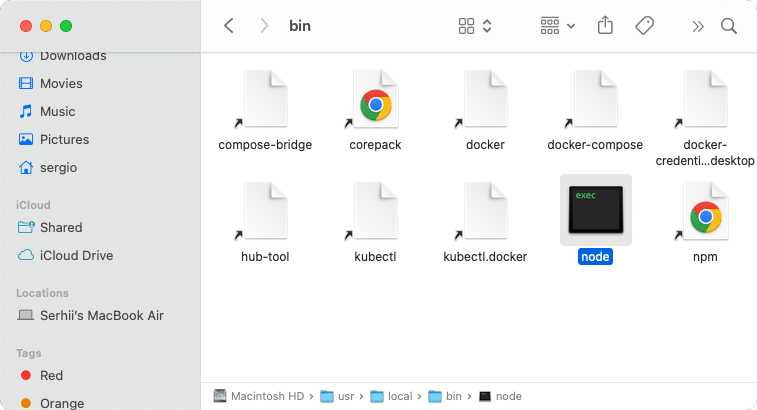
/usr/local/bin/nodeCopy
- On Apple Silicon (M1, M2):
npm binary:
- Same directory as Node, e.g.
/opt/homebrew/bin/npmCopy
- Same directory as Node, e.g.
Global Node modules:
- Apple Silicon:
/opt/homebrew/lib/node_modulesCopy
- Intel:
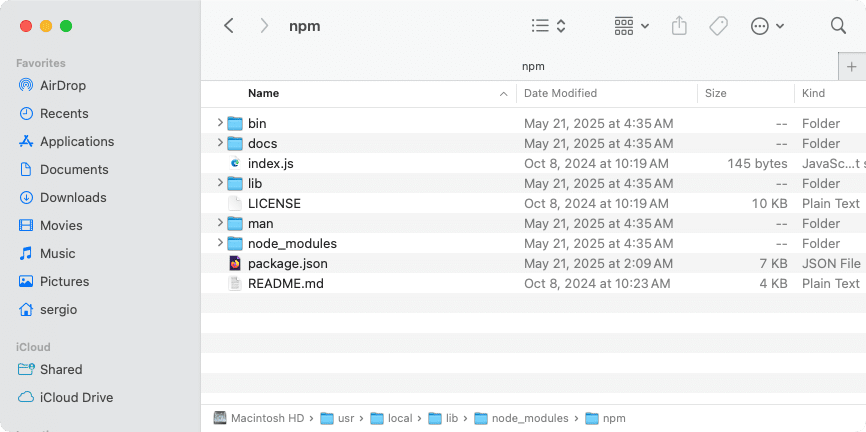
/usr/local/lib/node_modulesCopy
- Apple Silicon:
Configuration and support files:
- Binaries: or
/opt/homebrew/bin/Copy
/usr/local/bin/Copy
- Libraries: or
/opt/homebrew/lib/Copy
/usr/local/lib/Copy
- Includes: or
/opt/homebrew/include/Copy
/usr/local/include/Copy
- Binaries:
How to uninstall Node.js from a Mac
Note:
The way to remove Node.js depends on the way used to install it on a Mac.
👉 That’s because each method, whether it’s Homebrew, NVM, or the official installer, stores files in different places and requires a different removal approach.
How to remove Node with Homebrew
If Homebrew was your install method (for example, you ran brew install node), here’s how to remove Node.js:
- In Finder, go to Applications folder → Utilities → Terminal.
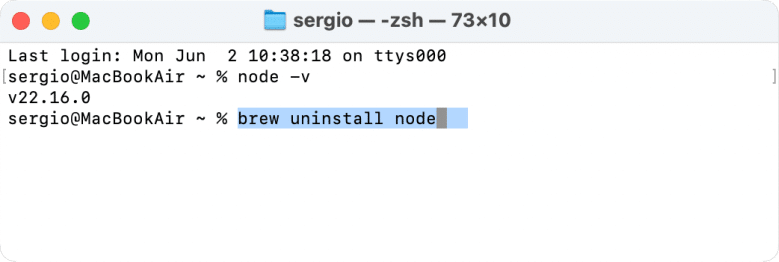
- Copy and paste the following command and press Return:
brew uninstall nodeCopy
- Delete leftovers by entering the following command:
brew cleanupCopy
- Confirm the removal by running:
which node
which npm
node -v
npm -v
Copy
If the Terminal shows the Node and/or NPM version, it just means there’s another copy on your system or another installation method was used, in which case see the next methods. In case the Terminal doesn’t return a version, Node.js has been successfully removed.
💡Extra tip:
To make sure every trace of Node is gone, make one last check using the step 5 from the manual method of deleting Node.
How to delete Node with NVM
If you installed Node using NVM, you should proceed with uninstalling it the same way. This helps avoid interfering with other versions or dev environment settings. Here’s the right way to uninstall it cleanly:
- Open Terminal.
- Check the Node version. For this enter this command and press Return:
node -vCopy
- Delete Node by entering the following command and specifying your version:
For example, nvm uninstall 22.16.0
nvm uninstall <version>Copy
- Make sure Node is uninstalled by using this command:
which node
which npm
node -v
npm -v
Copy
No version and/or directory result is expected, which means Node.js has been fully removed from your system.
How to uninstall Node manually with Finder
If you went with the official installer or simply want Node completely off your Mac, you’ll need to manually delete all related files and folders, but be cautious to avoid deleting anything system-critical.
That’s why we’ve done thorough research and listed all the possible file paths where Node.js and its support files may be hiding. Follow the steps below to safely remove everything:
- Open Finder.
- Press the Cmd+Shift+G.
- In the search field, type the following directory and press Return:
/usr/local/libCopy
- Locate any files or folders containing node in the name, and drag them to Trash.
- Repeat this process for the following locations and remove any Node-related files or folders:
Application support & binaries
/usr/local/include/nodeCopy
/usr/local/include/node_modulesCopy
/usr/local/lib/dtrace/node.dCopy
/usr/local/lib/node_modulesCopy
/usr/local/lib/nodeCopy
/usr/local/bin/nodeCopy
/usr/local/bin/node-gypCopy
/usr/local/bin/node_modulesCopy
/usr/local/bin/npmCopy
/opt/local/include/nodeCopy
/opt/local/bin/nodeCopy
/opt/local/lib/node_modulesCopy
/opt/local/lib/nodeCopy
~/.npmrcCopy
~/.npmCopy
~/.node-gypCopy
~/.node_repl_historyCopy
~/.nvmCopy
Caches
/private/var/db/receipts/org.nodejs.node.pkg.bomCopy
/private/var/db/receipts/org.nodejs.npm.pkg.bomCopy
/private/var/db/receipts/org.nodejs.node.pkg.plistCopy
/private/var/db/receipts/org.nodejs.npm.pkg.plistCopy
Shared documentation
/usr/local/share/doc/nodeCopy
/usr/local/share/systemtap/tapset/node.stpCopy
/usr/local/share/man/man1/node.1Copy
/usr/local/share/man/man1/npmCopy
- After removing all of Node’s files, empty Trash.
- Shut down and power your Mac back on to ensure all changes take effect and system memory is cleared.
⚠️ Important
Restart won’t work, a full shutdown and power-on cycle is necessary. Restarting won’t fully reset certain environment variables or unload cached binaries that may still linger in memory.
How to remove applications’ leftovers from a Mac
Apps don’t just sit in your Applications folder, they hide support files in various corners of your Mac. And like Node, deleting the app alone doesn’t clear everything out. That’s where App Cleaner & Uninstaller steps in.
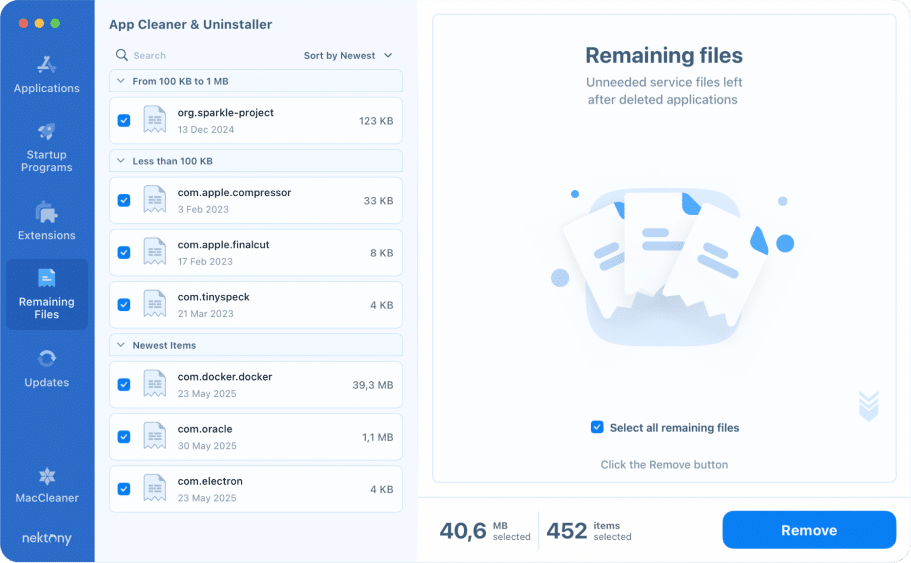
By downloading this tool, you get software that scans your system for these leftover files and removes them for good in seconds. After launching the tool, you have to take a little.
Here is how it works:
- Run the uninstaller.
- Select the Remaining Files tab in its sidebar.
- Check leftover files in the left panel.
- Click the Remove button → confirm the action.
That’s all it takes! Your Mac is now spotless from leftover clutter. Remember, regularly scanning for unused programs and forgotten support files can free up valuable space and protect your Mac from some of the most common reasons that slow your Mac down.
Node.js removal is a bit more complex than usual, but this guide gives you the full picture. Need more help? Just ask in the comments below.
Troubleshooting when removing Node
Uninstalling Node.js can be tricky when errors or conflicts arise, often requiring a full clean uninstall and reinstall. Here’s a rundown of typical issues and how to spot them:
-
Errors during the npm install
You might see errors like:
- npm ERR! code MODULE_NOT_FOUND
- npm ERR! ENOENT: no such file or directory
- EACCES or EPERM permission errors (especially when installing global packages)
Reasons:
- Corrupted npm cache
- Incorrect or broken PATH environment variables
- Global packages installed with sudo, causing permission issues
Fix:
Try clearing the npm cache with npm cache clean –force and avoid using sudo for package installs. Also, check your PATH settings to ensure npm directories are included.
-
Conflicts between Homebrew, NVM, and official installations
If you have installed Node using multiple methods (Homebrew, NVM, or the official installer), the following conflicts can arise:
- node -v and npm -v show different or unexpected versions
- Terminal shows errors like node: command not found even if installed
- Inability to update npm (npm install -g npm fails)
Reason:
Multiple installations with different paths can confuse your system.
Fix:
Uninstall Node the way you installed it and clean leftover files. Use one installation method consistently going forward.
-
Global package issues
You might face errors when running global CLI tools: command not found. Installed global packages (e.g., eslint, create-react-app, nodemon) are not recognized.
Reasons:
- Global npm packages installed in directories not in your $PATH
- Using sudo to install global packages, which can block updates or removal
- Corrupted config files like .npmrc or package-lock.json
Fix:
Ensure global npm directories are added to your PATH. Avoid sudo installs and try reinstalling problematic packages.
-
node-gyp errors when installing dependencies
- gyp: No Xcode or CLT version detected!
- node-gyp rebuild fails
Reasons:
- You don’t have the Xcode CLI tools installed
- Your Node version isn’t compatible with your macOS version
Fix:
Install CLI tools by running xcode-select –install. If the problem persists, check Node’s compatibility with your macOS version.
-
Broken NVM or .nvmrc
You might find nvm commands fail or Node versions don’t switch as expected.
Issues:
- nvm: command not found error arises when trying to switch Node versions
- Node version not switching between projects
- zsh or bash not loading NVM automatically
Reasons:
- NVM isn’t properly set up in your shell configuration files (.zshrc, .bash_profile)
- the NVM directory is corrupted
Fix:
Open Terminal and use this command to add the following to your shell config file:
export NVM_DIR="$HOME/.nvm"
[ -s "$NVM_DIR/nvm.sh" ] && \. "$NVM_DIR/nvm.sh"
Copy
Then restart your Terminal or run source ~/.zshrc / source ~/.bash_profile.
Final lines
To wrap up, even though Node.js can be uninstalled only through the same method it was originally installed, knowing where its files live and how to remove every trace gives you full control over your development environment
And if you want to put your flow to a new automated level, tools like App Cleaner & Uninstaller can take care of +1000 apps and hidden leftovers in just a few clicks. Contact us and find out how the app can benefit your Mac.
