August 8, 2025
How to uninstall Notion on a Mac
Notion has become a go-to tool for many people looking to organize their work and personal life in one place. However, there may come a time when you no longer need the app or want to free up space on your Mac.
In this article, we’ll show you how to completely and safely uninstall the Notion desktop app from your Mac.
Contents:
Before we start
Below, we’ll provide two ways of uninstalling Notion from a Mac. However, if you are looking for the quickest solution, use a special software called App Cleaner & Uninstaller. This uninstaller will automatically detect all service files and uninstall the app completely with a few clicks.
What is Notion and should I delete it?
Notion is a service with quite a wide functionality for those who use many different programs and dream of collecting all tasks or all information in one place. In simple words, Notion is a service that works both as a database and as a task planner. It is quite easy to go to it and transfer all the necessary information due to simplified import, and control of all the tasks of interest is simplified due to integration with various programs.
The developers position the service as an “all-in-one workspace.” It can replace several popular applications at once like Trello, Microsoft Word, Google Docs, Evernote, Confluence, Todoist, and Airtable.
Notion provides flexibility for users, allowing access and management of information from multiple devices, such as:
- Any web browser
- Desktop app for macOS and Windows
- Mobile app available for iPhone, iPad, and Android devices
If you have downloaded the Notion desktop app to your Mac but mostly use the web version, we recommend uninstalling the app to free up valuable disk space and ensure your system runs smoothly.
How to manually uninstall Notion from Mac
The process of manually deleting Notion includes finding and removing its remaining files from the Library folder. Getting rid of leftover files is an essential step for a complete uninstallation and smooth work of your system’s performance.
Here’s how to uninstall Notion and delete its leftovers:
- Quit the Notion desktop app.
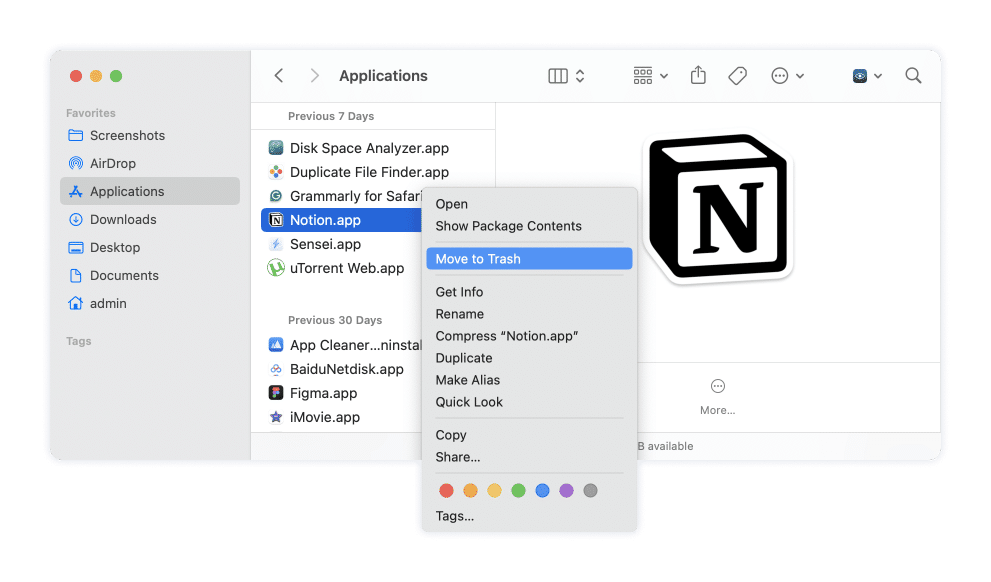
- Open the Applications folder.
- Locate and remove Notion into the Trash.
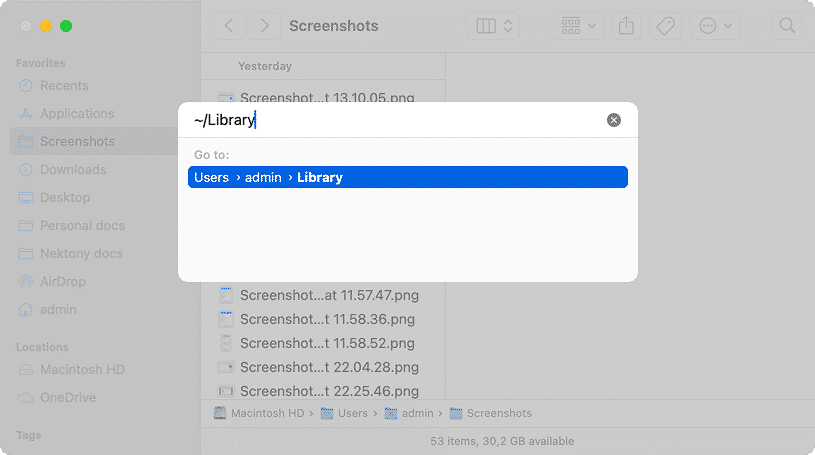
- In Finder, press Cmd+Shift+G.
- In the dialog window that appears, type ~/Library and press Return.
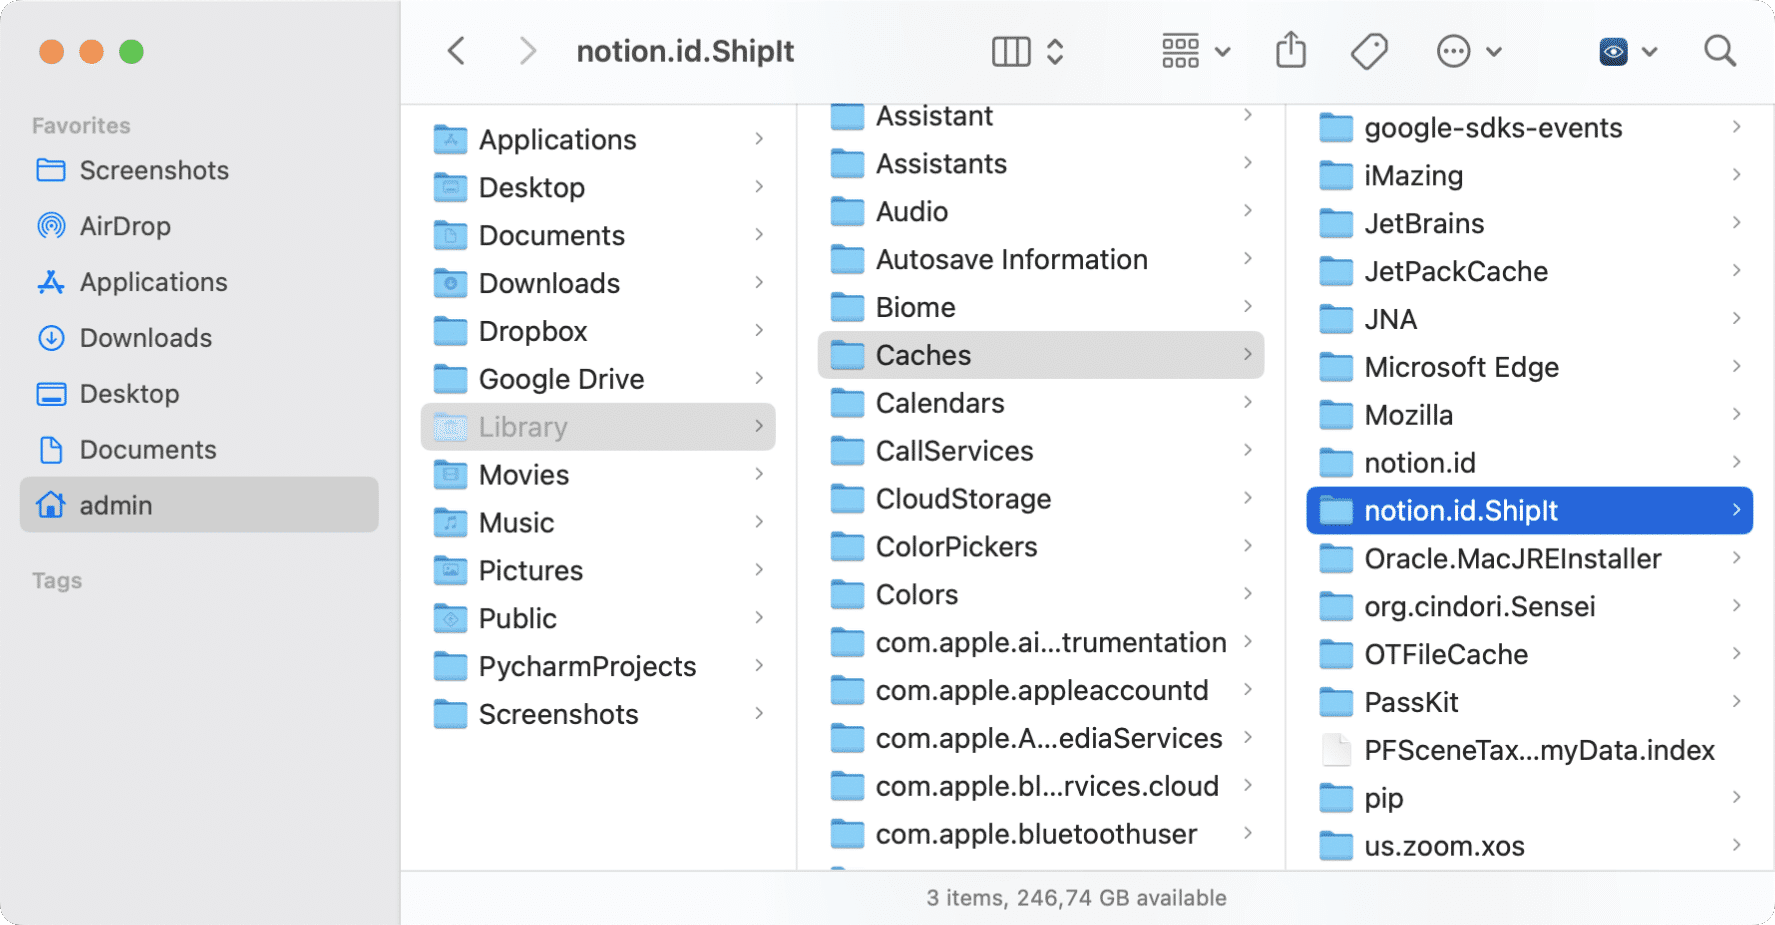
- Here, locate and delete all files associated with Notion. You can recognize them by bundle ID notion.id:
~/Library/Application Support/NotionCopy
~/Library/Application Support/com.apple.sharedfilelist/com.apple.LSSharedFileList.ApplicationRecentDocuments/notion.id.sfl3Copy
~/Library/Preferences/notion.id.plistCopy
~/Library/Logs/NotionCopy
- Then find these cache files:
/Macintosh HD/private/var/folders/gm//private/var/folders/gm/vl6bd07j1tn7j_2skv2z9bxr0000gn/notion.idCopy
/Macintosh HD/private/var/folders/gm//private/var/folders/gm/vl6bd07j1tn7j_2skv2z9bxr0000gn/notion.id.helperCopy
admin/Library/Saved Application State/notion.id.savedStateCopy
- Once you remove all Notion support files, empty the Trash folder.
- Restart your system.
How to uninstall Notion: The easy way
Another quick way to uninstall any program on a Mac is to use a third-party uninstaller. You can use App Cleaner & Uninstaller from Nektony which deletes any software completely without leaving any traces behind on your Mac. Here’s how to use it:
- Quit the Notion desktop app.
- Download and launch App Cleaner & Uninstaller.
- Select Notion in the list of scanned apps.
- Click the Uninstall button.
- Confirm uninstallation.
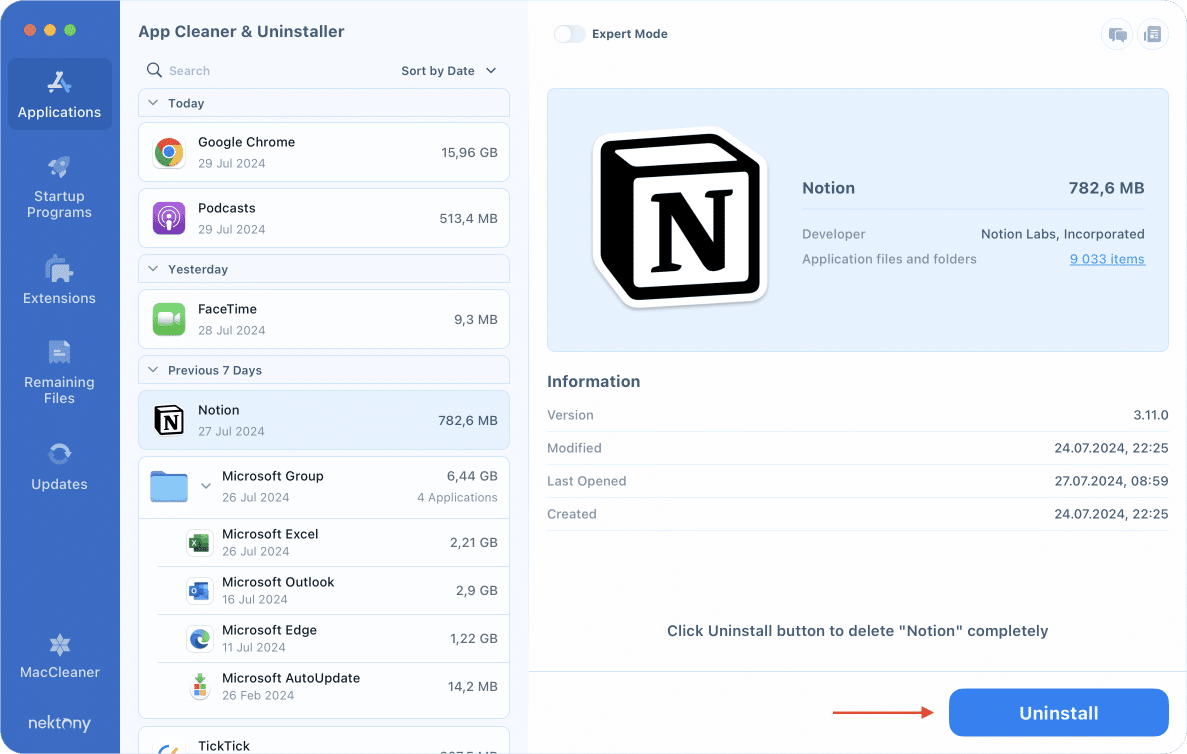
That’s all. App Cleaner & Uninstaller will delete Notion entirely with all its support files.
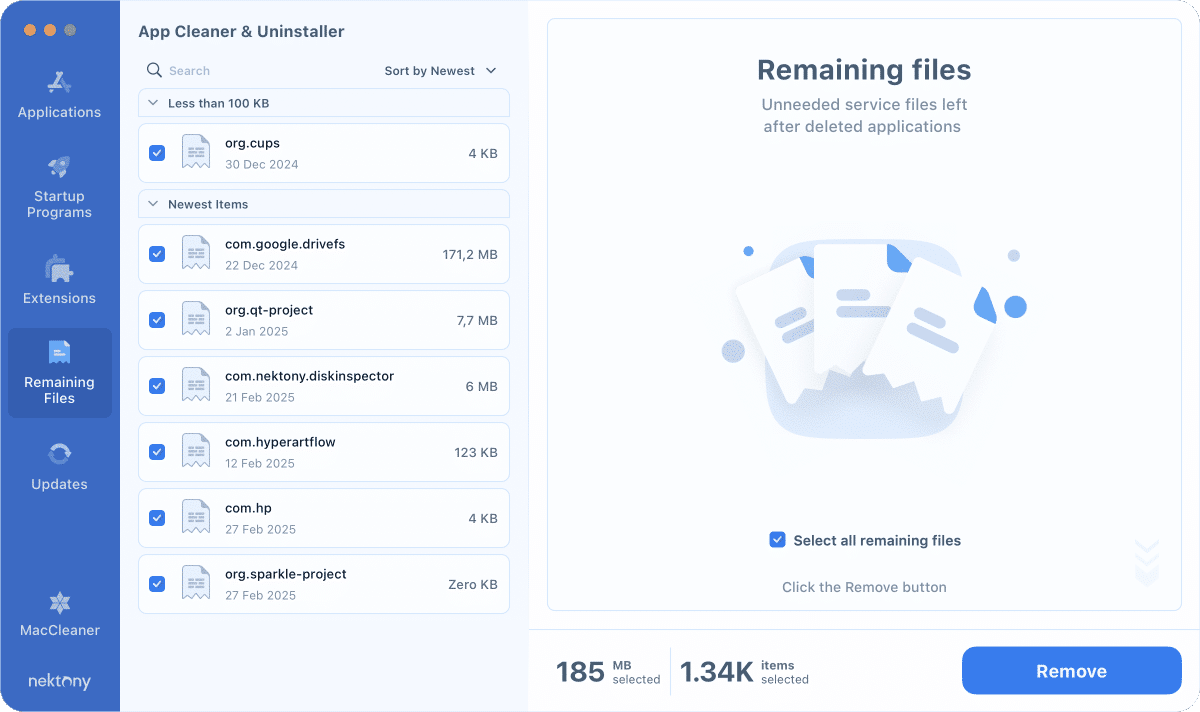
If you have already deleted Notion by dragging and dropping its icon into the Trash, you can find its leftover files without a need to manually search for them in the Library folder. For this:
- Switch to the Remaining Files section.
- Select all remnants of Notion and other apps.
- Click the Remove button and confirm.
Alternatives to Notion
Once you uninstall Notion from your Mac, you may need to install its alternative. Here is a list of top popular apps that may suit your workflow:
- Evernote. It is a classic note-taking app with a strong search function and a web clipper. It’s great for users who want a structured way to store text, images, and scanned documents.
- OneNote. Best for those who prefer freeform note-taking. It provides a deep integration with the Microsoft ecosystem.
- Coda. It combines documents, spreadsheets, and databases into a single platform and offers powerful automation features and integrations.
- Airtable. Ideal for users who need structured databases with a simple UI.
- Roam Research. A powerful tool for building interconnected notes using bidirectional links, making it excellent for research and idea organization.
To sum up
Manual uninstallation involves locating and deleting Notion’s residual files in various Library subfolders, which can be time-consuming and requires attention to detail. Alternatively, using a specialized tool like App Cleaner & Uninstaller simplifies the process by automatically detecting and removing all related files with just a few clicks.


