June 10, 2025
Three methods to uninstall Xcode from Mac completely
If you’ve ever installed Xcode on your Mac, you know how things can get messy. I’ve personally run into trouble after updates, with old and new Xcode versions clashing or my projects suddenly failing to run.
Whether you want to install a fresh copy or simply clear out space, a complete uninstallation of Xcode helps you avoid both current glitches and hidden future headaches. I’ll show you three methods to do it.
Which Xcode removal method should you use?
There are three main ways to uninstall Xcode from your Mac. Each approach has its strengths and drawbacks, so choose the one that fits your comfort level and needs:
- Manual removal gives you full control and transparency but it takes more time and effort.
- Terminal commands are quick for experienced users, but mistakes can be irreversible.
- App Cleaner & Uninstaller offers the easiest experience, automatically finding and deleting all traces of Xcode.
Here’s a quick comparison to help you decide:
| Method | Advantages | Disadvantages | Difficulty | Speed | Removal Thoroughness |
|---|---|---|---|---|---|
| Manual Removal | Full control, thorough cleanup | Time-consuming, requires Finder skills | ★★★ | ★☆☆ (slow) |
★★★ (complete) |
| Terminal Commands | Fast, very efficient | Requires familiarity with Terminal | ★★☆ | ★★☆ (fast) |
★★★ (complete) |
| App Cleaner | Easiest, just a few clicks | Requires extra software | ★☆☆ | ★★★ (fastest) |
★★★ (complete) |
Ready to dive in? Here’s how to manually remove Xcode and all its leftovers.
Manual method: How to uninstall Xcode completely from Mac
This step-by-step guide works for macOS 15.5 and Xcode 16.4.

You’ll start by dragging Xcode to Trash, and then proceed to clearing all traces of Xcode out completely.
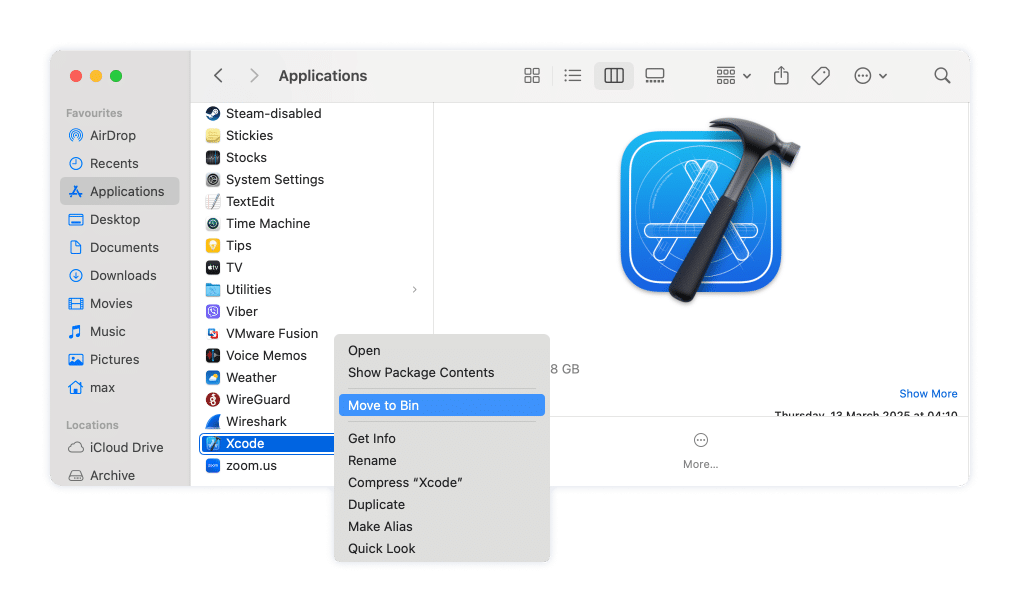
Step 1. Delete the main Xcode application
- Go to the Applications folder.
- Find Xcode.app and drag it to the Trash.
Step 2. Remove user and project data
Note:
To quickly open any of the folders mentioned here in Finder, use Go > Go to Folder… (or press Cmd + Shift + G) and paste the path.
Head to the following folders:
~/Library/Application Support/Copy
~/Library/Developer/Copy
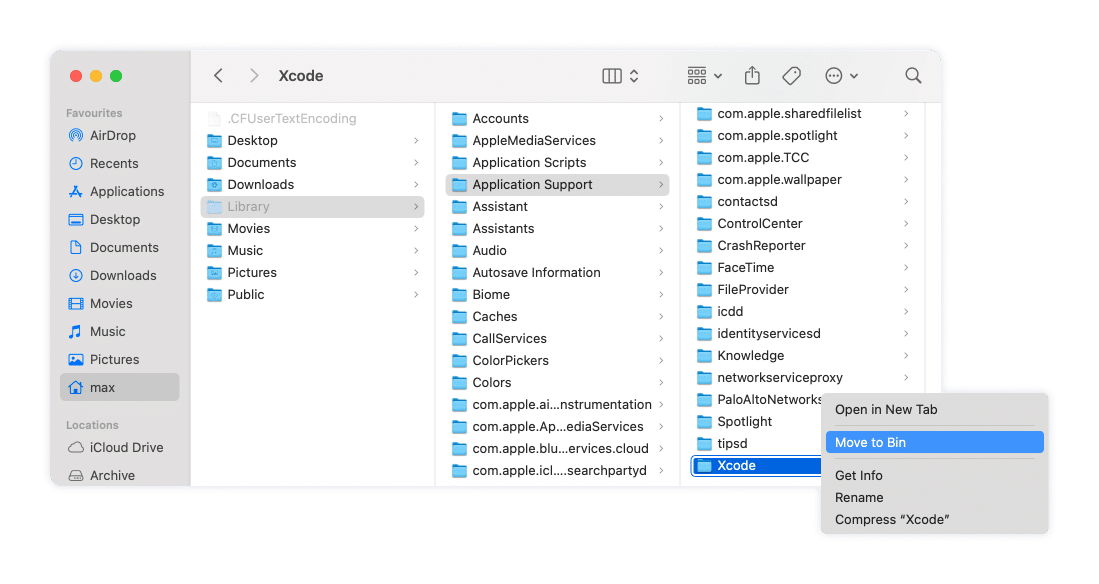
These should contain the Xcode folder storing project data, build files, simulators, and more. Move the entire Xcode folders to the Trash.
Note:
~/Library/Developer/Xcode
Copy
Step 3. Clean up scripts and app data
Navigate to the following directories and delete the listed folders and files:
~/Library/Application Scripts/com.apple.iphonesimulator.ShareExtensionCopy
~/Library/HTTPStorages/com.apple.dt.XcodeCopy
~/Library/HTTPStorages/com.apple.dt.Xcode.binarycookiesCopy
~/Library/HTTPStorages/com.apple.dt.Xcode.sourcecontrol.GitCopy
These locations keep data for simulators and some Xcode cloud features.
Step 4. Remove recent documents and support lists
Find this file and delete:
~/Library/Application Support/com.apple.sharedfilelist/com.apple.LSSharedFileList.ApplicationRecentDocuments/com.apple.dt.xcode.sfl3
Copy
It stores your recent Xcode documents list.
Step 5. Delete caches
~/Library/Caches/com.apple.dt.Xcode
Copy
Delete the entire folder.
Step 6. Clear simulator containers
Find and delete:
~/Library/Containers/com.apple.iphonesimulator.ShareExtension
Copy
This is used by the iPhone simulator for sharing and testing features.
Step 7. Remove preferences files
These plist files store settings for Xcode and related tools like FileMerge and SKAgent. Find and remove them:
/Library/Preferences/com.apple.dt.Xcode.plistCopy
~/Library/Preferences/com.apple.FileMerge.plistCopy
~/Library/Preferences/com.apple.dt.SKAgent.plistCopy
~/Library/Preferences/com.apple.dt.Xcode.plistCopy
~/Library/Preferences/com.apple.dt.xcodebuild.plistCopy
Step 8. Delete crash reports
Look for any files starting with Xcode_ and ending in .plist. in this folder and remove:
~/Library/Application Support/CrashReporter/
Copy
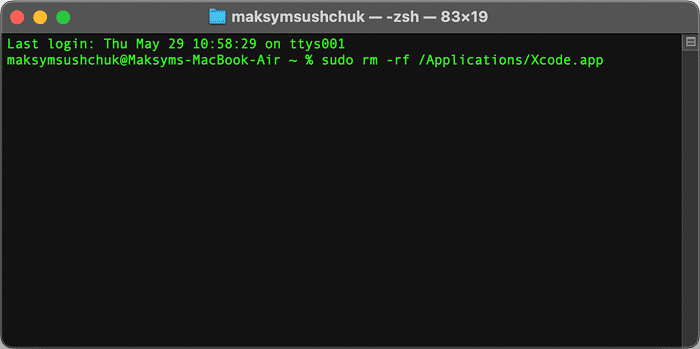
How to remove Xcode using Terminal command line
Prefer using the Terminal for a faster, more thorough cleanup? Here’s how to remove Xcode and all its leftovers in just a few commands.
- Run Terminal.
- Type the following command and hit Return to delete the main Xcode application:
sudo rm -rf /Applications/Xcode.appCopy
Note:
You’ll need admin privileges, so have your password ready once the Terminal asks for it. You probably know it already, but you will see no output printed as you type in the password. This is the intended behavior in Terminal.
- Type in your admin password and hit Return.
- Remove Xcode’s application support and developer data. Copy and paste each command and hit Return after each of them.
rm -rf ~/Library/Application\ Support/XcodeCopy
rm -rf ~/Library/Developer/XcodeCopy
- Delete simulator scripts and cloud data using these commands:.
rm -rf ~/Library/Application\ Scripts/com.apple.iphonesimulator.ShareExtensionCopy
rm -rf ~/Library/HTTPStorages/com.apple.dt.XcodeCopy
rm -f ~/Library/HTTPStorages/com.apple.dt.Xcode.binarycookiesCopy
rm -rf ~/Library/HTTPStorages/com.apple.dt.Xcode.sourcecontrol.GitCopy
- Remove recent document lists:.
rm -f ~/Library/Application\ Support/com.apple.sharedfilelist/com.apple.LSSharedFileList.ApplicationRecentDocuments/com.apple.dt.xcode.sfl3Copy
- Delete Xcode caches:.
rm -rf ~/Library/Caches/com.apple.dt.XcodeCopy
- Remove simulator containers:.
rm -rf ~/Library/Containers/com.apple.iphonesimulator.ShareExtensionCopy
- Delete preferences and settings:.
sudo rm -f /Library/Preferences/com.apple.dt.Xcode.plistCopy
rm -f ~/Library/Preferences/com.apple.FileMerge.plistCopy
rm -f ~/Library/Preferences/com.apple.dt.SKAgent.plistCopy
rm -f ~/Library/Preferences/com.apple.dt.Xcode.plistCopy
rm -f ~/Library/Preferences/com.apple.dt.xcodebuild.plistCopy
- Remove crash reports:.
rm -f ~/Library/Application\ Support/CrashReporter/Xcode_*.plistCopy
Important note!
Files deleted in this way can’t be recovered
How to remove Xcode using App Cleaner & Uninstaller
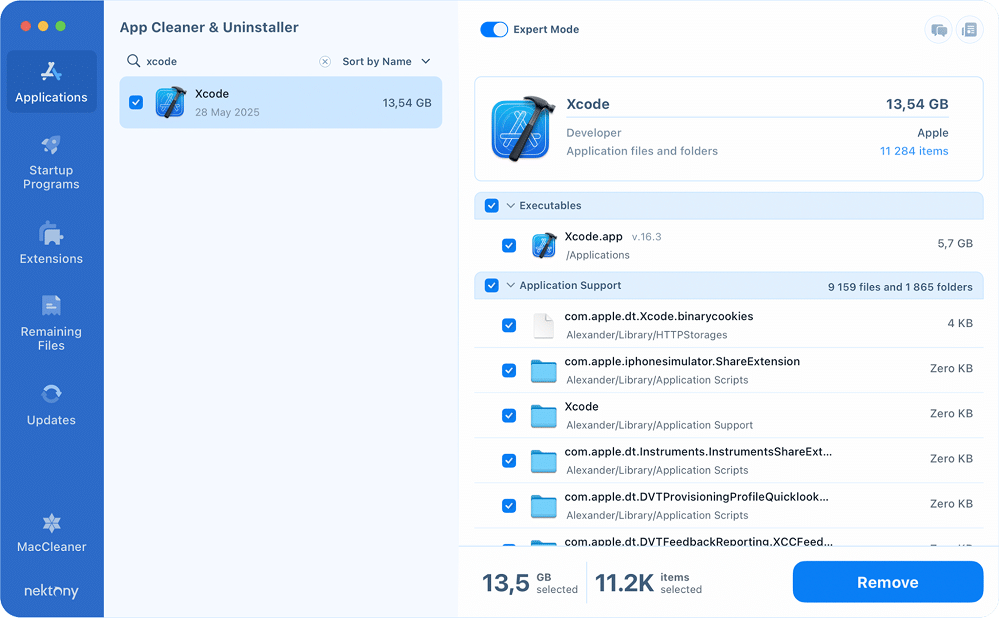
If you prefer an easy, visual solution, you can remove Xcode and all its leftover files in just a few clicks with App Cleaner & Uninstaller. This is the fastest and safest way – no need to dig through folders or use Terminal commands.
Here’s how:
- Open App Cleaner & Uninstaller.
- Find Xcode in the list of applications. You can use the search bar or scroll to locate Xcode.
- Select Xcode. In the Expert mode, the app will automatically show all associated files, such as project folders, caches, preferences, simulators, and more.
- Click the Remove button.
- Confirm your choice. App Cleaner & Uninstaller will move Xcode and all its leftovers to the Trash.
- Empty your Trash to finalize the process and free up disk space.
Note: If you have already trashed Xcode and want only to remove its leftovers, head to the Remaining Files tab in App Cleaner & Uninstaller. There, enter Xcode in the Search bar, and you’ll have a list of files you can safely remove.

How Xcode’s file structure has evolved over time
Uninstalling Xcode isn’t as straightforward as dragging the app to the Trash. Over the years, Apple’s development environment has undergone huge changes in how it stores files and leaves behind various components that can clutter your system.
Legacy versions: The /Developer directory era
/Developer/Library/uninstall-devtools
Copy
Modern Xcode: Self-contained bundles with residual files
/Applications/Xcode.app
Copy
These files contain build data, device support files, simulator data, and other resources that can accumulate over time. Even after deleting the main Xcode application, these files often remain, consuming significant disk space.
The problem of multiple Xcode versions
Developers frequently install multiple Xcode versions, especially beta releases, to test new features or ensure the compatibility of their projects. However, this practice can lead to Xcode file conflicts.
For instance, installing a beta version alongside a previous, public version has been reported to cause issues like broken simulators and malfunctioning GPX file loading in the older version. These problems arise because newer Xcode installations can overwrite shared resources and lead to compatibility issues.
The need for a thorough uninstallation
Given the dispersed nature of Xcode’s files and the potential for version conflicts, a comprehensive uninstallation is crucial. Simply deleting the application bundle doesn’t remove associated files and settings.
A thorough removal ensures a clean environment and paves the way for a fresh and trouble-free Xcode installation.
Personal note: Use one Xcode per machine
Over the past 15 years, I’ve uninstalled Xcode more times than I can count, usually after something broke or a beta update went sideways. And not once did just dragging the app to the Trash actually do the job. Every single time, stubborn leftovers were hiding out somewhere on my Mac and causing all kinds of trouble.
As much as I enjoy testing the latest Xcode releases, I’ve learned the hard way that when you’re working on commercial projects, it’s best to keep all experiments on a separate or virtual machine. Yes, there is this XcodesOrg project on Github to juggle multiple Xcode versions, but trust me: your nerves (and your clients) will thank you for having one at a time.
For everyday peace of mind, stick to a single, stable version of Xcode on your main Mac. It keeps things running smoothly and makes the uninstallation process a whole lot simpler.
