October 3, 2025
How to duplicate the screen on a Mac
We’ve all been in a situation like this: You want to share your screen – be it a presentation, a video, or even a game – with a larger audience using a TV, projector, or second monitor. How do you do that quickly and without fumbling through settings? In this quick article, I’ll show you how.
A no-hustle one-minute instruction to duplicate your Mac screen
After you connect an external display to your Mac via HDMI, Thunderbolt, USB-C, or any other method, duplicating your screen takes just a few clicks. Here’s what to do as per Apple’s official guide:
- Open System Settings
Click the Apple menu in the top-left corner of your screen and select System Settings. - Go to Displays
Scroll down the sidebar and choose Displays. - Select the External Display
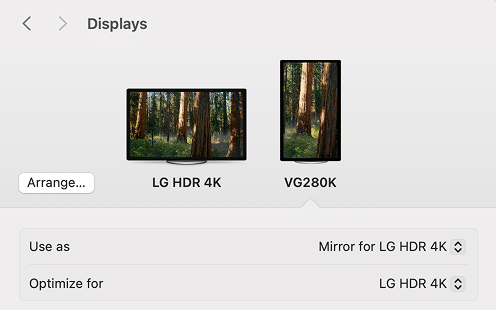
In the layout view, click on the external display (you’ll see your MacBook screen and any connected monitors). - Choose the Mirroring Option
Click the Use as dropdown and select Mirror for… (usually it’s Mirror for Built-in Display).
That’s it! Your Mac screen should now appear on the external display, perfectly mirrored in real-time.
Troubleshooting screen mirroring on Mac
If mirroring doesn’t work or something seems off, don’t worry. Here are the most common issues and how to fix them:
My external display isn’t showing up at all
- Check the cable and port
Make sure the cable is securely connected and compatible with your Mac and display. Try using another port if available (e.g., a second Thunderbolt/USB-C port). The difference between modern USB-C/Thunderbolt standards also adds to confusion on forums. - Use a different adapter or hub
If you’re using a USB-C to HDMI adapter, test another one. Some hubs might also not support adapters or be incompatible with some Macs, as stated in this Reddit thread’s comments. - Force macOS to detect displays
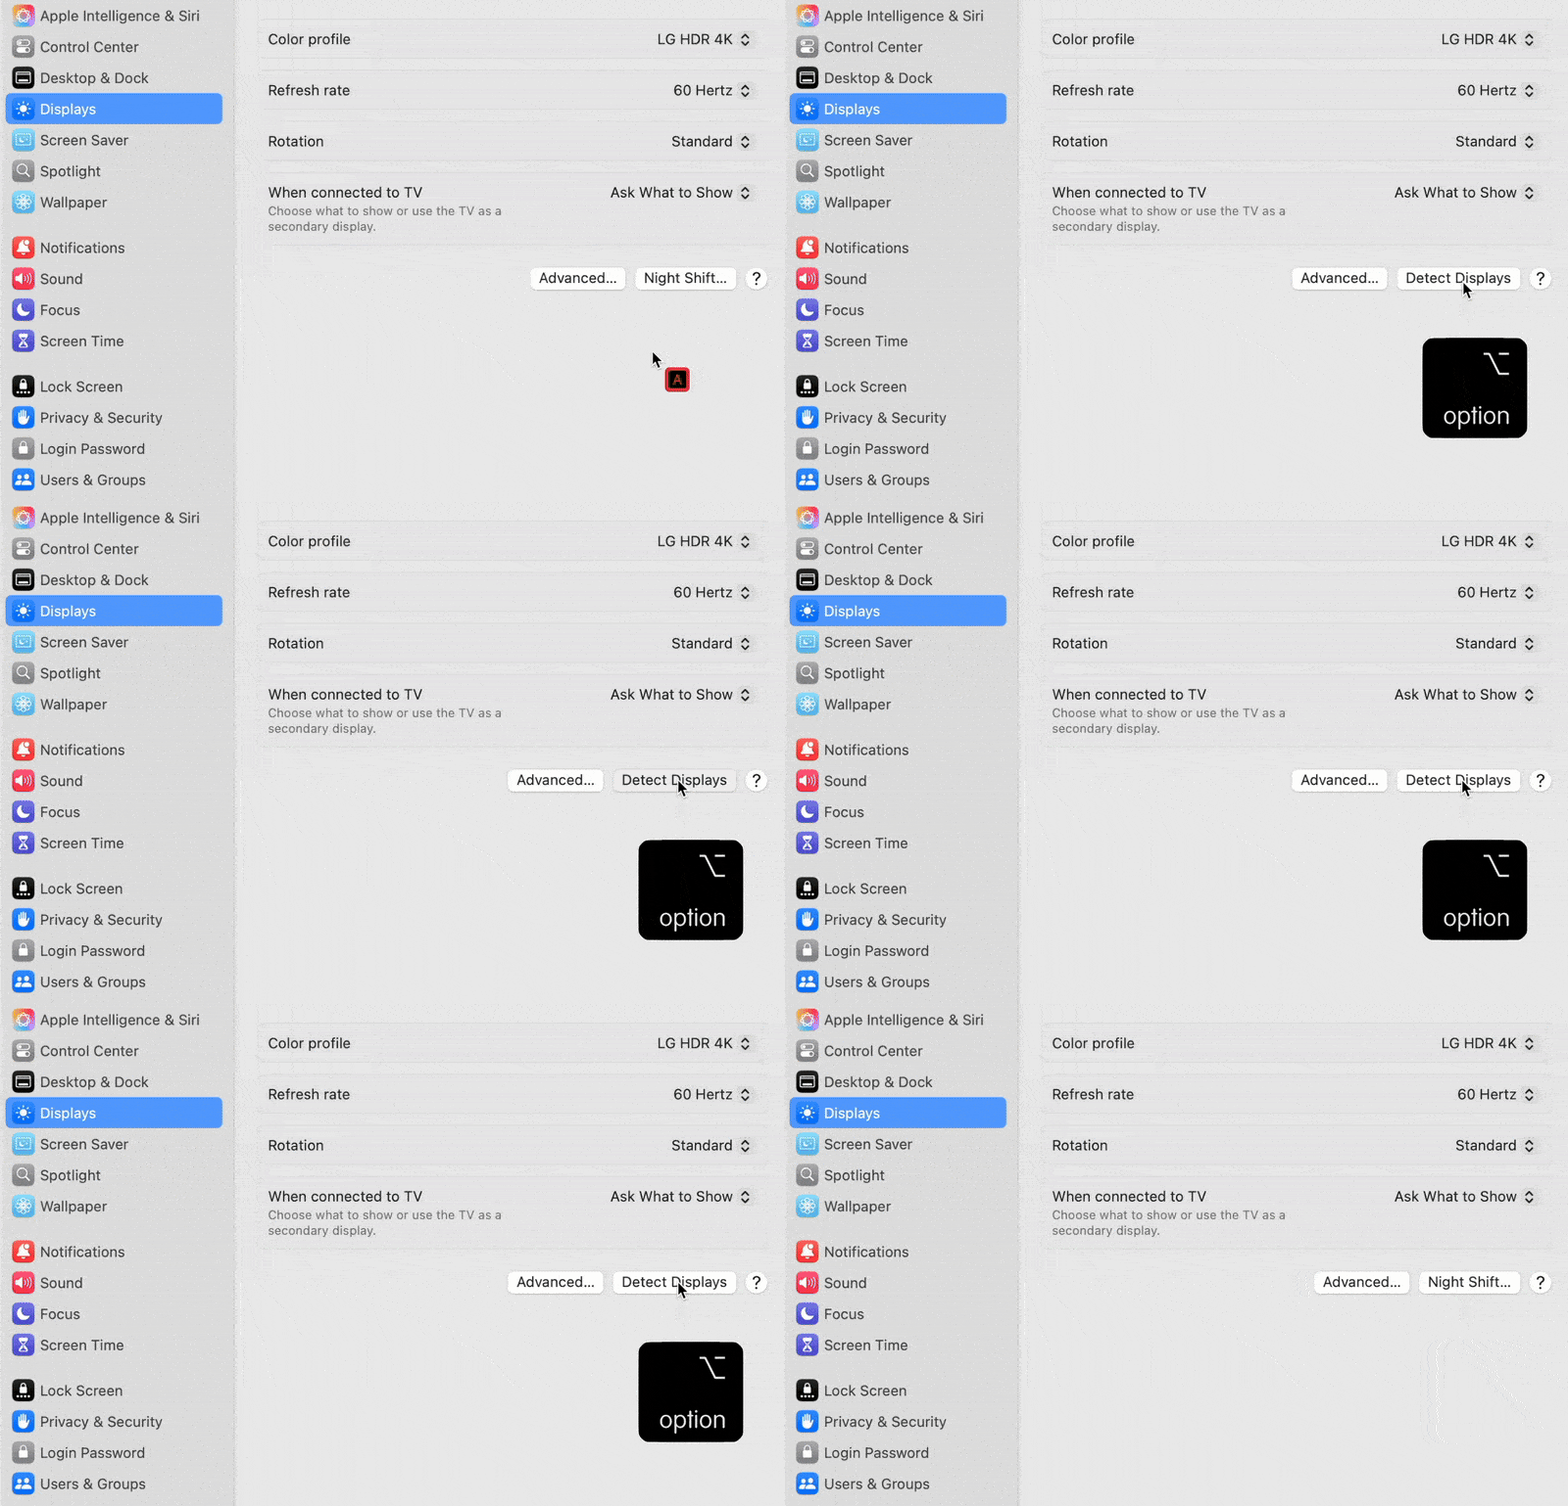
In System Settings → Displays, press and hold the Option (⌥) key and click the Detect Displays button that appears.
The display is detected, but I don’t see the same image
- Try toggling mirroring off and back on
Sometimes simply turning mirroring off, waiting a few seconds, and re-enabling it helps reinitialize the connection.
The mirrored screen has black bars or scaling issues
- Adjust resolution settings
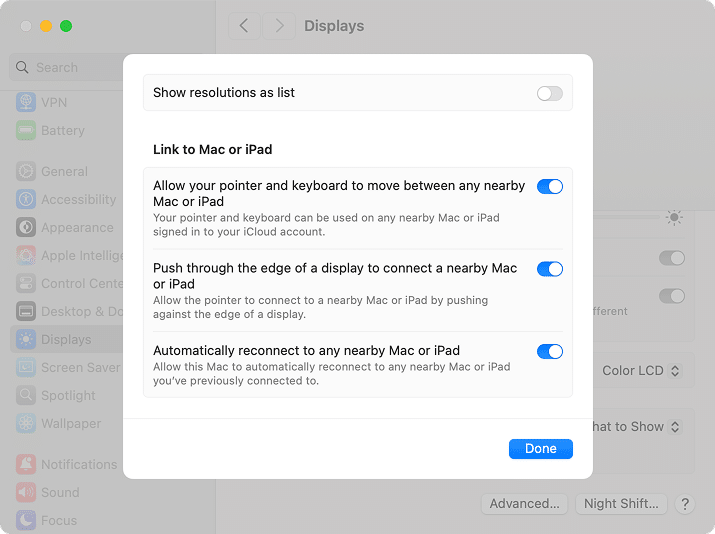
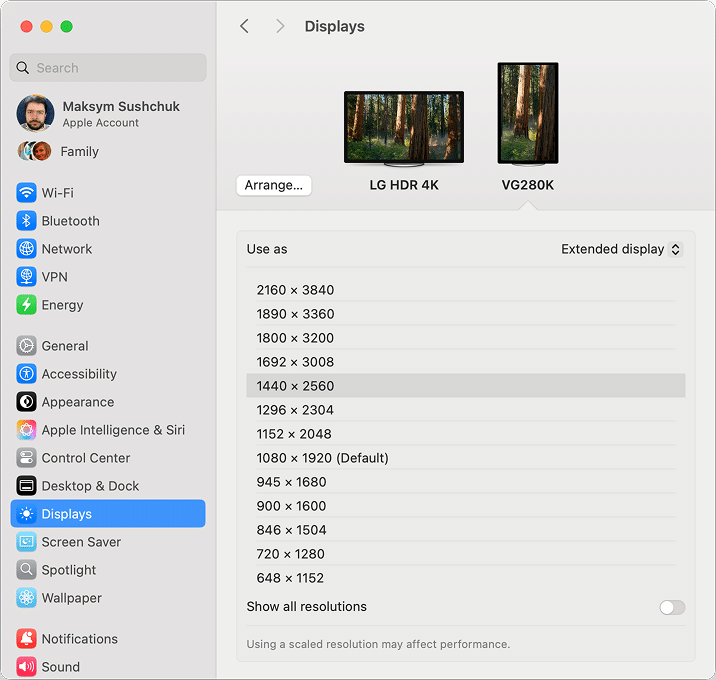
In the Displays section of System Settings, click Advanced → Show resolutions as a list and try a different resolution that matches your external display.In some cases, you might even want to toggle Show all resolutions at the bottom of the resolutions list to eliminate scaling artifacts or black bars.
- Check the aspect ratio
Some projectors or TVs might stretch or crop the image. Look for display settings on the external device itself. For example, on my decade-old Toshiba TV, I need to switch from “Zoom” to “Original” mode every time to see the screen uncropped.
There’s no sound on the external display
- Manually switch audio output
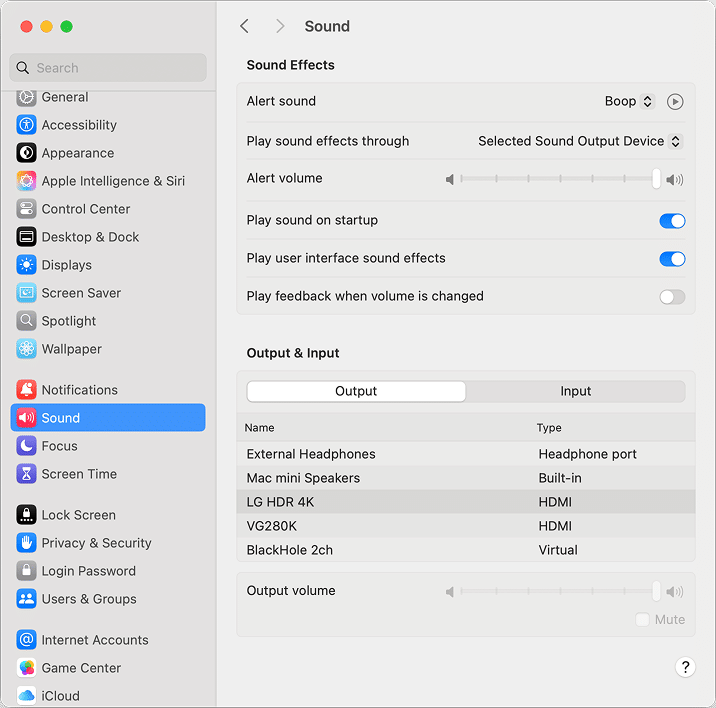
Go to System Settings → Sound → Output and select the name of your external display (e.g., LG TV, Epson Projector). macOS sometimes doesn’t auto-switch.
Mirror your screen wirelessly with AirPlay
With AirPlay, macOS gives you a wireless way to mirror your screen. Depending on your goal, there are two directions you might want to mirror:
Mirror Mac screen to another device (TV, projector)
You can mirror your Mac’s screen to:
- Any Apple TV
- AirPlay-compatible smart TVs (like recent models from LG, Samsung, Sony, or Vizio)
- Another Mac acting as an AirPlay Receiver (macOS Monterey or later)
Here’s how to do it:
- Make sure both your Mac and the receiving device are on the same Wi-Fi network.
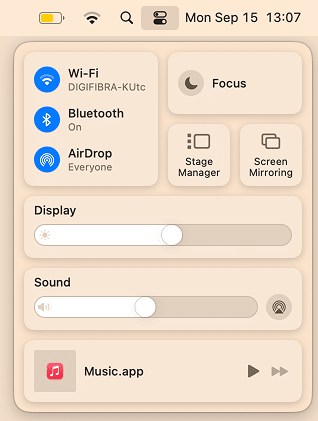
- Click the Control Center icon in the menu bar.
- Select Screen Mirroring.
- Choose the available AirPlay device from the list.
- If prompted, enter the pairing code displayed on the other screen.
This will mirror your entire Mac screen, including video and sound, to the external display.
Note:
If you don’t see the target device, make sure it supports AirPlay and is turned on. On some TVs, AirPlay must be manually enabled in settings.
Mirror iPhone or iPad screen to your Mac
Starting with macOS Monterey and newer, you can turn your Mac into an AirPlay Receiver. This means you can wirelessly mirror your iPhone or iPad screen onto your Mac, which is perfect for demos, game streaming, or just previewing mobile content on a larger screen.
System Requirements:
- AirPlay Receiver on Mac requires macOS Monterey or later.
- Only available on Macs from 2018 or later.
- Both devices must be on the same Wi-Fi network and signed in to the same Apple ID (or have Bluetooth and Wi-Fi enabled).
To use your Mac as a receiver:
- On your iPhone/iPad, open Control Center.
- Tap Screen Mirroring.
- Select your Mac from the list.
- Your iPhone/iPad screen will now appear on your Mac in a floating window.
Mirroring isn’t the only way: extend your display for more control
While screen mirroring is great for sharing the same content on both screens, most Mac users go a step further by extending their desktop instead.
When you extend your display, your external screen (connected via a cable) becomes an additional workspace. You can drag apps, windows, or media across screens, keeping your Mac’s built-in display as your control panel. It’s like a split mission: your MacBook screen is the command center, and the external display is the output terminal.
How to extend instead of mirror
- Connect your external display.
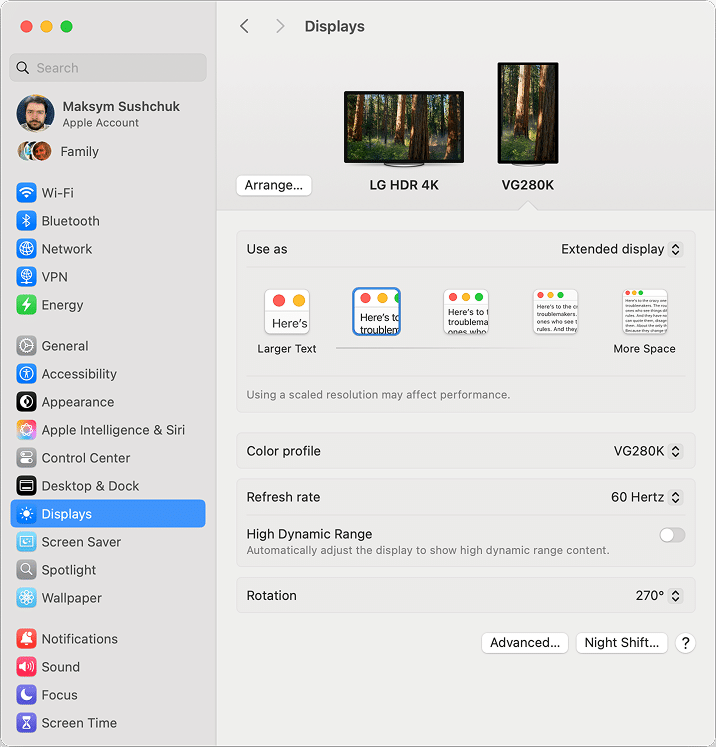
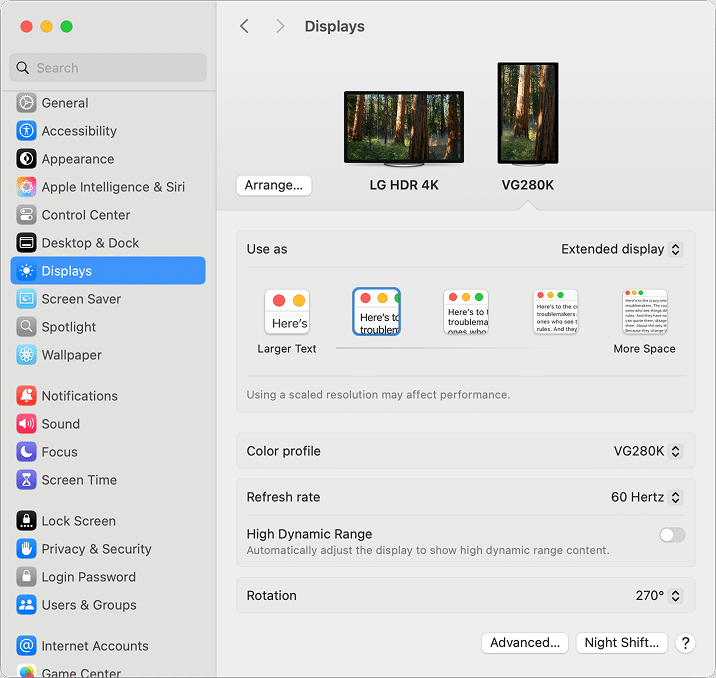
- Open System Settings → Displays.
- Under the Use as menu, select Extended Display.
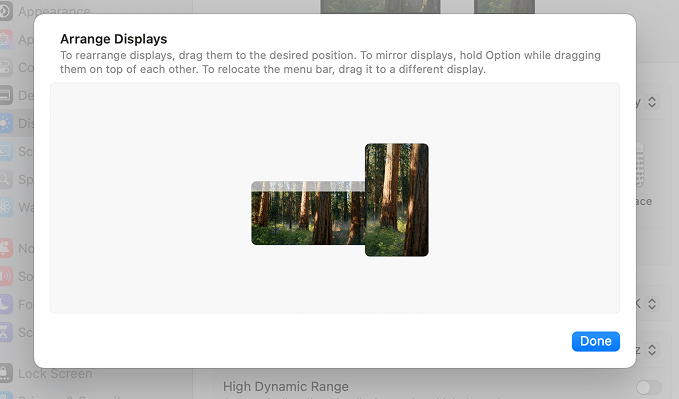
- Click Arrange… to drag and position the virtual display boxes so they match your real-world setup (e.g., place one above the other or side by side).
This setup is especially handy during:
- Presentations (you keep notes on one screen, slides on the other)
- Video calls (camera feed on Mac, screen share on external)
- Music production or editing (interface on Mac, playback on monitor)
- Multitasking-heavy workflows
Go even further with third-party tools
If you want advanced control over your multi-display setup, a few popular tools can help:
- DisplayLink – useful for Macs with limited ports as it lets you add extra displays via DisplayLink-supported USB adapters or hubs.
- DisplayBuddy – offers keyboard shortcuts, brightness, and input control across monitors.
- SwitchResX – allows full customization of display resolution, refresh rate, and screen arrangement.
- BetterDisplay – a modern utility for mirroring, extending, and tweaking virtual display setups, including HDR and HiDPI modes.
Personally, I once used DisplayLink to connect two external monitors to a MacBook Air M1, which Apple does not officially support. With only two USB-C ports, DisplayLink was a creative (though not very reliable) workaround that helped me stretch my setup way beyond the default limits.
Closing note
I’m constantly amazed by how far display technology has come. Today’s monitors offer everything from jaw-dropping refresh rates to OLED panels with inky blacks and stunning color accuracy. You’ve got ultrawide screens, 5K+ resolutions, and creative setups that weren’t even imaginable a few years ago.
What’s even more impressive is how smoothly macOS handles these modern displays. Whether you’re mirroring your screen for a quick presentation or crafting a dual-display workstation with pinpoint precision, Macs make the whole process seamless.
Honestly, it’s really never been easier or more fun to get the most out of your screen space.
