Contents:
- How to split screen on a Mac
- How to split screen using Mission Control
- How to fix it when split View is not working
- Tips for working with split screen
- How to exit Split View mode on a Mac
- FAQs
Before we start
MacCleaner Pro
How to split screen on a Mac
To split screen on your Mac and arrange two apps side by side in Split View, follow these steps:
- Open two apps that you want to place side by side on your screen.
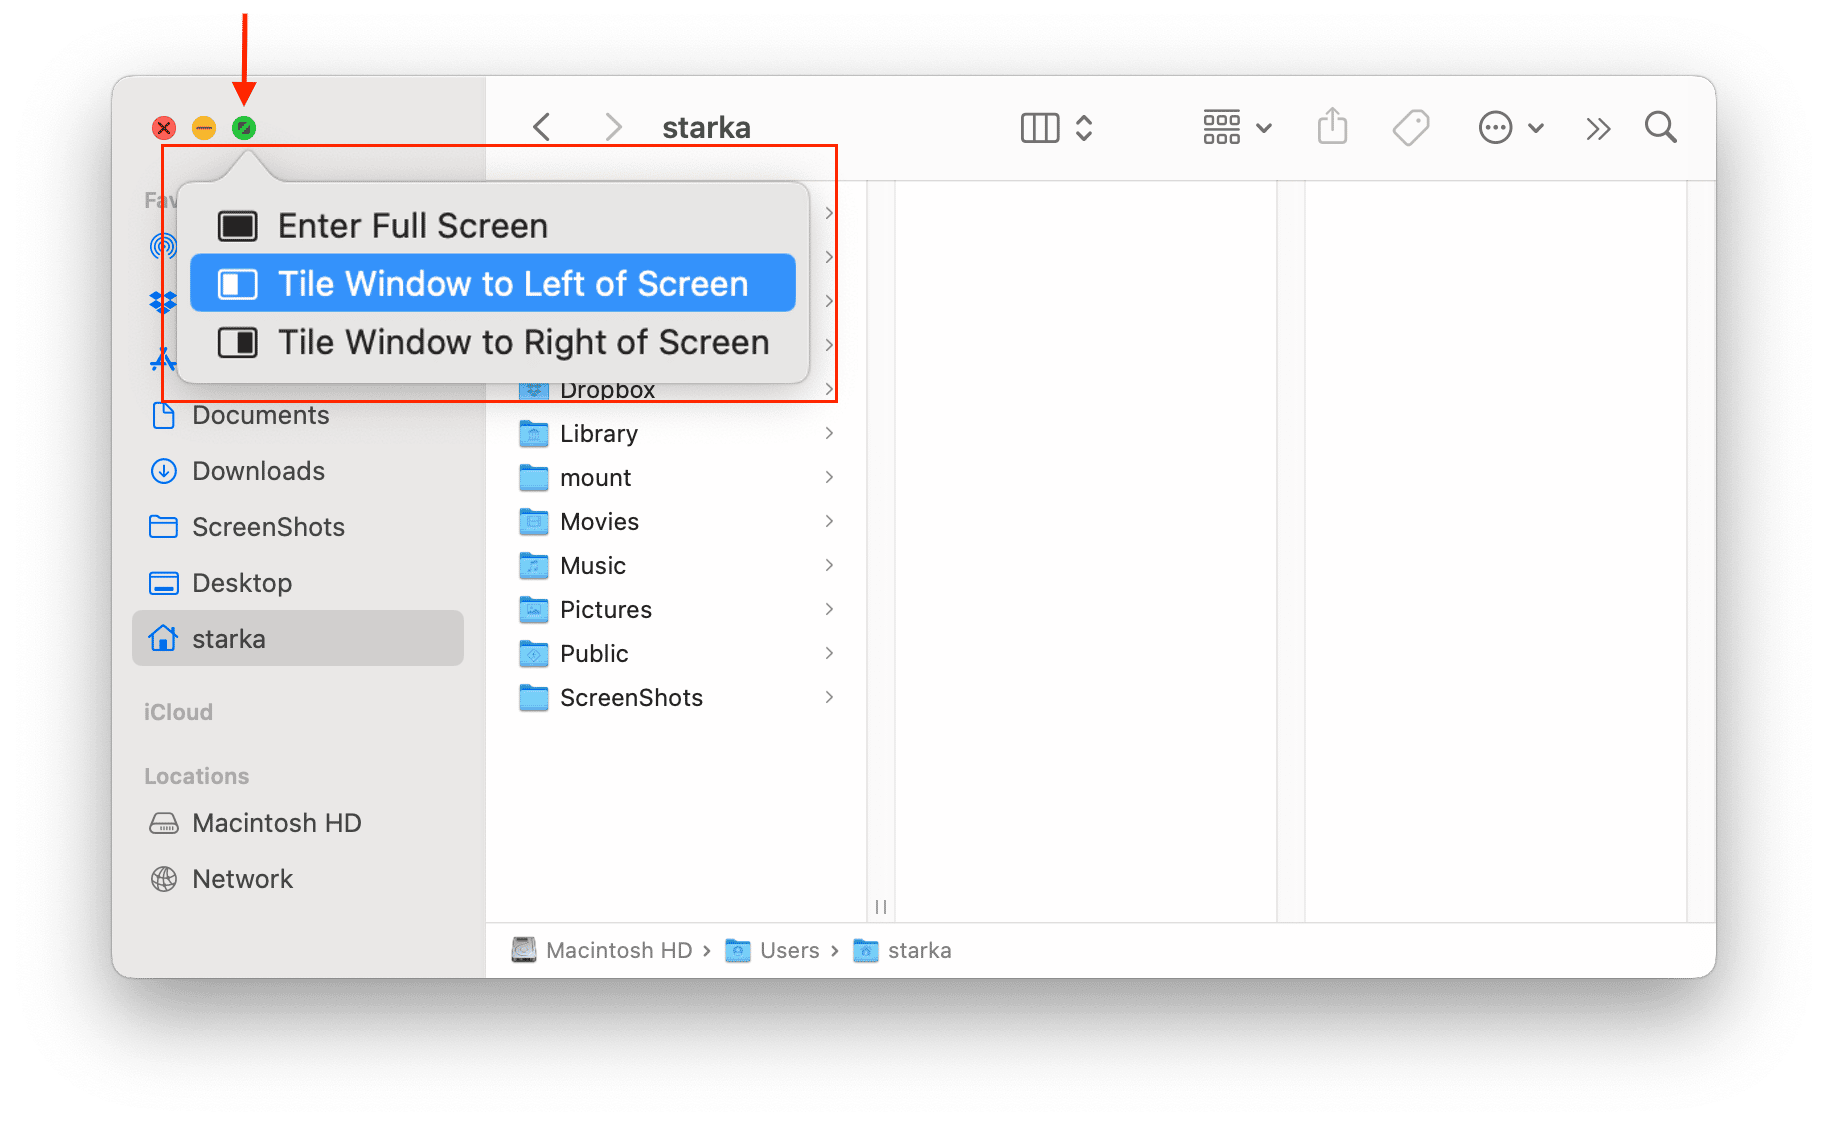
- Hover your mouse over the green circle icon on the top left side of the window.
- In the drop menu, click Tile Window to Left of Screen or Tile Window to Right of Screen.
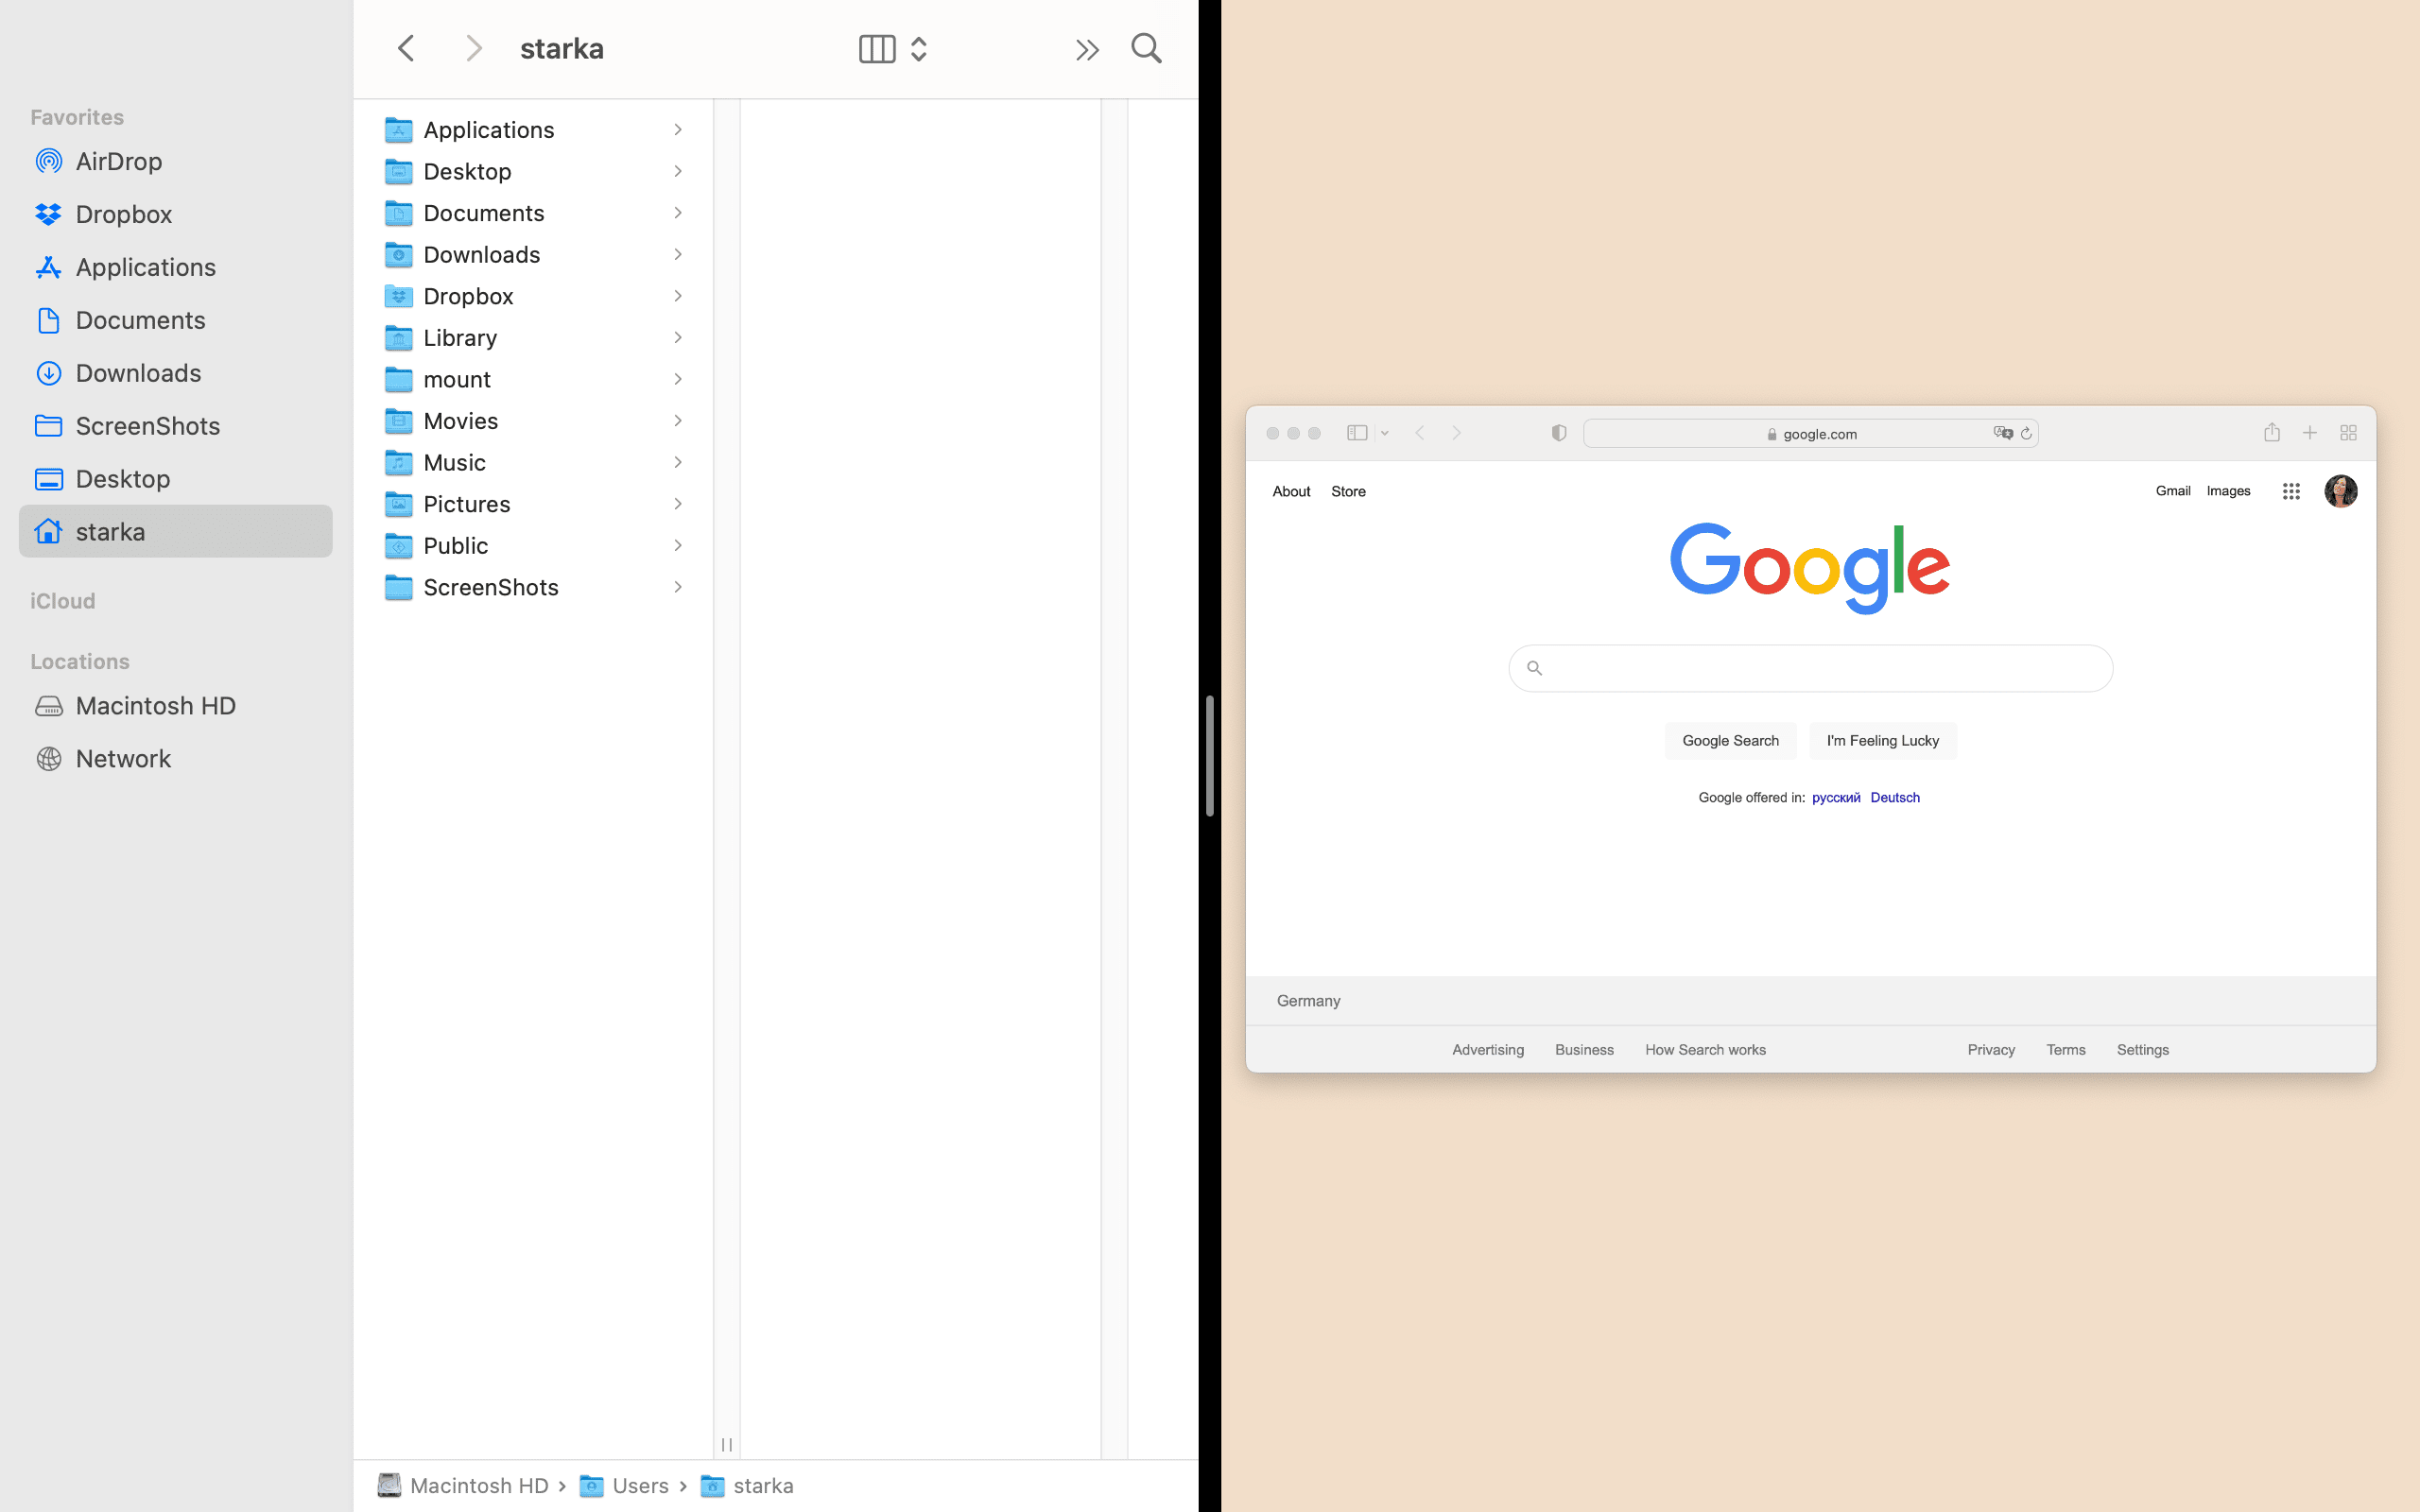
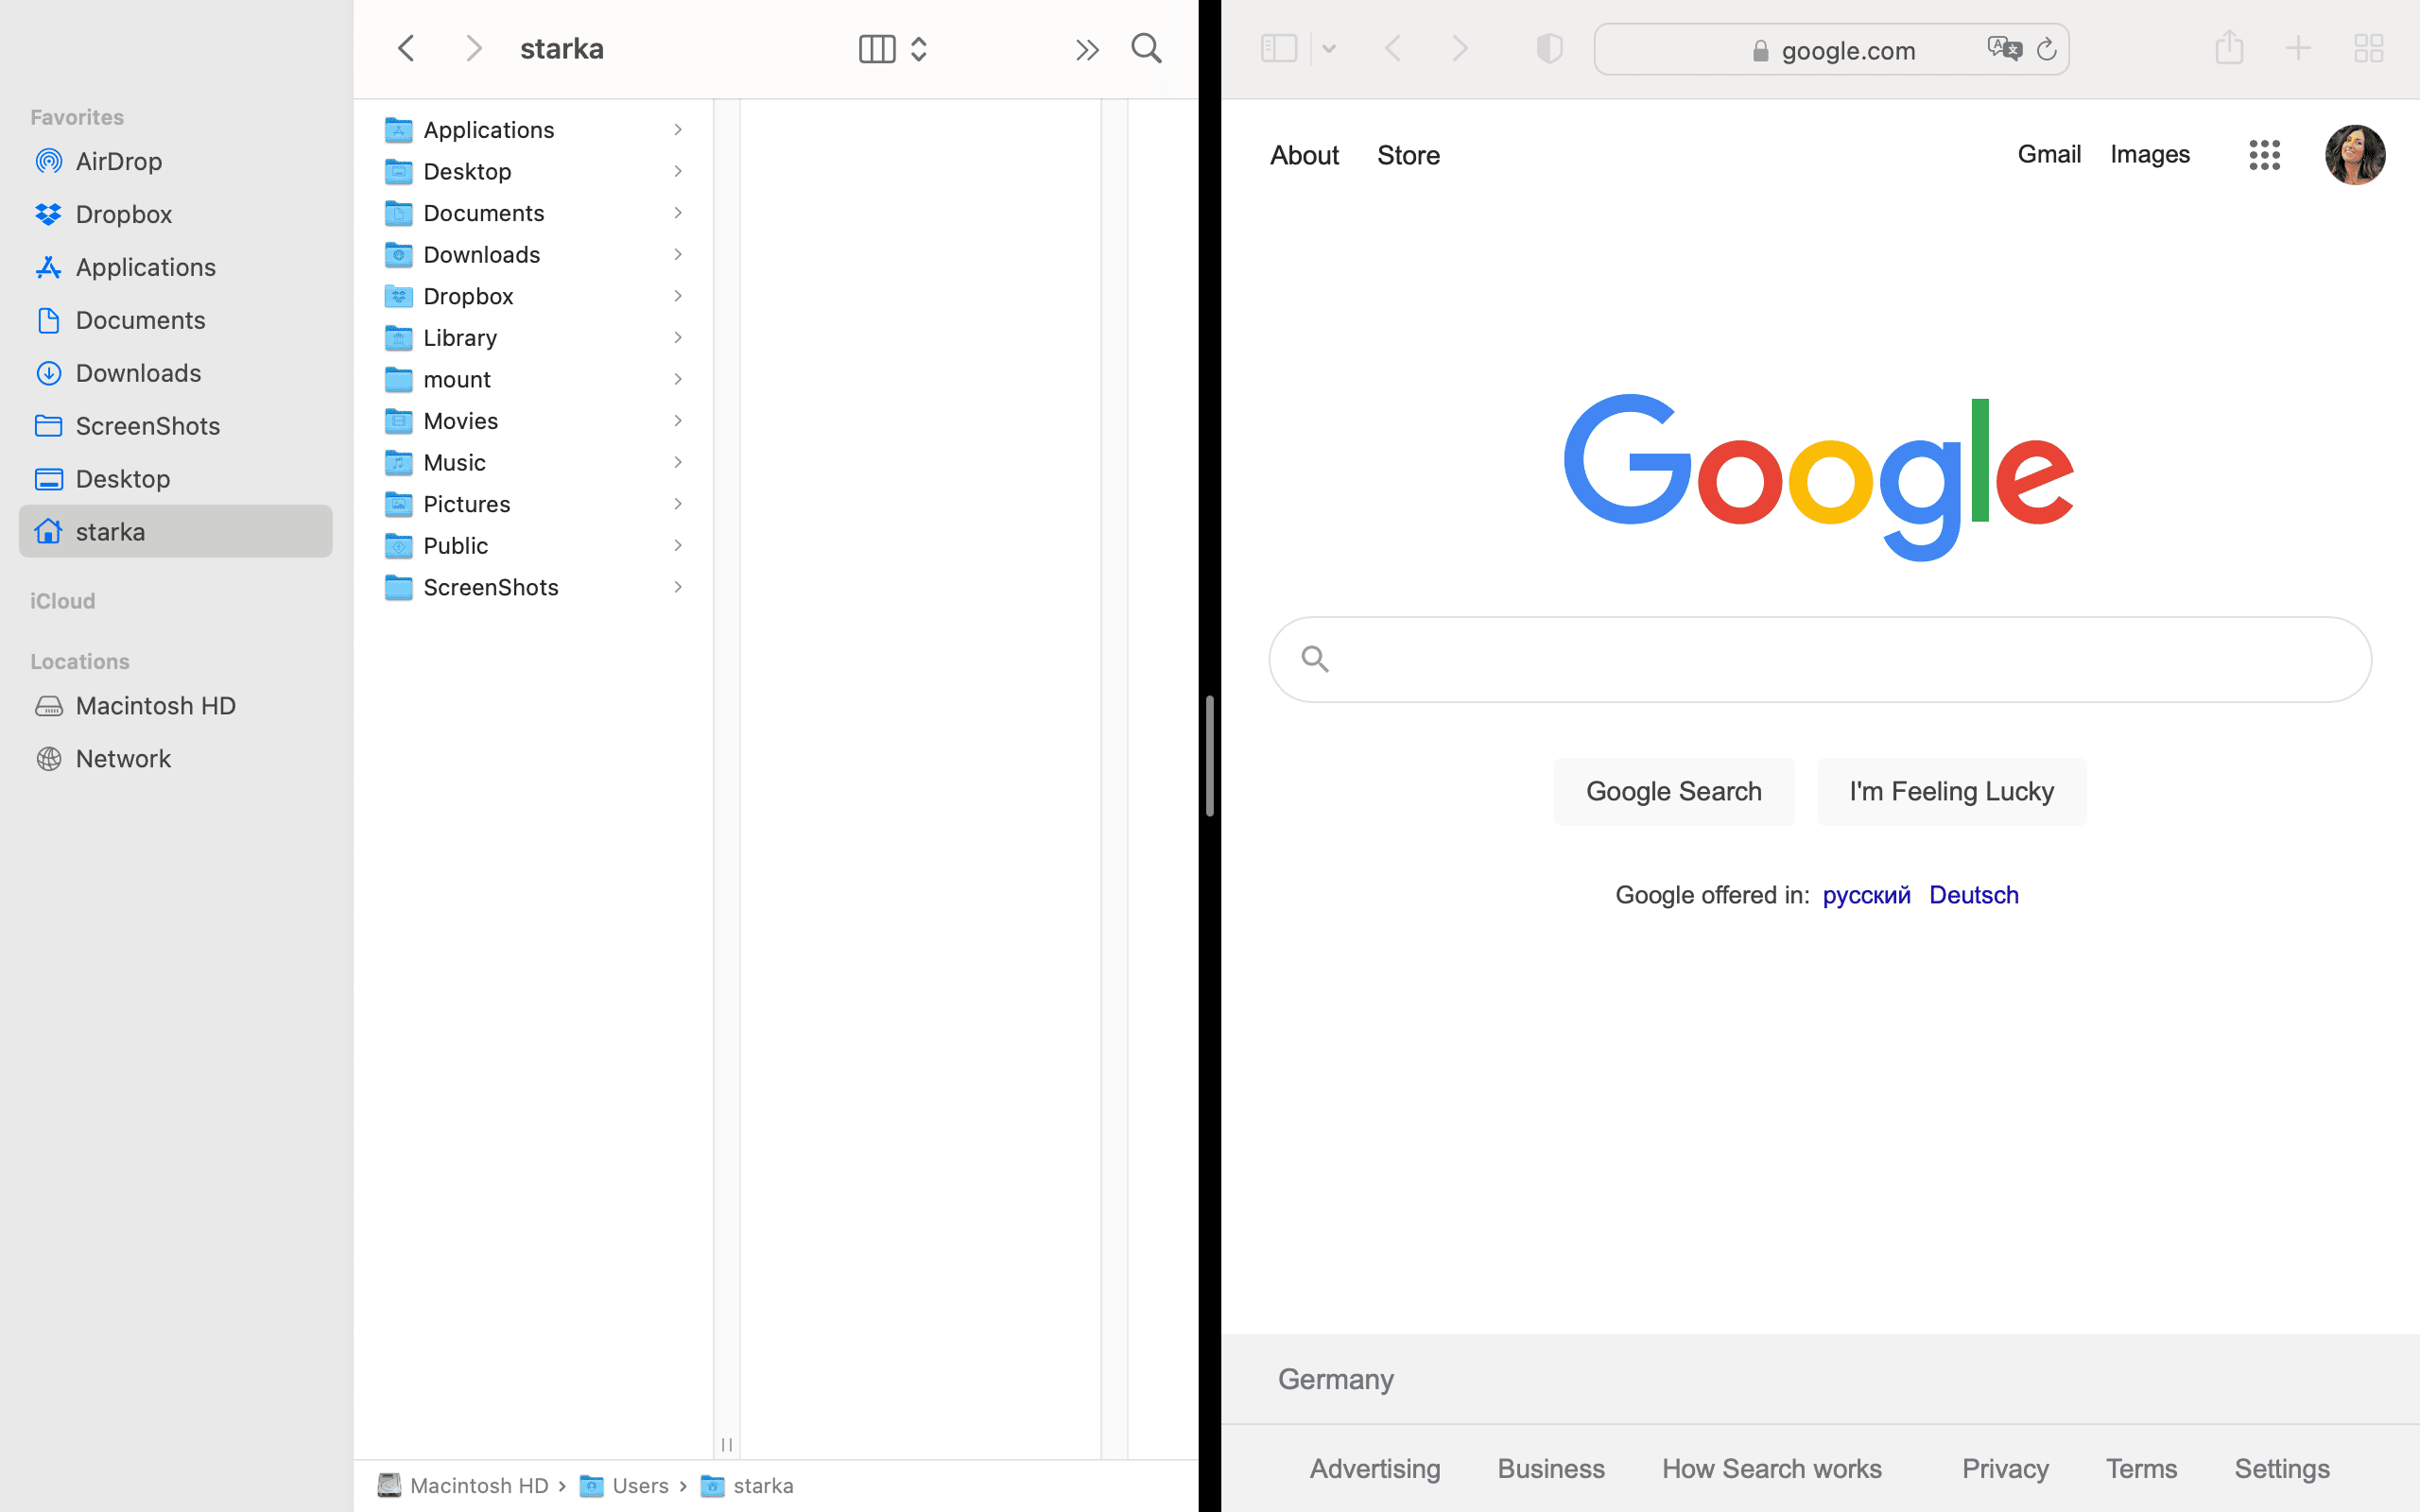
- Your screen will automatically be divided into two parts, and the application will occupy one side of the screen. On the other side, you will see other active windows.
- Click the app window that you want to fill the second part of your screen with.
How to do a split screen on a Mac using Mission Control
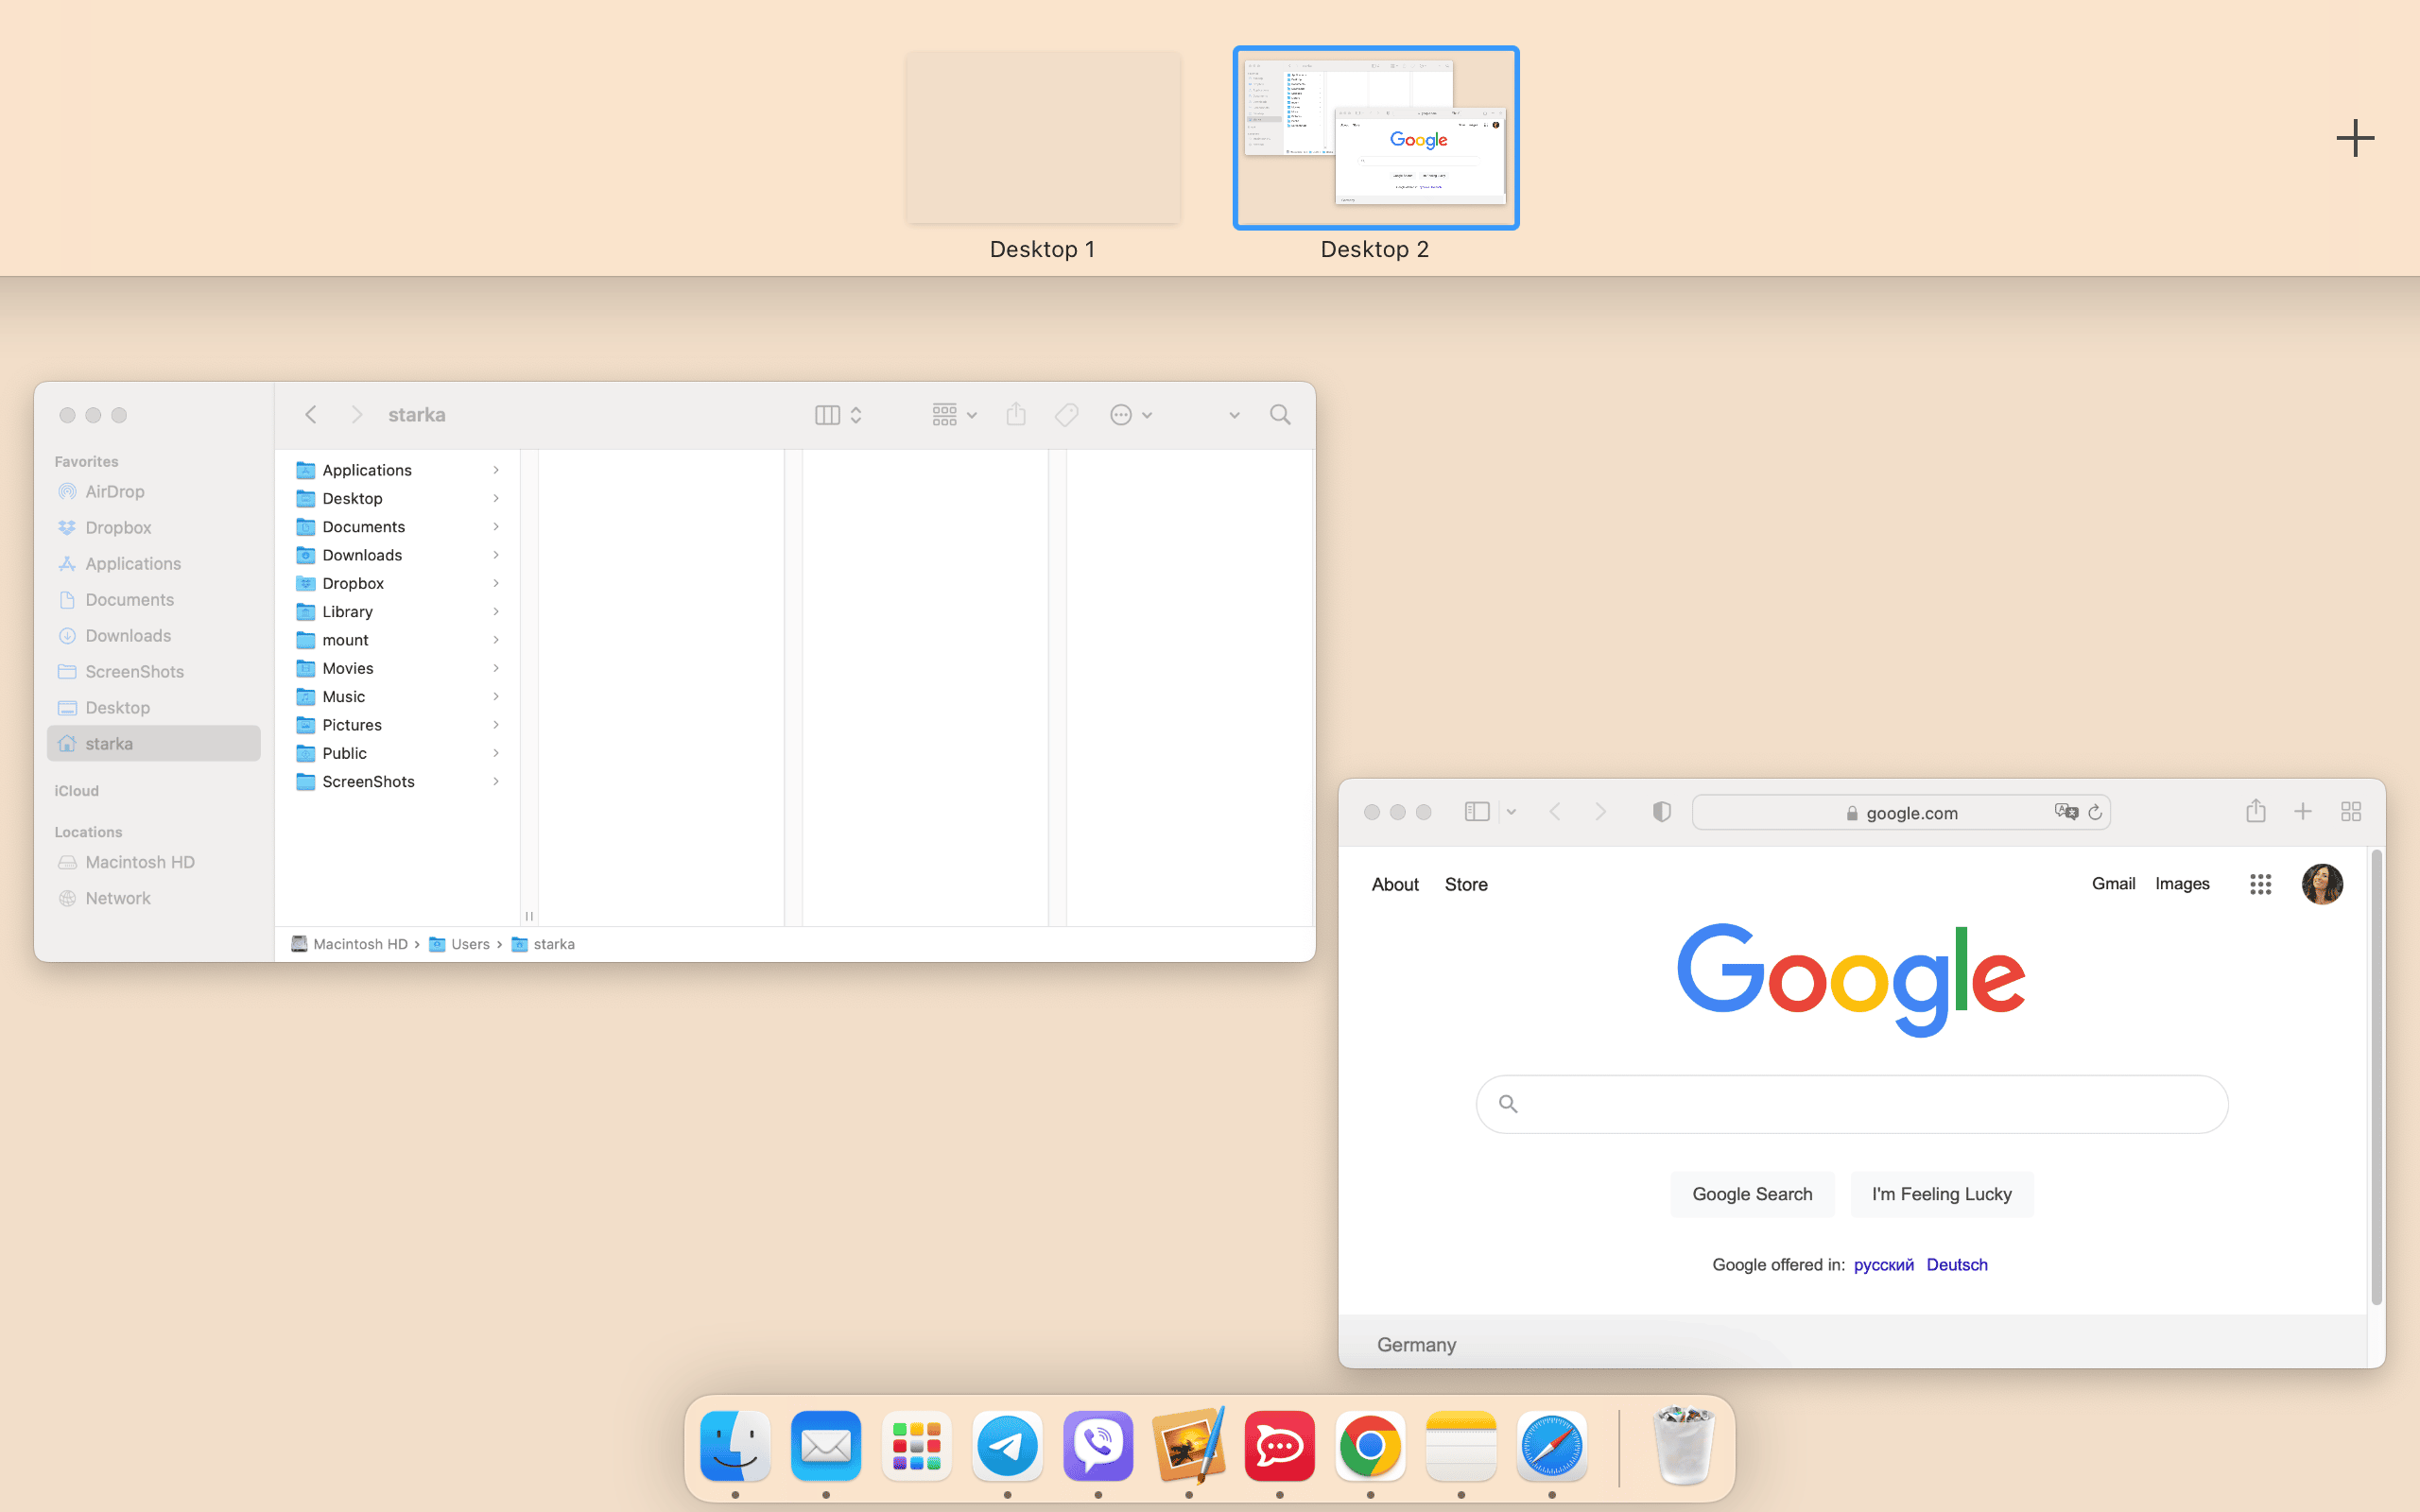
Using Mission Control on a Mac to run Split View is not as handy as using the Full Screen button. However, let’s see how it works:
- Open any application window on your Mac.
- Launch Mission Control by swiping up with your three fingers on your MacBook’s trackpad or double-click on Apple magic mouse. You can also run Mission Control from the Launchpad or the Applications folder.
- Drag the application window onto the application thumbnail of the full screen mode.
- Both application windows will enter Split View on your Mac. You can now click the Split View thumbnail to start using the two apps.
Split screen is not working on Mac. How to fix it?
If you follow the guide above to split your screen, but nothing happens on your desktop, check whether this option is activated on your Mac. Follow these steps:
- Open System Settings.
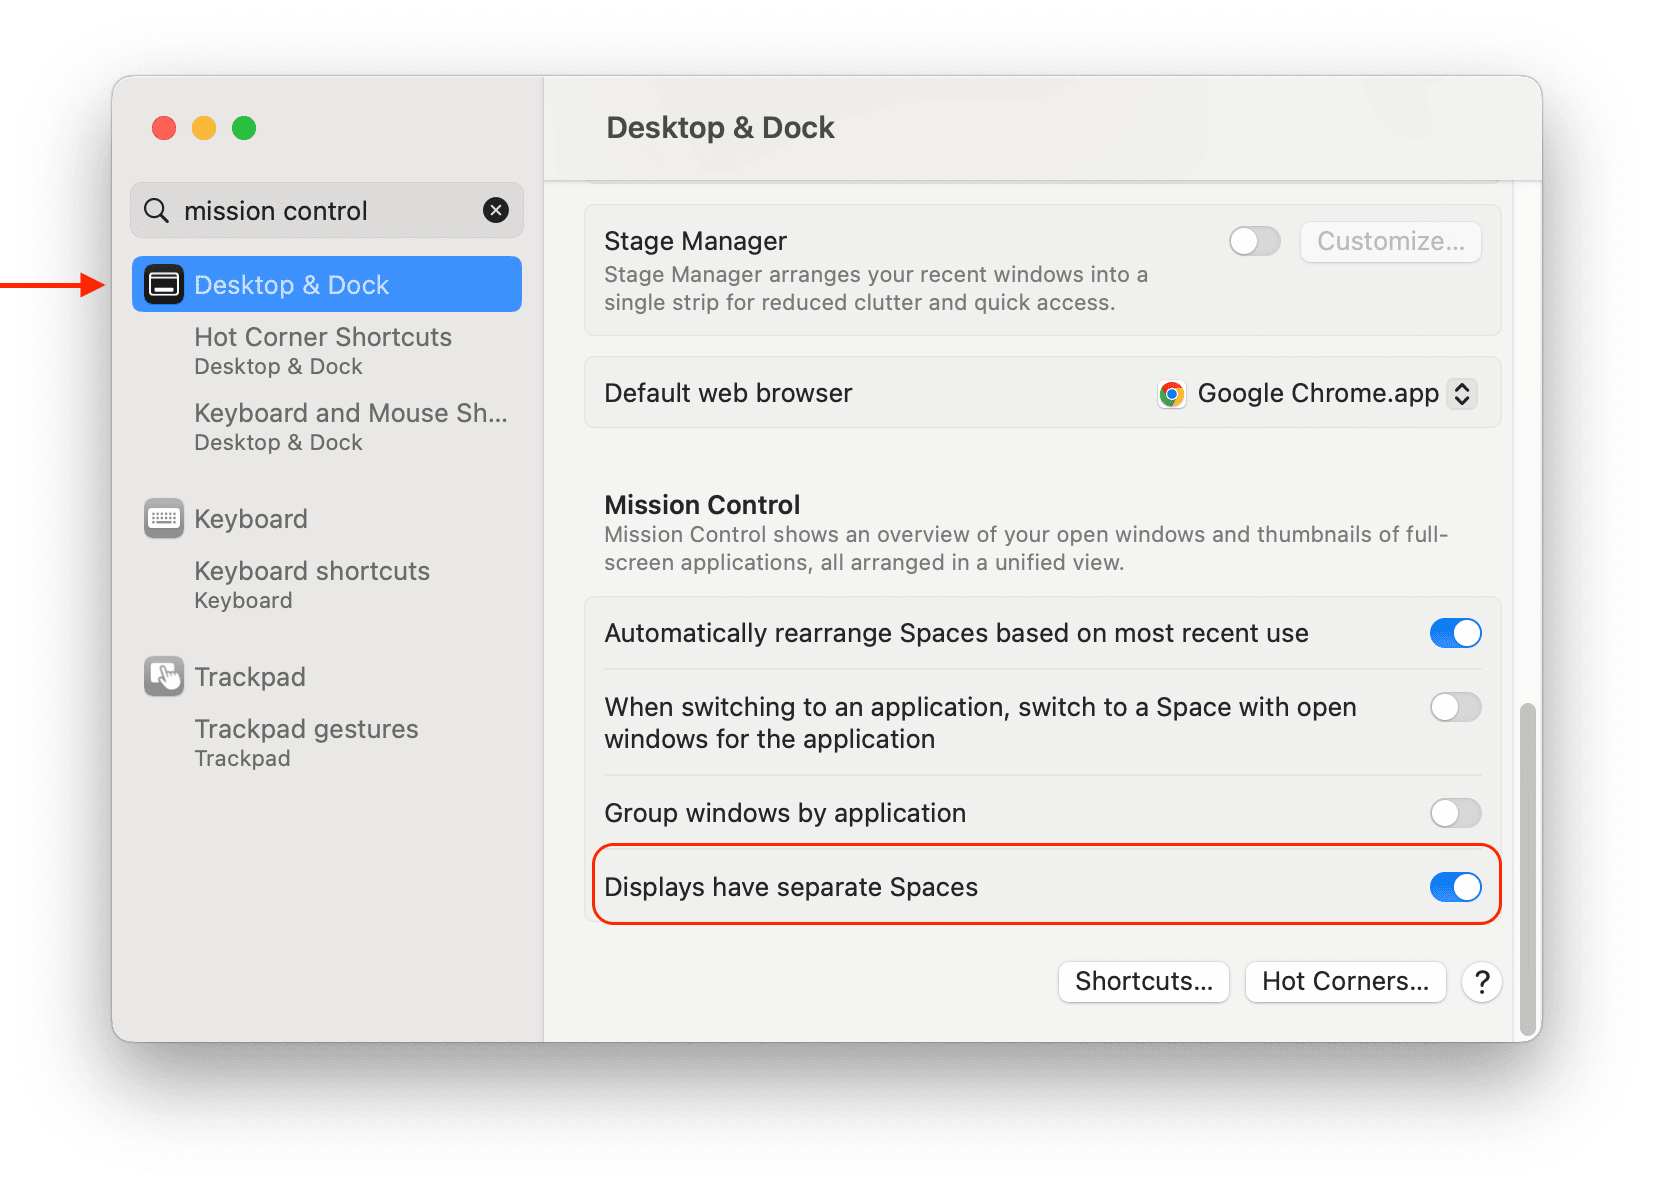
- Go to the Desktop & Dock section.
- Scroll down and find the Mission Control section.
- Enable the option Displays have separate Spaces.
Tips for working with split screen
Depending on your needs, you can adjust the window width and rearrange the window to make it convenient to work with applications in split screen mode on your Mac.
- Adjust window width by moving the vertical separator line between screen windows to the left or right.
- Swap windows by simply dragging a window from one side to another.
- Accessing the Dock in Split View by moving your mouse cursor to the bottom of the desktop, and the Dock panel will appear.
- Showing Menu Bar, by moving your mouse cursor to the top of the screen, and the Menu Bar will appear.
How to exit the Split View mode on a Mac
Closing the Split View mode is as simple as running it. Here is how:
- Move your mouse cursor to the top of the desktop screen.
- The Menu bar and windows’ top panels will appear.
- Click the green circle button in any window to exit split screen mode on your Mac.
FAQs
How to Full Screen on a Mac?
Click and hold the green circle button at the top of your application’s window and click Enter Full Screen.
You can also use a key combination Control+Command+F to enter Full Screen.
How do I maximize a window in Mac without the Full Screen?
You can stretch the window’s size by using diagonal and directional arrows. To do this, hover over the window’s borders line, and once you see the arrows, press your mouse, and move the borders.
You can also press the Option key and double-click your window. This will expand the window size so that it will occupy the entire desktop screen without entering the Full Screen mode.
How do I exit Full Screen mode on a Mac?
- Move your mouse cursor to the top of your desktop screen, and you will see the top panel of the window.
- Click the green circle button to exit from Full-Screen mode.
