October 24, 2025
Two ways to uninstall BlueStacks from your Mac
This article explains how to correctly and completely uninstall BlueStacks from Mac. We will share two methods of BlueStacks removal. You can do this manually or with the help of a third-party uninstaller.
No matter which method you choose, just remember that for a complete uninstallation of BlueStacks or any other application from Mac you also have to remove all of its support files.
What is BlueStacks and should you uninstall it from your Mac
BlueStacks is an application that allows users to play Android games on a Mac or Windows-based computer. BlueStacks is regularly updated and comes from a legitimate Bluestack Systems, Inc.
So generally BlueStacks is a safe and proven application for a Mac. However, if you need to free up some space on your Mac and you play games very rarely or if you have some issues with BlueStacks, you should uninstall the application. In this article we will tell you how to uninstall BlueStacks from Mac correctly and completely.
How to manually uninstall BlueStacks
In case you wish to uninstall BlueStacks on Windows, there is a special uninstaller you can find on the BlueStacks website. But things are different when it comes to removing BlueStacks from Mac.
Steps to manually uninstall BlueStacks from Mac:
- Quit BlueStacks.
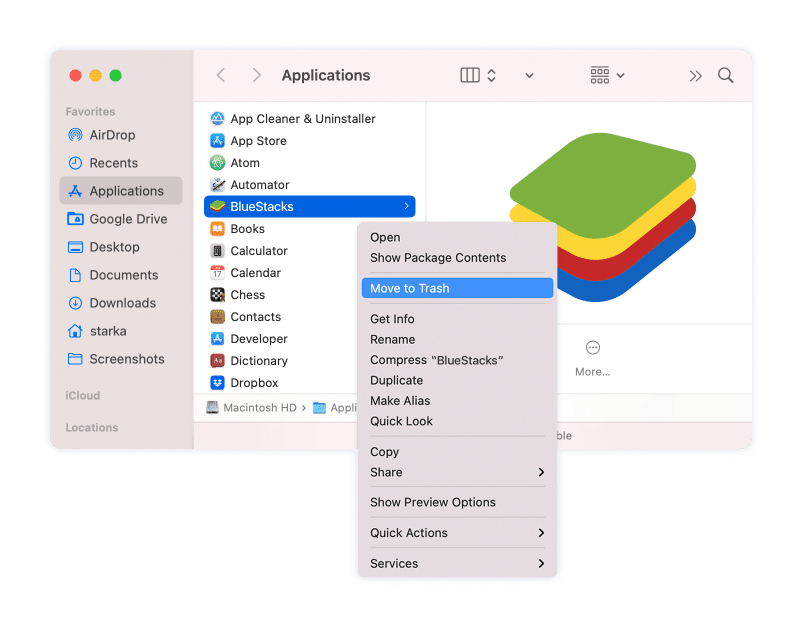
- Go to the Applications folder in Finder.
- Locate and remove BlueStacks.app to Trash.
Unfortunately, this is not the last step of BlueStacks removal. Temporary files and folders, which were created during BlueStacks usage, are still being stored on your Mac. You need to manually find and remove them. The steps below will describe how to do this.
Note:
Please be careful if you remove service files manually. Deleting important macOS system files might damage your system.
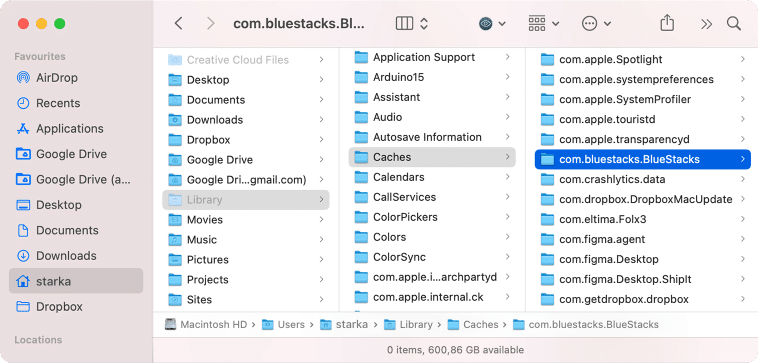
- Find BlueStacks’ support files. For this, in Finder press the Command+Shift+G shortcut.
- In the “Go to the Folder” search field type and hit Return.
~/LibraryCopy
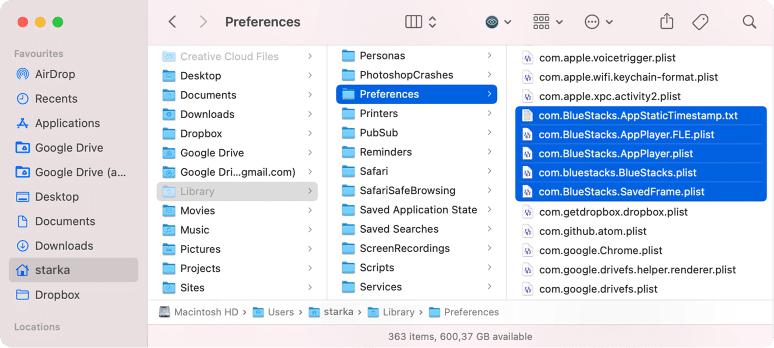
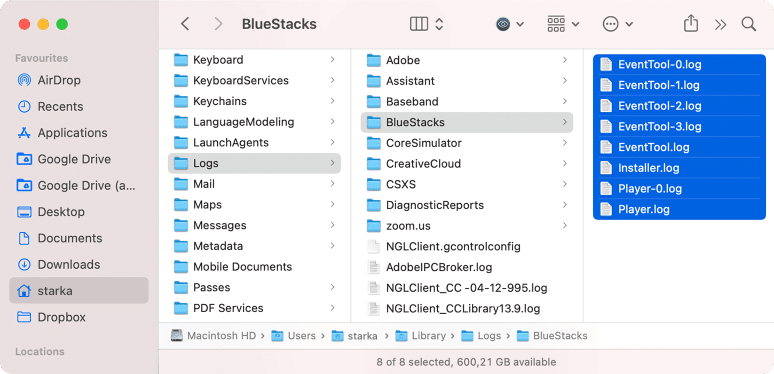
- Select and remove all files associated with BlueStacks. Check the following folders for them:
~/Library/Application SupportCopy
~/Library/CachesCopy
~/Library/PreferencesCopy
~/Library/LogsCopy
~/Library/CookiesCopy
- Once you remove all the BlueStack service files, empty your Trash bin.
Of course, you can find and remove all the unneeded files manually. However, some temporary files and folders might be scattered in different places on your Mac. It might be difficult to find all of them, since they are hidden or stored in hidden folders and you can spend a lot of time searching for them. Also, for new Mac users this might be unsafe as deleting other system files might damage the system.
If you have found and removed all the BlueStack service files, you can be sure that you have uninstalled the application completely. However, if you are not sure, we recommend that you use App Cleaner & Uninstaller. This tool will easily and entirely uninstall BlueStacks without leaving its temporary files behind on your disk.
How to quickly uninstall BlueStacks from Mac
If you wish to get rid of the BlueStacks application easily and completely, use a special software called App Cleaner & Uninstaller. It helps to uninstall any application on your Mac completely with all of its temporary files.
Even if you have already removed the BlueStacks app to Trash, you can use the uninstaller to find its remaining files on your hard drive.
Complete the following steps to completely uninstall BlueStacks from Mac:
- Download and launch App Cleaner & Uninstaller.
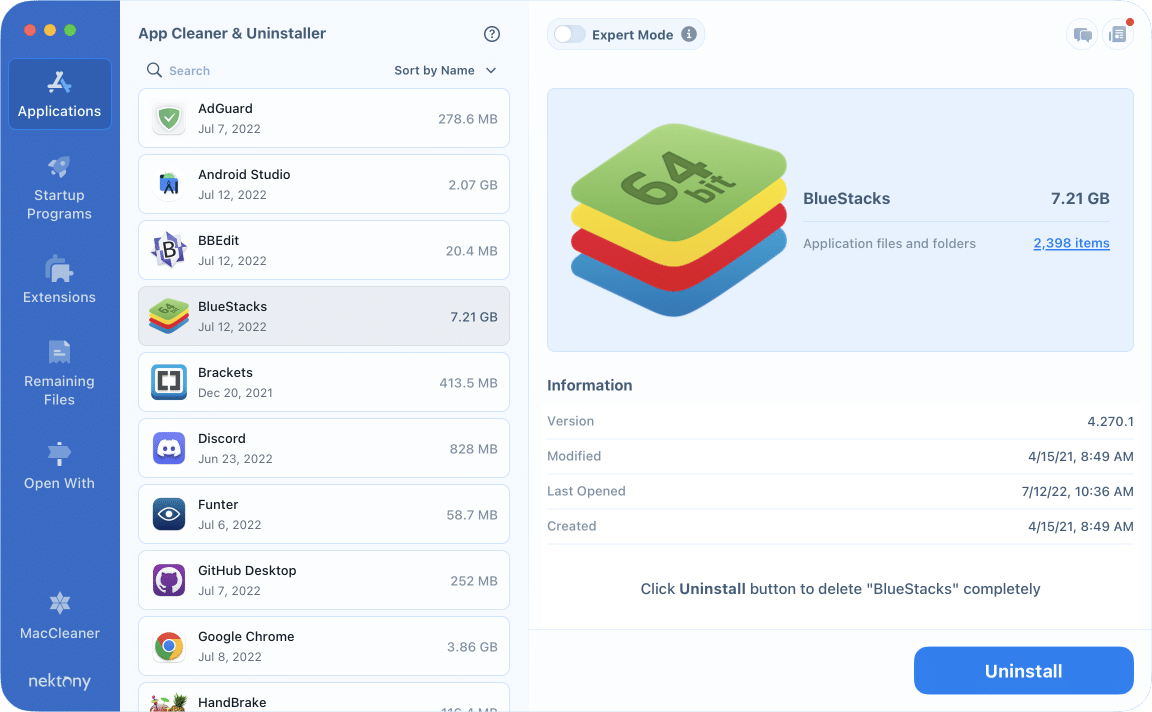
- Select BlueStacks on the left side of the window.
- Click the Uninstall button and confirm the action.
- Empty your Trash bin.
If you have already removed BlueStacks, switch to the Remaining Files section in App Cleaner & Uninstaller. There you will find its remaining files. Just select and click to remove them.
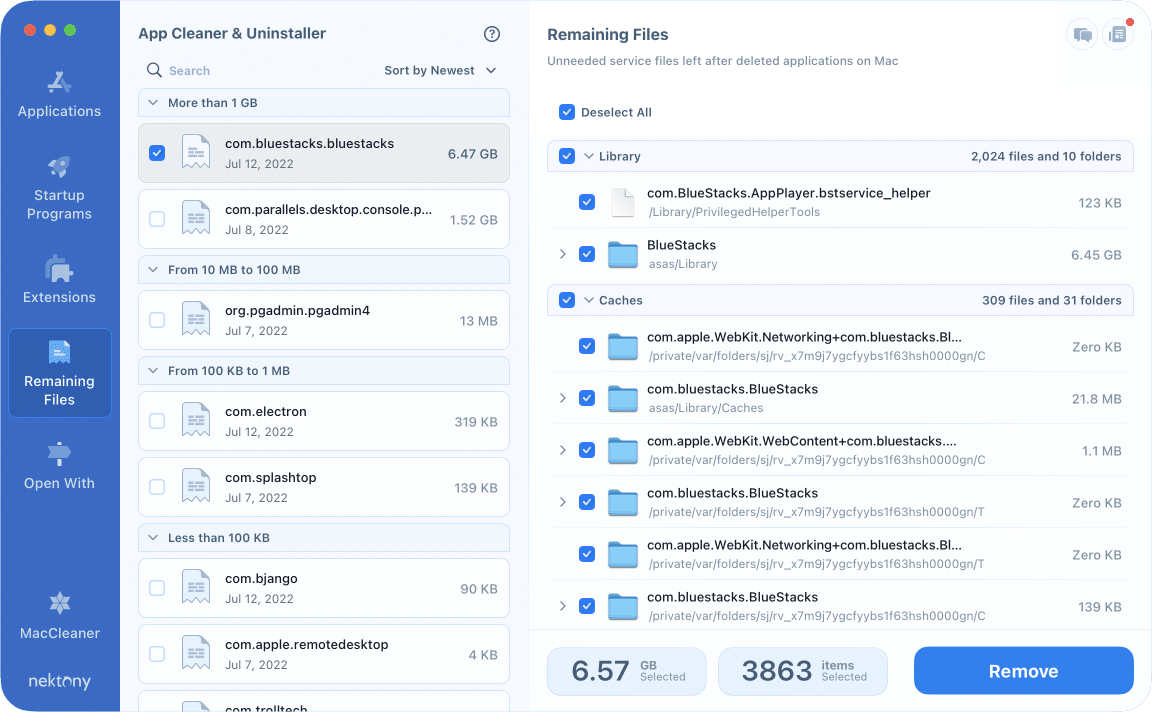
Deleting the remaining files of apps is important to keep your Mac clean from junk and prevent any issues in the future.
App Cleaner & Uninstaller can also help you to manage startup programs and extensions installed on your Mac. Open the Extensions tab to overview and handle extensions. Here you can delete old installation files and your browser extensions.
And the best thing about it is that you can evaluate it for free.
Conclusion
From time to time we have to uninstall applications, to either update them or remove them forever. Not all apps have a native uninstaller. The usual method of dragging and dropping apps into Trash does not remove the applications’ leftovers. To save your time and uninstall any application from Mac safely and entirely use App Cleaner & Uninstaller from Nektony.
