June 19, 2025
How to uninstall Dropbox on Mac completely: Step-by-step guide
Don’t get me wrong, Dropbox is still great, especially with new features like Dropbox Dash. Yet if you’ve decided to uninstall Dropbox for any reason, here’s how to do it completely and safely without leaving behind any unnecessary files.
This Article Contains
Save time: the quickest method
If you’re short on time and need to quickly uninstall Dropbox from your Mac, App Cleaner & Uninstaller by Nektony is your best bet. It fully and safely removes any app from your Mac in just two clicks.
Why uninstalling Dropbox isn’t that simple
Uninstalling Dropbox on a Mac isn’t always as straightforward as dragging the app to the Trash. Since Dropbox integrates deeply with Finder and syncs files across devices, it leaves behind more than just an app icon.
Many users wonder:
- What happens to the Dropbox folder when I delete the app?
- Will my files stay safe?
A good reason to follow a proper removal process is troubleshooting. While Dropbox is generally stable, things can go wrong: files stop syncing, the app won’t close, or it starts using more system resources than expected.
A clean uninstall followed by a fresh install can often fix these kinds of glitches. This is especially relevant if you didn’t use your Mac for a while or after a macOS update, which may break integrations or permissions.
Finally, if you’re switching to another cloud service like iCloud, Google Drive, or OneDrive, timing matters. You’ll want to ensure all your files are safely copied to the new platform before removing anything from Dropbox. Otherwise, you risk losing files or interrupting a critical sync in progress.
Note:
Deleting the Dropbox app or even the Dropbox folder on your Mac doesn’t automatically delete your cloud files. However, if your Dropbox is still syncing, removing files from the local folder might trigger deletions in the cloud. Always double-check that your important files are safely stored elsewhere before you remove anything locally.
Two ways to uninstall Dropbox completely
There are two reliable methods to remove Dropbox from your Mac without deleting your files:
- Manually, by locating and deleting all related files yourself.
- Automatically, using App Cleaner & Uninstaller, which does the heavy lifting for you.
If you’re tech-savvy and want to see exactly what’s being removed, manual deletion gives you full control. But if you prefer a faster and more hands-off approach, App Cleaner & Uninstaller is your best bet (especially if you’re unsure whether Dropbox left behind login items, hidden containers, or legacy files from older macOS versions).
Here’s a quick comparison:
| Manual Removal | App Cleaner & Uninstaller | |
|---|---|---|
| Easiness | ⭑⭑⭑⛤⛤ Medium requires navigating hidden folders and knowing what to delete |
⭑⭑⭑⭑⭑ Easy guided UI does everything for you |
| Speed | ⭑⭑⛤⛤⛤ Slower you need to find and delete files yourself |
⭑⭑⭑⭑⭑ Fast scans and removes files in seconds |
| Thoroughness | ⭑⭑⭑⭑⛤ High you need to be careful as it’s easy to miss hidden items |
⭑⭑⭑⭑⭑ Very High detects all leftover files, even on older or cluttered systems |
Manual method: uninstall Dropbox by hand
This guide was written and tested on macOS 15.4 (Sequoia) using Dropbox version 226.3.5047. If you’re using a different macOS or Dropbox version, some folder names or file paths might vary slightly, but the overall approach remains the same.
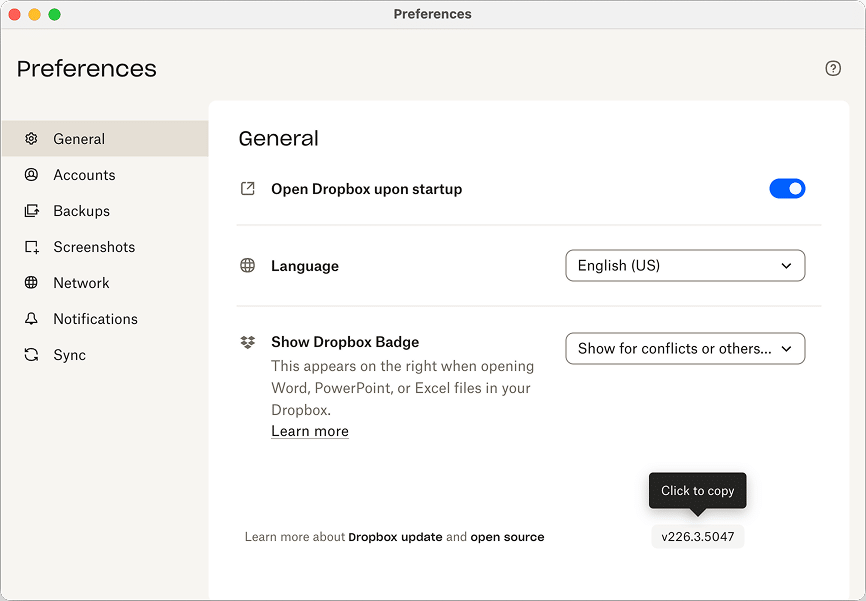
Manual uninstallation is the most thorough method if you want to completely remove Dropbox from your Mac, including hidden support files, sync-related scripts, and Finder extensions. Follow these steps to ensure nothing is left behind.
Note:
On your Mac, you might be unable to find every single file and folder mentioned below. Some files are generated only in certain cases and on certain machines, so it’s perfectly fine. Just make sure you look through all of them and remove the ones you find.
Step 1: Quit Dropbox and move the app to the Trash
You won’t be able to remove Dropbox if it’s running on your system, so start by shutting down.
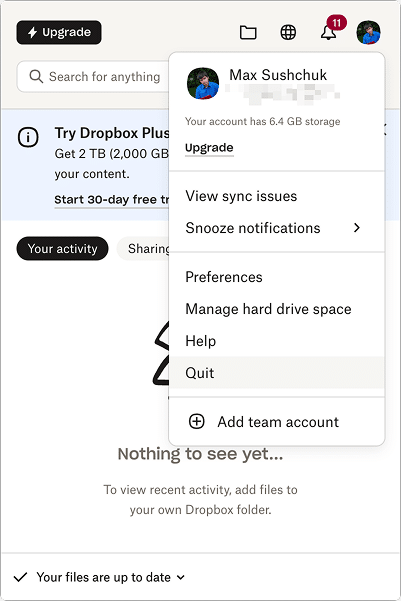
- On Mac, remove Dropbox from the menu bar and halt its work by clicking Dropbox’s icon. In the menu that appeared, click the icon with your photo and choose Quit in the drop-down menu.
- Open Finder and go to the Applications folder.
- Find Dropbox.app and drag it to the Trash.
This removes the main application, but many additional files remain on your system.
Step 2: Remove Dropbox support files
Below is a list of Dropbox files and folders you can safely delete, categorized by their type. These are used for sync behavior, file indexing, update processes, Finder integration, and login services. They are not required once the app is gone.
These files are ususally located in the user Library folder (~/Library). If you don’t know how to reach it, do the following steps:
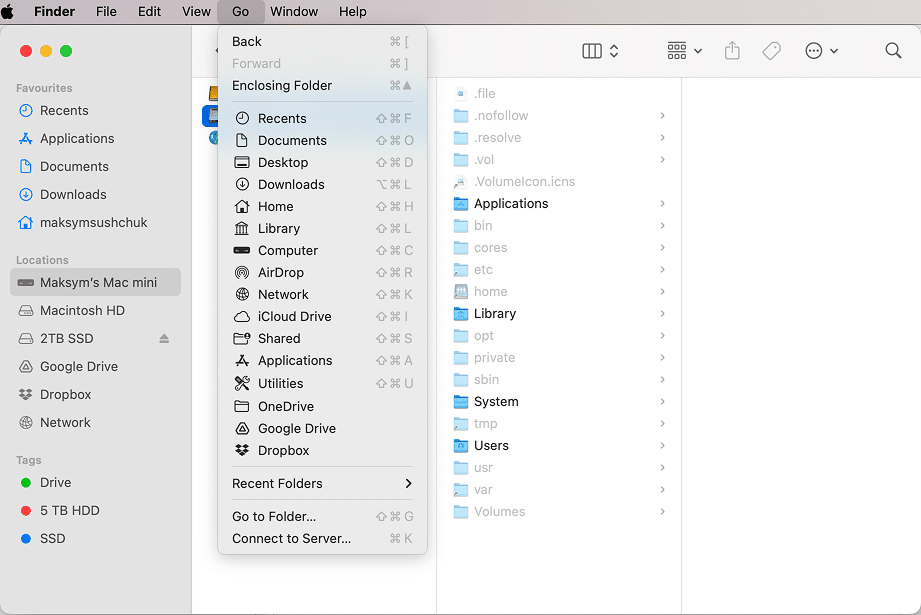
- In Finder, click the Go menu in the top menu bar.
- Press and hold the Option (Alt) key to see the Library option in the list if it’s still not there.
- Click Library to open ~/Library.
Now you can proceed to navigating to the following files and folders and remove them:
Application Support and Scripts
These contain sync databases, Dropbox update helpers, and Finder integration components.
~/Library/Application Support/DropboxCopy
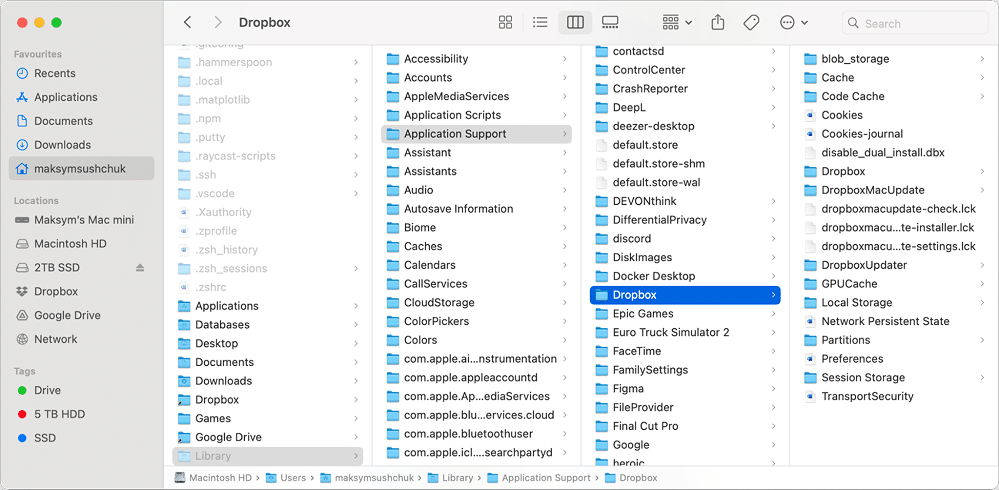
~/Library/Application Support/DropboxElectronCopy
~/.dropboxCopy
~/Library/Application Scripts/com.getdropbox.dropbox.garconCopy
~/Library/Application Scripts/com.getdropbox.dropbox.fileproviderCopy
~/Library/Application Scripts/G7HH3F8CAK.com.getdropbox.dropbox.syncCopy
~/Library/Application Scripts/com.getdropbox.dropbox.TransferExtensionCopy
~/Library/Application Scripts/com.dropbox.client.crashpadCopy
~/Library/HTTPStorages/com.getdropbox.DropboxMetaInstallerCopy
~/Library/HTTPStorages/com.getdropbox.DropboxMetaInstaller.binarycookiesCopy
Crash Reports
These are technical logs stored by Dropbox’s update process.
~/Library/Caches/com.plausiblelabs.crashreporter.data/com.dropbox.DropboxMacUpdateCopy
Preferences
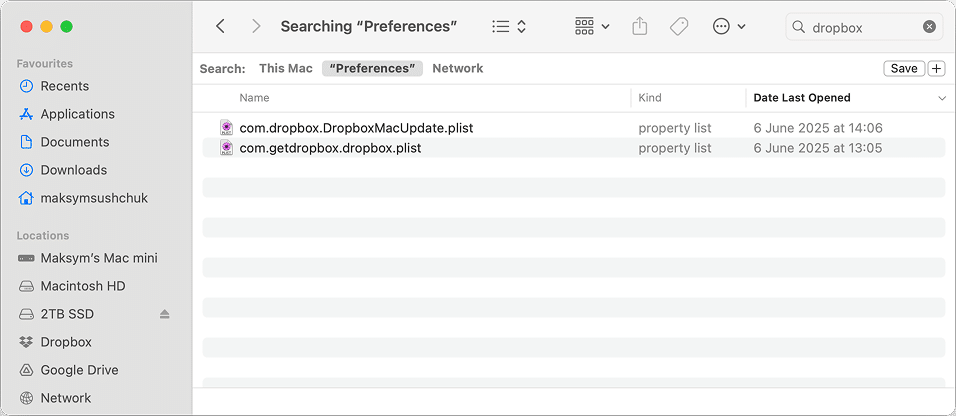
Preferences files store app settings and identifiers that can persist even after uninstallation.
~/Library/Preferences/com.dropbox.DropboxMacUpdate.plistCopy
~/Library/Preferences/com.getdropbox.dropbox.plistCopy
Caches and Saved States
On Mac, clear Dropbox cache by removing the files and folders below. They’re used to speed up app loading, store temp data, and keep recent activity lists.
~/Library/Application Support/com.apple.sharedfilelist/com.apple.LSSharedFileList.ApplicationRecentDocuments/com.getdropbox.dropboxmetainstaller.sflCopy
~/Library/Caches/com.getdropbox.dropboxCopy
~/Library/Caches/com.getdropbox.DropboxMetaInstallerCopy
~/Library/Saved Application State/com.getdropbox.DropboxMetaInstaller.savedStateCopy
Containers and Group Containers
Dropbox services like file previews, Finder overlays, and system extensions are sandboxed into these folders.
~/Library/Containers/com.getdropbox.dropbox.garconCopy
~/Library/Containers/com.getdropbox.dropbox.fileproviderCopy
~/Library/Containers/com.getdropbox.dropbox.TransferExtensionCopy
~/Library/Group Containers/com.getdropbox.dropbox.garconCopy
~/Library/Group Containers/G7HH3F8CAK.com.getdropbox.dropbox.syncCopy
~/Library/Group Containers/com.dropbox.client.crashpadCopy
Logs and Cookies
These files contain information about Dropbox activity and session data.
~/Library/Logs/Dropbox_debug.logCopy
~/Library/Cookies/com.getdropbox.DropboxMetaInstaller.binarycookiesCopy
Kernel Extensions
This kind of file is located in the system-level /Library folder. To get there, follow the next steps:
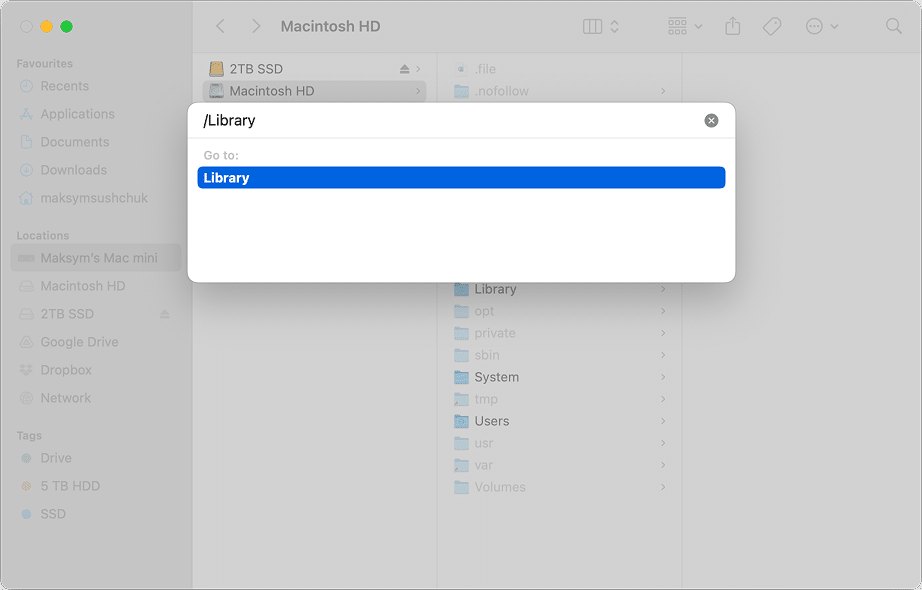
- In Finder’s Go menu, choose Go to Folder… (or press Shift + Command + G).
- Enter and press Return.
/LibraryCopy
You can repeat the “Go to Folder” step for any path mentioned here.
- Find and remove the following file.
/Library/Extensions/Dropbox.kextCopy
Note:
This file enables deeper system integration for features like Smart Sync. You may not have it if your version of macOS doesn’t support third-party kernel extensions by default (especially on M-series Macs). My M4 Pro Mac Mini does not have this file.
Dropbox Helper Tools and Extensions
These folders contain background processes and Finder integration components.
/Library/DropboxHelperToolsCopy
~/Library/DropboxCopy
~/Library/QuickLook/DropboxQL.qlgeneratorCopy
Removing them helps ensure no residual Dropbox data remains on your system.
Step 3: Empty Trash
After verifying that you’ve backed up any important files and you’ve removed only Dropbox-related folders, go ahead and empty the Trash.
Step 4: Restart your Mac
Restarting your Mac finalizes the removal by unloading any background services and completing the cleanup.
Quick method: Uninstall Dropbox using App Cleaner & Uninstaller
If you prefer a faster and safer way to remove Dropbox from your Mac, you can use App Cleaner & Uninstaller by Nektony. It automatically finds all support files Dropbox scatters across your system so you don’t have to dig through multiple Library folders manually.
This method is ideal if:
- You want to remove Dropbox completely without the risk of missing hidden files.
- You’re switching services and want a clean slate.
- Dropbox is acting up, and you plan to reinstall it from scratch.
Step 1: Launch App Cleaner & Uninstaller
If you don’t have it installed yet, download and open App Cleaner & Uninstaller.
It’s compatible with macOS 10.13 and later and supports both Intel and Apple Silicon Macs.
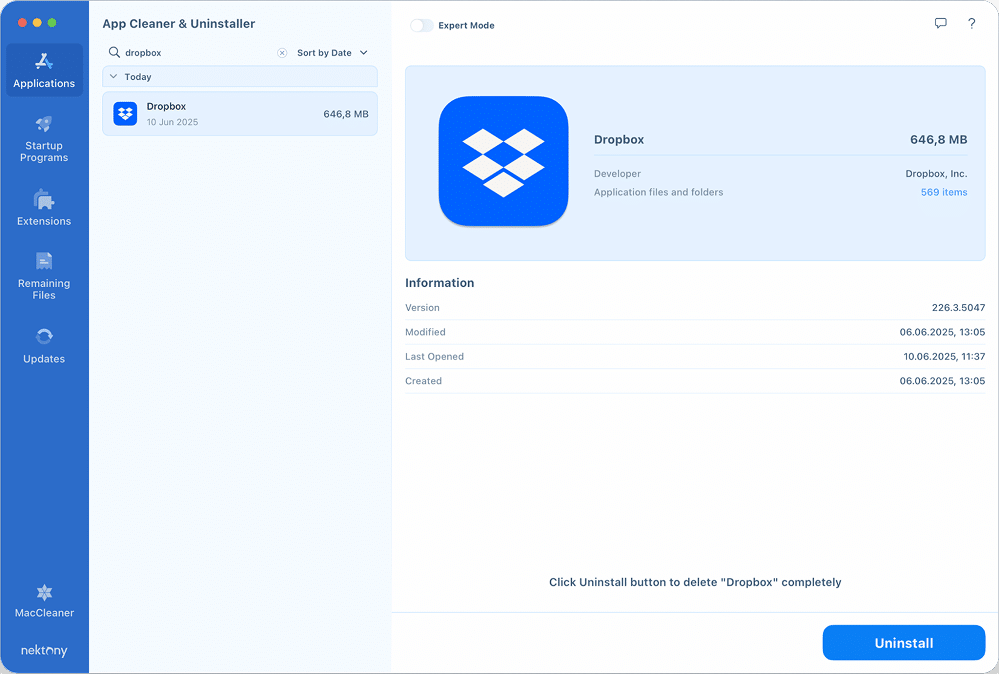
Step 2: Select Dropbox from the Applications list
Once the app opens, it automatically scans your Mac for installed apps and opens the Applications tab.
In the app list on the left, find and select Dropbox. The right panel will show quick information about the Dropbox version and dates when it was opened and modified.
Step 3: Review and remove all related files
You can either hit Uninstall or switch to the Expert mode to review the files that are to be deleted.
App Cleaner & Uninstaller should show you all the files and folders mentioned above. Once you have decided on the list of files and folders, click the Remove button.
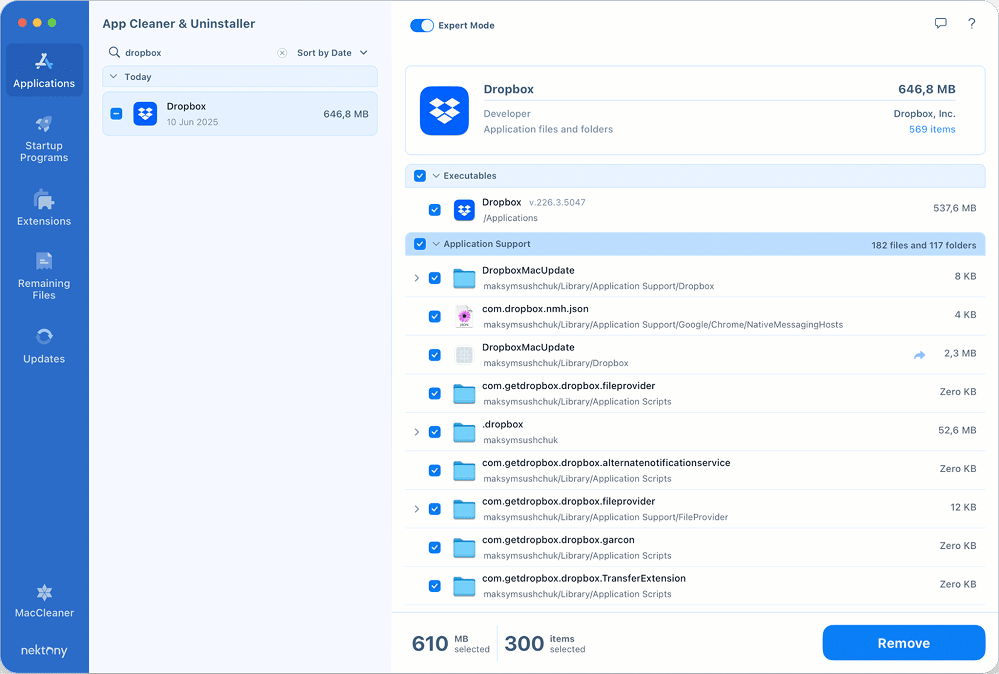
App Cleaner & Uninstaller will then move Dropbox and all its leftovers to the Trash in one go.
Note:
If you already trashed Dropbox and want to make sure no extra files are left behind, proceed to the Remaining Files tab in App Cleaner & Uninstaller to search for Dropbox leftovers there.
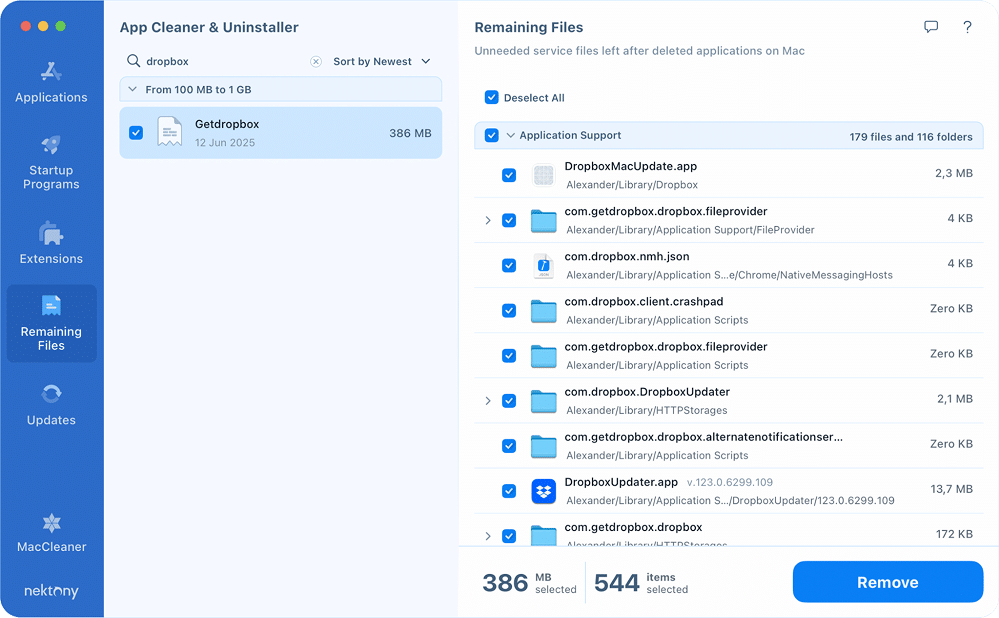
Step 4: Empty the Trash and restart
After removal:
- Empty your Trash to free up disk space.
- Restart your Mac to complete the cleanup, especially if any Dropbox background services were active.
How to remove Dropbox’s Finder extension
Dropbox installs a Finder extension that doesn’t always go away on its own. To remove it:
- Head to System Settings.
- Go to General → Login Items & Extensions.
- Open the File Providers list.
- You may find Dropbox listed there. Disable it.
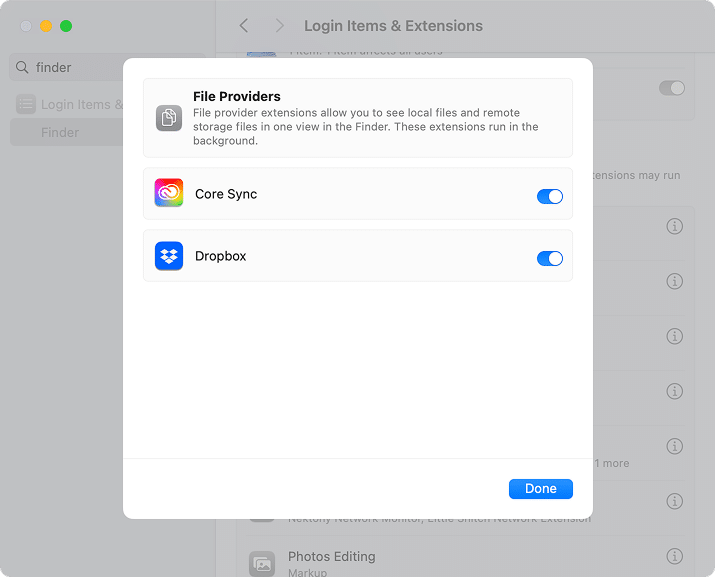
Final note: a few things to double-check
Over the years, I’ve seen people trying to uninstall Dropbox thinking it’s just another app you can throw into the Trash. But the reality is a bit more nuanced. Dropbox is more than an app. It’s where your files live, and depending on how long you’ve been using it, it may be woven pretty deeply into your system.
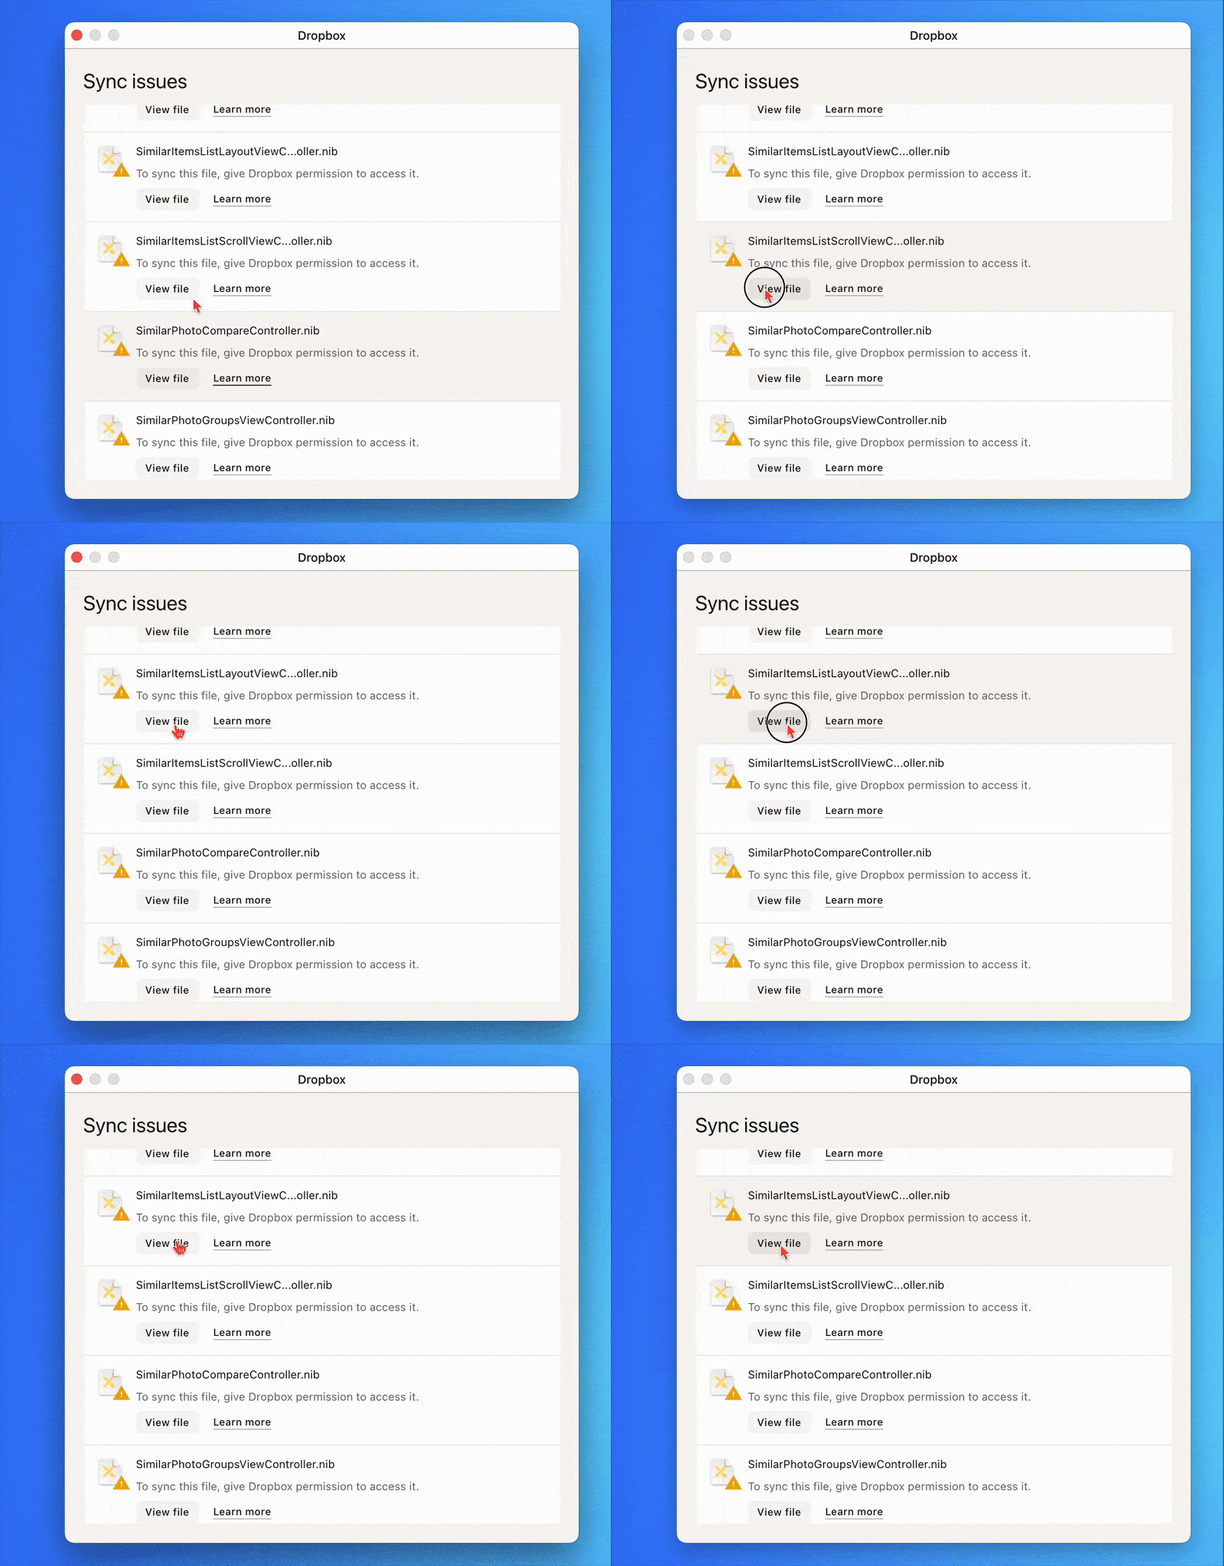
While researching this guide, I came across plenty of cases where people ran into unexpected issues with file syncing. Some files didn’t upload due to access issues. Others didn’t download from the cloud. And it’s easy to forget whether removing files from the local Dropbox folder should cause them to disappear from the cloud or not.
There’s a lengthy guide from Dropbox explaining when and why these problems happen. My point here is, they do happen.
So here’s the takeaway:
Make sure all your important data is truly exported and saved somewhere else before you uninstall Dropbox. Double-check both your cloud and local folders. Don’t rely on assumptions. Especially if you’re moving to another service, get the transfer right before you clean up.
Once you’re confident everything’s backed up and Dropbox is gone from your system, you can safely delete the local ~/Dropbox folder. It usually stays behind as a last copy of your files, a kind of safety net.
When all that’s done, you’ll know you’ve truly removed Dropbox. Cleanly, safely, and without surprises.
