July 24, 2025
4 Ways to uninstall GlobalProtect from Mac
For most of us, GlobalProtect ends up on our Macs through work or uni. It’s a VPN app that quietly runs in the background, doing its thing… until you no longer need it and realize it doesn’t want to leave.
I’ve seen it cause update errors, clash with other network tools, or keep showing login prompts even after being “deleted.” If you’re in the same boat, this guide will help you uninstall GlobalProtect properly.
This Article Contains
A quick solution
Short on time? App Cleaner & Uninstaller by Nektony offers the easiest way to get rid of GlobalProtect and all its support files. With just a few clicks, they’re gone.
When you should uninstall GlobalProtect from Mac
Before we dive into removal methods, let’s be clear: GlobalProtect is a reliable piece of software.
As Mario Queiroz, executive vice president at Palo Alto Networks, puts it:
Palo Alto Networks secures some of the world’s largest companies, banks, hospitals, and the rest of our 85,000 worldwide customers.
That said, even the most trusted apps may need to be removed, especially when they misbehave, overstay their welcome, or block other software from working properly.
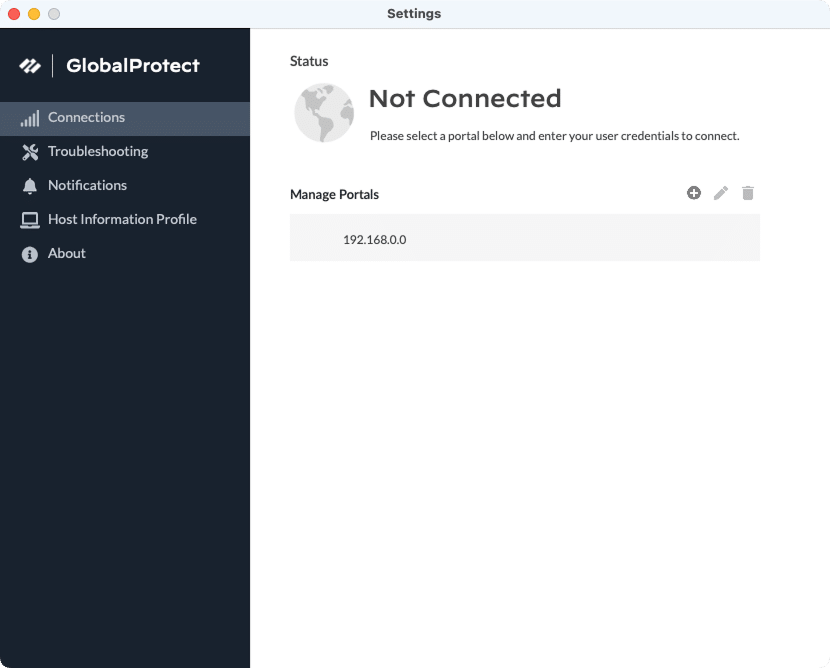
Here are the most common reasons why you might need to uninstall (and then reinstall) GlobalProtect from your Mac:
- The app doesn’t launch or crashes at startup. Often caused by file corruption, failed updates, or macOS compatibility issues.
- You’re stuck approving system extensions. macOS may fail to prompt you for necessary permissions or refuse to load GlobalProtect’s kernel extensions at all.
- GlobalProtect stays on “Connecting…” or “Discovering portal…” forever. This can be due to DNS cache issues, outdated certificates, or broken config files.
- You see installation errors like “gpAppPlugin missing” or “Unable to install gpService.” Usually happens when leftover files interfere with new installs or updates.
- VPN connects, then instantly disconnects. Most likely caused by conflicting certificates, Keychain permission issues, or broken internal libraries.
- Background services like gpDaemon refuse to start. Errors in the system logs or console usually point to broken launch daemons or helper tools.
- Conflicts with other VPN clients or network extensions. Especially common when GlobalProtect is installed alongside Cisco AnyConnect, WireGuard, or other NE-based VPNs.
- Permission issues prevent access to necessary folders or settings. This may include Full Disk Access or Accessibility permissions that were denied or misconfigured.
- You get certificate-related errors like “Failed to download gateway certificates.” Often due to cached or invalid certs stored in the system or app preference files.
- The VPN tunnel drops every time your Mac wakes from sleep. Sometimes tied to Power Nap, launch scripts, or background process issues.
How to completely uninstall GlobalProtect from your Mac
GlobalProtect can be tricky to remove, and many users on forums like MacRumors have reported issues with leftover components even after deleting the app. Dragging it to the Trash alone won’t get rid of all background processes, system files, or kernel extensions. Below are four proven methods to uninstall it properly.
Here’s how they differ:
| Feature / Method | Official installer | Built-in script | Manual removal | App Cleaner & Uninstaller |
|---|---|---|---|---|
| Removes the app itself | ✅ Yes | ✅ Yes | ✅ Yes | ✅ Yes |
| Removes background services | ✅ Yes | ✅ Yes | ⚠️ Requires locating and deleting them manually | ✅ Yes |
| Deletes system extensions and login items | ✅ Yes | ❌ No | ⚠️ Requires locating and deleting them manually | ✅ Yes |
| Cleans logs, caches, and preferences | ❌ No | ❌ No | ⚠️ May leave residual files | ✅ Yes |
| Removes all user data and configs | ✅ Yes | ⚠️ May leave residual files | ⚠️ May leave residual files | ✅ Yes |
| Time to complete | ⚡ Fast (under 1 minute) |
⏳ Medium (1–3 minutes) |
🕒 Slow (5–10+ minutes) |
⚡ Fast (under 1 minute) |
| Beginner-friendly | ✅ Yes | ⚠️ Somewhat | ❌ No | ✅ Yes |
| Fits best for | Users with access to the original installer | Advanced tech users | Advanced tech users | Anyone who wants a quick and safe removal |
Select the one that fits your needs most and proceed to its description below.
Method 1: Delete GlobalProtect using the official installer
If you still have the original GlobalProtect installer package (.pkg) from when you first set up the app, you can use it to safely remove everything, just like the developers intended.
Here’s how to do it:
- Locate the original installer. You’ll need the exact .pkg file you used to install GlobalProtect. If you don’t have it, try checking your Downloads folder.
- Double-click the installer.
- Click Continue until you reach the Installation Type step.
- Click the Uninstall button.
- Enter your administrator password when prompted.
- Finish the process and restart your Mac. This ensures all launch daemons, services, and background components are properly removed.
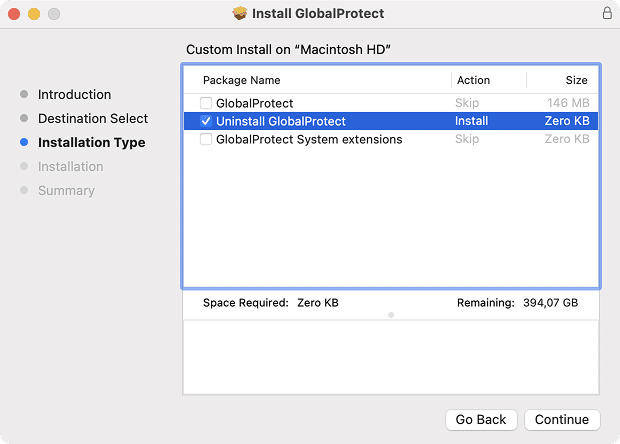
This method is safe and officially supported, but it’s not accessible if you no longer have the installer. Additionally, it doesn’t remove logs, caches, or preferences. So, consider using one of the methods below.
Method 2: Execute the built-in script
Another way to get rid of GlobalProtect is by running the official script that comes bundled with the app. This method has existed for several years on Stack Overflow already and has proven its reliability. Here’s how to do it:
- Open Terminal (use Spotlight or find it in Applications → Utilities).
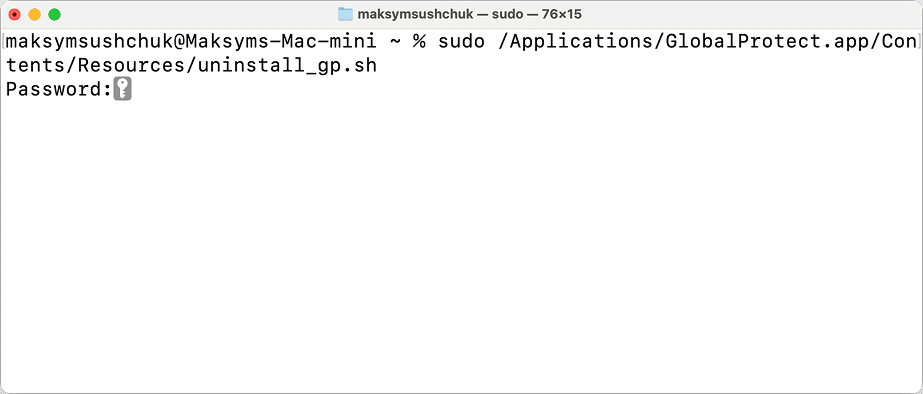
- Enter the following command and press Return:
sudo /Applications/GlobalProtect.app/Contents/Resources/uninstall_gp.shCopy
- Enter your admin password when prompted.
(You won’t see any symbols when you type a password in Terminal; this is intended behavior.)
This script will automatically remove the client and delete background service components.
Method 3: Remove GlobalProtect manually
If the script fails or you want to be 100% sure that nothing remains, you can manually delete the associated files and folders.
Note:
This method was tested with GlobalProtect 6 on macOS 15. The files in this list may be absent or have different names in the case of other (especially older) versions of GlobalProtect.
- Quit the app first via Activity Monitor (it’s an important step to prevent an issue “Can’t Trash the app because it’s open.”)
- Go to the Applications folder → locate and trash GlobalProtect.
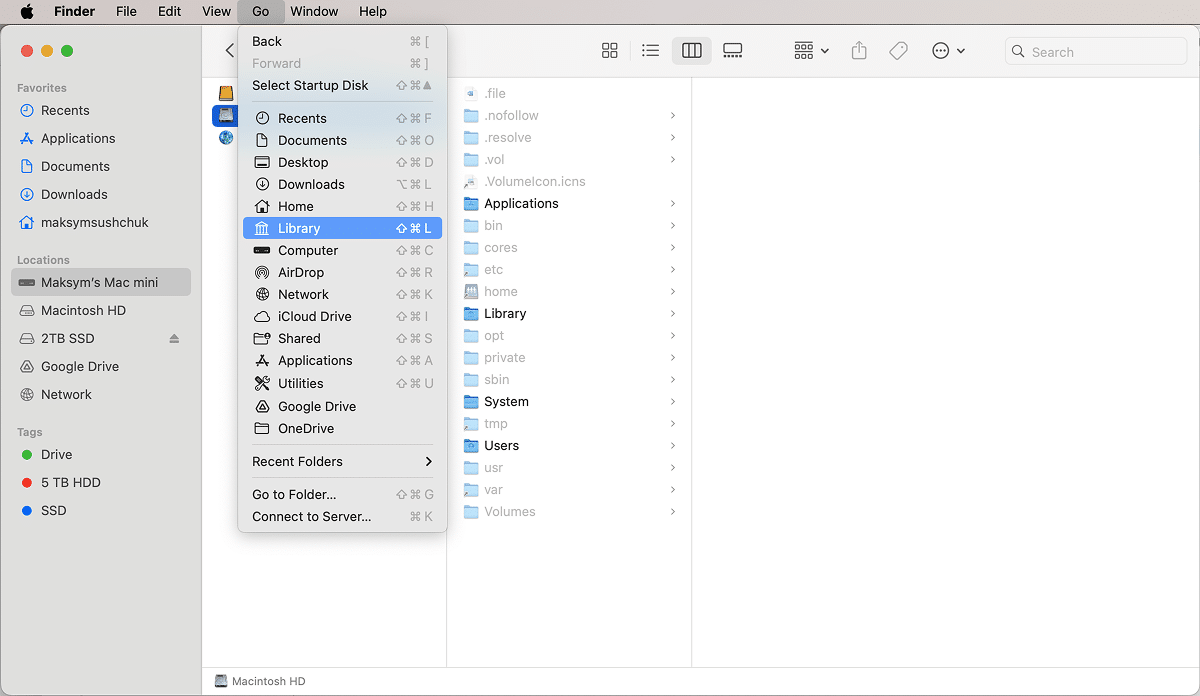
- Navigate to the ~/Library folder. For this, click Go in the menu bar → hold down the Option key and click Library.
- Now you need to remove the following files and folders in the Library folder:
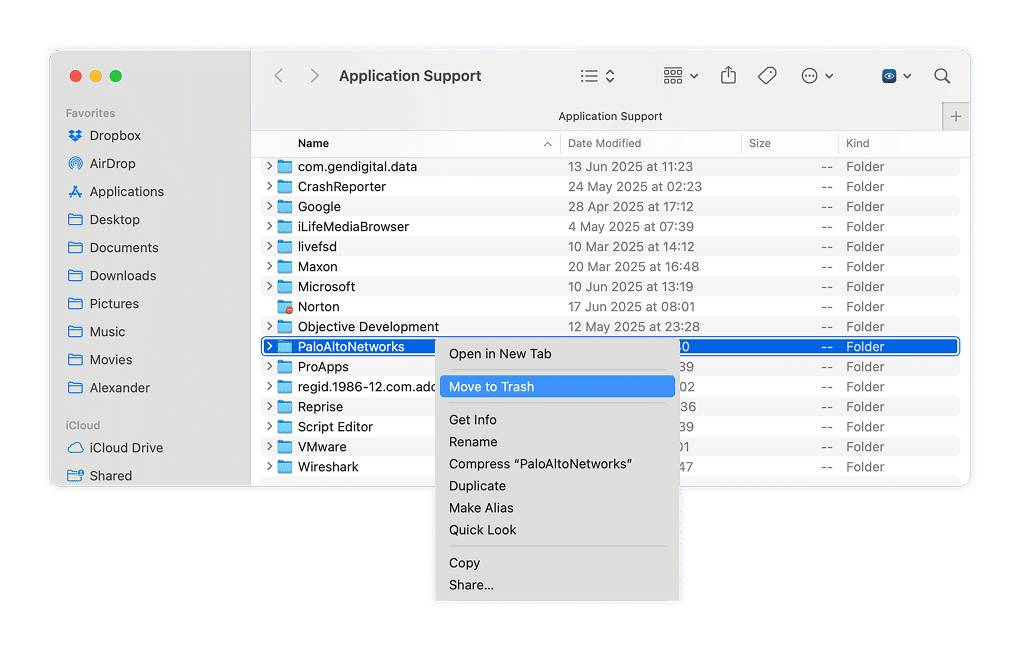
~/Library/Application Support/PaloAltoNetworksCopy
~/Library/Application Support/GlobalProtectCopy
~/Library/Application Scripts/group.com.paloaltonetworks.globalprotect.vpnCopy
~/Library/Caches/PanGPSCopy
~/Library/Preferences/com.paloaltonetworks.GlobalProtect.settings.plistCopy
~/Library/Preferences/com.paloaltonetworks.GlobalProtect.client.plistCopy
~/Library/Logs/PaloAltoNetworksCopy
~/Library/Containers/E42D22B1-822F-4305-8F92-E2EAA7E36C42/Data/Library/Saved Application State/com.paloaltonetworks.globalprotect.vpn~iosmac.savedStateCopy
~/Library/Containers/396BC6B4-61EC-492A-8AF2-A4316905A679/Data/Library/Caches/com.paloaltonetworks.globalprotect.vpn.extensionCopy
~/Library/Group Containers/group.com.paloaltonetworks.globalprotect.vpnCopy
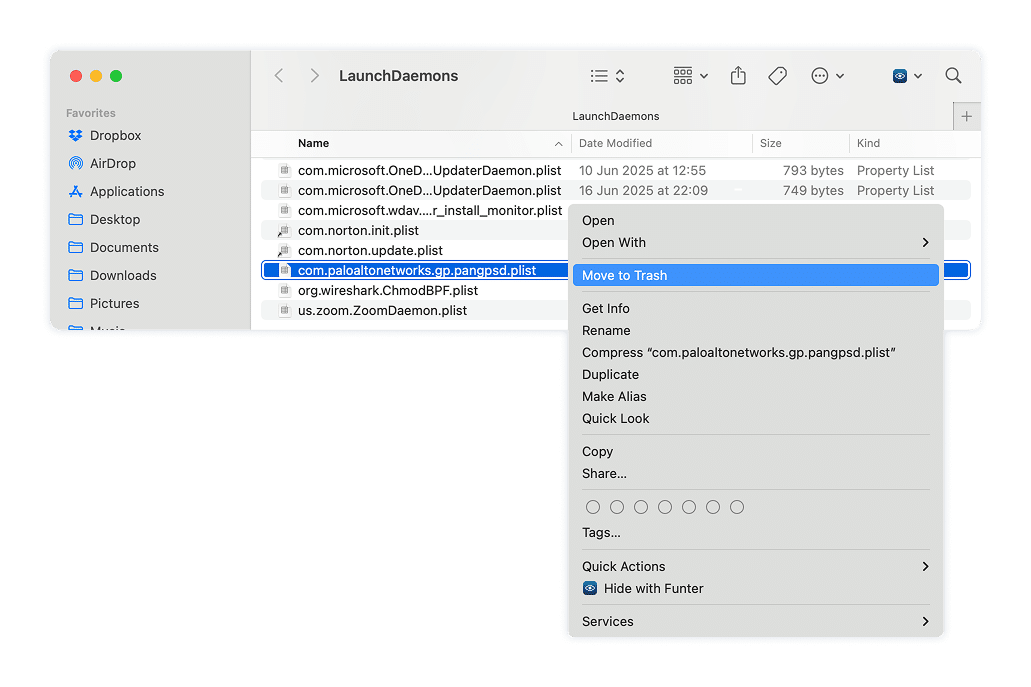
- Now let’s head to /Library. Unlike the users’ ~/Library, /Library is the system’s folder available in the root of your system disk. In Finder, press Cmd+Shift+G → navigate to the following files and folders and remove them:
/Library/PrivilegedHelperTools/com.paloaltonetworks.gpserviceCopy
/Library/Application Support/PaloAltoNetworksCopy
/Library/Logs/PaloAltoNetworksCopy
/Library/Preferences/com.paloaltonetworks.GlobalProtect.settings.plistCopy
/Library/LaunchAgents/com.paloaltonetworks.gp.pangps.plistCopy
/Library/LaunchAgents/com.paloaltonetworks.gp.pangpa.plistCopy
/Library/LaunchDaemons/com.paloaltonetworks.gpservice.plistCopy
/Library/LaunchDaemons/com.paloaltonetworks.gp.pangpsd.plistCopy
- The last folder to go to is /private/var (use the same approach as in the previous step to access it). Delete the following files there:
/private/var/run/PanGPS.pidCopy
/private/var/db/receipts/com.paloaltonetworks.globalprotect.pkg.plistCopy
/private/var/db/receipts/com.paloaltonetworks.globalprotect.pkg.bomCopy
- At the very end of these file manipulations, restart your Mac as per Apple’s recommendations.
Method 4: Delete GlobalProtect instantly with App Cleaner & Uninstaller
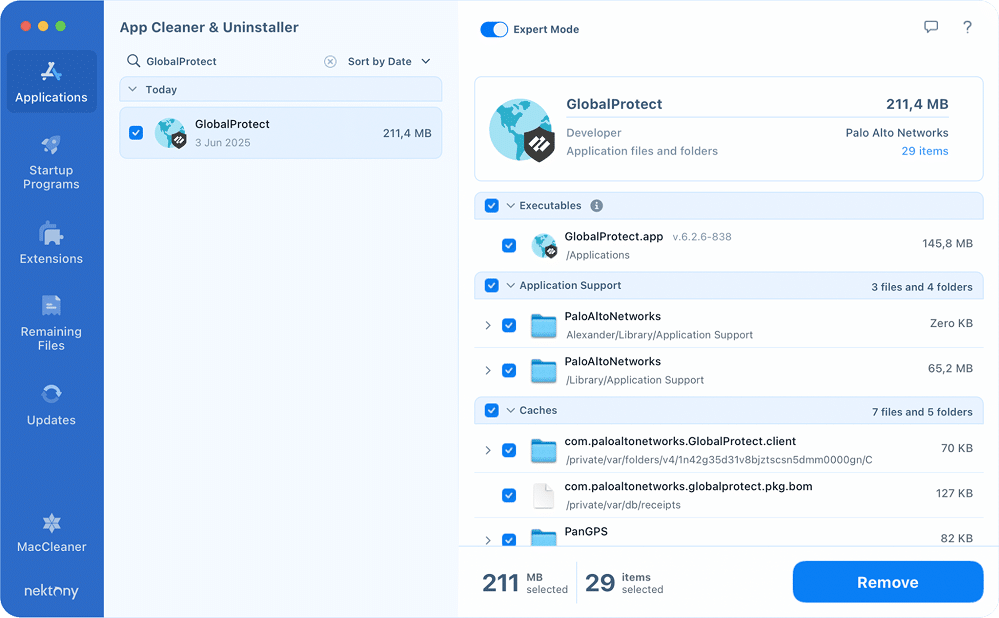
If you want the easiest and fastest way to remove GlobalProtect and all its traces, use App Cleaner & Uninstaller from Nektony. It finds all related files and deletes them in a few clicks, so no need to dig through system folders or run Terminal commands.
Here’s how to do it:
- Open App Cleaner & Uninstaller.
-
Find and select GlobalProtect in the list of applications.
The tool automatically scans your Mac and displays all installed apps, so you can immediately find GlobalProtect in the list.Optional: Enable Expert Mode if you want to see exactly and review what is about to be deleted via the toggle in the upper part of the screen.
- Click “Remove” (Or “Uninstall” if you’re not in Expert mode).
- Confirm the action.
GlobalProtect and all of its components will be removed in seconds. - Empty your Trash.
This completes the uninstallation process.
How to reset GlobalProtect
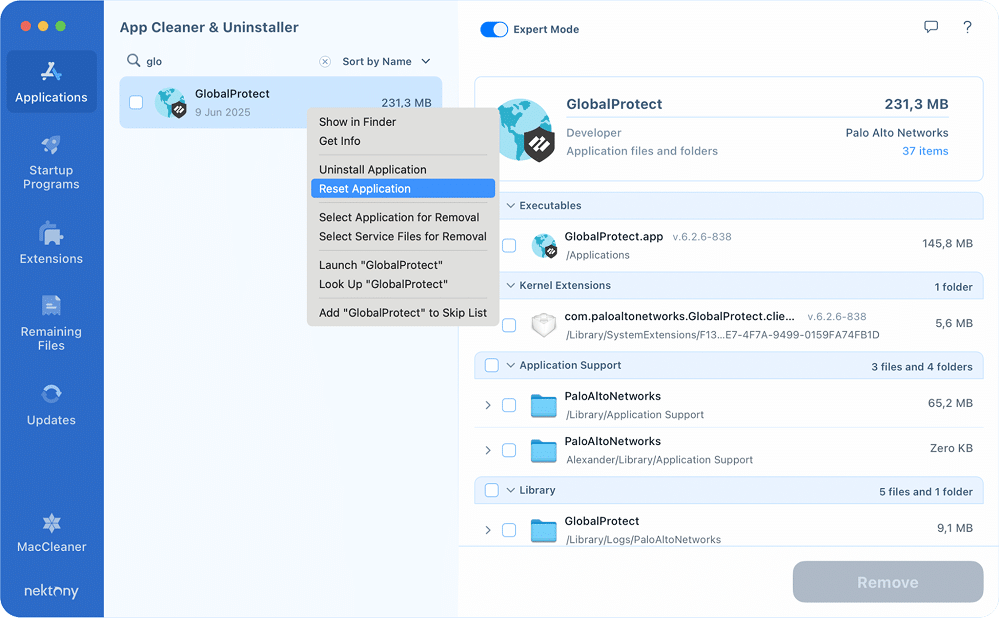
If your goal is just to fix the problem with GlobalProtect, instead of uninstalling and reinstalling it, you can reset it, which is basically the same. For that, when you find GlobalProtect in the list of applications in App Cleaner & Uninstaller, right-click it and select Reset Application.
How to remove GlobalProtect residual files
If you’ve already deleted the app manually and only want to remove the leftovers, search for them in the Remaining Files tab instead.
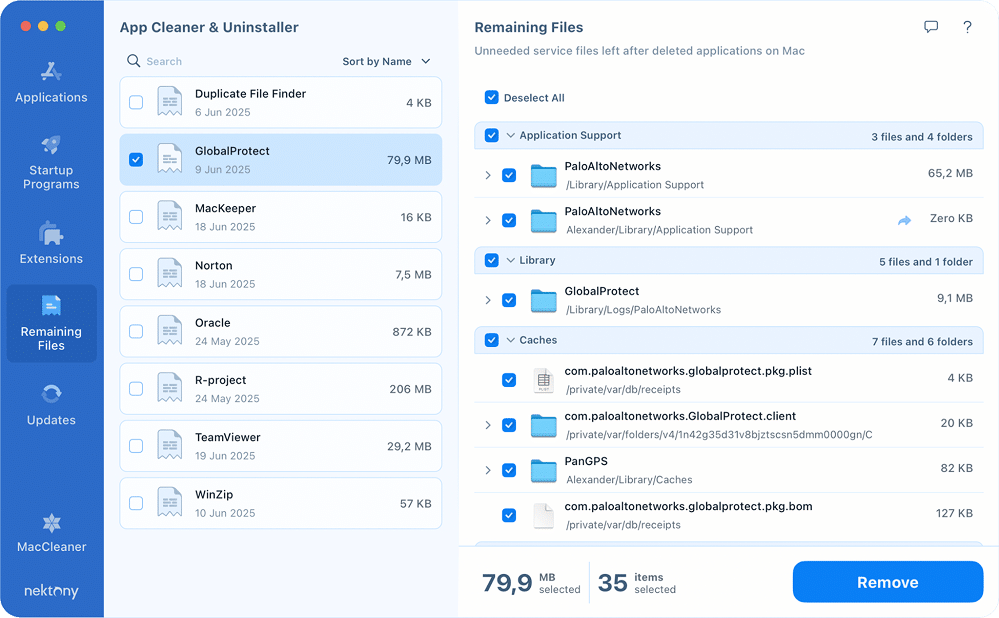
App Cleaner & Uninstaller ensures a deep, clean uninstall – ideal if you want to make sure nothing is left behind.
A final thought
Whether you’re troubleshooting connection errors or just parting ways with your workplace or university, a clean uninstall of GlobalProtect is often the best way forward. In many cases, reinstalling the app after a proper removal can fix such stubborn issues as failed updates, endless “Connecting…” messages, broken permissions, system conflicts, and more.
If you no longer need GlobalProtect, uninstalling it thoroughly ensures your Mac stays clean and future VPN tools work without interference. Also, if you’re looking for an alternative, check out our VPN Client.
One important note: since GlobalProtect provides access to secured networks, you may need login credentials or access keys to reconnect after reinstalling. Before proceeding, make sure you won’t lose anything critical in the process. We’ve covered this and other common concerns in the FAQ section below.
