


August 14, 2025
How to uninstall MacKeeper from Mac
Share

Sometimes, keeping your Mac tidy means removing the very apps that promise to do it for you.
MacKeeper is a perfect example. While it claims to clean and optimize your Mac, many users discover it does the opposite. That alone can feel unsettling and is often the reason people decide to remove it.
In this guide, I’ll show you exactly how to uninstall MacKeeper safely and completely.
This article contains:
A simpler way to remove MacKeeper
MacKeeper’s own uninstaller runs quietly in the background, leaves components behind, and doesn’t always explain what it’s doing. If you’d rather skip the uncertainty, App Cleaner & Uninstaller by Nektony gives you full control. It finds, shows, and removes everything MacKeeper leaves behind in just a few clicks.
Why so many people choose to remove MacKeeper
I tried using MacKeeper version 6.8 on macOS Sequoia in 2025. Honestly, it didn’t go well.
Right after installation, the app froze on the initial scan, while a background process called “MacKeeper Agent” started eating up over 500% of the CPU.
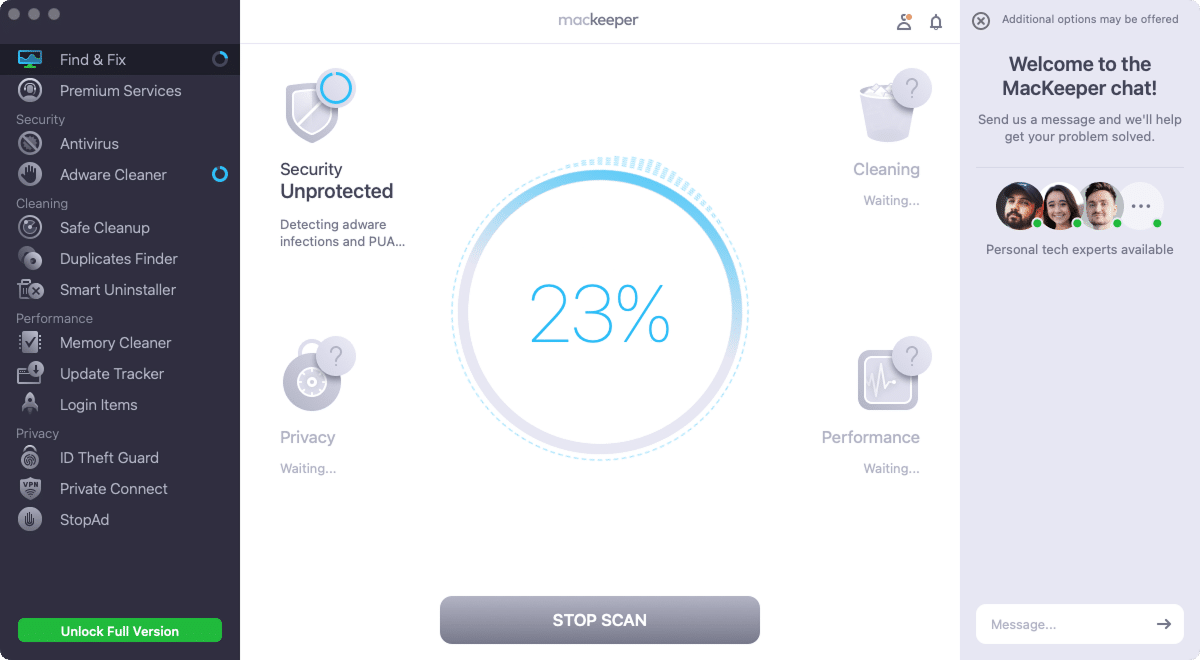
I reached out to support through the app, and their first suggestion was to reboot my Mac. That didn’t help.
Several restarts, agent resets, and permission toggles later, the scan finally moved past 24%. Not exactly the seamless optimization experience I expected.
Even when it worked, the interface felt clunky. Each tool launched its own scan, and everything took longer than it should on a nearly empty Mac.
And then there’s the pricing: premium support costs €58+/month, which is hard to justify for an app that stumbles on launch.
Unfortunately, my case isn’t unique. Complaints about MacKeeper’s performance and behavior have been circulating for years on Apple Discussions and Reddit. If you’re wondering whether you should keep it installed, you’re not alone.
That said, if you’ve already been using MacKeeper and something just broke, reinstalling it might actually fix the issue. Here’s when that makes sense.
When reinstalling MacKeeper might help
Sometimes, wiping MacKeeper and starting fresh is the fastest way to fix strange behavior.
If you’re running into any of these issues, a clean reinstall might be worth a shot:
- It won’t open or just freezes on launch
That usually points to broken internal files or a conflict with something else on your Mac. Reinstalling clears all that out. - MacKeeper refuses to update
Chances are its services or configuration files are broken. A full uninstall and a fresh installer from the official website can usually fix it. - You’re getting constant “MacKeeper Helper quit unexpectedly” errors
It’s usually caused by damaged background services. Reinstalling takes care of those by clearing out old support files in,~/Library/Application Support/Copy
, and~/Library/Preferences/Copy
. A full reinstall saves you from doing that manually.~/Library/Launch Agents/Copy
- It’s slowing things down or conflicting with other apps
This problem could be a conflict with its background modules. Try uninstalling it, then reinstalling only the features you really need. - Cleanup tools aren’t working properly
Whether it’s file removal errors, scan failures, or cache cleanup that never finishes, these issues often come down to permission problems. A clean reinstall (with a reboot in between) usually resets access and gets things working again.
Read on to find out how you can uninstall it before reinstallation.
Three ways to uninstall MacKeeper on a Mac
Currently, there are three ways to remove MacKeeper. Each method varies in completeness, effort, and transparency. Use the table below to quickly compare and decide what suits you best.
| Method | Removes all files? | Transparency & safety | Recommended for… |
|---|---|---|---|
| Trashing the app | ❌ Only partially | ⚠️ Low (runs hidden tasks) |
Users who prefer speed over thoroughness |
| Manual uninstallation | ✅ Yes (if thorough) |
❌ Risk of deleting files that disrupt the system. | Tech-savvy users familiar with the Library file structure. |
| Using a third-party tool | ✅ Yes | ✅ Transparent, guided | Anyone who wants fast, complete, and safe removal |
What each method involves
- Trashing the app
Move MacKeeper to the Trash to launch the official uninstallation process. Some service files are removed automatically, but many are left behind. - Manual uninstallation
You’ll need to delete MacKeeper manually, then search for and remove its leftover files from various system folders. That will take some time. - Using App Cleaner & Uninstaller
Open the tool and let it find and remove all MacKeeper-related components in just a few clicks.
Choose the method you prefer and scroll to follow it.
Uninstall MacKeeper by trashing the app
This is the most straightforward way to remove MacKeeper. At least on the surface.
During testing, I found that this method behaves differently from what the official guide says. It quietly triggers a built-in uninstaller and browser redirects, and still leaves files behind. Here’s exactly what happens and what to do:
Step 1. Move MacKeeper to the Trash
- Open your folder.
ApplicationsCopy
- Locate MacKeeper.
- Drag it to the Trash or right-click and choose Move to Trash.

- Once you do this, your system will likely show a prompt asking for permission for MacKeeperUninstaller.app to control other apps. This helper tool activates the moment the main app is trashed.


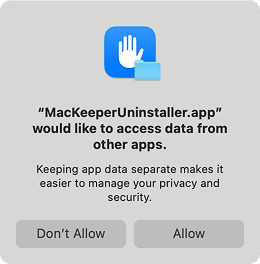
Step 2. Handle the access request
- Click Allow when prompted.
- The system will launch your default browser and open a “Sad to see you go…” webpage.

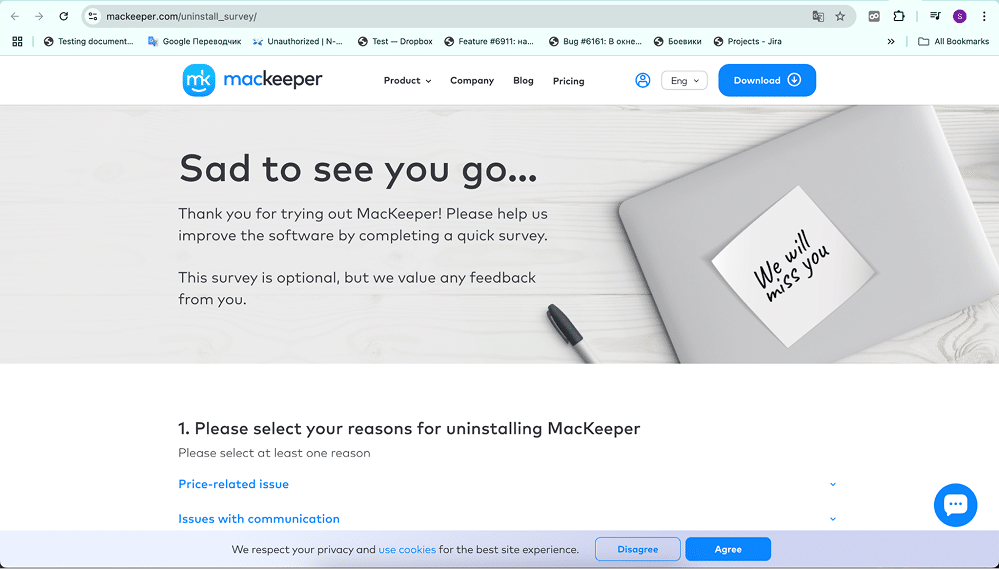
At this point, MacKeeper silently removes some of its service files without showing you exactly what it’s doing.
Step 3. Restart Your Mac
Even after this background cleanup, the uninstaller itself remains on your Mac (typically inside a temporary system cache). It disappears only after the next reboot.
Rebooting ensures the temporary cache is cleared and any leftover uninstaller components are unloaded from memory.
Note:
This method still won’t remove everything unless you do a deeper manual cleanup (see steps 3–5 in the next section) or use a specialized tool (see section Uninstall MacKeeper using App Cleaner & Uninstaller).
Uninstall MacKeeper manually
Manual removal gives you full control over what stays and what goes. Just follow the steps carefully to ensure MacKeeper is fully wiped from your Mac.
Step 1. Quit MacKeeper and stop background processes
- Open Activity Monitor.
- Search for .
mackeeperCopy
- Click the X button to force quit any related processes including ,
MacKeeperCopy
, orMacKeeperAgentCopy
.MacKeeper NetworkingCopy

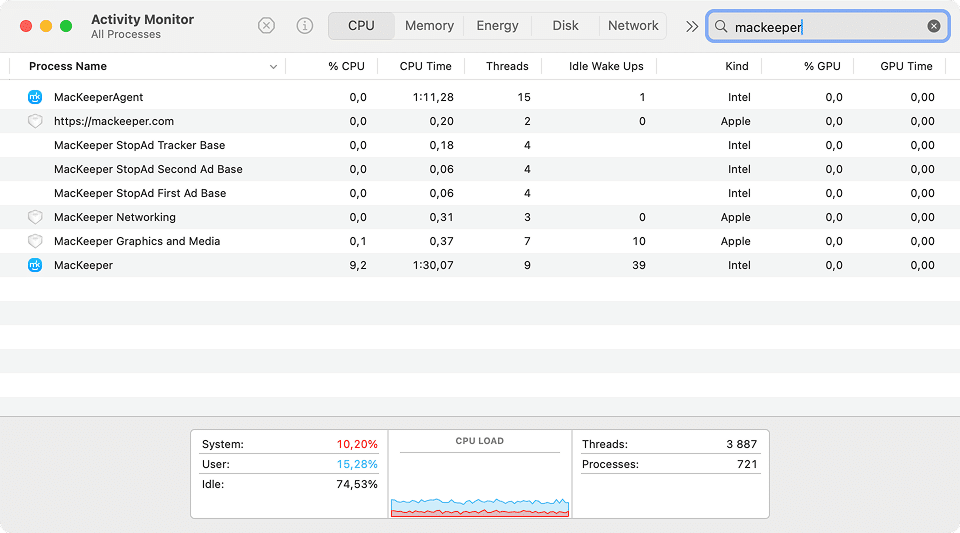
This prevents MacKeeper and its background tasks from relaunching or blocking file deletion.
Step 2. Delete the MacKeeper app
- Go to your Applications folder.
- Move MacKeepero the Trash.
- You might be prompted to enter your admin password.
Note:
Trashing the app may trigger a built-in helper (MacKeeperUninstaller.app), which removes some files and opens a browser window as explained in the previous method. However, many components will still remain.
Step 3. Remove MacKeeper files from ~/Library
~/Library
Copy
How to use path
- Open Finder, then choose Go → Go to Folder from the top menu.
- Copy and paste the ~/Library path and press Return to open the folder.

64424ZBYX5
Copy
~/Library/Application Support/
Copy

~/Library/Application Scripts/Copy
~/Library/Caches/Copy
~/Library/Containers/Copy
~/Library/Group Containers/Copy
~/Library/Cookies/Copy
~/Library/HTTPStorages/Copy
~/Library/LaunchAgents/Copy
~/Library/Logs/Copy
~/Library/Preferences/Copy
~/Library/Saved Application State/Copy
~/Library/WebKit/Copy
~/MacKeeper BackupsCopy
Step 4. Delete MacKeeper files found in /Library
-
Open the
/LibraryCopy
How to use path
- In Finder, press Cmd + Shift + G to launch the Go to Folder dialog.
- Copy and paste the /Library path and hit Enter to navigate to it.

- Delete any leftover files from:
/Library/Application Support/Copy
/Library/LaunchDaemons/Copy
/Library/PrivilegedHelperTools/Copy
/Library/Preferences/Copy
-
You may also find, which was installed along with MacKeeper. It can be safely removed.
/Library/Application Support/vpnwholesaler/Copy

Step 5. Trash MacKeeper files stored in /private
-
Proceed to
/privateCopy
How to use path
- Copy this path: /private
- Open Finder, then click the Go menu at the top and select Go to Folder.
- Paste the path and press Return to access the folder.
- Look in the following locations and remove any matching files:
/private/var/db/receipts/Copy
/private/tmp/Copy
Files you’ll typically find here include:
com.mackeeper.MacKeeper.pkg.plistCopy
com.mackeeper.MacKeeper.pkg.bomCopy
com.mackeeper.adwareAnalyzer.pkg.*Copy
com.mackeeper.MacKeeper.Installer.configCopy
These are used for tracking installations and can be deleted safely.
Step 6. Restart your Mac
Once all components are removed, restart your Mac to finalize the cleanup and unload any remaining background services.
Uninstall MacKeeper using App Cleaner & Uninstaller
The fastest and most thorough way to remove MacKeeper is by using App Cleaner & Uninstaller by Nektony. It finds all support files, including those buried deep in the system, and deletes them safely.
If MacKeeper is still installed
- Open App Cleaner & Uninstaller.
- Find MacKeeper in the list of installed apps.
- Select it. To view all related files the app found, toggle the Expert Mode at the top.

- Click Remove, then confirm the deletion.
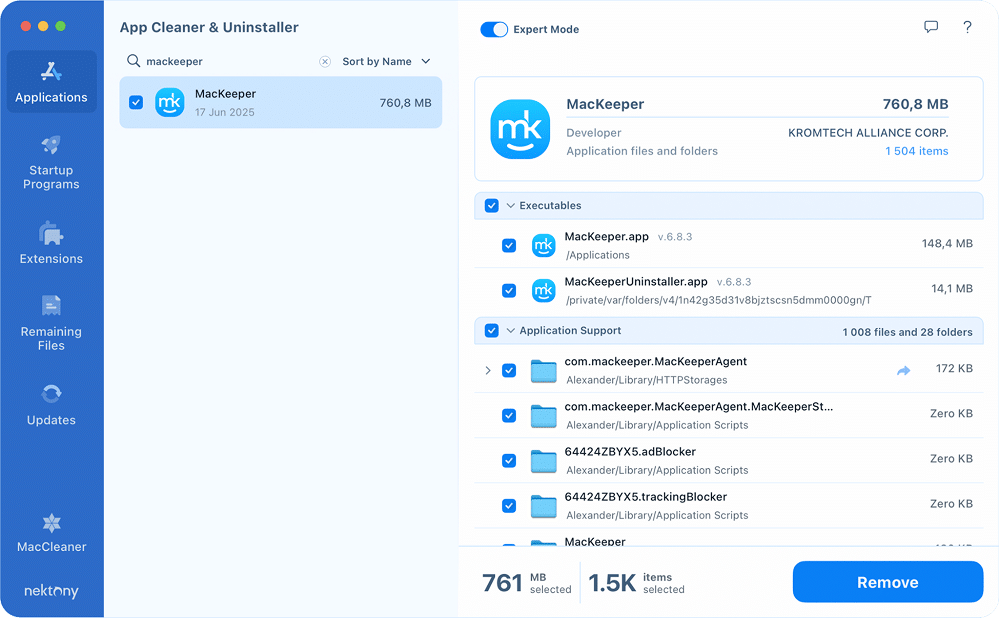
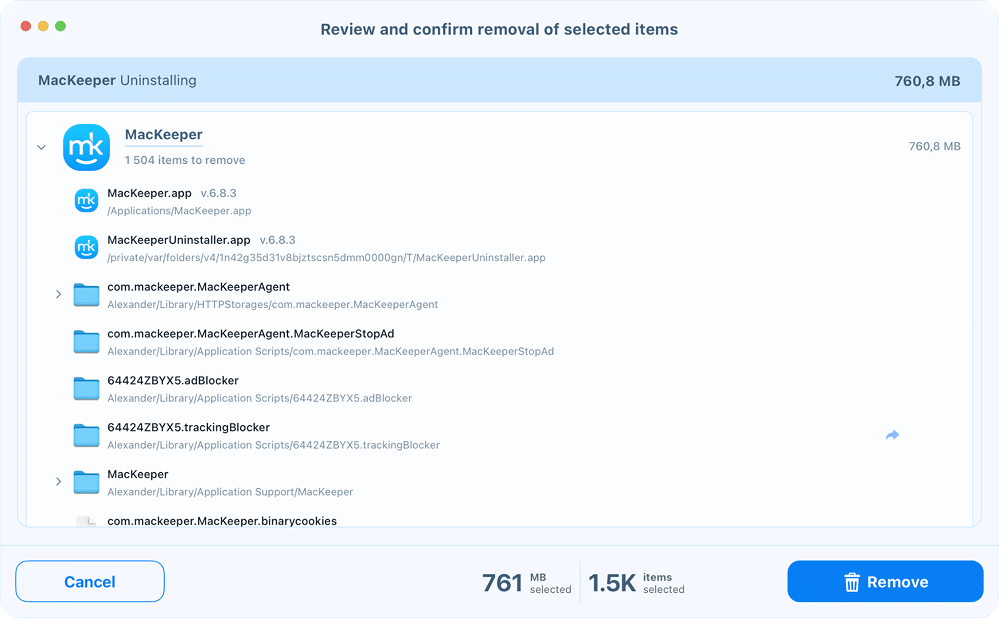
This removes the app along with logs, launch agents, caches, and more, all in one go.
If you already trashed MacKeeper
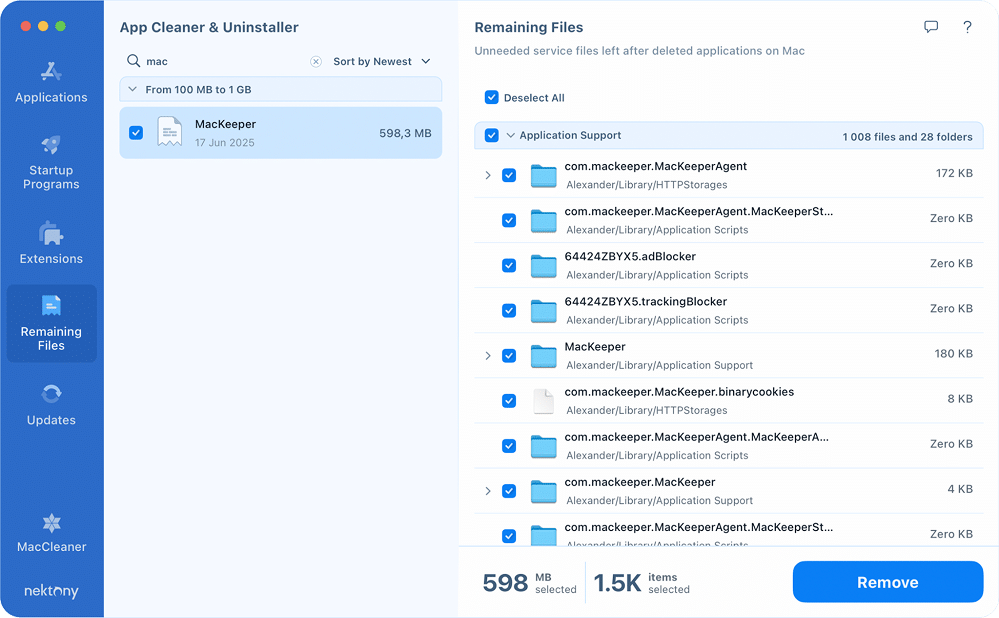
Service files stay behind even after moving the app to Trash. To remove them:
- Open App Cleaner & Uninstaller.
- Go to the Remaining Files section.
- Find MacKeeper in the list.
- Select it and click Remove.
If you want to fix MacKeeper without removing it
Instead of fully uninstalling the app, you can try resetting it:
- In App Cleaner & Uninstaller, right-click on MacKeeper.
- Click the Reset Application button.
- Confirm to remove all support files while keeping the app itself installed.
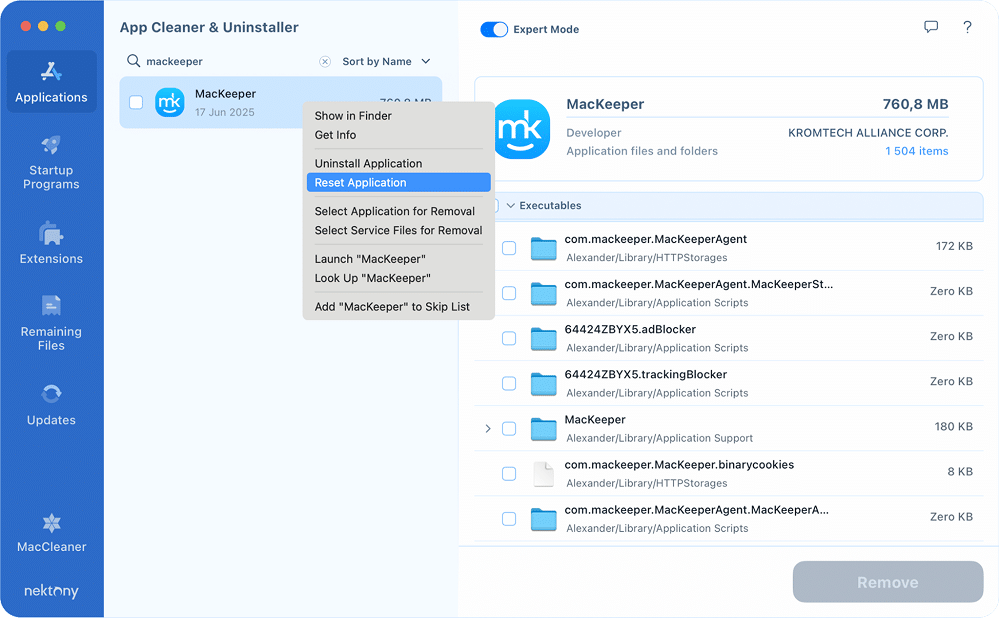
This often helps resolve issues like crashes, failed scans, or freezing, without needing to reinstall the app manually.
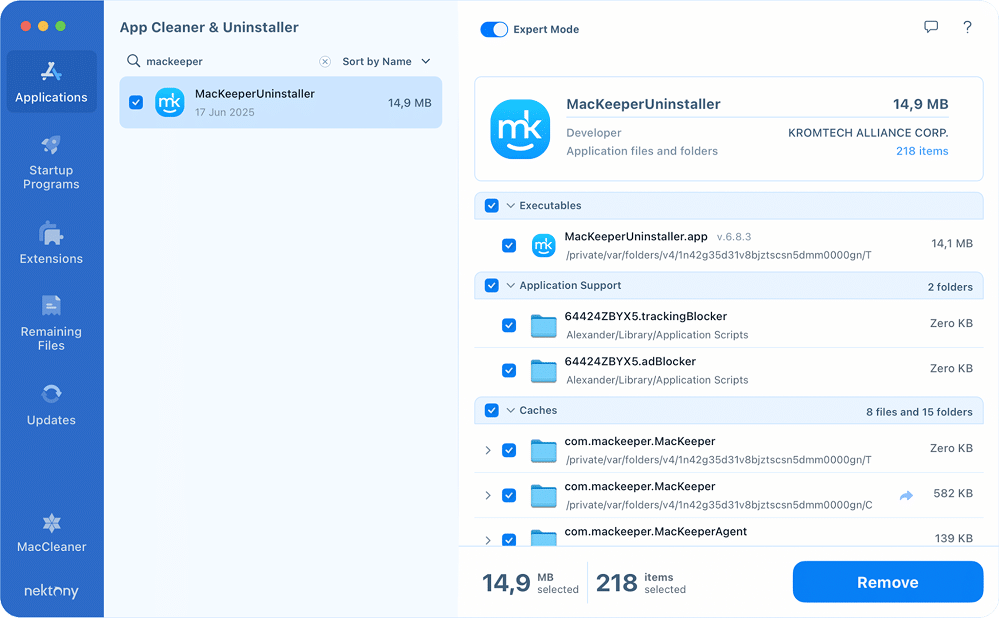
Don’t forget MacKeeper Uninstaller
After removing MacKeeper manually, its internal MacKeeper Uninstaller often shows up as a separate app. In my case, App Cleaner & Uninstaller detected it with 127 leftover files across 9 folders.
- If you see MacKeeper Uninstaller in the list of apps found by App Cleaner & Uninstaller, select it.
- Click Remove.
- Confirm deleting all associated files by clicking Remove in the next window.
That’s it!
Final thoughts
MacKeeper is one of many utilities that aim to clean and optimize your Mac. While it offers a broad feature set, the experience can feel overwhelming. The interface is packed with tools, pop-ups, and a support chat that appears to be less helpful than one can expect. For less tech-savvy users, that can be more confusing than helpful.
Interestingly, this complexity extends to how MacKeeper handles its own removal. The app launches background processes, opens browser tabs, and scatters leftover components across the system, which makes it harder to fully uninstall than it should be. In contrast, App Cleaner & Uninstaller manages to remove MacKeeper more cleanly than MacKeeper removes itself.
In the end, it’s not about how many features an app offers, but how reliably and transparently it performs the ones that matter. MacKeeper positions itself alongside tools like MacCleaner Pro, but in my view, less – when done right – can often be more.