In our previous post we explained how to use Siri on an iPhone. Today we want to share several tips on how to use Siri on a Mac.

Contents:
- 1. How to use Siri on a Mac
- – How to activate Siri on a Mac
- – How to start using Siri
- – How to set up “Hey Siri”
- – How to enable Type to Siri
- 2. How to use some Siri commands
- 3. Tips on how to use Siri results
How to Use Siri on a Mac
Siri, the virtual assistant that is part of Apple operating systems, operates using voice queries to answer questions and locate information. Not only is it simple to set up, but you can also train Siri to be more helpful and intuitive over time. It is really handy when you are working on your Mac and can simultaneously ask Siri to find some important information. Here are a few steps to get started using Siri.
How to Activate Siri on a Mac
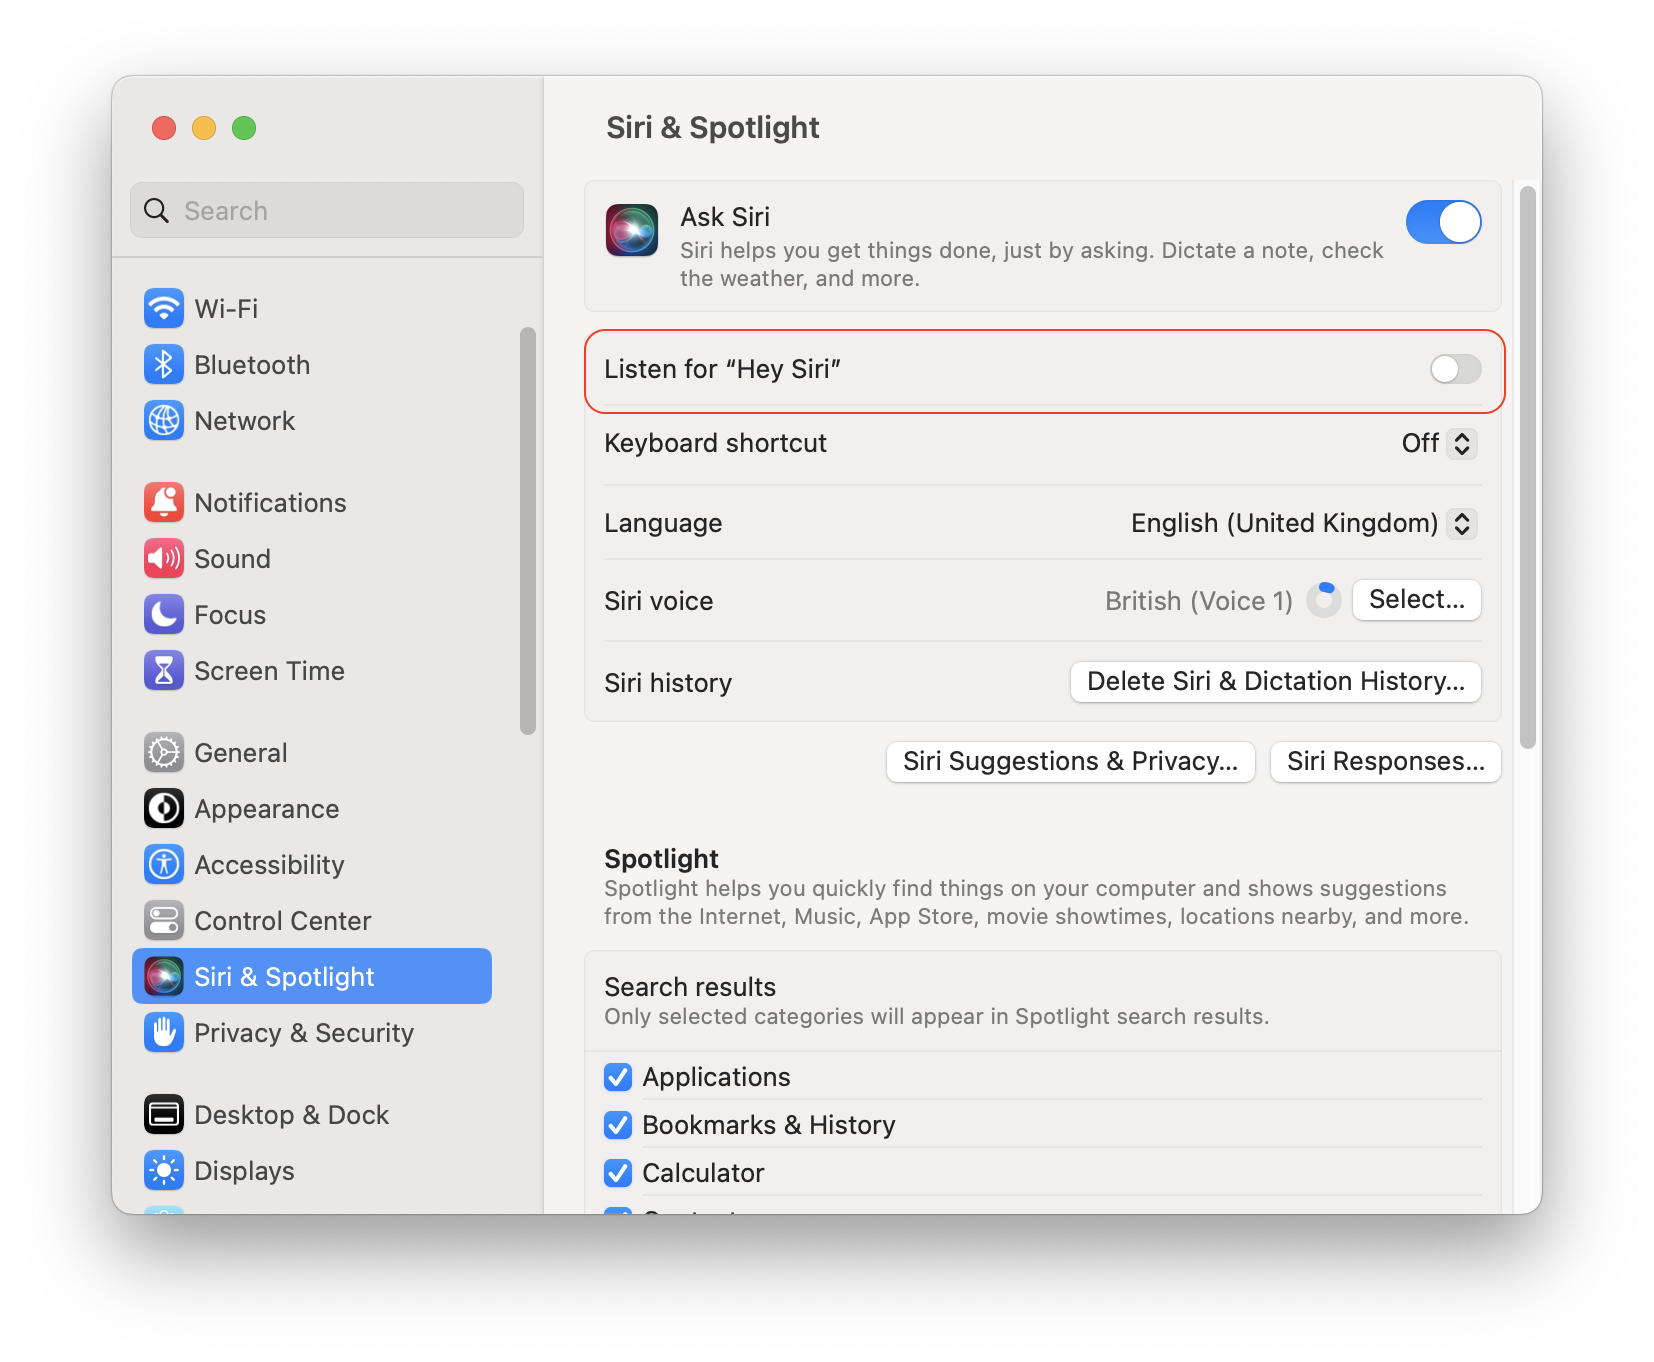
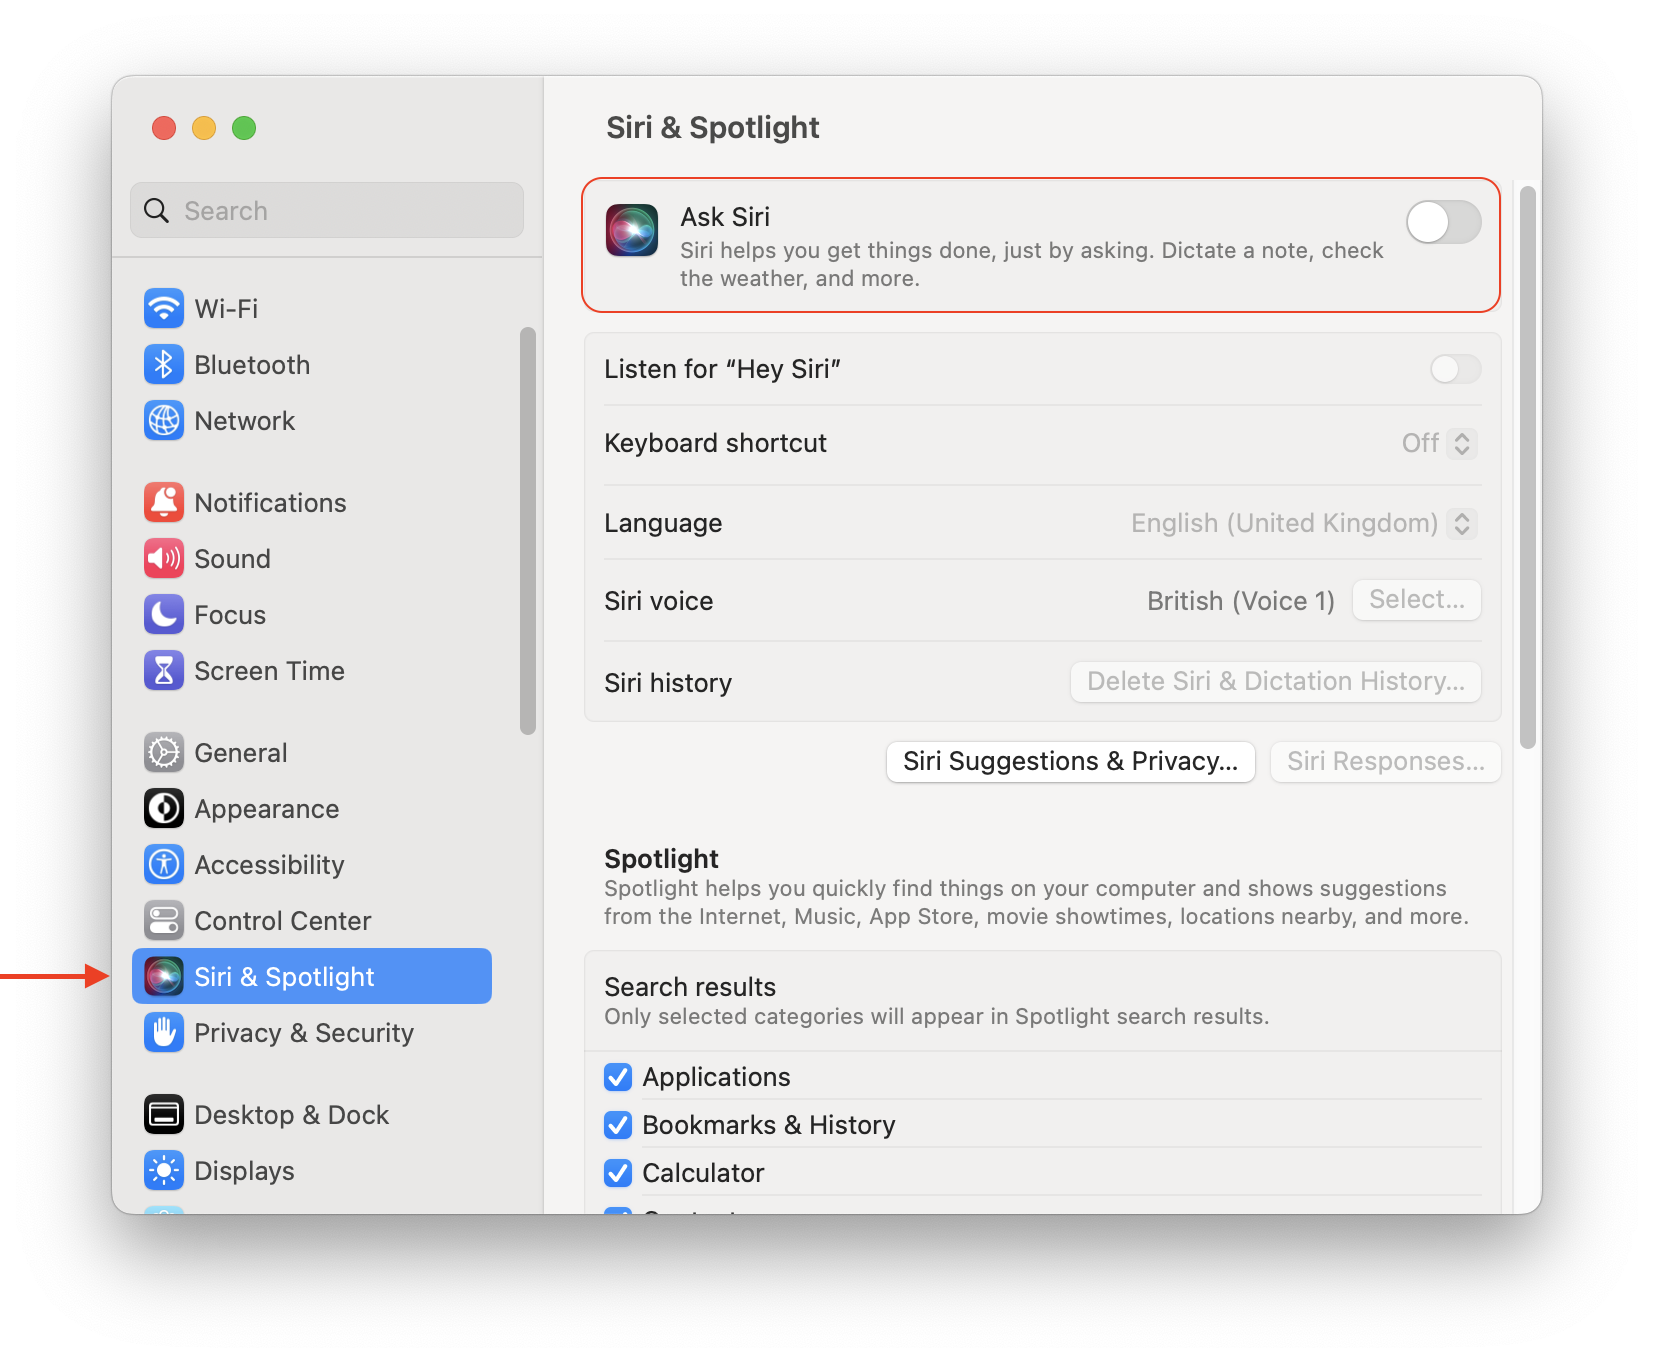
To set up Siri on Mac, take the following steps:
- Open System Settings.
- Click Siri & Spotlight in the sidebar.
- Enable the “Ask Siri” option.
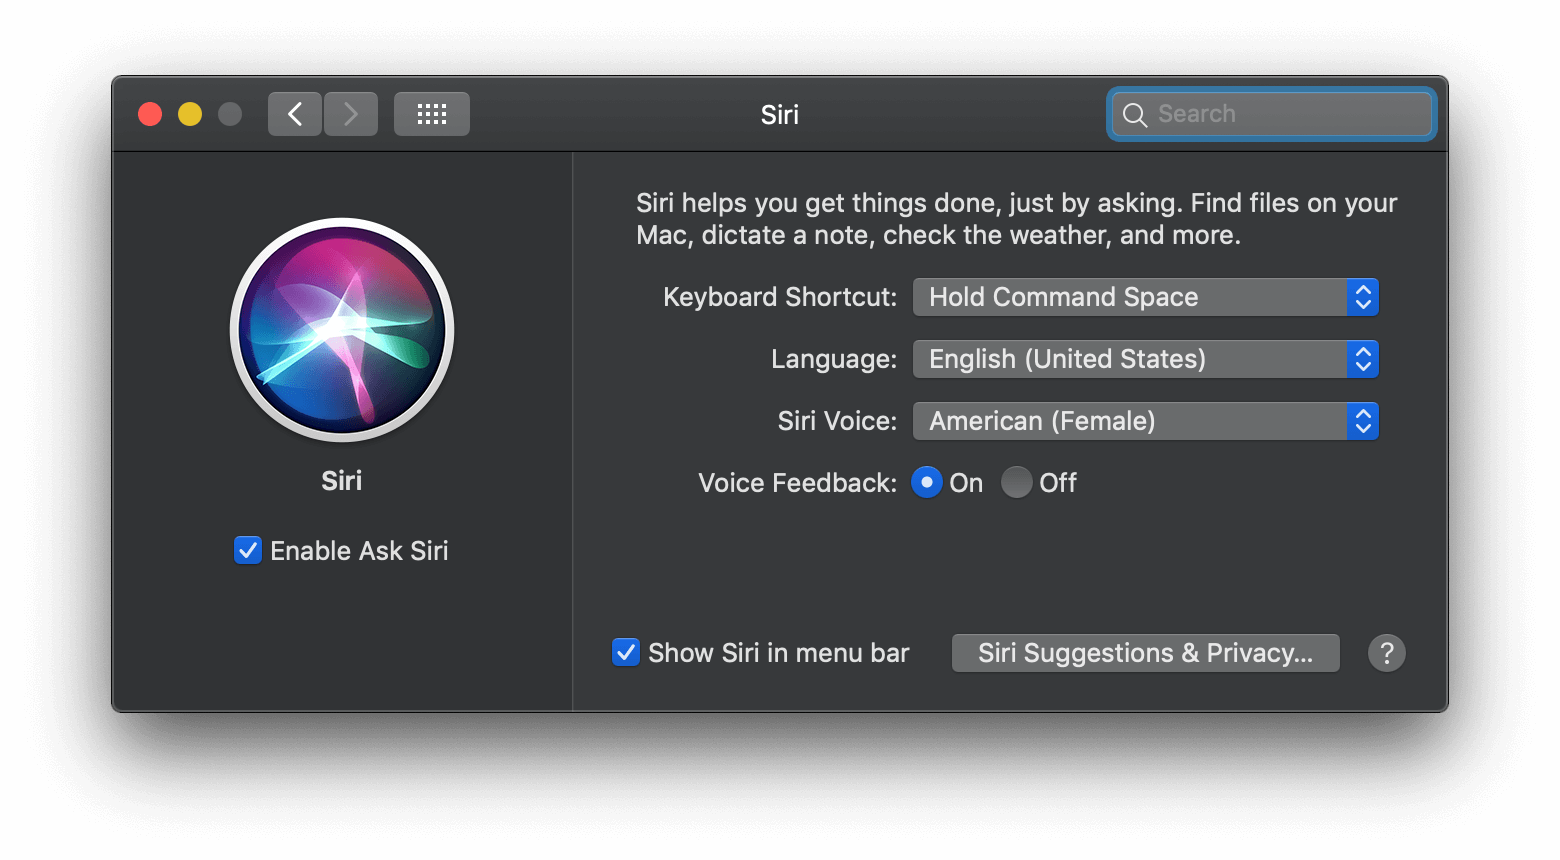
To set up Siri on macOS Monterey or earlier versions of macOS, take these steps:
- Go to → select .
- In the window that appears, select under the colored circle Siri icon.
Then you can manage other Siri preferences:
- Select the keyboard shortcut if that is handier for you
- Choose the language and dialect that are specific to your region
- Decide on whether you want to hear a female or a male voice
- Allow Siri to give you feedback aloud or not
- Click on the button to select apps that will help Siri to make suggestions
- Enable the option to show Siri in the menu bar.
How to Start Using Siri on a Mac
You can ask your virtual assistant about lots of things. For this, choose one of the following ways to open Siri and ask your question:
- Say if your Mac computer was released in 2018.
- If you use a MacBook Pro with a Touch bar, press and hold the Siri icon.
- Click the Siri icon in the or .
- Press and hold the Siri . By default, the Command + Space shortcut is used for this option.
If Siri was not closed automatically, click on the Close (X) button at the top left corner of the Siri window or swipe right to close it.
How to Set Up “Hey Siri”
You can activate Siri by voice if you have one of the following Apple computers:
- MacBook Pro (15-inch, 2018)
- MacBook Pro (13-inch, 2018, Four Thunderbolt 3 ports)
- MacBook Air (Retina, 13-inch, 2018)
- iMac Pro
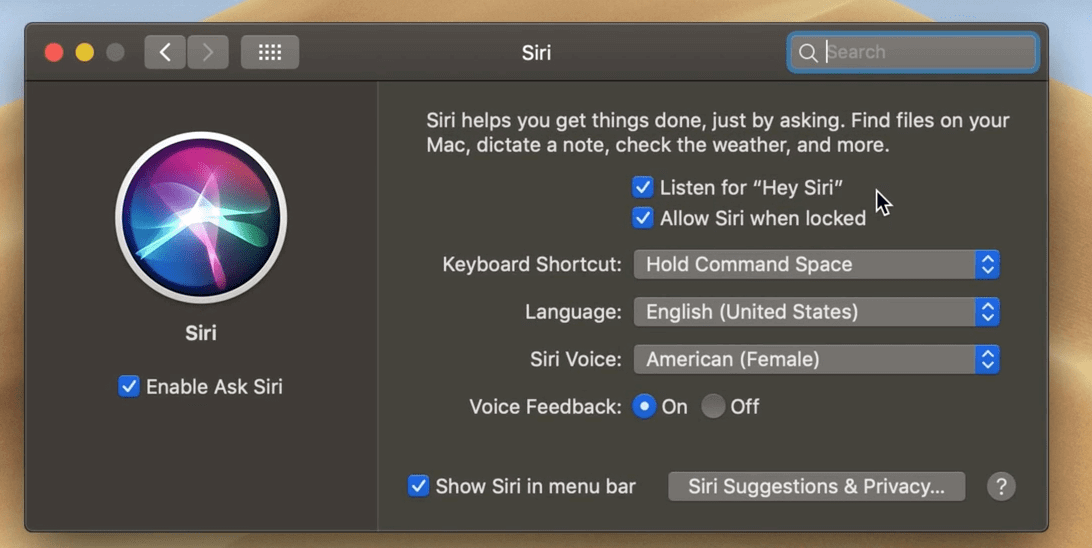
To activate “Hey Siri” on a Mac, go to → → select .
You can also select the option, but if you have a laptop, the lid should be open.
How to Enable “Type to Siri” on macOS Monterey or earlier versions:
In the case that your Mac does not support the voice query, or you do not want to speak aloud, you can type a request to Siri. For this, take the following steps:
- Open → select ;
- Within the Accessibility window, in the Interaction section, choose → select .
- In the case that you do not want Siri to respond aloud, within the Accessibility window, click on the button → select next to the option.
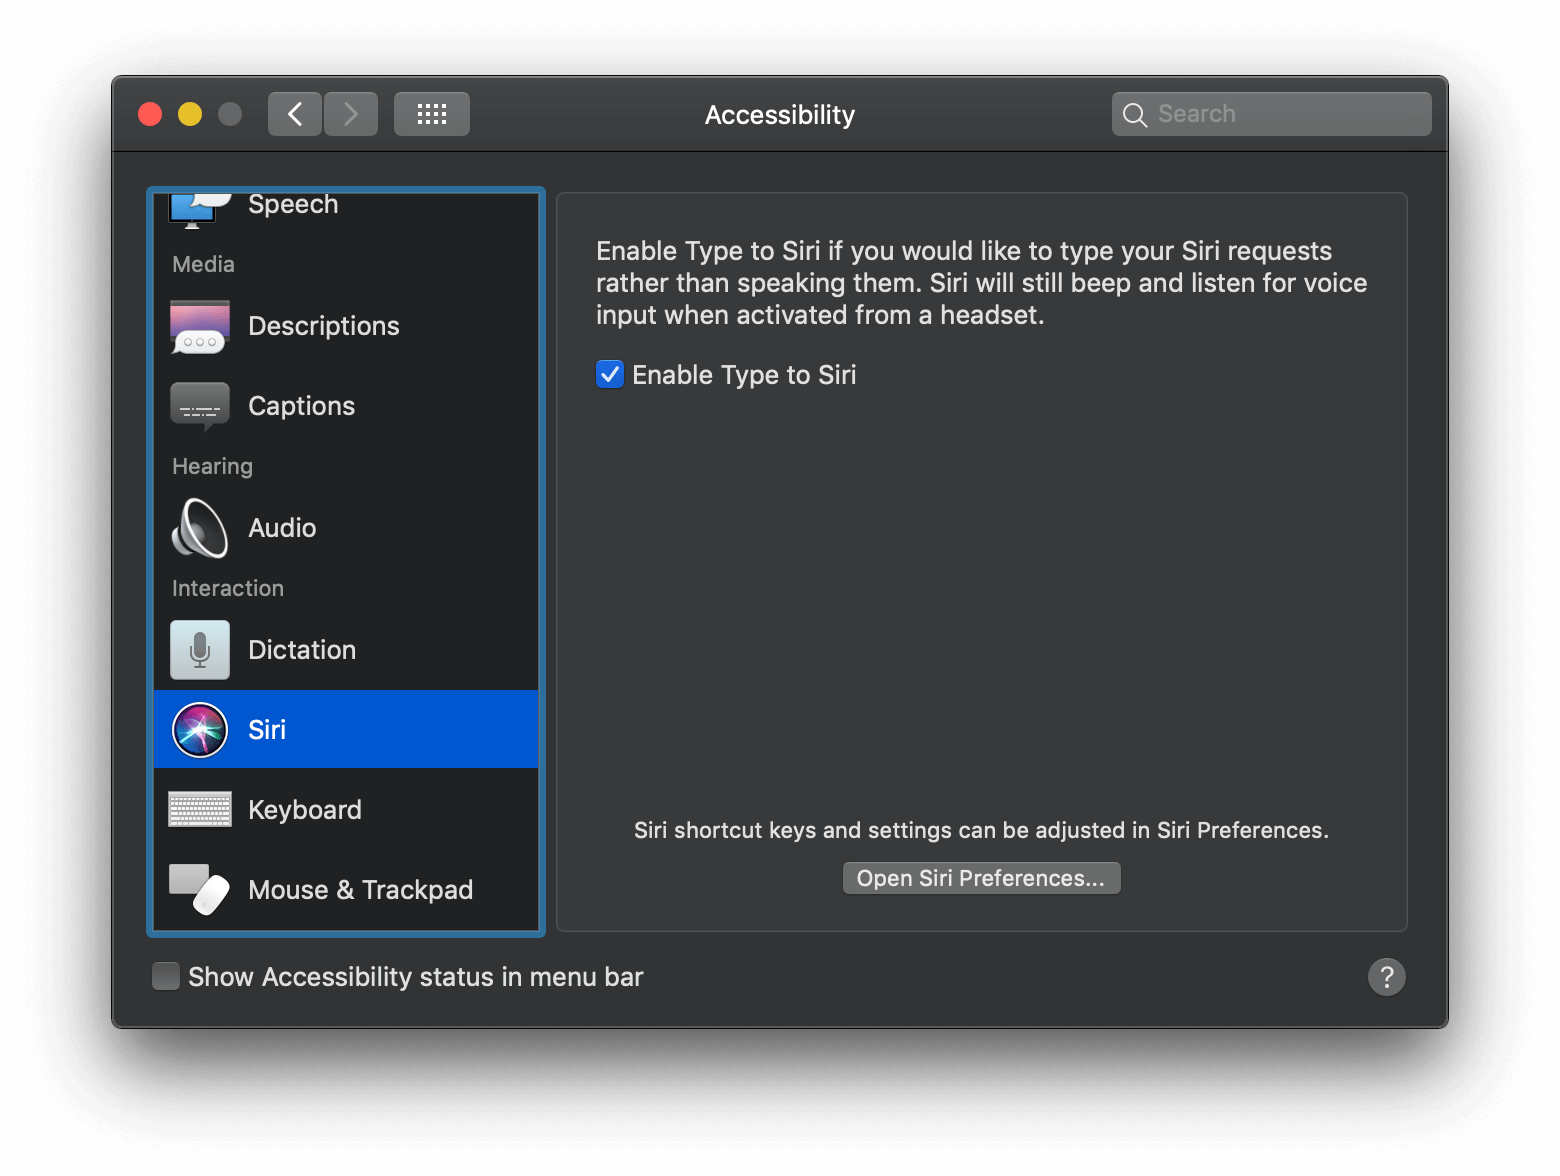
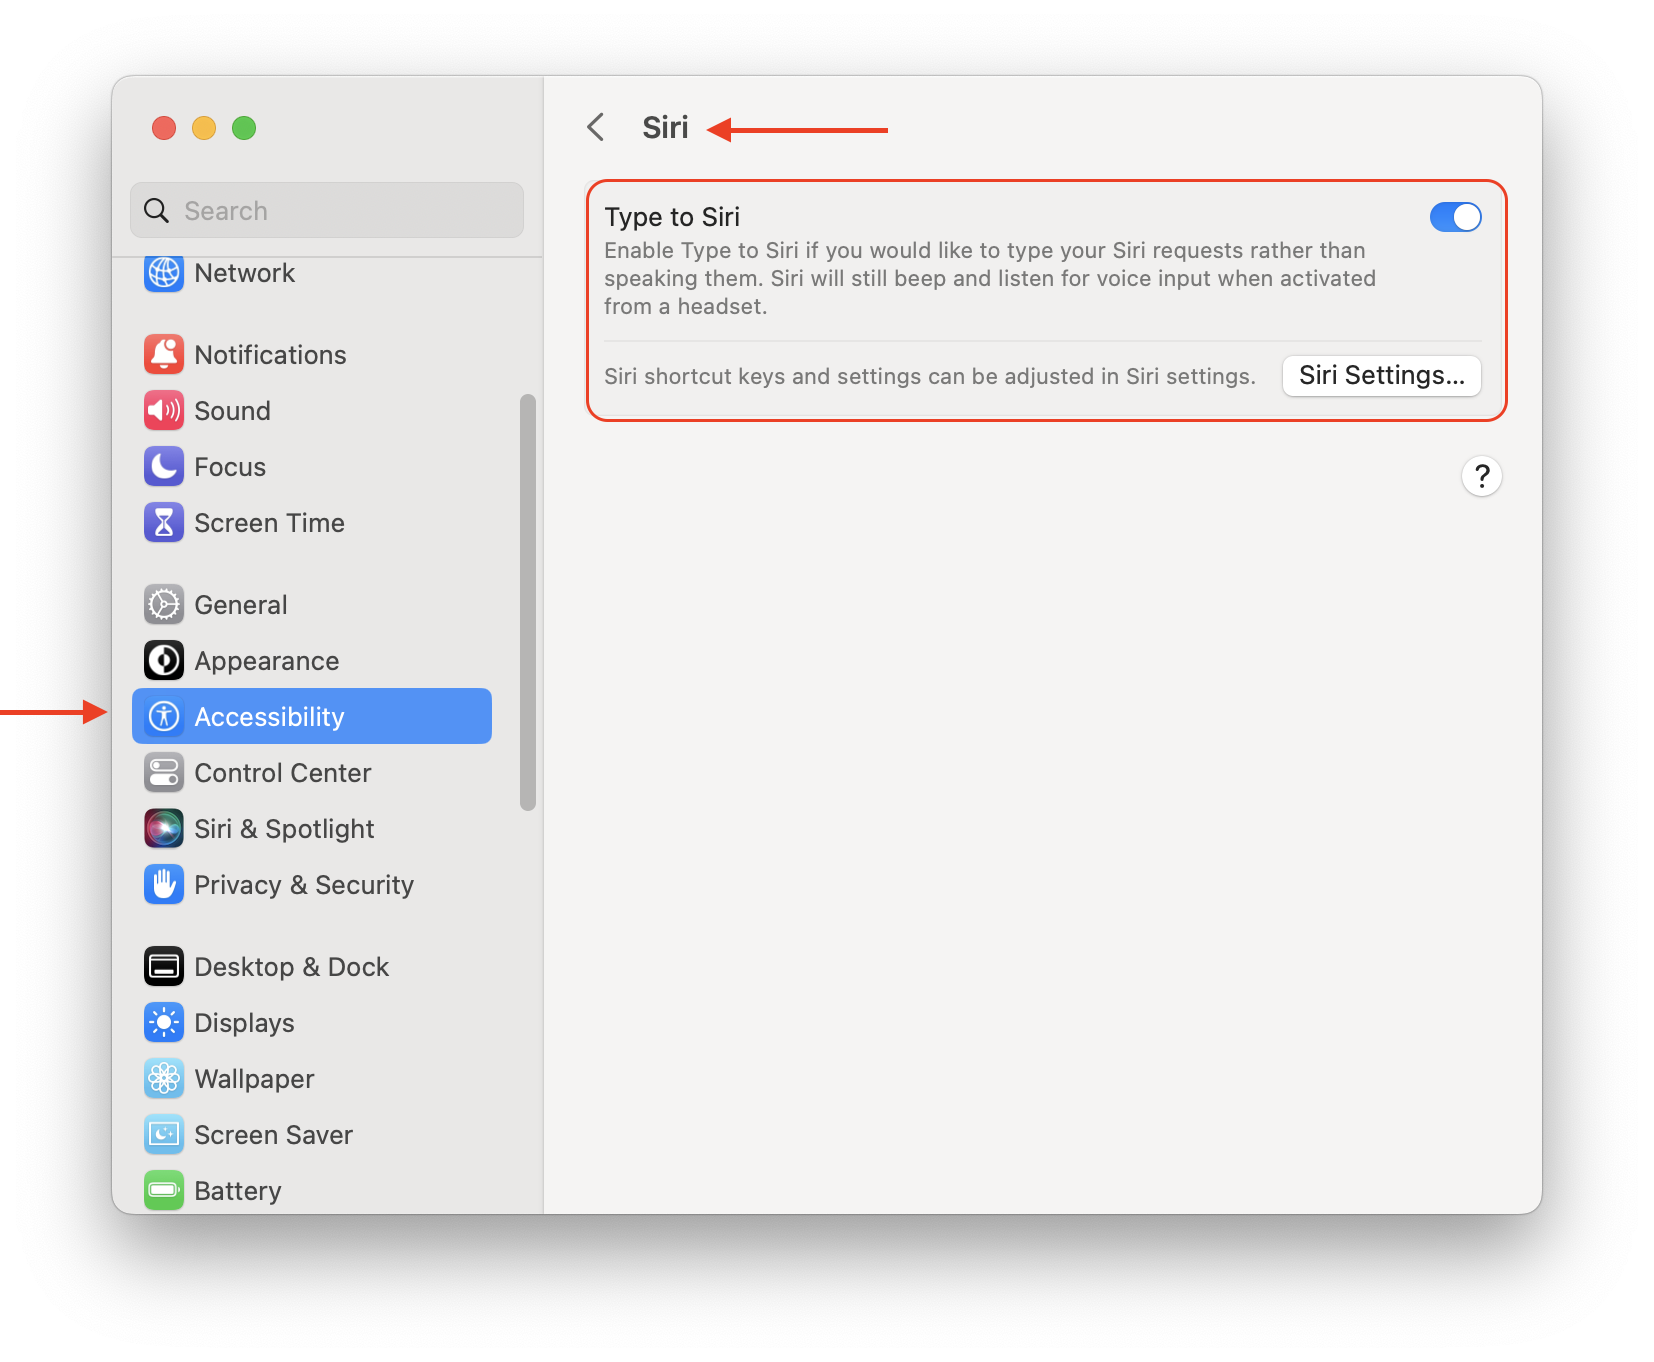
How to Enable “Type to Siri” on macOS Ventura or earlier versions:
- Open System Settings and go to the Accessibility section.
- Click Siri in the right panel.
- Switch on the toggle button for the “Type to Siri” option
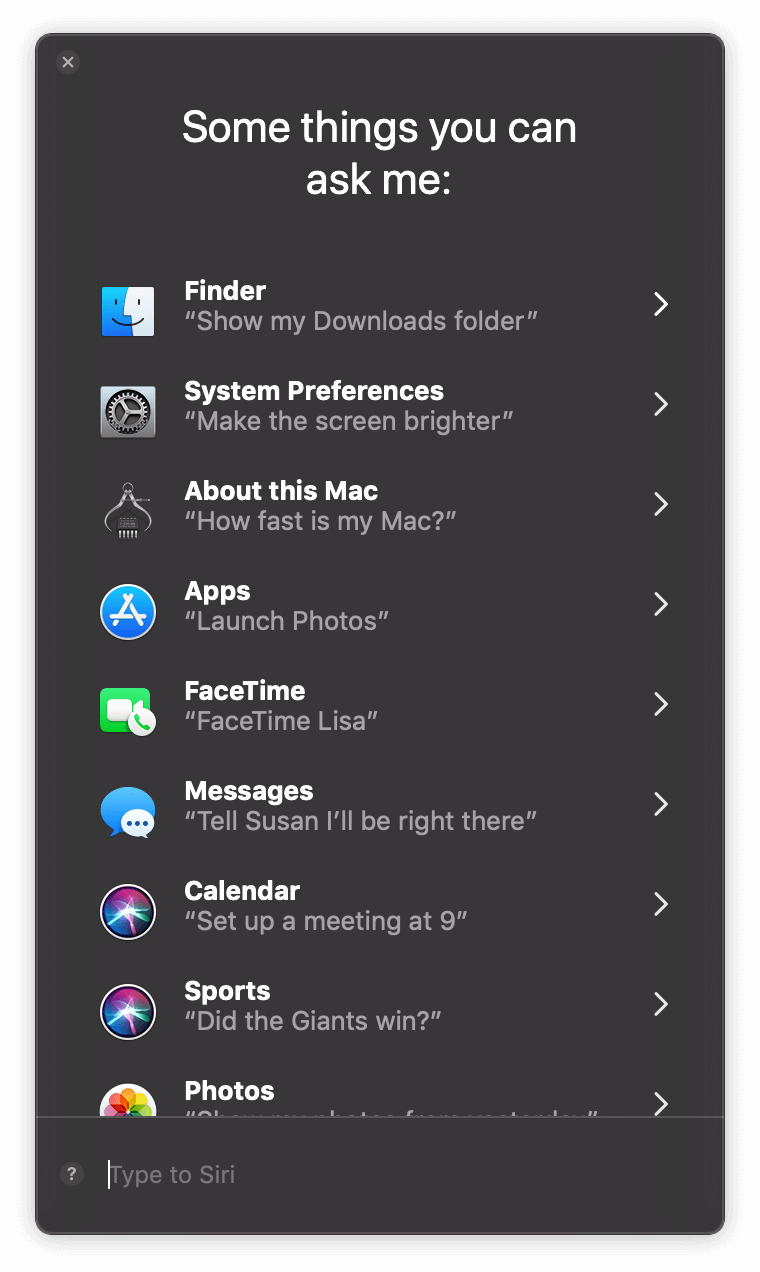
How to Use some Siri Commands
If you are not accustomed to using Siri, just launch Siri and wait for a few seconds. In the next moment, Siri will show you the list of things you may ask. If you enabled the Type to Siri option, launch Siri and click on the question mark in the bottom left corner to see recommendations you may ask your virtual assistant. Siri can ask you clarifying questions to better understand you.
Here are some things you can ask your virtual assistant:
- Show the IMG files in my Downloads folder
- Open my recent PPTX files
- Look up the MLB Schedule
- Remind me to call Lora tomorrow at 12
- Locate all the files I worked on yesterday
- Play some Christmas songs
- Is it windy outside?
- Show me photos I took last year
- Send a message to Andy
- Find puppies pics on the web
- How much free space is on my Mac?
Let’s see an example. Imagine that your free disk space is limited and you want to quickly clean up junk files with MacCleaner PRO. Just ask Siri to “launch MacCleaner PRO” and free up storage space using this app on your computer.
This all-in-one solution will help you to remove tons of useless files, such as caches, unneeded extensions, apps support files, duplicate files, system junk.
Tips on How to Use Siri Results
There are two useful tips we want to highlight:
- You can save your request results provided by Siri in the . For this, click on the at the top right corner of the Siri results list. The added data will stay up to date, so you can always stay on top of things.
- You can also drag and drop information provided by Siri. For example, you can ask Siri to find an image and easily drag and drop it from the Siri results window to your email or a document.
Conclusion
Siri is a useful virtual assistant in our multi-tasking world. We do hope that our article will help you to efficiently operate Siri, because the more you use it, the more helpful it becomes.
