If you haven’t managed your music files in iTunes for a long long time, most likely you have many duplicate songs. This article will explain how to delete duplicate songs in iTunes and in the Music app on your Mac.
Contents:
- Why do I have duplicate songs in iTunes?
- How to delete duplicate songs in iTunes?
- Can iTunes delete duplicate songs automatically?
- How to delete duplicate music on Mac quickly and easily?
Before we start
Before you learn the manual way to find duplicate songs on Mac, we want to introduce a free application called Duplicate File Finder. It will help you quickly find and remove duplicate music files on Mac, iTunes or any external storage.
Duplicate File Finder
Why do I have duplicate songs in iTunes?
Every music lover might have duplicate songs in iTunes. The reasons for creating duplicates might be different. For example, you imported your favorite tracks from CD to iTunes or Music by mistake more than once, you downloaded different versions of a track (the album version and the live performance version), you saved the same song in different albums on your Mac, you accidentally clicked to make a copy of the audio file.
No matter why you have duplicate songs on your Mac. The more important question is how to remove duplicate songs from Mac. Find below a detailed guide on how to do this.
How to delete duplicate songs in the iTunes playlist
In Catalina and later versions of macOS, the iTunes app has been replaced by the Music app. Actually, the differences between the two applications are minimal, and the steps on how to find duplicate songs in both versions are the same. However, before we explain how to do this, note that you cannot mass select and remove duplicate songs in iTunes. You can delete duplicates only one by one. For mass deleting duplicate music from your Mac, you can use a free application Duplicate File Finder from Nektony. Download the application from the App Store.
How to find duplicate songs in iTunes and Music app:
- Launch the Music app or iTunes.
- Go to the menu bar and click on File → Library → select Show Duplicate Items.
- You will see the list of duplicate songs.
- Choose the songs you don’t need and delete them.
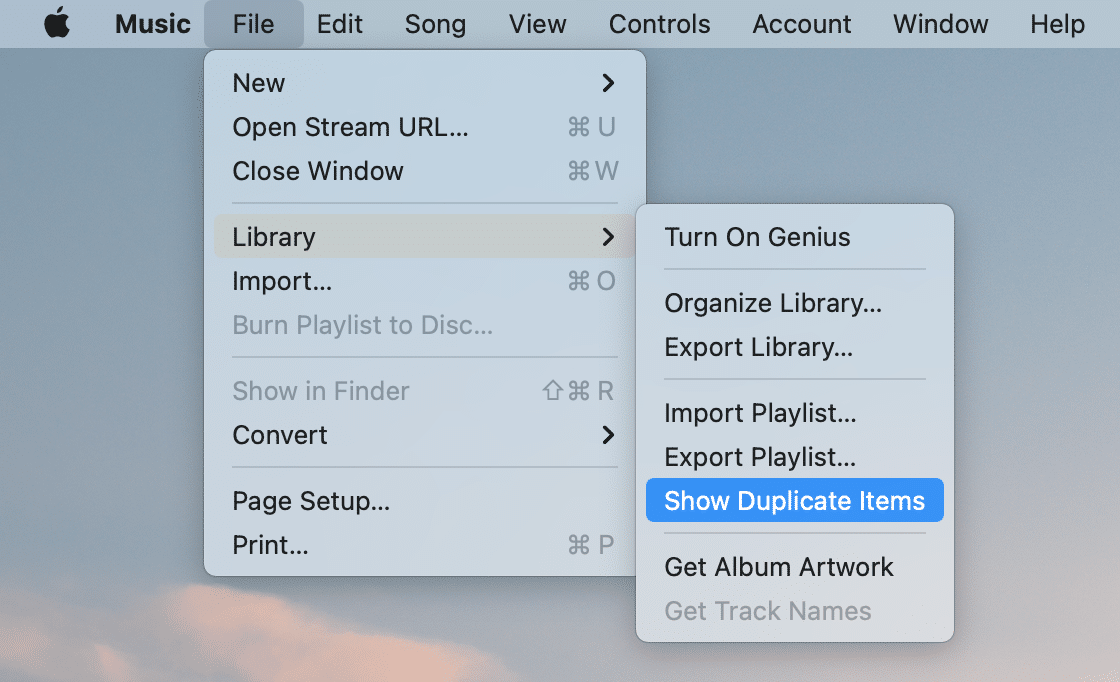
Please, don’t mass select and remove all duplicate songs that iTunes shows you. The duplicate songs displayed in iTunes might be from different albums or be different versions of a song. We recommend that you check the tracks before deleting them or use Duplicate File Finder from Nektony. Duplicate File Finder detects which songs are completely duplicates and which ones are similar. Similar media means that tracks can slightly differ by record time, metadata, and so on.
How to find exact duplicates in iTunes
How to check the Music library on Mac for exact duplicate media files without third-party applications? In fact, iTunes and the Music app provide such an option. You will need just to repeat the steps above with anadditional one.
Steps on how to find exact duplicate songs:
- Open iTunes or the Music app.
- Go to the menu bar and click on File → Library.
- Press and hold the Alt key on your keyboard.
- You will see the Show Exact Duplicate Items option. Select it.
- This time iTunes will show the list of exact duplicate songs in your Music Library.
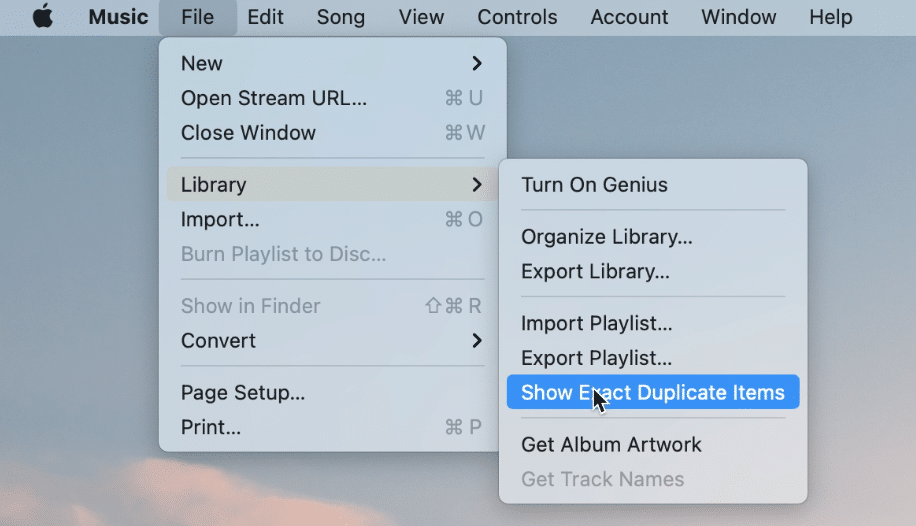
Please, don’t automatically select and delete all files which iTunes shows as exact duplicates. If you do this, you will remove all copies. iTunes is showing all files and you need to manually skim them and decide which one you want to remove. Check whether the track is in your Playlist or not, how many times each track has been playing, you marked the tacks as loved or not. Also, you can sort your files by bitrate and detect the track with a higher quality and remove the duplicates, which have lower quality.
And once again, you can use Duplicate File Finder, which can automatically find and remove the exact duplicate music files on your Mac.
How to manually delete duplicate songs in iTunes?
We explained how to find duplicate songs in iTunes/Music. Now let’s see how to delete unneeded tracks.
- In iTunes/Music click on the track you want to delete.
- Press Delete on your keyword.
- Confirm removal.
Also, you can right-click on the track and select Delete from Library in the context menu.
If you need to mass delete duplicate songs, just first select all of the files you want to delete. For this, press and hold the Command key while selecting files. Then press Delete.
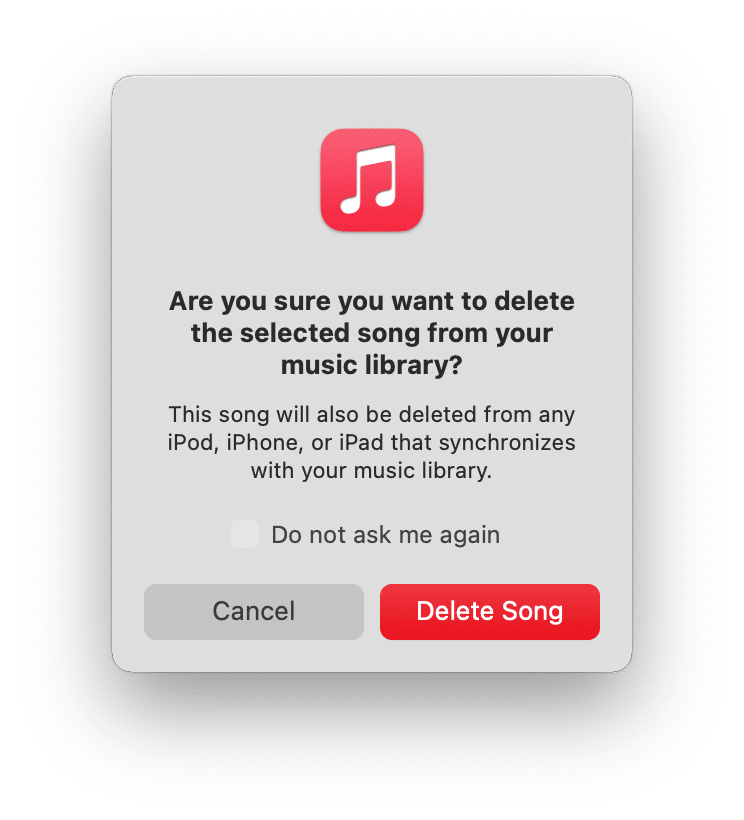
Depending on where your song is stored, in your Cloud Music Library or Mac Music Library, you will see the appropriate confirmation window for deleting.
If the music file is stored in your Mac Music Library, you can recover deleted files from the Trash. If the file is stored in iCloud, you can’t recover a deleted item. That’s why we don’t recommend mass deleting duplicate songs from iTunes.
Can iTunes delete duplicate songs automatically?
Deleting duplicates from iTunes might be time consuming. Unfortunately, iTunes does not provide any option to automatically delete duplicate songs. You will periodically need to check your Music Library for duplicates and manually remove unneeded tracks copies. Also, if you have duplicate songs stored in different folders on your disk, the mentioned method will not help you to find them and free up space on your Mac. In this case, the best way to check your Mac for duplicate songs is to use Duplicate File Finder. Keep reading and learn how to find exact duplicates and similar audio files on Mac in just a few clicks.
How to delete duplicate music on Mac quickly and easily?
The easiest and quickest way to find duplicate music on Mac is to use a special application called Duplicate File Finder. Duplicate Files Finder scans any storage and disk and detects all types of duplicate files, including duplicate music.
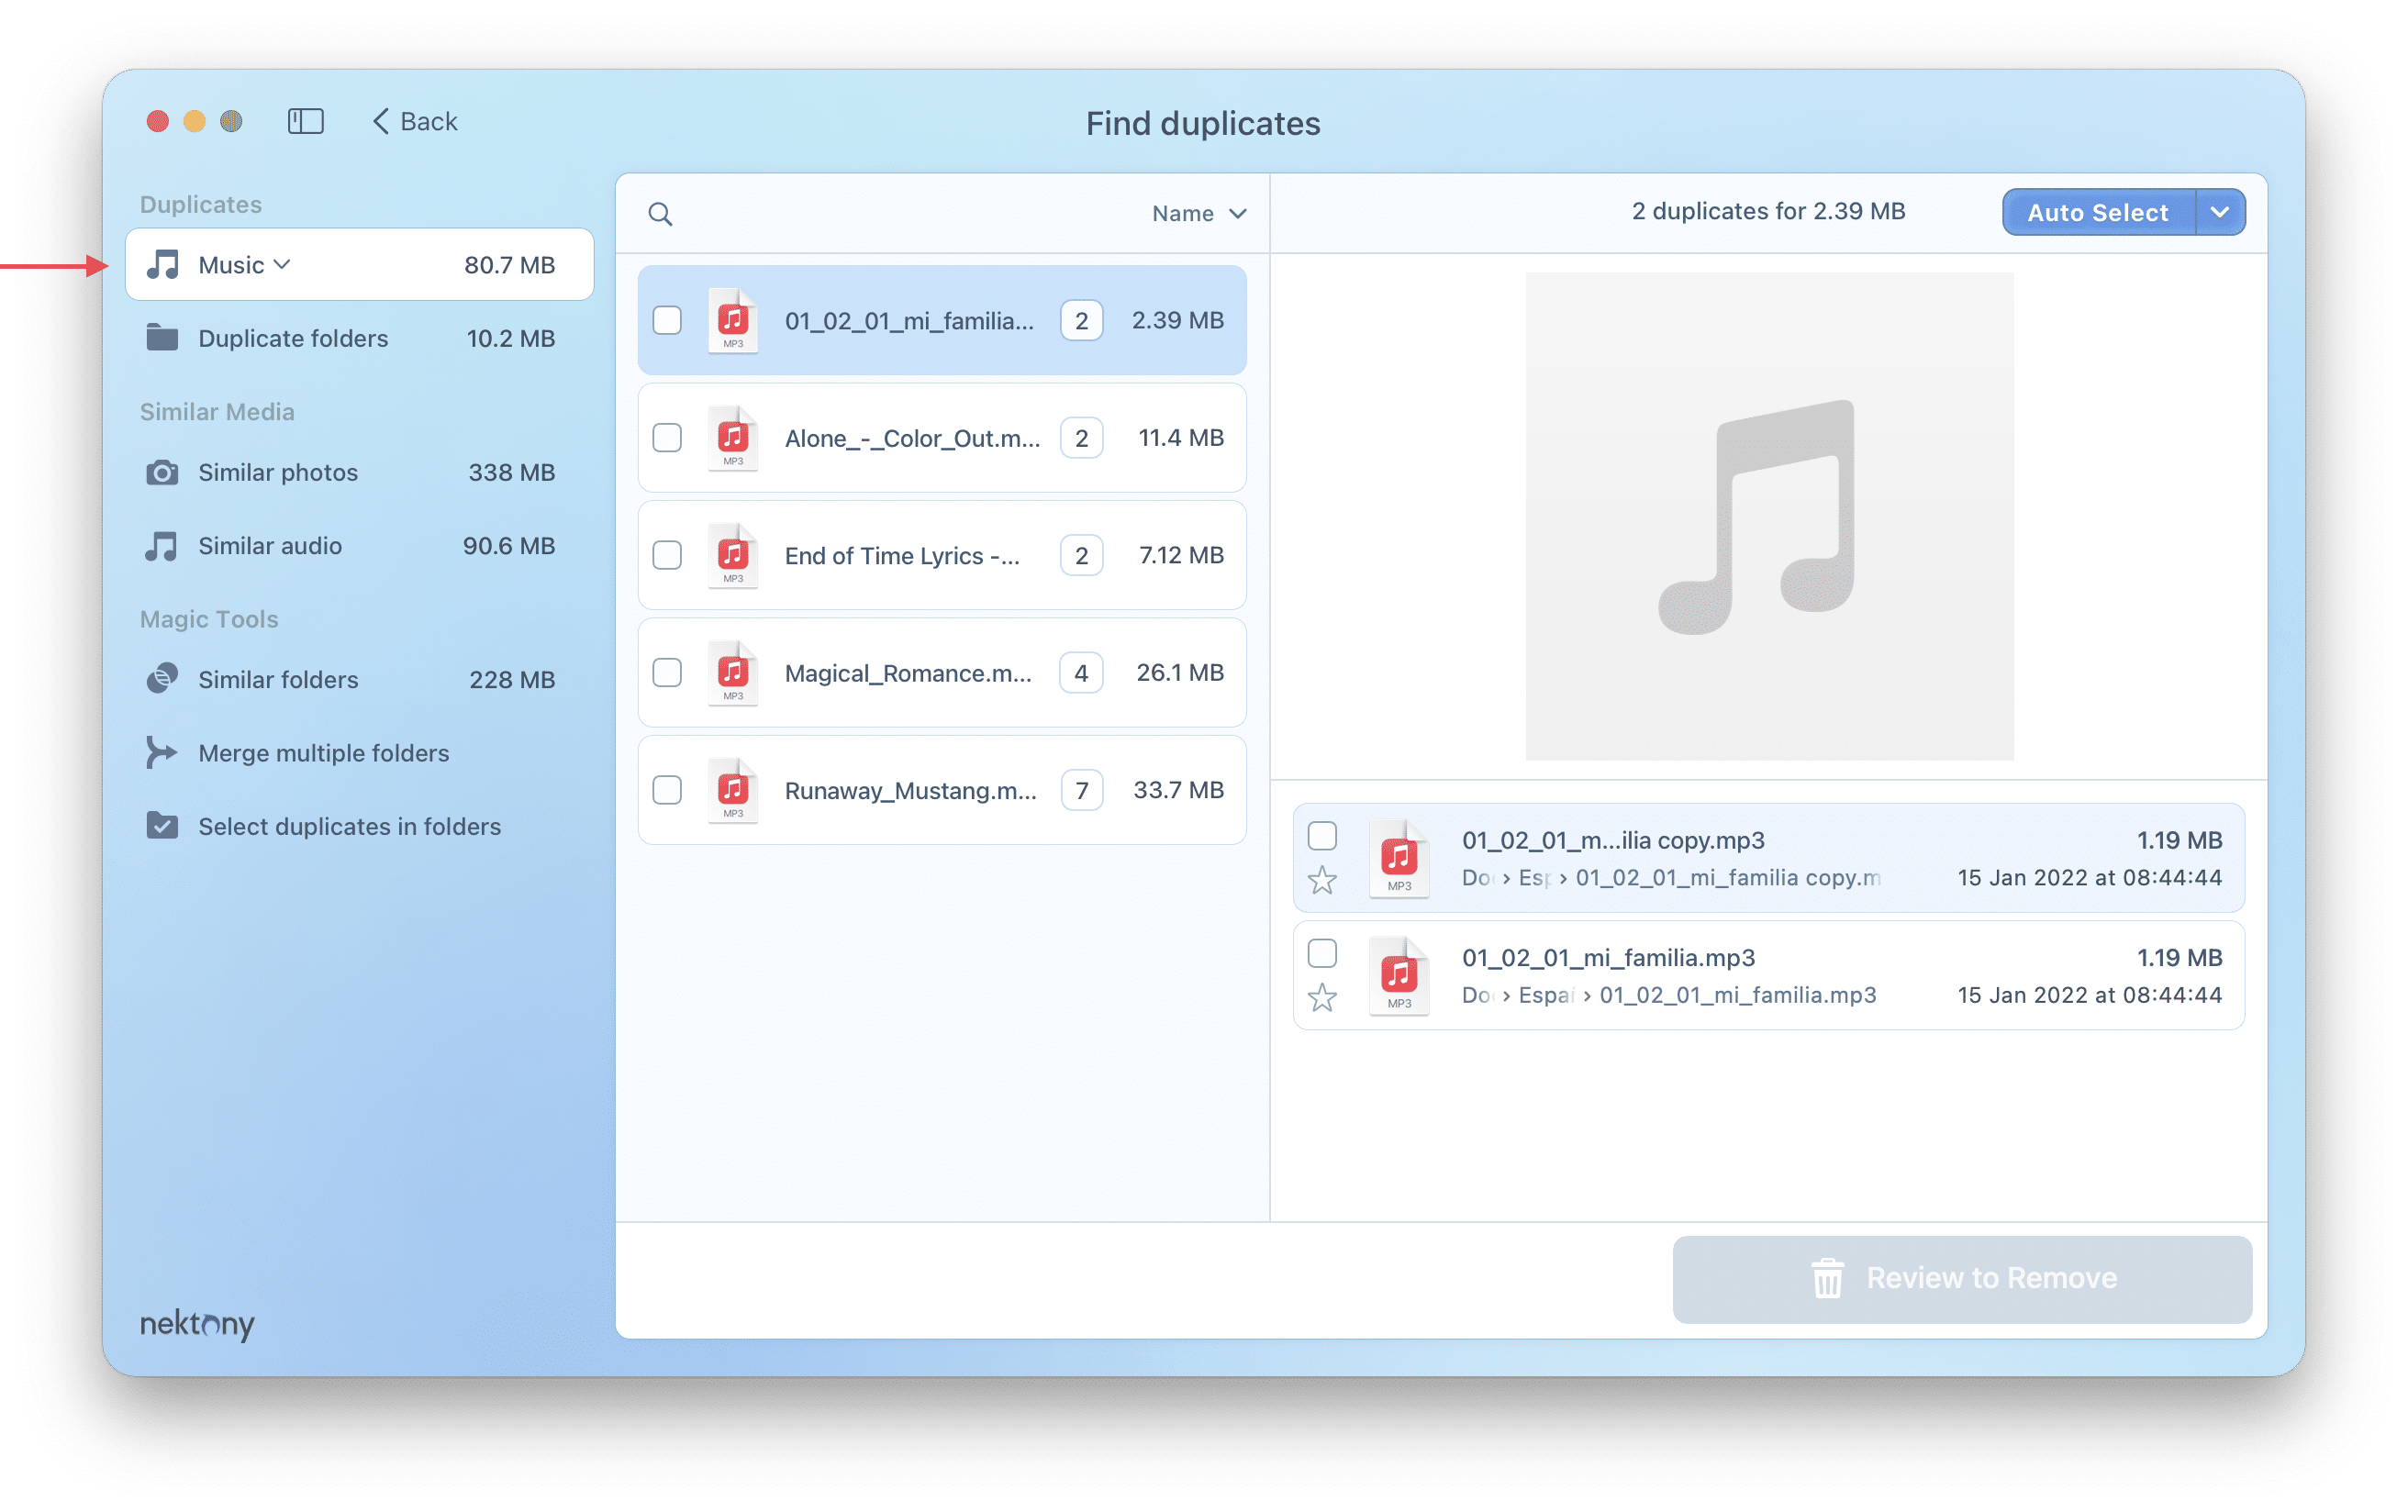
What is important about this application, is that it groups detected duplicates into two sections – duplicate music and similar audio files. Unlike iTunes, the application displays in the list of duplicates only those files which are absolutely identical. When you auto select files for removal, by default, it keeps one of the copies.
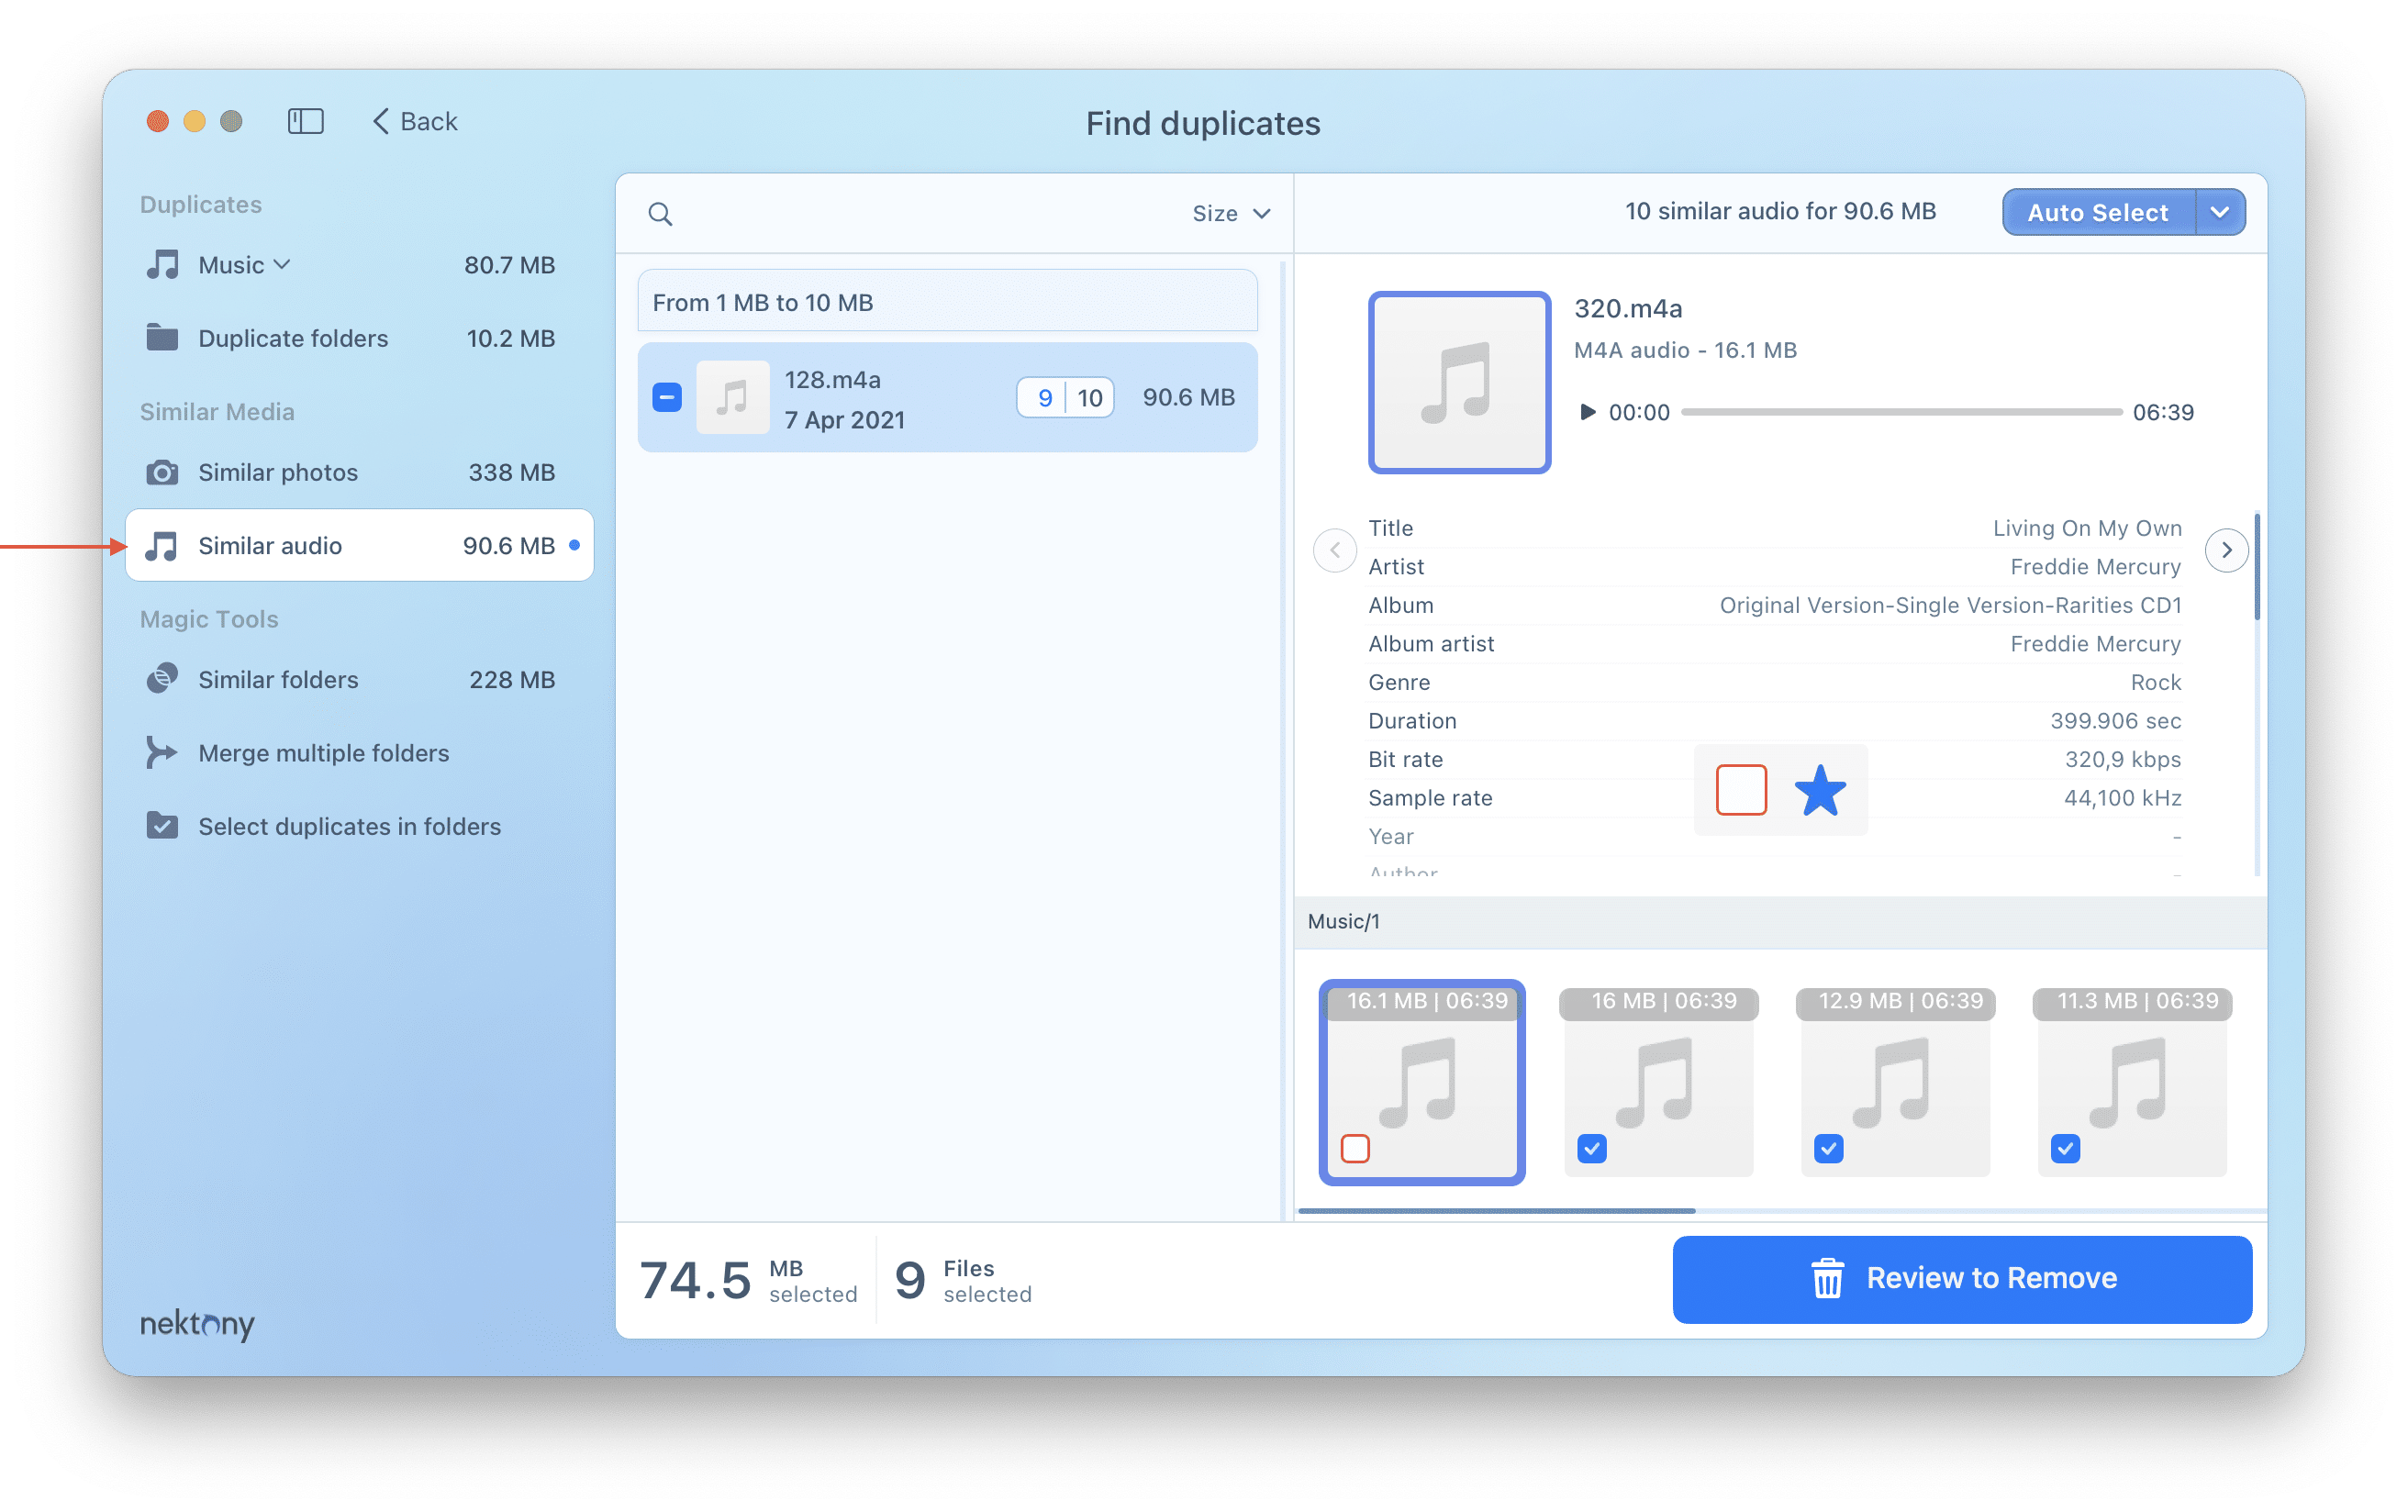
When songs slightly differ from one another, Duplicate File Finder will display those tracks in the Similar Media section. The same song but from different albums or which have different record times will be shown as similar.
Thus, with Duplicate File Finder, you will not remove all of the copies of your favorite track and can be sure that you remove the exact duplicates. Using the Duplicate File Finder app is very easy and even new Mac switchers can handle this task.
Steps on how to delete duplicate songs on Mac using Duplicate File Finder:
- Launch Duplicate File Finder.
- Add the folders or disks you want to scan. You can add a Music Library as well.
- Click Find duplicates.
- Go to the Duplicate Music tab and select unneeded duplicate songs for removal.
- Switch to the Similar audio tab and select unneeded similar audio files for removal.
- Click the Remove button and confirm the action.
Using Duplicate File Finder is much easier for finding and removing duplicate songs, isn’t it? The application is free to use. Also, it provides additional Pro options for organizing duplicates on Mac. To use the Pro version you will need to purchase an upgrade.
