
While some users adore every new macOS upgrade, others after a while decide they like the previous macOS version better. In this article, you will discover all the steps you need to downgrade from your current version of macOS to the earlier version on your Mac.
Contents:
1. Backup your Mac data
2. Check if your Mac has the Apple T2 Security Chip
3. Download macOS Mojave or High Sierra
4. Reset NVRAM on your Mac
5. Erase your Macintosh HD (startup disk)
6. Reinstall macOS
1. Back up your Mac
The first thing you should do is to make a backup of your data. While using your Mac, you have probably created several files, which you want to save. Even more important is to save your data if you have not already made a backup before installing new macOS. This is because the next steps include erasing your HD. To make a backup of the information stored on the disk, you can transfer it to an external hard drive or cloud storage like Dropbox, Google Drive, OneDrive, and so on.
2. Check the Apple T2 Security Chip
The next step is to check if your Mac has the Apple T2 Security Chip. This refers to the iMac Pro, and the MacBook Pro, MacBook Air, and Mac mini models released in 2018 or later. If you have one, take the following steps:
- To ensure that you have a T2 controller, press and hold the key and click on the → from the drop-down menu, select → in the sidebar, choose the (or iBridge) section → if you have the chip, you will see Apple T2 chip in the on the right.
- If you have the T2 chip, you need to restart your Mac into Recovery Mode to continue to downgrade macOS. So, click on the and select . As soon as you see the Apple logo on the screen, press and hold the keys until the computer boots into . When you see the utilities window, release the keys. At the menu bar, click → from the drop-down menu, select → enter either the login password, Apple ID password, or a firmware password if prompted → in the section, select Allow booting from external media to enable options of the macOS installation for the next steps.


3. Download the earlier version of macOS Mojave in advance
Now you need to think about which macOS you want to use on your computer instead of your current macOS. Basically you have several options for installing a macOS:
- Use Time Machine. If you regularly make Mac backups, you can install any of them from your external drive before the macOS downgrade.
- Use Internet Recovery. This option allows you to reinstall the factory-preloaded macOS that comes with your Mac, or the closest version available.
- Use external storage with the particular macOS installer.
If you wish to install a macOS from a USB thumb drive, download the desired version of the operating system in advance. You can find them on the App Store. For your convenience, here are the links where you can download macOS High Sierra or macOS Mojave.
4. Reset NVRAM Mac
If one of the reasons you want to downgrade macOS is some software issue, it may be connected to the information stored in NVRAM. For example, some users reported that after resetting the nonvolatile random-access memory on a Mac and the macOS reinstallation, the new operating system runs perfectly. Moreover, if you noticed that your Mac starts behaving strangely after launching of a particular program on Mac, you should remove this app. The best way to completely delete an application and all its service files from your Mac is to use the universal App Cleaner & Uninstaller software tool. After deletion, reset NVRAM by completing the next steps:
- Click on the and select .
- Immediately press and hold the keys until your Mac restarts. It may take about 20 sec.
You can skip this step but, considering the Mac users’ experience, the NVRAM resetting removes potential bugs, which are harmful for a new macOS installation.
5. Erase Macintosh HD
Now your Mac is ready to erase uneeded version of macOS from the disk. For this, complete the following steps:
- Click → select .
- Immediately press and hold the keys to boot your Mac into again. Release the keys when you see the familiar startup screen.
- The next moment, you will see the Utilities window.
- Select and click .
- In the sidebar of the Disk Utility window, select your HD’s Data volume. By default, it is called . Right-click and select Delete APFS Volume from the menu.
- Then, select the (your startup disk) and click on the button in the toolbar. In the window that appears, pick a drive name, file format, and GUID Partition Map. Click to confirm the action.
- Quit Disk Utility and shut your Mac down.


6. Reinstall macOS
The final step on your way to downgrade macOS is to reinstall it or restore it from the backup. As we mentioned before, you can choose one of these three ways to install a new macOS on your Mac:
- . For this, follow the next steps:
- Put your external drive into your Mac.
- Switch your computer on and then press and hold the keys to boot the Mac into Recovery Mode. Release the keys as soon as you see the Utilities window.
- In the Utilities window, choose and click . In the window that appears, click again to confirm the action.
- Select your Time Machine backup disk and click → choose the desired backup version with macOS Mojave or High Sierra or earlier from the list and click → select your Macintosh HD (startup disk) and click (Continue).
- When done, reboot your Mac.
- . It is important that you now have a stable internet connection. To use Internet Recovery, take the following steps:
- Switch your computer on and instantly press and hold the keys.
- You can release the keys as soon as you see a spinning globe and the message Starting Internet Recovery.
- Then, you should wait a while. Your Mac will check if the factory-preloaded macOS is still available, and download it or the closest macOS version. This may take a few hours. In addition, your Mac will be checked for any hardware issues with memory and disk.
- When the Utilities window appears, select by following the on-screen instructions.
- When the process is over, reboot your Mac.
- . For this, complete the next steps:
- Put the USB thumb drive with macOS Mojave or earlier version’s installer into your Mac.
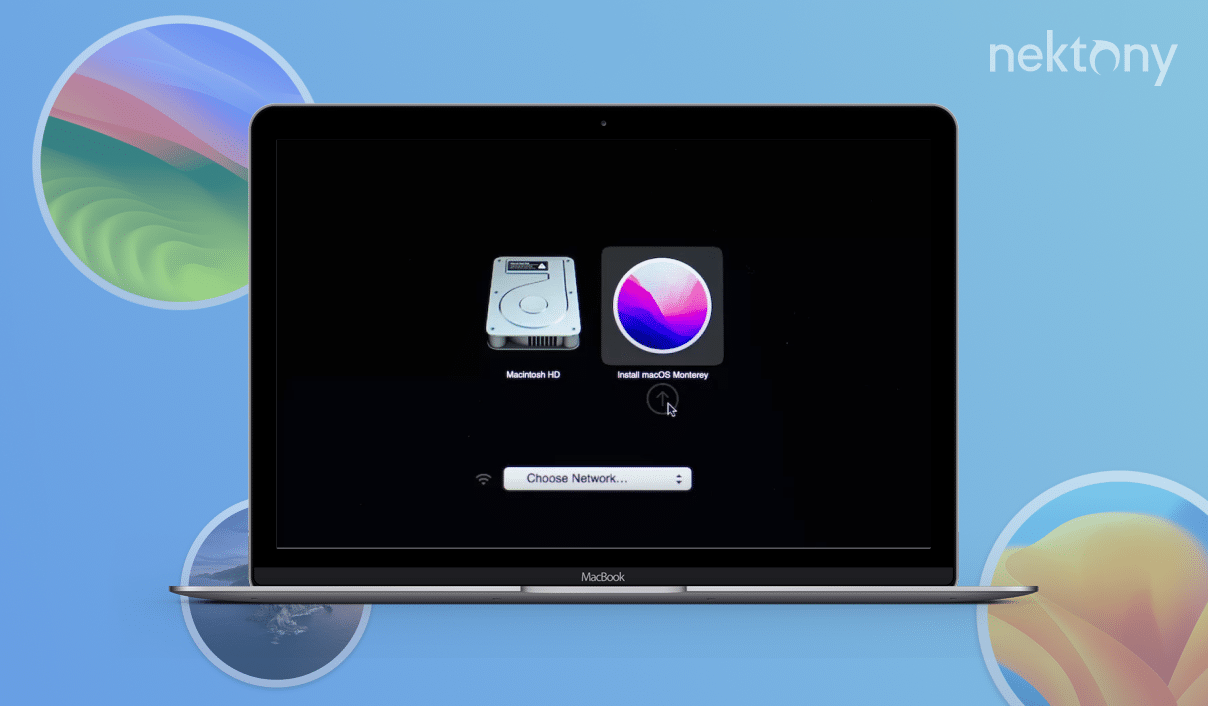
- Turn your computer on and immediately press and hold the key.
- The next moment, you will see the option to select your USB drive as a boot disk. Select it so that the system can download macOS Mojave or another pre-saved version. After that, you will see the macOS Utilities window.
- Click to proceed. Follow the on-screen instructions to install the macOS.
- When finished, reboot your Mac.
![]()


Conclusion
If you really do not like your current macOS version, you can downgrade your system and install macOS Mojave, macOS High Sierra, or an earlier version on your Mac. All these steps take time, but if you do all of them carefully, you can enjoy using the previous macOS on your computer again. Just remember to save your essential information, as after erasing the HD, you will lose it forever unless you have a recent backup.
Once again, if you face any technical issues while using macOS, you probably do not need to uninstall it. Check our article How to improve a slow Mac and fix any possible issues.


