November 21, 2025
How to downgrade macOS Tahoe to macOS Sequoia
Apple released macOS Tahoe on September 15, 2025. Its bold redesign was presented as a step toward the future of the Mac experience. Yet not everyone was thrilled. Beyond the visual overhaul, users began reporting performance issues, app incompatibility, and missing features they relied on daily. That’s why many now want to roll back to the previous macOS Sequoia version.
In this article, I’ll walk you through every possible way to downgrade from Tahoe to Sequoia, but get prepared: the process won’t be simple.
Short overview of downgrade options
Currently, it is possible to go back from macOS Tahoe to Sequoia in four different ways. Each way has its own requirements and pitfalls. Some options let you return to your exact setup, while others require starting over. Here’s a quick look at what’s possible:
| Method | Description | Estimated time |
|---|---|---|
| Time Machine restore | Uses a backup you created before upgrading to Tahoe to bring your Mac back to that exact state: apps, settings, and all. | 30–90 minutes |
| APFS snapshot | Reverts your Mac to its pre-upgrade state using an internal system snapshot. It’s the fastest rollback option if the snapshot still exists. | 10–30 minutes |
| Internet Recovery | Reinstalls the macOS version that originally came with your Intel Mac. Doesn’t require a USB installer or backup. | 60–150 minutes |
| Clean installation via USB | Installs Sequoia from scratch using a bootable USB drive. Wipes your disk and sets up a brand-new system. | 45–120 minutes |
Note:
A clean reinstallation is the most reliable way to return to Sequoia, but it’s not a true downgrade. You’ll need to reinstall your apps, sign in to your account, and restore your data manually.
Before you proceed with the downgrade method of your choice, take a moment to decide whether downgrading is truly necessary. Many Tahoe-related issues can be fixed without reinstalling macOS. The next section should help you figure that out.
When the downgrade is actually worth it
Some users (especially on Reddit) who upgraded to macOS Tahoe report severe lag, slow animations, and even full system freeze-ups. While these problems are frustrating, downgrading to Sequoia (or staying with it, as recommended by the Roonlabs community users) is not always the best answer. In many cases, there are easier ways to fix performance or stability issues without reinstalling the entire system.
In my view, here are the situations where downgrading makes real sense.
- App incompatibility
If there is a critical app you rely on daily and it no longer works properly on Tahoe, reverting to Sequoia can be a valid solution. This applies especially to professional or legacy software that has no immediate replacement. For instance, older code editors or virtualization tools may never receive updates for Tahoe compatibility. If waiting for the developer’s fix or switching to an alternative app is not realistic, downgrading becomes a practical way out. - Performance issues
Each new macOS version comes with higher hardware demands. If your MacBook Pro is from 2019 or has 8 GB of RAM and struggles with Tahoe, the problem is likely hardware limitations rather than temporary bugs. Rolling back to Sequoia can help restore smooth performance while you decide on a hardware upgrade. - Unsuccessful upgrade
Sometimes the installation of Tahoe fails entirely or leaves the system unstable. In that case, downgrading is the only viable fix. The methods described in this article will work for such situations as well.
However, not all frustrations justify a downgrade. Some issues are better solved with updates or small adjustments:
- Battery drain. Some users on Apple Community Discussions notice their battery depletes 20–30 percent faster on macOS Tahoe 26.0. This is typically fixed in subsequent patches. Until then, try shutting down your Mac completely instead of sending it to sleep, and check for background apps that consume power excessively.
- Design changes. The new Liquid Glass UI has received mixed reactions. If the interface feels unfamiliar or less comfortable, reverting to Sequoia would be excessive. Tools like TinkerTool allow tweaking UI elements without reinstalling macOS, though I can’t guarantee their compatibility with future system updates.
- Minor glitches. Wi-Fi or Bluetooth dropouts, external display flickering, Control Center freezes, or Spotlight lag are common early-version bugs. They are often resolved by simple actions such as reconnecting to your network or devices, or by cleaning your Mac with a utility like MacCleaner Pro from Nektony to fix indexing and cache issues.
If you have ruled out these smaller fixes and remain confident that Sequoia worked better for your setup, move on to the downgrade method that best fits your case.
First things first: make a backup
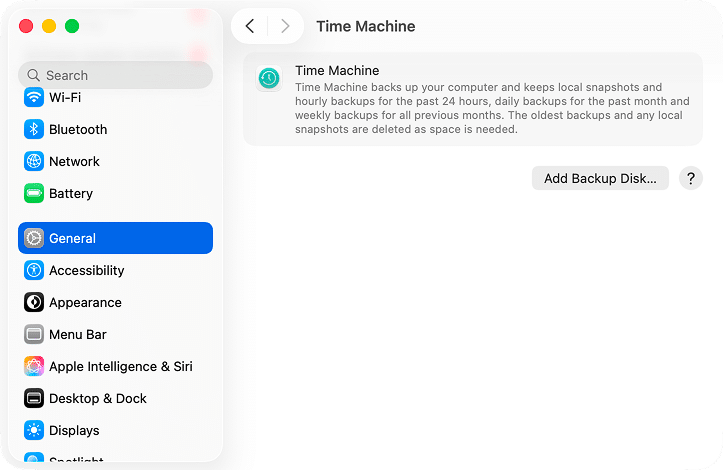
In the event that your downgrade goes south, you need to have the option to revert to the current state, even if you’re not satisfied with it. For that, back up your data now via Time Machine.
To do this, connect your external drive, open System Settings → General → Time Machine → Add Backup Disk…, select your external drive, and click Set up Disk.
Note:
You can back up your files to iCloud or other cloud provider, but that won’t allow you to restore the system itself and its settings, only your personal files and some app settings.
Downgrade from Tahoe to Sequoia using Time Machine
If you have a valid Time Machine backup from before upgrading to macOS Tahoe, this is your best-chance method to restore your Mac exactly to how it was under macOS Sequoia.
Steps:
- Connect your external Time Machine drive to your Mac.
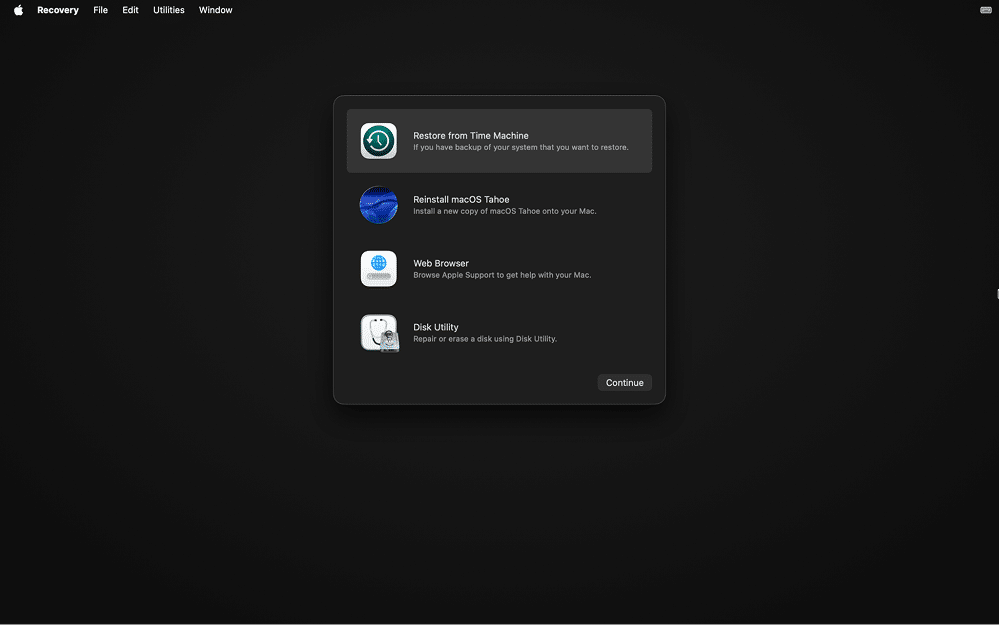
Restart your Mac in Recovery mode.
- On Intel Macs: hold ⌘ + R (or ⌥ + ⌘ + R to force Internet Recovery).
- On Apple Silicon: hold the power button until Startup Options appear, then select Options → Continue.
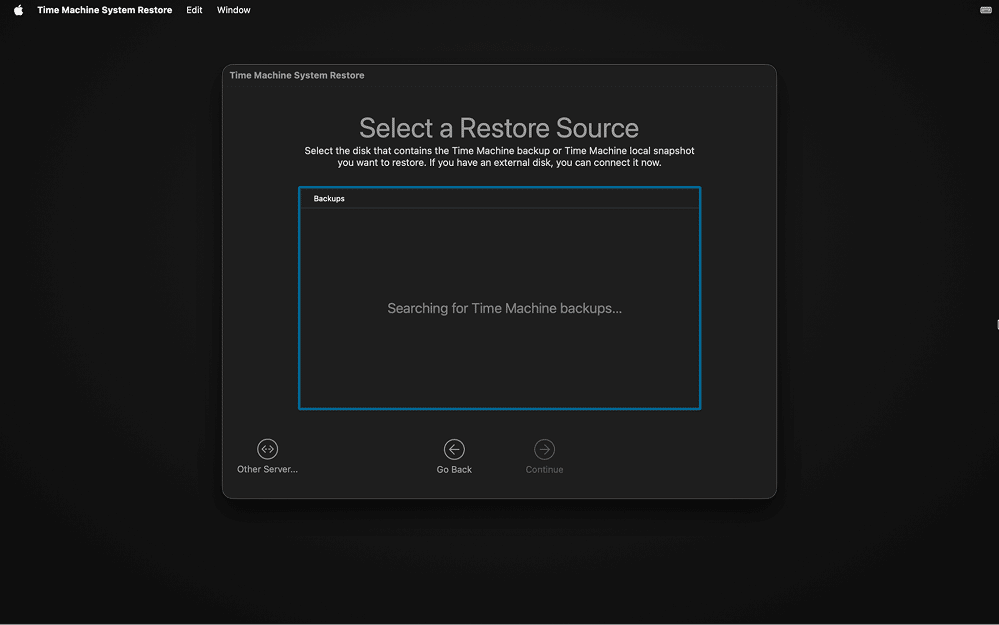
- In the Recovery screen, choose Restore from Time Machine Backup.
- Select the backup made before the upgrade to Tahoe. Double-check the date and macOS version in the backup listing.
- Proceed with the restore process and allow your Mac to reboot.
Note:
If the backup disk is corrupted or missing critical files, the restore may hang or fail.
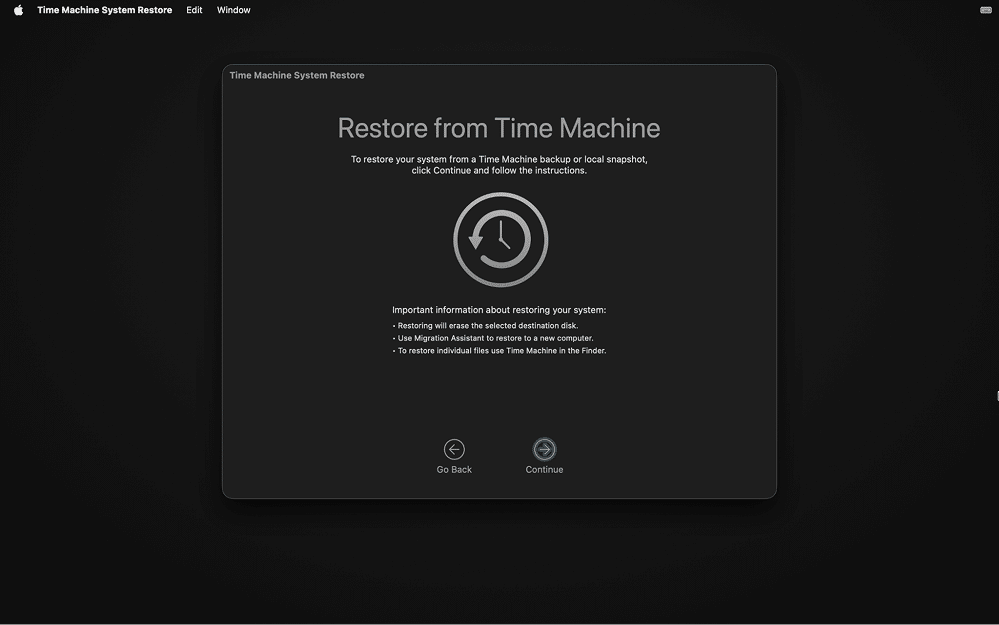
Once the restore completes, your Mac will boot into Sequoia with your apps and settings intact (assuming the backup included them).
Roll back using APFS snapshot to revert to Sequoia
If you updated your Mac to Tahoe and the system automatically created an APFS snapshot of the pre-upgrade state, you may be able to revert to Sequoia precisely as the system was before Tahoe. This is the fastest method, provided the snapshot still exists.
Note:
If your system disk was erased or reformatted after the upgrade, the snapshot won’t be usable.
So first, let’s check if you have a necessary snapshot:
Restart your Mac in Recovery mode:
- On Intel: hold ⌘ + R.
- On Apple Silicon: hold the power button → Startup Options → Options → Continue.
- From the top menu, choose Utilities → Terminal.
- In Terminal, run the following command:
diskutil apfs listSnapshots /Copy
- This shows snapshots existing on your Mac. If none appear, this method is not available.
Note:
If all your snapshots are created after Tahoe’s installation, like in the screenshot above, you won’t be able to change the macOS version with your snapshots.
If you see a snapshot created just before the Tahoe upgrade (verify date/time), remount your filesystem with writing permissions before applying it:
mount -uw /Copy
Now use the following command, but replace the <snapshot-ID> part with your snapshot’s name (e.g., “com.apple.TimeMachine.2024-09-25-230145”) or unique identifier (e.g., “21F78C2D-53EC-431A-A659-DD66214FCCB2”):
asr restore --source snapshot=<snapshot-ID> –target / –eraseCopy
After the rollback is complete, enter the “reboot” command in Terminal to restart your Mac. It should load into Sequoia as it was before the upgrade.
Use Internet Recovery to reinstall Sequoia (Intel Macs only)
This method works on Intel Macs and can reinstall the version of macOS that originally came with your Mac (or the latest compatible version).
Note:
You’ll need a reliable internet connection; some networks (captive-login, 802.1X) may fail to allow installation.
Steps:
Restart your Mac in Recovery Mode by holding one of these combinations:
- ⌥ + ⌘ + R – installs the latest compatible macOS.
- ⇧ + ⌥ + ⌘ + R – installs the version that shipped with your Mac or the closest available.
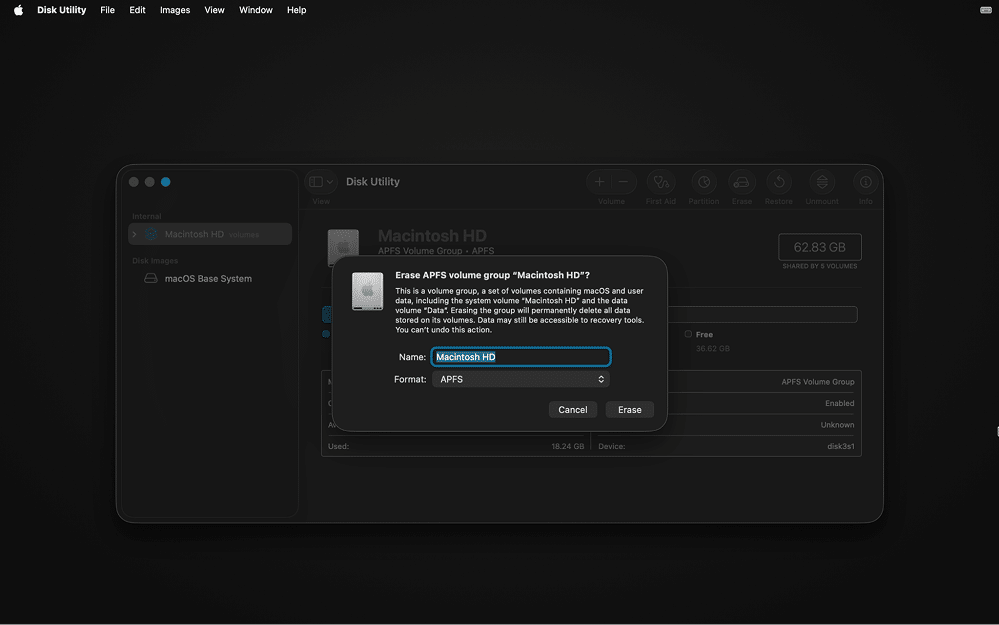
- When Recovery mode is loaded, make sure the Reinstall macOS option is available. If it is so, open Disk Utility, erase your system partition (format it as APFS) to prepare it for a clean system installation, and close it.
- Choose Reinstall macOS and proceed.
- Once the installation is complete, proceed with setup and restore your data from Time Machine or iCloud if you have backed it up.
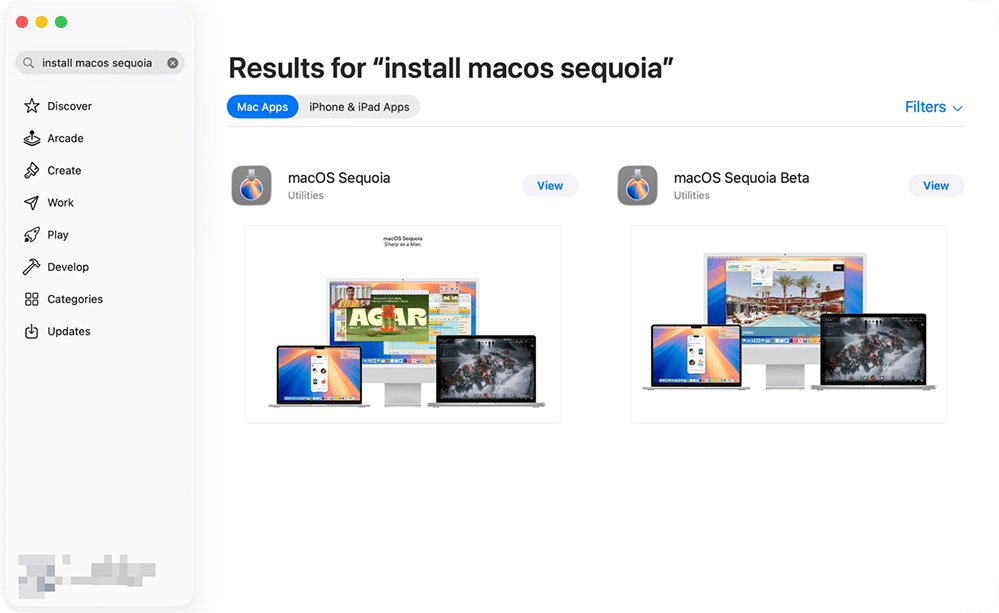
If you have reinstalled an older version of the system, you can upgrade to Sequoia by downloading the macOS Sequoia installer from the App Store and launching it.
Install Sequoia instead of Tahoe via USB drive
When you don’t have a suitable Time Machine backup (or a pre-upgrade snapshot), doing a clean install of Sequoia via a bootable USB lets you get back to that version.
Be aware:
- This method erases your drive and requires reinstalling apps and restoring files manually.
- Your Mac must be connected to the internet during the installation process. In their official guides, Apple states that even when using a bootable installer, Mac may need to download firmware or other information specific to the model.
Here’s how to install Sequoia via USB drive:
- Download the “macOS Sequoia” installer from the App Store.
Alternatively, you can use Terminal:
softwareupdate –fetch-full-installer –full-installer-version 15.6Copy
- Plug in a USB flash drive (16 GB or larger). Use the following command in Terminal to create a bootable installer:
sudo /Applications/Install\ macOS\ Sequoia.app/Contents/Resources/createinstallmedia –volume /Volumes/MyUSBCopy
Note:
This operation erases the contents of your flash drive.
Restart your Mac in the Recovery mode:
- Intel: hold Option (⌥) after reboot.
- Apple Silicon: hold the power button until Startup Options appear, then select the USB drive.
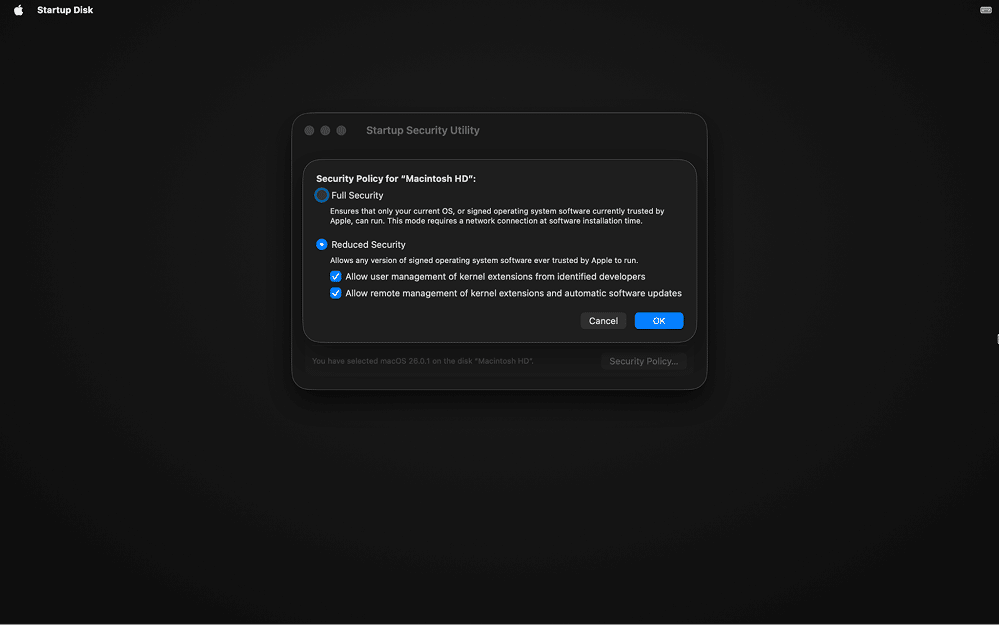
If you don’t see the USB drive in the list and you have an Apple Silicon Mac or Intel Macs with the T2 security chip, you may need to reduce the security level in Startup Security Utility to allow booting from external media.
Here’s how to do it:
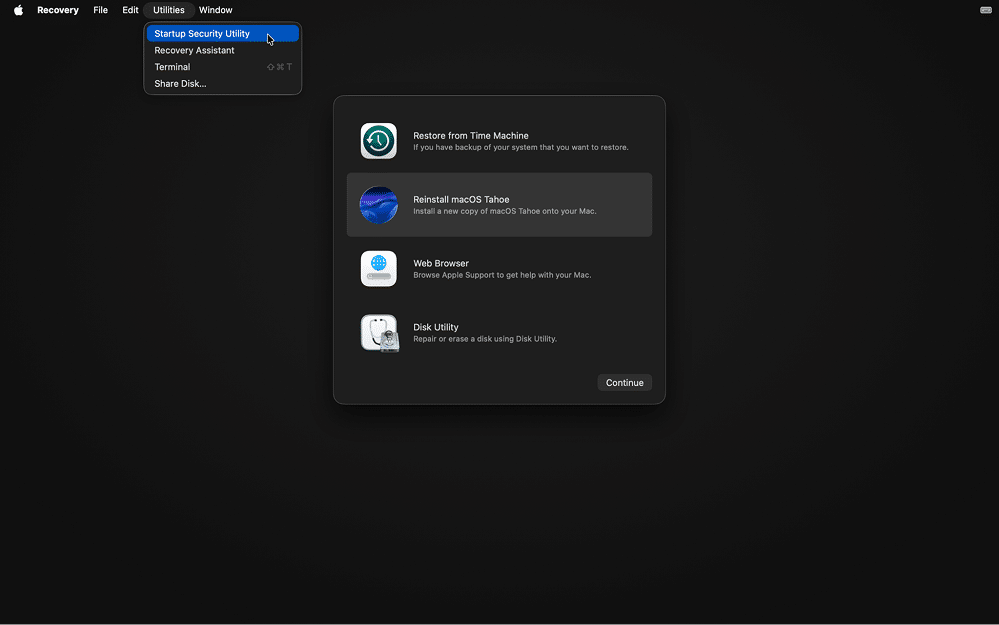
- Select Startup Security Utility in the Utilities menu.
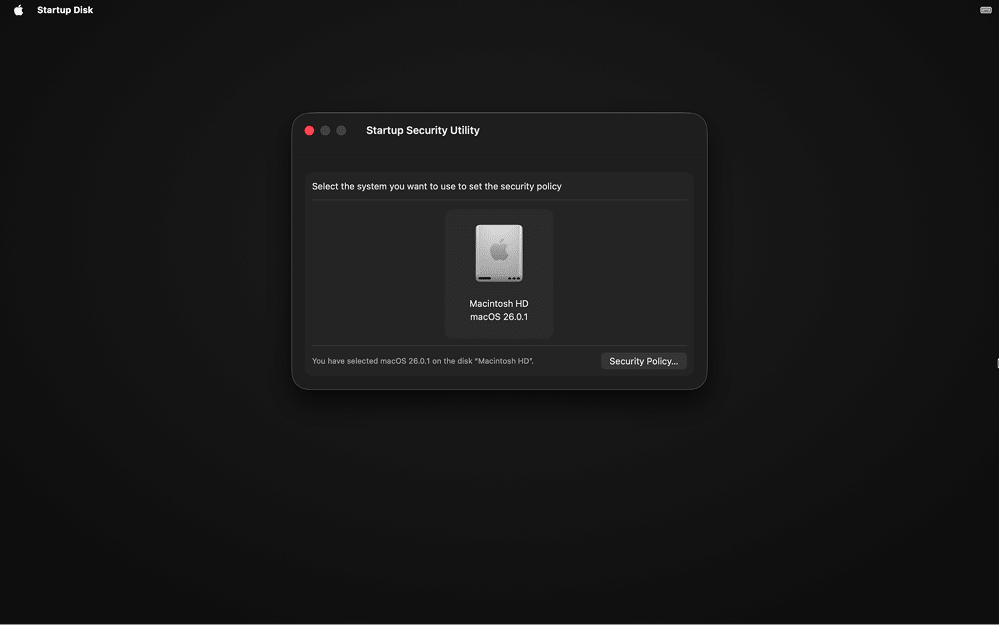
- Select your drive with your current macOS and click Security Policy… at the bottom of the window.
- Select Reduced Security and make sure both options under it are ticked. This allows the Mac to boot from your flash drive and launch the system installation process.
- Now that you have made sure you can select the USB drive and proceed with system installation, you need to erase your system drive (e.g., “Macintosh HD”) and format it as APFS in Disk Utility. In this way, you’ll prepare your disk for a clean system installation.
- Run the installer from the USB and follow the on-screen prompts.
Once the installation is complete, restore your personal files from the backup or cloud and reinstall your apps.
Final notes
What I’ve always appreciated about Apple is its stability. Through the years, macOS never demanded a clean reinstall. Even when I experimented with Hackintosh builds back in the early 2010s, the system stayed impressively reliable. And apps like MacCleaner Pro help eliminate many annoying glitches and freezes smoothly and quickly.
That’s why it feels unusual for me to even consider downgrading. While some of Apple’s design and usability choices in macOS Tahoe may not sit well with everyone, going back to Sequoia is neither simple nor future-proof. Each year, macOS evolves further away from its predecessors, making full rollbacks increasingly difficult.
Still, having the option to return to an earlier version is valuable. Whether you do it to regain lost performance, restore compatibility, or simply feel comfortable again in the environment you know best, it’s good to know that macOS still leaves that door open, even if it takes a few careful steps to walk through it.
