June 19, 2025
How to uninstall VMware Fusion on a Mac
In this hands-on guide, we’ll show you three tried-and-true solutions to uninstall VMware Fusion from Mac totally.
This Article Contains
Want the fastest way out?
Cut straight to the easiest method: App Cleaner & Uninstaller. This tool automatically scans your Mac and fully removes apps like VMware Fusion with all its hidden data and virtual debris.
What is VMware Fusion?
Here’s how it works: VMware Fusion creates a virtual machine (VM), a sandboxed environment that acts like a real computer. By using it without affecting your actual Mac setup, you can:
- install another OS inside it
- run app
- play games
- test software
Why uninstall VMware Fusion?
VMware Fusion is helpful and feature-rich, but it’s also a heavy hitter that can drain your Mac’s resources over time and might be one of the reasons that slow your Mac down:
- Takes up tons of space: it might be light on paper (750 MB & at least 5 GB for each VM), but virtual machines can take up 100 GB or even more, which is heavy.
- Eats system resources: running multiple operating systems, multitasking, and operating in the background, which uses up RAM and CPU, leaving your Mac less responsive.
- Сlutters your system: over time, VMware Fusion can scatter leftover files, settings, and logs across your system.
- No longer needed: if it’s not part of your daily workflow, there’s no reason to keep it around and let it be a burden for your Mac.
- Better alternatives available: depending on your needs, you might be better off with lighter, more native virtualization software.
3 solutions to remove VMware Fusion on Mac
We ran VMware Fusion 13.6.3 on macOS Sequoia 15.3.1 to check how each uninstallation method performs. Whether you want it gone with a click or script or prefer the manual route, it’s up to you. Let’s see each option in detail so you can pick what works best.
How to uninstall VMware Fusion manually
Although Broadcom provides a manual removal guide, our business is to warn you that this method is time-consuming and requires extra attention to remove all VMware Fusion components. We’ve gone beyond and tracked down all the relevant directories for you.
Manual steps to delete VMware from Mac
- Step 1. Quit VMware Fusion.
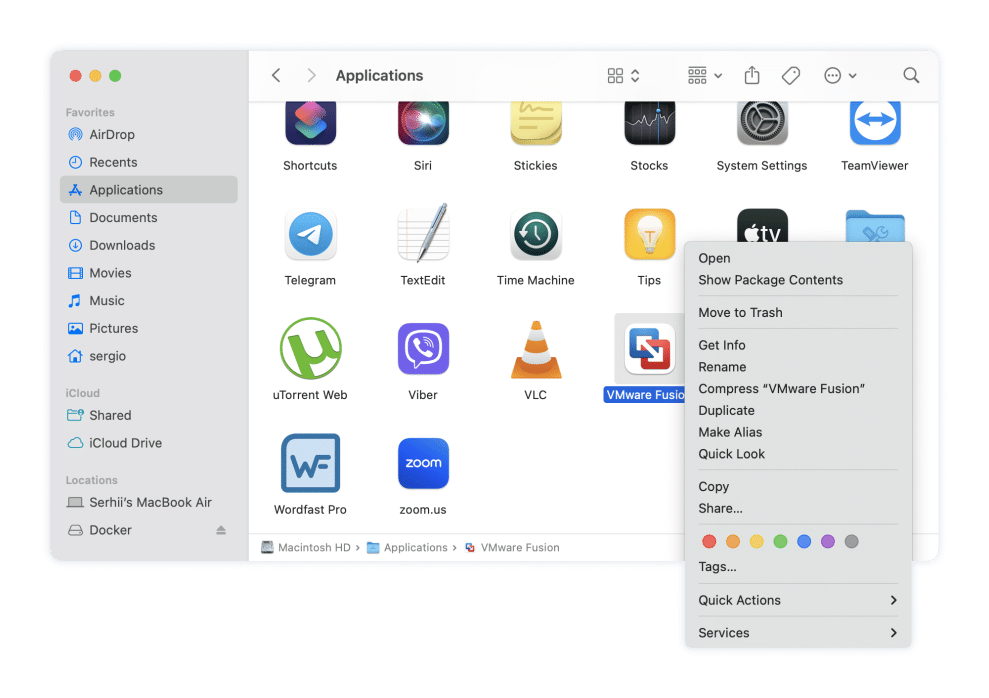
- Step 2. Go to the Applications folder → drag the VMware Fusion.app to Trash.
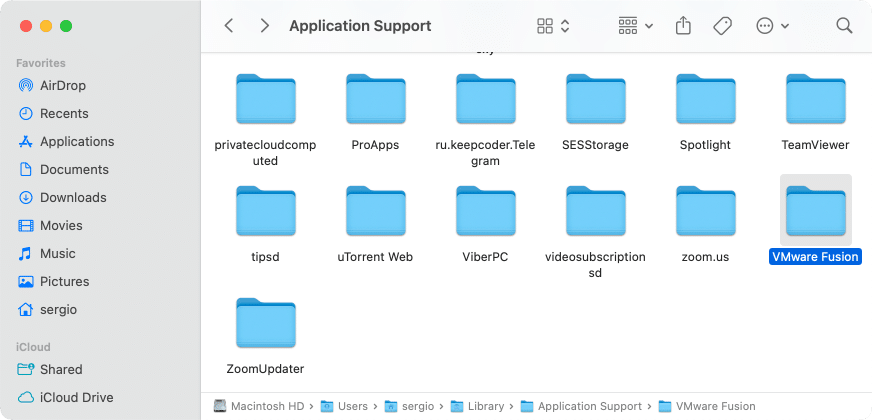
- Step 3. Delete VMware Fusion leftovers.
To fully remove VMware Fusion from your Mac, you’ll need to manually delete its leftover files stored in various system folders.- Open Finder.
- From the top menu bar, click Go → Go to Folder (or press Cmd + Shift + G).
- Enter each of the following paths one at a time, and press Return after each entry.
- In every folder that opens, look for and delete any VMware-related files/folders you find.
Application support files:
~/Library/Application Support/VMware FusionCopy
~/Library/Application Support/VMwareCopy
~/Library/Application Support/VMware Fusion Applications MenuCopy
/Library/Application Support/VMware FusionCopy
/Library/Application Support/VMwareCopy
/private/etc/paths.d/com.vmware.fusion.publicCopy
/Library/StartupItems/VMware FusionCopy
/Library/StartupItems/vmnetCopy
→ delete anything starting with com.vmware/Library/PrivilegedHelperTools/Copy
→ delete anything starting with vmware, vmnet, and vmnat/private/var/run/Copy
Caches:
~/Library/Application Support/com.apple.sharedfilelist/com.apple.LSSharedFileList.ApplicationRecentDocuments/com.vmware.fusion.sflCopy
~/Library/Caches/com.apple.helpd/SDMHelpData/Other/English/HelpSDMIndexFile/VMware Fusion Help*11.0.1Copy
~/Library/Saved Application State/com.vmware.fusion.savedStateCopy
~/Library/Caches/com.vmware.fusionCopy
~/Library/Caches/com.apple.helpd/Generated/VMware Fusion Help*Copy
~/Library/Application Support/com.apple.sharedfilelist/com.apple.LSSharedFileList.ApplicationRecentDocuments/com.vmware.fusion.sfl2Copy
/private/var/db/vmwareCopy
Logs:
→ move to trash files named with VMware/Library/Logs/Copy
→ trash any files that start with VMware~/Library/Logs/Copy
Preferences:
→ remove all the files containing VMware~/Library/Preferences/Copy
→ remove all the files containing VMware/Library/Preferences/Copy
Login-items:
→ erase any file that begins with com.vmware/Library/LaunchDaemons/Copy
Kernel Extensions:
/Library/Extensions/vmnet.kextCopy
/Library/Extensions/vmci.kextCopy
/Library/Extensions/vmmon.kextCopy
/Library/Extensions/vmware-usbarbitrator.kextCopy
- Step 4. Empty Trash.
Nice! You’re all good to go now👍
How to delete a virtual machine in VMware (optional)
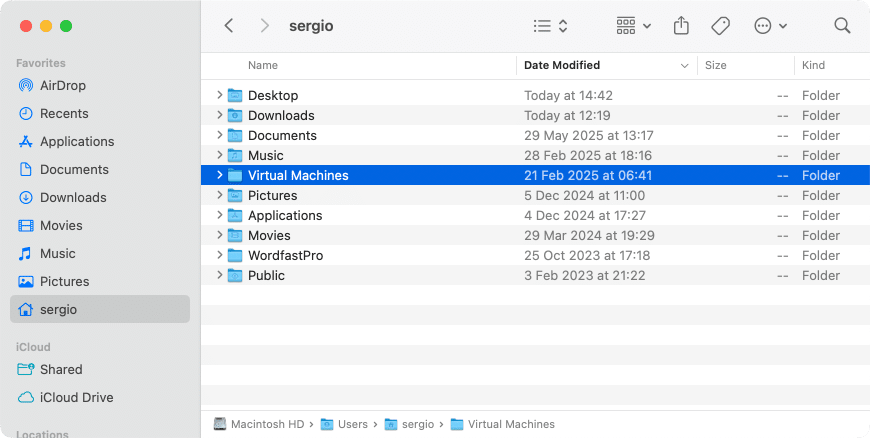
Uninstalling VMware Fusion doesn’t automatically remove the VMs you created with it. They’re typically stored in a few standard folders on your Mac, we’ll show you how to locate them.
- Open Finder → press Command + Shift + G.
- In the Go to Folder box, enter the common VM default locations and hit Return:
~/Documents/Virtual Machines.localized/Copy
~/Library/Containers/com.vmware.fusion/Data/Documents/Virtual Machines/Copy
~/Virtual Machines/Copy
- Look for files with the .vmwarevm extension: these are your virtual machines.
Note:
If you think you might need them later, back up the files to an external drive or cloud storage.
- Drag the .vmwarevm files you want to delete into the Trash.
- Empty Trash.
And that’s it — you’ve not only uninstalled VMware Fusion but also cleaned up the remaining VMs that take up space.
Uninstall VMware Fusion with App Cleaner & Uninstaller
As you can see, manually removing VMware Fusion involves digging through dozens of system files and folders. Fortunately, there’s a much easier solution: App Cleaner & Uninstaller makes the entire process simple.
Believe it or not, this software removes apps like VMware Fusion and all its hidden support files in just seconds. We checked everything. Here’s what the process looks like:
- Download and launch the uninstaller.
- Select VMware Fusion from the applications list.
- Click the Remove button → confirm the uninstallation.
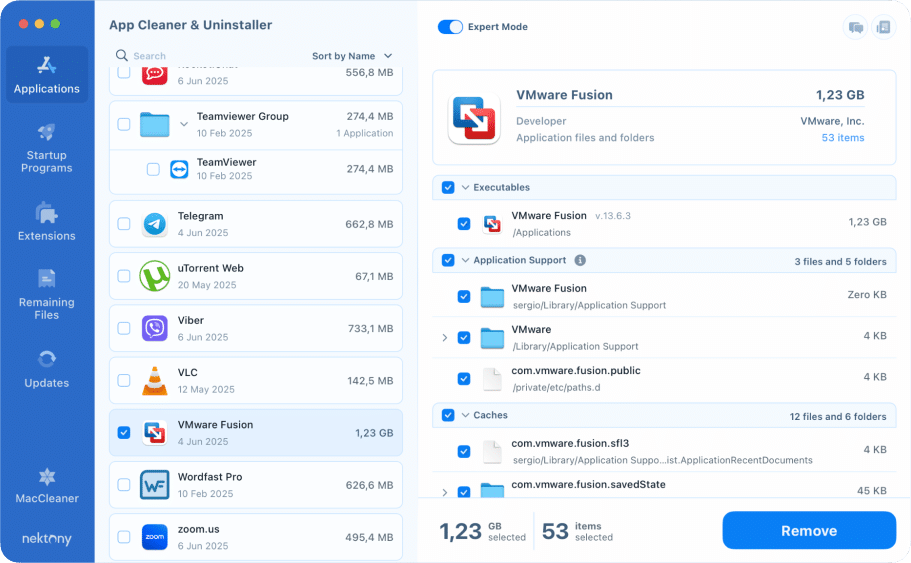
That’s all. Told you, all gone 😏
Even if you started deleting VMware Fusion by another method, you can still clean up VMware leftovers with App Cleaner & Uninstaller. For this:
- Switch to the Remaining Files tab.
- Select all leftovers → click the Remove button → confirm the action.
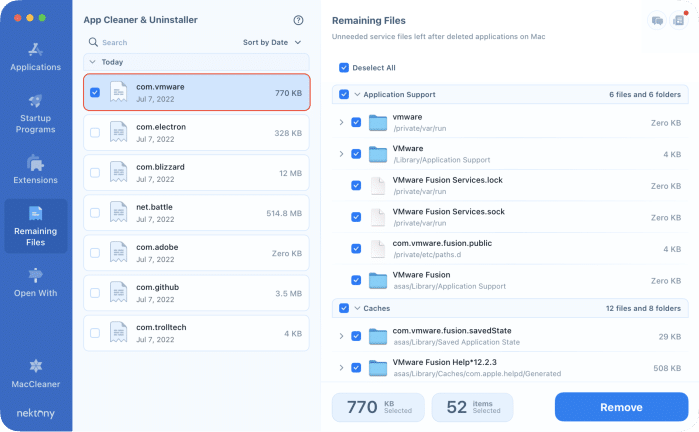
With App Cleaner & Uninstaller, you can be confident that apps are fully uninstalled and no service files are left behind. Get it for free and embrace its best features.
How to remove VMware Fusion with Terminal
Some advanced users prefer using Terminal to automate the uninstallation of VMware Fusion. There are shell scripts available that can speed things up by deleting all associated files in one go.
Note:
If you’re still interested, you can proceed with care and check out the Terminal uninstallation experience shared by users on GitHub. Or you can rely on us in this regard:
Terminal steps to remove VMware Fusion
- Run Terminal.
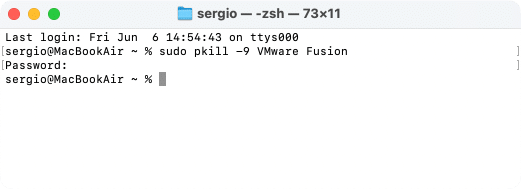
- Force Quit VMware Fusion. For this, use the command and press Return:
sudo pkill -9 VMware FusionCopy
- Remove the main executable file (.app) by entering this command:
sudo rm -rf /Applications/VMware\ Fusion.appCopy
Note:
In the next step, you’ll handle VMware leftovers with an uninstall script. But don’t be afraid. It strictly targets files and folders associated with VMware Fusion. It does not interfere with other applications or system components on your Mac.
Important!
The example path ~/Downloads/remove_vmware.sh points to the Downloads directory. If you saved the script file somewhere else, adjust the path accordingly.
- Delete VMware-related files: download the VMware files uninstall script → activate it in Terminal using the commands below line by line:
chmod +x ~/Downloads/remove_vmware.shCopy
~/Downloads/remove_vmware.shCopy
- Remove virtual machines by running the relevant command, depending on your VM(s) location:
rm -rf ~/Documents/Virtual Machines.localized/Copy
rm -rf ~/Library/Containers/com.vmware.fusion/Data/Documents/Virtual Machines/Copy
rm -rf ~/Virtual Machines/Copy
Troubleshooting when removing VMware Fusion
There is no guarantee uninstalling apps will always go smoothly, especially with system-level tools like VMware Fusion. From stubborn processes to leftover system files, unexpected blockers can get in the way. That’s why we put together common issues and fixes:
How to reset VMware Fusion if something went wrong
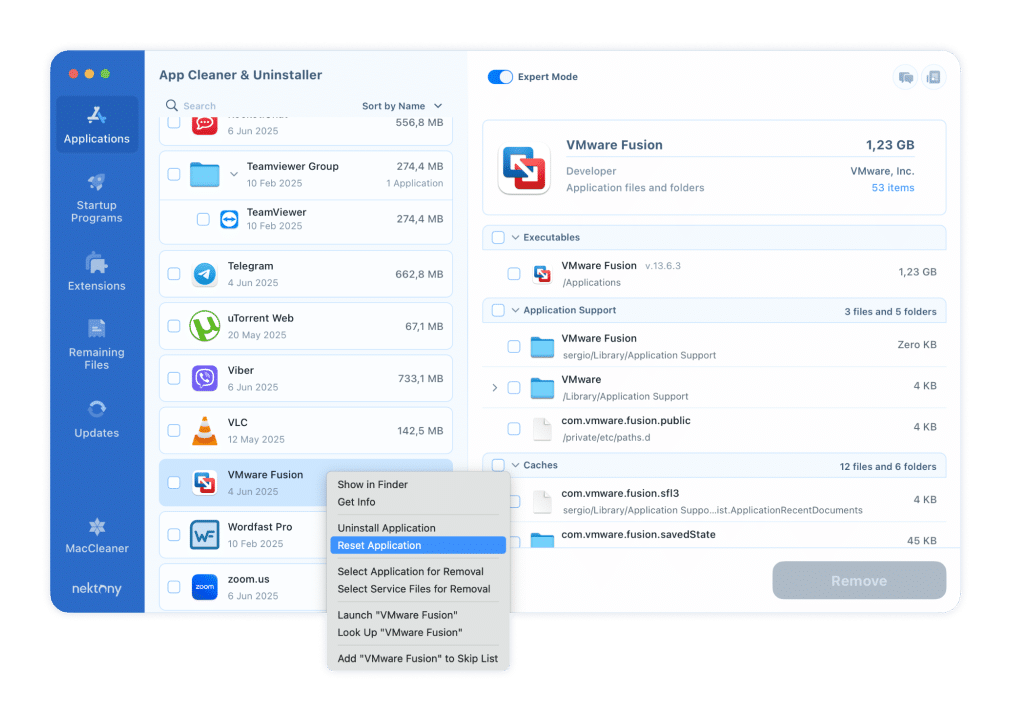
In case VMWare Fusion is not working properly, you can give it a shot resetting before deleting it. Here’s how to reset VMWare Fusion via App Cleaner & Uninstaller:
- Launch App Cleaner & Uninstaller.
- Locate VMWare Fusion from the Applications list → control-click on it.
- Select the Reset Application from the dropdown list → confirm the action.
How to handle VMware Fusion launch issues or VMware start failure
The app won’t start after clicking the app, or you get an error like: “VMware Fusion.app cannot be opened because it is from an unidentified developer.”
Possible reasons:
- Corrupted app binary after a macOS update.
- Incompatible kernel extensions (KEXTs) after upgrading to macOS Ventura, Sonoma, or later.
- Missing permissions (Full Disk Access, System Extensions).
Fixes:
- Go to System Settings → Privacy & Security → Security, and allow system extensions.
- If that fails, uninstall and reinstall VMware Fusion, focusing on the removal of all KEXTs.
How to overcome Kernel extension not approved errors (NEXT block)
When launching Fusion, macOS blocks Fusion from loading system extensions, and you can’t find an option to approve the extension in System Settings.
Possible reasons:
- macOS requires manual re-approval of KEXTs after system updates.
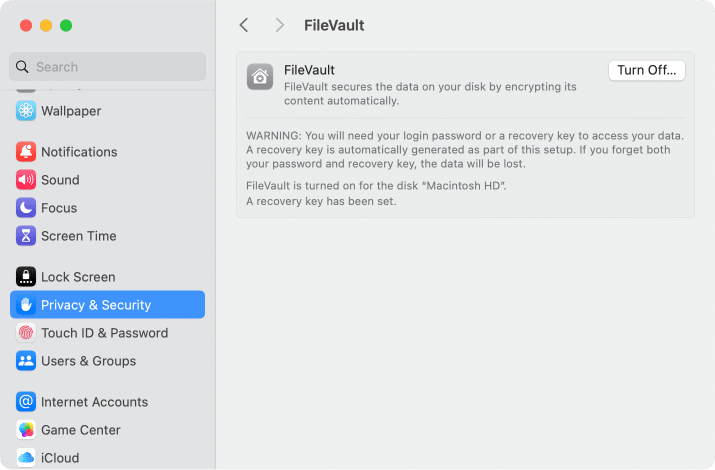
- The “Allow” button may not appear if FileVault is enabled or if Fusion wasn’t installed via the App Store.
Fixes:
- Disable FileVault (System Settings → Privacy & Security → FileVault → Turn Off) → reset and install/launch Fusion.
- Boot into macOS Recovery Mode (Cmd + R), enable System Integrity Protection (SIP), and approve system software from VMware.
- If issues persist, remove all VMware KEXTs and reinstall with the latest installer.
How to avoid virtual machines crashing when running on APFS volumes
The VM launches but crashes after some time or during heavy disk writes with I/O errors. Sometimes, the whole host system reboots or freezes.
Possible reasons:
- Incorrect permissions on .vmwarevm virtual disk folders.
- Corruption or structural problems with the APFS volume itself.
Fixes:
- Stop all running VMs. Open Disk Utility → First Aid and run it on the APFS drive where your VMs are stored.
- If errors persist, move the VMs to another volume or use Terminal:
diskutil verifyVolumeCopy
- For frequent I/O errors, back up .vmwarevm files (or use Time Machine), then reinstall VMware Fusion.
How to address VM missing network adapters (bridged/NAT not working)
The guest doesn’t see the network, pings fail, and no IP is assigned.
Possible reasons:
- Corrupted network configuration in macOS or missing KEXTs for the vmnet.framework.
- Conflict with third-party software that creates VPN adapters (e.g., Cisco AnyConnect, OpenVPN, WireGuard).
Fixes:
- In System Settings → Network, delete any existing vmnet1 or vmnet8 adapters, then restart macOS, which lets VMware recreate the necessary interfaces.
- Check for conflicts with VPN clients: temporarily disable or uninstall them.
- If it is impossible to restore network adapters manually, reinstall VMware Fusion to reset the vmnet KEXT.
How to manage license expired errors or licensing issues
Fusion runs in trial mode only, and entering a serial number results in an invalid key or cannot contact license server errors.
Possible reasons:
- Corrupted license file.
- In the case of buying VMware Fusion via the Broadcom website, the license key is linked to your account. After the transition to Broadcom, reactivation may be required.
Fixes:
- Delete the old license file: → relaunch Fusion and re-enter your valid license key.
~/Library/Application Support/VMware Fusion/licenseCopy
- If the issue persists, uninstall VMware Fusion completely, reinstall the latest version, and activate it using your Broadcom-linked account.
Alternatives to VMware Fusion
If VMware Fusion keeps getting you frustrated, you may consider something simpler, lighter, or free. Here are the top contenders that might better match your Mac setup:
| Alternative | Why it’s worth trying |
|---|---|
| Parallels Desktop | Sleek UI, great for beginners, and optimized for Apple Silicon. Runs Windows apps like native Mac apps. It’s not free, but very polished. |
| UTM | 100% free and open source. Supports ARM and x86, built on QEMU. Great if you’re into DIY and want to emulate niche systems. |
| VirtualBox | Free and cross-platform. Decent for light use, but it’s slower and less Mac-optimized. Doesn’t play as nicely with macOS Ventura+ or M1/M2 chips. |
| Docker | Technically it’s not a VM, but ideal for running isolated apps, especially for developers. Great for containerized workloads, not for full OS installs. |
Which one should you choose:
- Just want Windows to run on your Mac smoothly?
👉 Go with Parallels Desktop. - Looking for a free tool to experiment with different operating systems?
👉 Try UTM or VirtualBox. - Need to test apps in isolated environments without booting full VMs?
👉 Docker is your new best friend.
If you’re experimenting with other virtualization apps, make sure to learn how to properly uninstall Parallels or correctly get rid of VirtualBox, too.
Final notes
Uninstalling VMware Fusion isn’t as straightforward as dragging it to the Trash, not with its loads of files, background helpers, and giant virtual machines hiding in your system. But now you’ve got all the steps laid out, and even better: you’ve got options.
The easiest and the most trustworthy? App Cleaner & Uninstaller. With just a few clicks, it does what takes dozens of commands or folders to clean manually – fully removing Fusion and everything tied to it.
Curious about how this tool can empower your Mac? We’re just a message away.


