Contents
This article will explain how to customize the menu bar on a Mac, where to find its settings, and how to make it visible in fullscreen mode on a Mac.
What is the Mac menu bar?
The Mac menu bar is a strip at the top of the desktop screen where the Apple menu and applications menu are located. The right corner of this bar is called a toolbar. There, you can see different icons helping to quickly access applications, perform different tasks, check statuses and so on.
If you have been using a Mac for a long time and have installed a large number of software tools, most likely your menu bar (the area where the clock is displayed) is cluttered with numerous icons. In this article, we will share tips on how to edit the menu bar on your Mac, what to do when the menu bar is missing, how to hide the menu bar and some more tips for toolbar settings.
How to customize menu bar on Mac
Where is the menu bar on a Mac? This is one of the frequently asked questions from Mac users. The menu bar is located on the top of the macOS desktop. However, by default, macOS hides the menu bar in fullscreen mode. This is especially useful for the owners of MacBooks with small displays and users who rarely click on items from the status bar.
If you don’t like when your Mac menu bar disappears, you can stop hiding it in fullscreen mode. Below, we will share a trick for keeping the menu bar visible in fullscreen on your Mac.
How to keep the menu bar visible in the fullscreen mode on your Mac
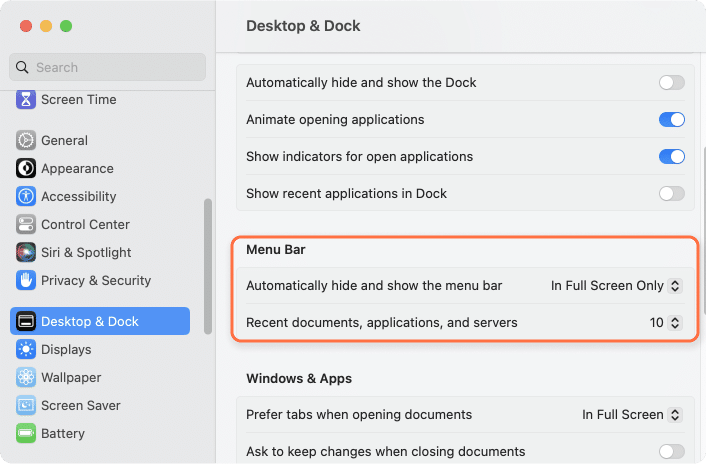
You can stop the menu bar from automatically hiding in the System Settings. Here is how to do this:
- Open System Settings.
- Click Desktop & Dock in the left panel.
- Scroll down and find the Automatically hide and show menu bar section.
- Disable this option.
After this, the menu bar will stop disappearing when you work in a window/application.
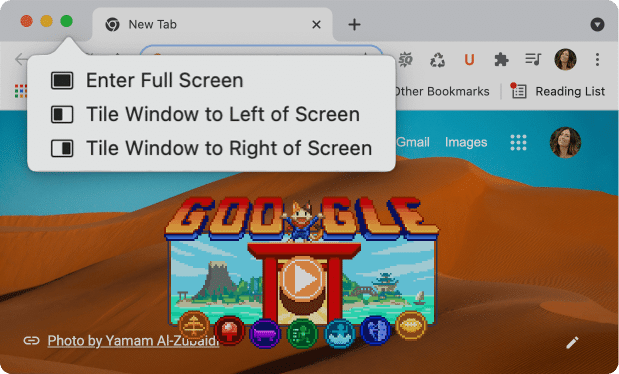
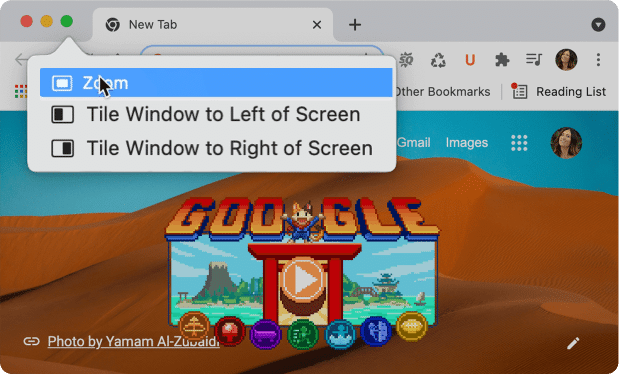
By default, when you hover your mouse at the top in fullscreen mode, the menu bar will float. If you want to keep it visible at all times, press the Option key and then click the green button in the left top corner of the window. In this case, instead of Enter Full Screen option, you will see the Zoom option, and the window/application will maximize in that desktop with the menu showing on top.
How to move icons in the menu bar on a Mac
Not every Mac user knows that it’s possible to arrange the default menu icons that come with your Mac without any third-party software. Just hold the ⌘Cmd key, then click and drag the icons in the toolbar in any order you like.
Note, the Control Center and Spotlight icons are protected from being moved or removed from the Mac toolbar.
The icons’ order in the menu will retain after the system restart.
How to remove icons from the menu bar on a Mac
If you want to remove system icons from the toolbar, press the ⌘Cmd key and drag an icon to the desktop area.
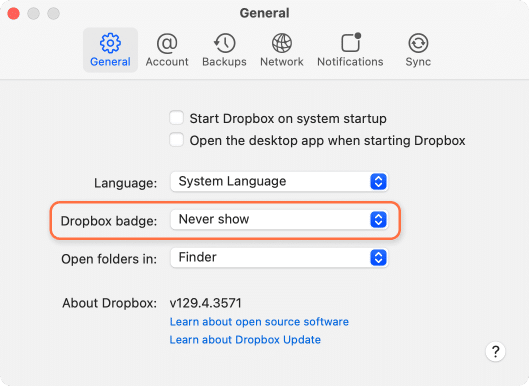
To remove icons of third-party applications, you will have to change the settings in the applications’ preferences. For example, you can remove the Dropbox icon from the toolbar in its Settings → General tab.
How to add icons to the menu bar on Mac
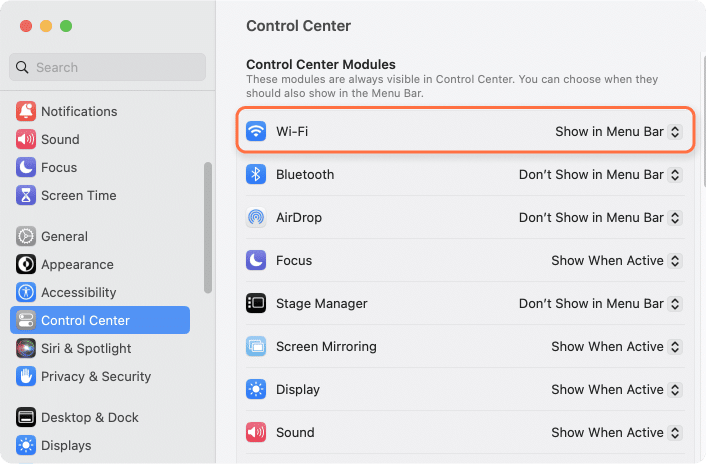
Once you clean up your toolbar from unneeded icons and options, you can add what you really need there. You can add additional icons to be displayed in the menu bar from the System Settings → Control Center.
Here are some useful options that can be added to the toolbar:
- Bluetooth
- Siri
- Sound
- Wi-Fi
- Battery charge level
- Fast user switching
- AirDrop
Top Mac menu bar applications
Now, let’s take a look at which third-party applications can be useful for your menu bar.
1. Memory Cleaner
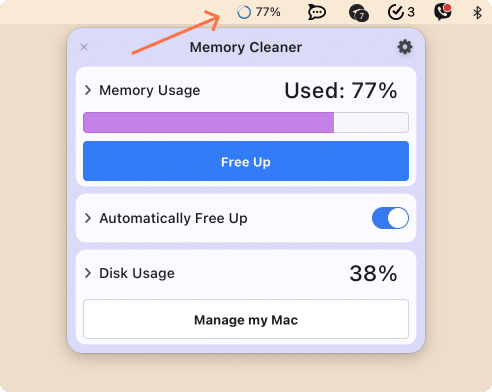
If you use a large number of applications at the same time, if you use applications that use much RAM memory or if your Mac often slows down and applications freeze, a free application called Memory Cleaner will greatly help you to fix issues and speed up your Mac.
Memory Cleaner allows you to free up RAM memory on your Mac, see the memory-consuming applications and quit the heavy consumers. The application is absolutely free to download and use on a Mac.
Once you open Memory Cleaner, its icon appears in the menu bar. Just click on the Memory Cleaner icon and then click the Cleanup button. Also, Memory Cleaner shows how much junk files, duplicate files, unused applications and large/old files you have on your disk and which should be cleaned up from your Mac.
2. Funter
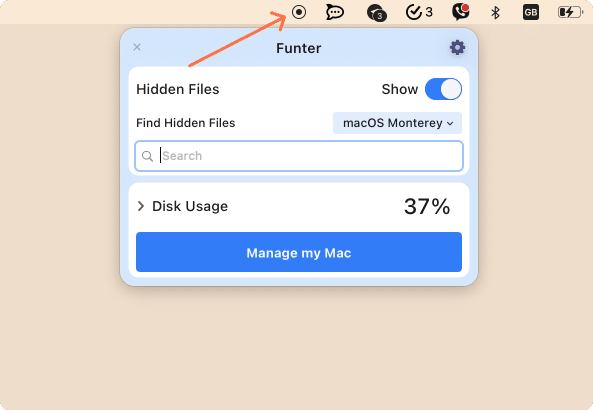
Funter is a free application from Nektony designed to hide/unhide files and search for hidden files on a Mac. Here is the download link for Funter.
Once you run Funter, its icon appears in the menu bar. Just click on its icon and use the toggle button to hide or unhide hidden files on your Mac. If you need to find appropriate hidden files, just enter the query in the search field and press Enter. You will see the list of all hidden files matching your query.
3. Monosnap
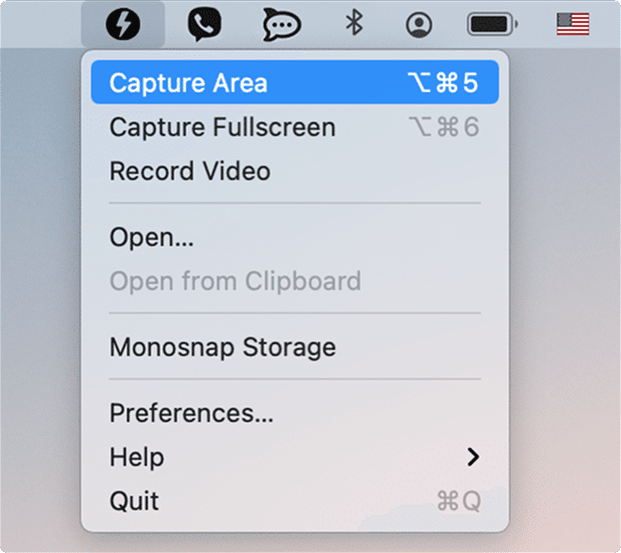
Monosnap is a free tool to take screenshots and record video of the desktop with its own cloud storage. Unlike the standard Mac shortcut for taking screenshots, Monosnap is handy when you need to send the screenshot to someone or when you need to record what you are doing on your desktop. Once you launch Monosnap, its icon appears in the menu bar. All you have to do to use the app is to click its icon and choose the appropriate option from its dropdown menu.
Conclusion
Now you know how to customize the menu bar on your Mac and what free additional applications you can add there for some frequently used tasks. Share in the comments below your favorite applications you use in the menu bar.
