August 22, 2025
Uninstalling Battle.net on Mac: Step-by-Step Guide
Caught in a never-ending respawn, striving to get rid of Battle.net from your Mac? 🤯
This guide arms you with everything you need to fully uninstall and troubleshoot the app.
In this tutorial, you’ll get two clear roadmaps to uninstall Battle.net from your Mac: one quick and efficient, the other more hands-on. You’ll also become aware of important pre-install steps, including account deletion. And, if anything glitches along the way, I’ve got fixes and answers to the most common questions about Battle.net for you. Let’s get started.
This Article Contains
Want a 100% uninstall score?
Delete Battle.net, any other game, and every unused app in one flawless run with the help of App Cleaner & Uninstaller. It gets you that 100% clean sweep every time in under a minute, with no leftovers, no manual quests involved.
What is Battle.net?
If you play Blizzard games (World of Warcraft, Diablo, StarCraft, Overwatch), you’ve definitely met the Battle.net launcher. Much like Steam or Epic Games Launcher, Battle.net is Blizzard’s official launcher and online platform, but only focused on its dedicated ecosystem.
It’s more than just a game launcher; it’s the hub where over 23.12 million monthly players handle game installs, updates, patches, and tap into social features like chat and friends lists.
Quick tidbit:
In 2024 alone, Blizzard Entertainment recorded an incredible 8.34 billion hours of playtime across all its games, that’s roughly 952,055 years of nonstop gameplay, a testament to the massive user engagement via Battle.net.
Why uninstall Battle.net?
I remember spending way too much time inside the Battle.net universe, commanding armies through SC campaigns, rushing 1v1s, battling infernal fiends in Diablo’s dungeons, or queueing up with friends until 3 a.m. But eventually, the time comes when you hit pause.
Let’s see what might’ve brought you here:
- You are a game quitter. You’ve conquered every campaign or achieved all you set out to do. Or you’ve hung up your virtual boots and stepped away from playing.
- You need to free up space. Blizzard games are massive, and the launcher itself leaves behind caches, logs, and support files that quietly eat up storage.
If disk space is your only concern and you keep playing some Blizzard games, uninstalling one or two heavy games you haven’t touched in ages might do the trick.
- The app keeps glitching. Launcher refuses to update, gets stuck mid-launch, or won’t uninstall properly. Starting fresh can reset everything and solve persistent issues.
- Your gaming library evolved. If you’re all-in on building castles in Minecraft, climbing the ranks in League of Legends, and Battle.net isn’t where you’re logging in anymore.
- You’re switching platforms. You’re moving to a console, or you wanna try other non-Blizzard games like Fortnite, which is running with the Epic Games Launcher.
Pre-uninstall things to consider
Before you go full uninstallation mode on Battle.net, take a moment to prepare. Deleting the app won’t cancel your subscription, cut ties with your account, erase your achievements, purchased games, or game progress. Nor will it uninstall games linked to the launcher.
If your goal is a clean break, there are a few key things to handle first: uninstalling any Blizzard games, cancelling active subscriptions, and doing a full account deletion to avoid future charges.
How to uninstall a Blizzard game in Battle.net
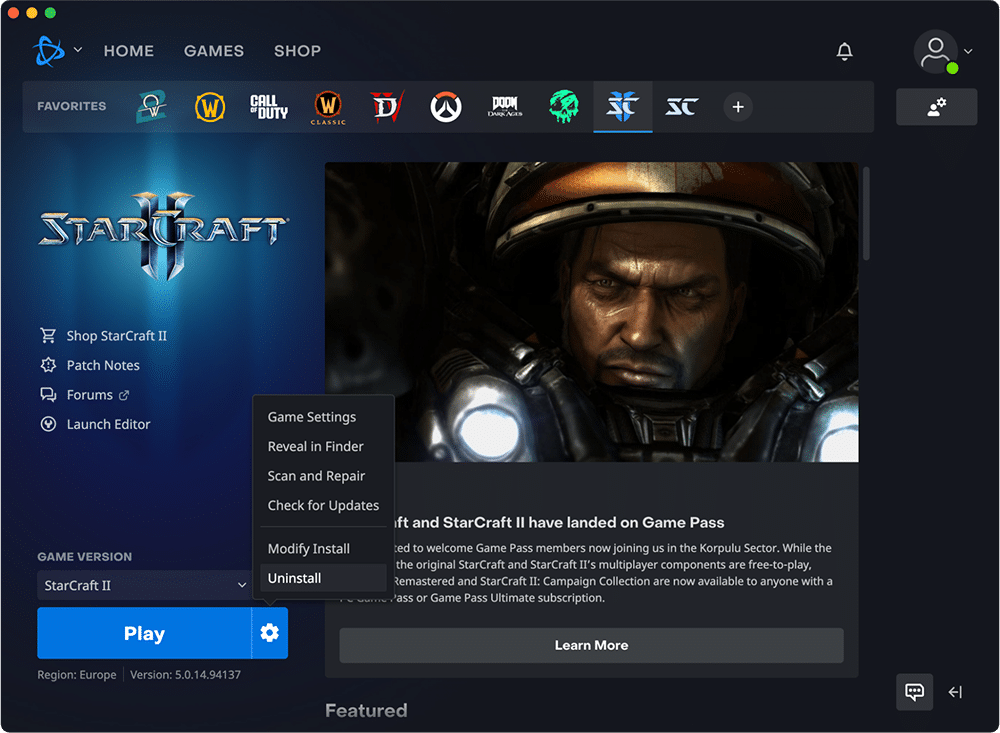
- Run the Battle.net app.
- Click the Games tab.
- Select your game (e.g., StarCraft II).
- Click on the ⚙️ Gear icon next to Play.
- Select Uninstall → confirm.
How to cancel a subscription in Battle.net?
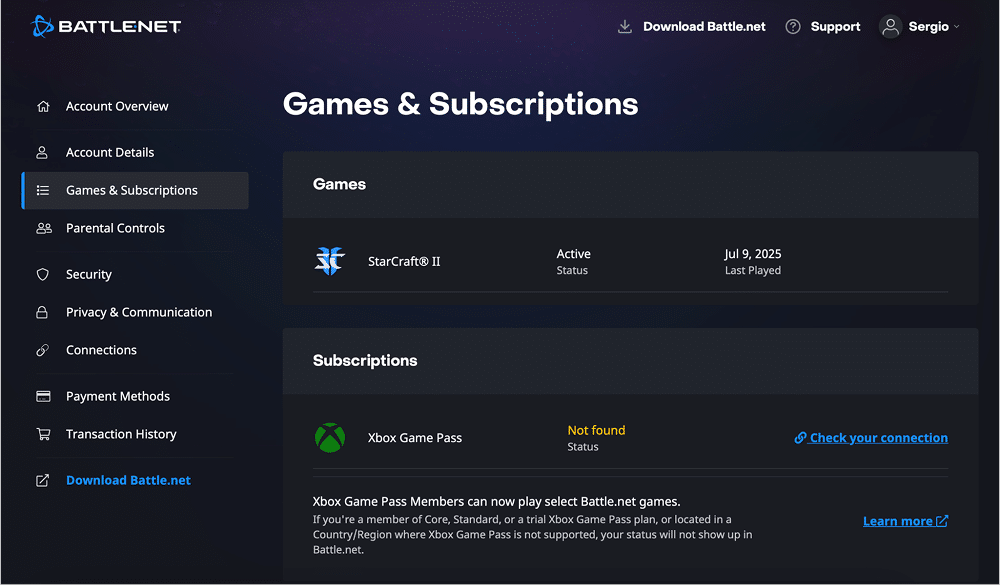
- Go to account.battle.net → sign in.
- In the left sidebar, select the Games & Subscriptions tab.
- Find your active subscription under the Subscriptions section.
- Click Manage next to the subscription.
- Select Cancel Subscription → confirm.
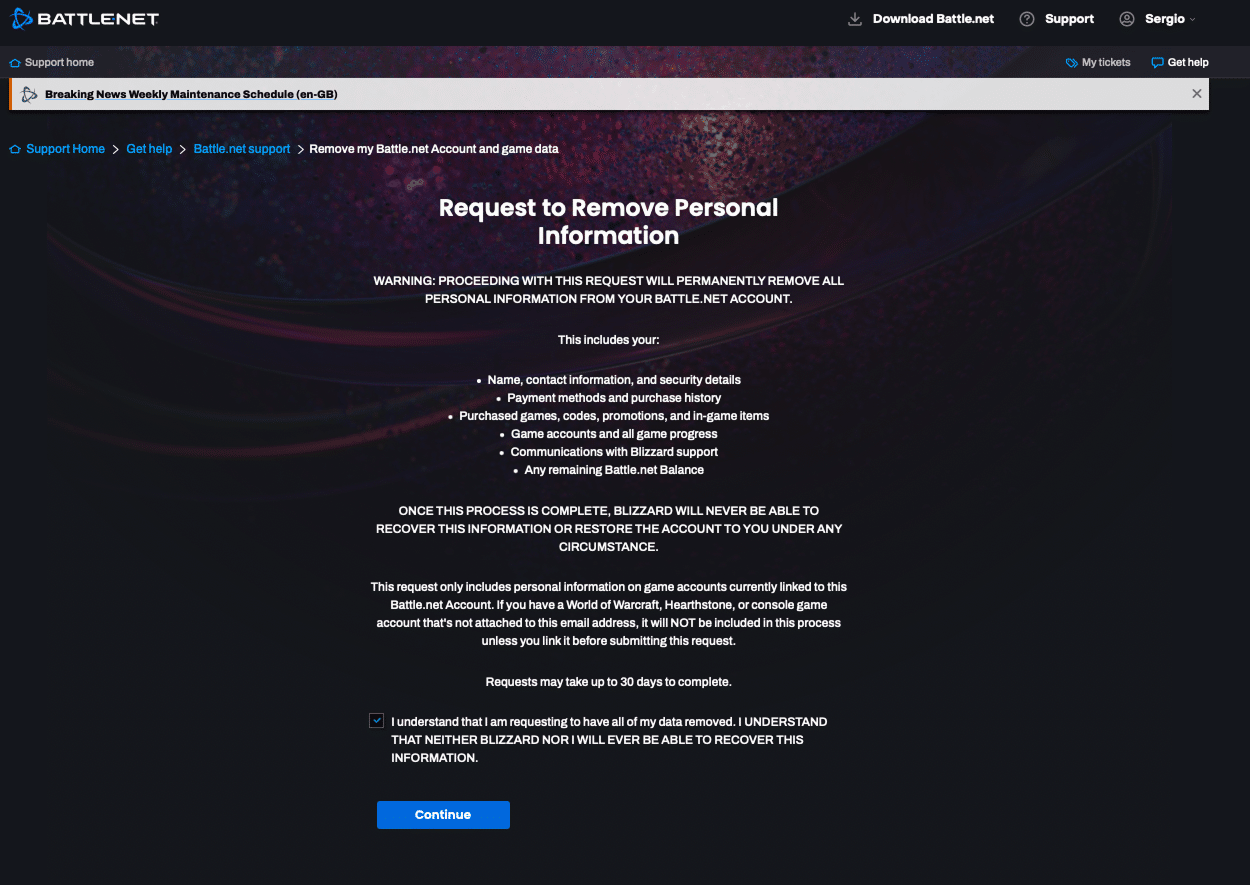
How to delete a Battle.net account?
- Go to the Blizzard support portal → log in.
- In the search bar, type Delete account → hit Return.
- Select the article titled Delete Battle.net Account.
- Look through what info will be deleted → locate the line saying Click here to request the deletion of your Battle.net account → go to the link.
- Check the account deletion acknowledgement box → click the Continue button.
- Enter the verification code sent to your email → click the Submit button.
- Wait for the request processing (up to 30 days). It usually takes much less, but it depends on Blizzard’s support load.
Two roadmaps to uninstall Battle.net
Once you’ve handled the prep work, you are ready to actually get Battle.net off your Mac. You have two ways forward: a quick, no-stress route using a special total uninstaller, or a manual method that takes a bit more digging but still gets the mission accomplished.
Note:
I checked two uninstall roadmaps using Battle.net version 2.44 on macOS 15.
Remove Battle.net rapidly
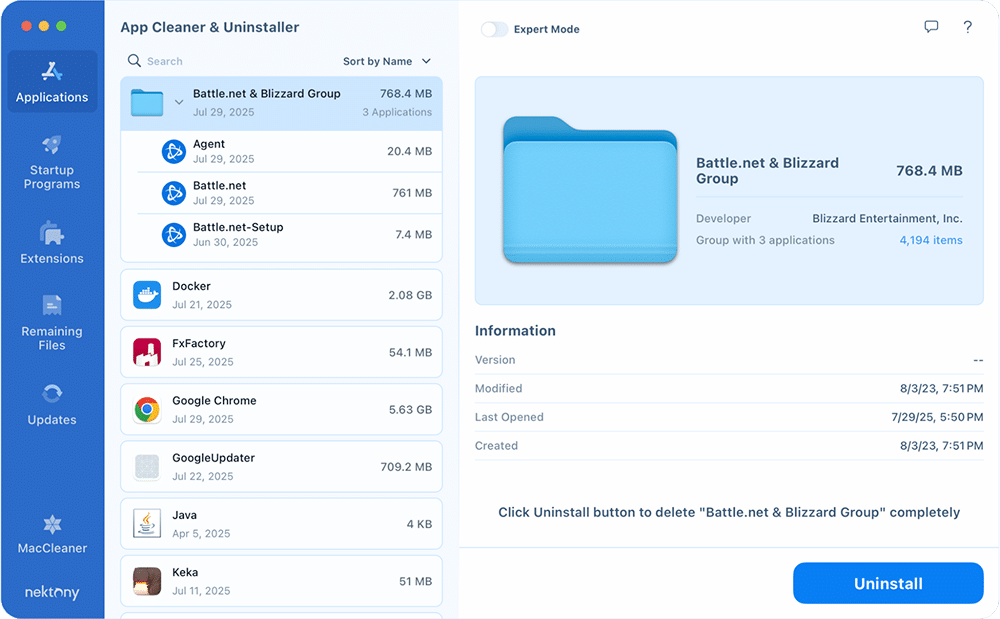
If you look for the one-shot kill to remove Battle.net and execute a perfect auto-cleanup, it’s about using App Cleaner & Uninstaller. It’s the easiest and safest one set to remove everything in record time and guarantee no missing support files.
- Install and fire up the uninstaller.
- Spot Battle.net in the list → select it.
- Click Uninstall → confirm the complete removal of Battle.net.
No extra clicks needed 👌
Trash Battle.net with Finder
I checked out Blizzard’s official manual, and frankly? It’s set to easy mode. Here is the thing: it’s about deleting the core app and clearing a couple of preferences, but it does not cover the whole dungeon. Lucky for you, I’ve already navigated and detailed this full manual journey, especially concerning your Library folder.
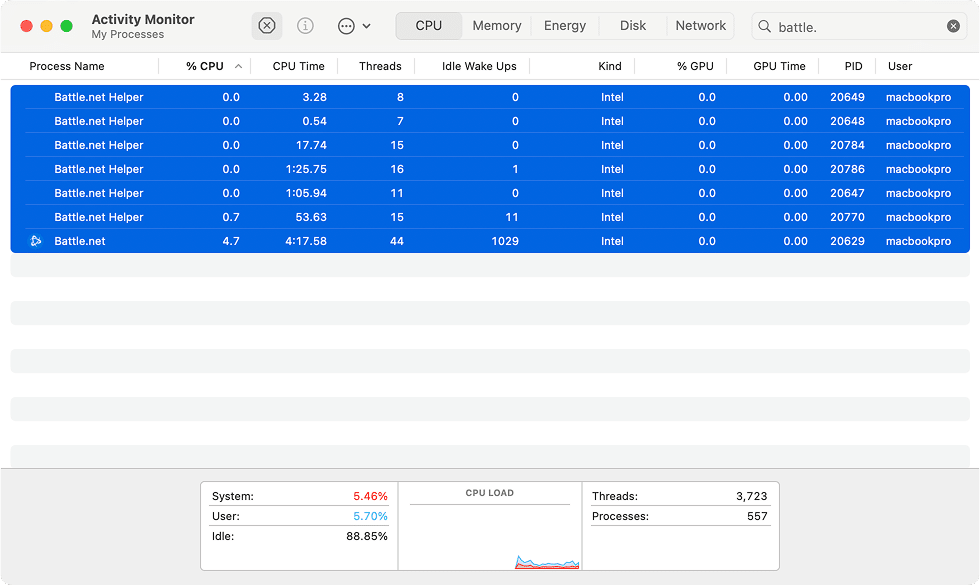
Step 1. Quit all Battle.net processes:
- Open Activity Monitor (Applications → Utilities).
- Search for any processes named Battle.net or Blizzard.
- Select them and hit the X button → Force Quit.
Step 2. Delete the Battle.net launcher itself:
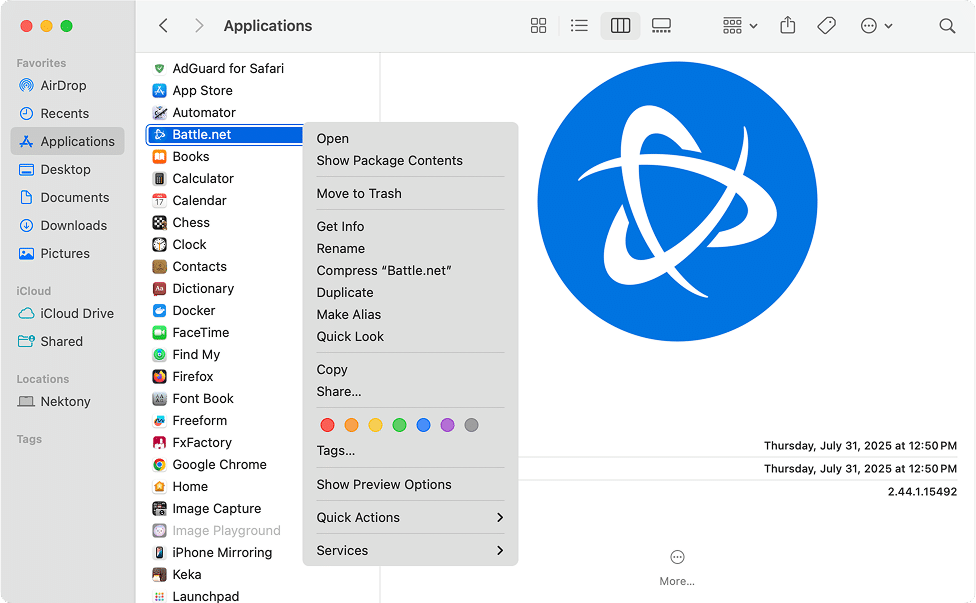
- Open Finder.
- Go to the Applications folder.
- Find Battle.net → control-click.
- Select Move to Trash from the dropdown.
Step 3. Purge all Battle.net support files:
- In Finder, click Go in the top menu bar → select Go to Folder from the dropdown.
- Item by item, visit and delete the appropriate folder or file:
Application support:
~/Library/Application Support/Battle.netCopy
Shared:
/Users/Shared/Battle.netCopy
/Users/Shared/Blizzard/Battle.netCopy
Caches:
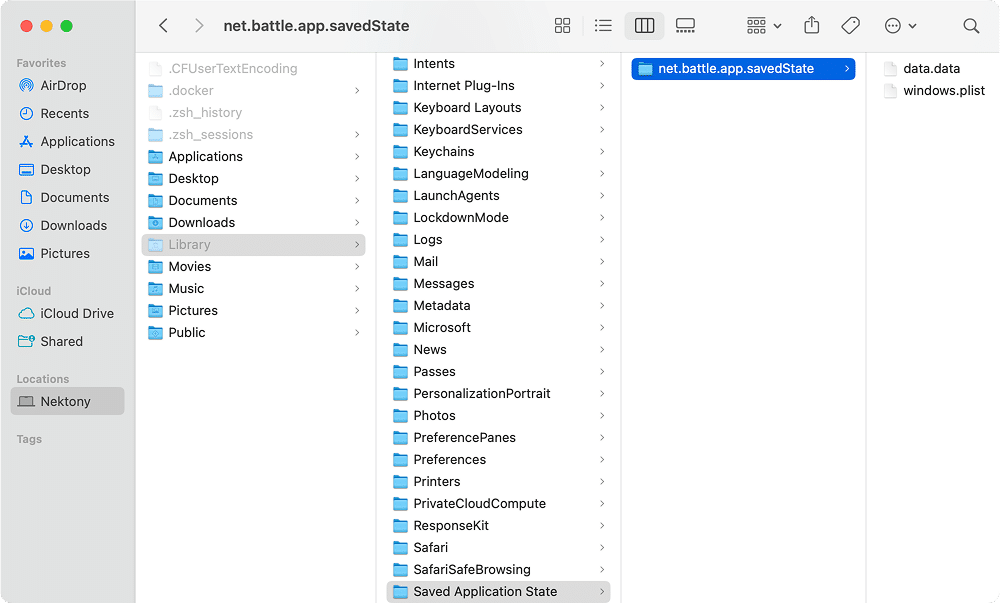
~/Library/Saved Application State/net.battle.app.savedStateCopy
/private/var/folders/Copy
In the search bar (top right corner), type com.blizzard → in the search results, click the folders filter → delete folders whose path clearly starts with /private/var/folders/ and are related to Battle.net remnants.
→ delete every piece matching net.battle~/Library/Caches/Copy
Preferences:
→ locate anything that begins with net.battle~/Library/Preferences/Copy
/Library/Preferences/net.battle.plistCopy
Logs:
→ check for anything that includes Battle.net~/Library/Logs/Copy
Step 4. Sweep up Blizzard locations:
Note:
To fully remove every trace of Battle.net, including data created by Blizzard games, you’ll need to go beyond Battle.net and remove files related to Blizzard as a whole. At this point, you are supposed to ask yourself whether you want to keep your games or not. If yes, do NOT delete Blizzard folders.
- Back in Finder, repeat the process with the Cmd+Shift+G shortcut for these directories:
Application support:
~/Library/Application Support/BlizzardCopy
Shared:
/Users/Shared/BlizzardCopy
Caches:
/Users/Shared/BlizzardCopy
→ find any instances of com.blizzard~/Library/Caches/Copy
→ remove any folder commencing with com.blizzard~/Library/Saved Application State/Copy
/private/var/folders/Copy
In the search bar (top right corner), type com.blizzard → in the search results, click the folders filter → delete folders whose path clearly starts with /private/var/folders/ and are related to Battle.net remnants.
Preferences:
→ examine for any occurrences of com.blizzard~/Library/Preferences/Copy
Logs:
→ look for and delete Blizzard~/Library/Logs/Copy
Step 5. Empty Trash.
Debugging Battle.net glitches
If Battle.net is acting up: won’t launch, gets stuck, or throws errors after an update, a reset or fresh install can often help. Here’s how to troubleshoot some Battle.net problems, instead of deleting everything.
Note:
If you don’t plan to uninstall games, but deal with the launcher issues, make sure to back up your saved progress and game settings. Also, avoid deleting Blizzard folders, as they contain core data used by both the Battle.net launcher and installed games.
Case 1. Battle.net won’t launch or keeps freezing
Likely cause: Corrupted cache, broken configs, or a faulty update.
Fix it:
Step 1. Quit Battle.net and Agent:
- Open Activity Monitor → search for Battle.net and Agent.
- Select each process → click the X → Force Quit.
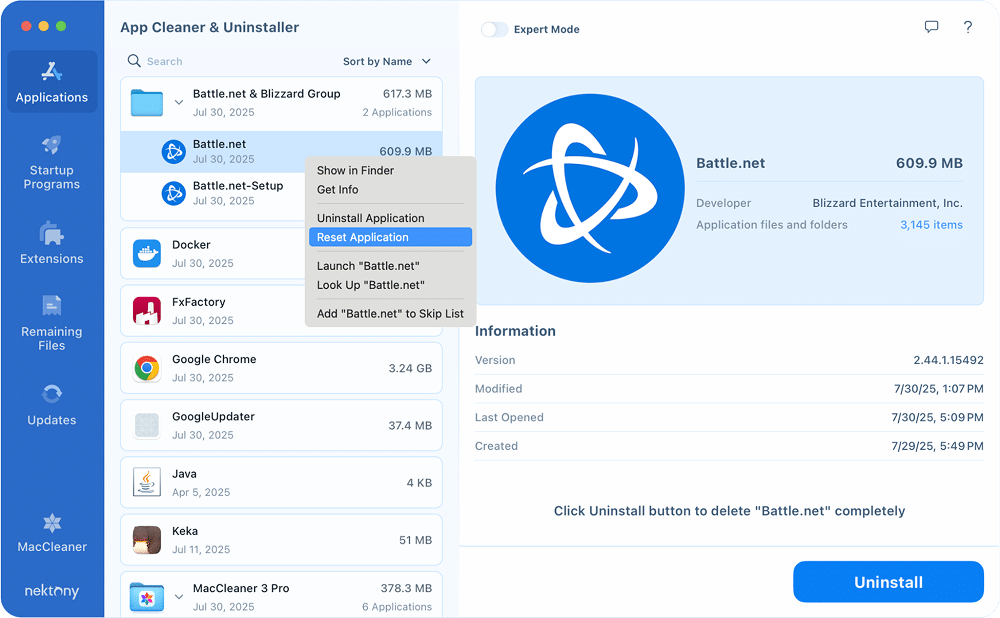
Step 2. Reset Battle.net with App Cleaner & Uninstaller:
- Open App Cleaner & Uninstaller.
- Locate and control-click on Battle.net.
- Click on Reset Application → confirm.
Step 3. Relaunch Battle.net to regenerate the required files.
If that doesn’t work for you, proceed with a full reinstall of the launcher.
Case 2. Battle.net fails to update (launcher or games)
Typical messages:
- Whoops! Looks like something broke
- Update Agent went to sleep
Fix it:
Step 1. Make sure that Agent.app is running by launching it and confirming that it started successfully. Otherwise, proceed with the next steps.
Step 2. Remove obsolete Agent data:
- Open Finder.
- Open the Go to Folder window with the Command + Shift + G shortcut.
- Type and press Return → delete Battle.net folder.
/Users/Shared/Copy
- Repeat for this directory:
~/Library/Application Support/Battle.net/AgentCopy
Step 3. Make sure your network isn’t blocking Blizzard servers (VPN, firewall).
Step 4. (Optional) Reinstall Battle.net if errors persist.
How to uninstall games without using Battle.net?
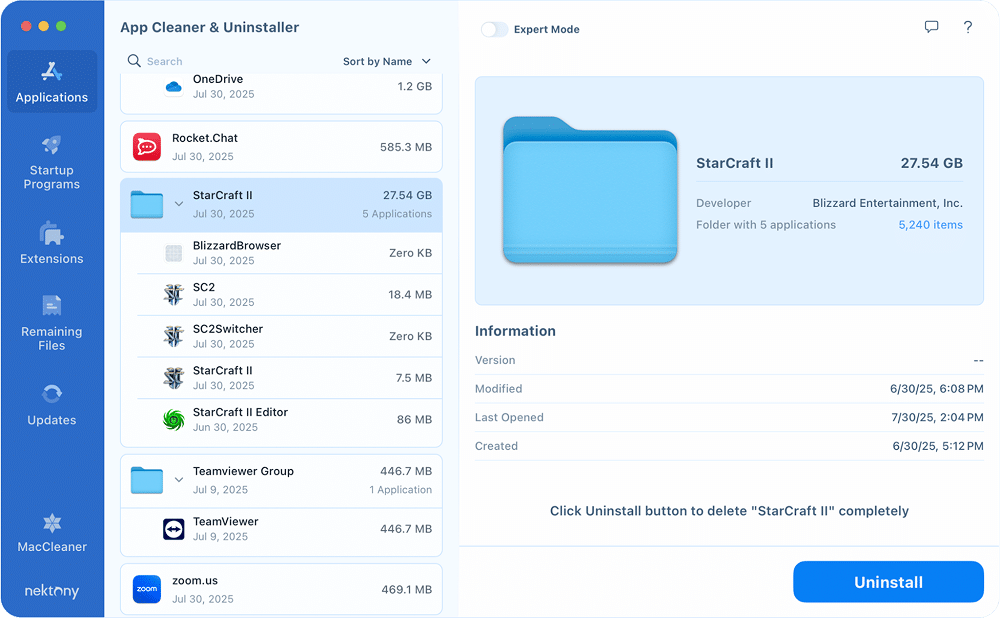
In cases where you have no access to Battle.net and still need to uninstall your game, you can bypass it entirely and uninstall Blizzard games directly through a cleanup utility. Here’s the workaround to uninstall any game using App Cleaner & Uninstaller, no launcher needed:
- Launch App Cleaner & Uninstaller.
- Select the Blizzard game (for example, StarCraft II) in the app list.
- Click on Uninstall → finish uninstallation by confirming.
Final milestone
It’s magnificent, isn’t it? With App Cleaner and Uninstaller, you can cast the delete spell on Battle.net, any game, or app, guaranteeing its 100% deletion with speed and ease. Beyond uninstalls, it helps you reset apps, remove leftovers, and manage your app stack.
Got questions? Connect with Nektony to embrace how this tool can help your Mac perform at its best – for gaming, work, or anything in between, keeping your Mac from slowing down.
