A slideshow is a perfect way to organize your photos and show them to others. It is a much more attractive alternative to ordinary photos, which need to be scrolled through manually. In this article, we will show you how to do slideshow on Mac using the Photos app and the best way to make slideshow with music on Mac. We will also describe how to quickly and easily get rid of unnecessary duplicate and similar photos on your Mac computer.

Contents:
- How to make a slideshow on Mac with Photos
- How to make a picture slideshow with music
- Remove duplicate and similar photos from your Mac
Tip #1 – Remove duplicate photos before you create a slideshow
We recommend that you clean up unneeded photos with Duplicate File Finder. This app will help you pinpoint and delete duplicate photos in just a few clicks. By deleting unnecessary similar photos, you will not only save your time while creating a slideshow, but also free up tons of space on your computer, which will positively affect its performance.
Duplicate File Finder
How to make a slideshow on Mac with Photos
Making a slideshow is a great way to beautifully arrange and organize your photos so that you can later review and remember the most important moments of your life. The Photos app on Mac is a perfect tool for creating your own photo slideshow on Mac. With this app, you can create your slideshow in a few steps. Moreover, the Photos app allows you to choose a theme and music for your slideshow during the creation process.
To create a photo slideshow on Mac:
- Launch the Photos app on your Mac.
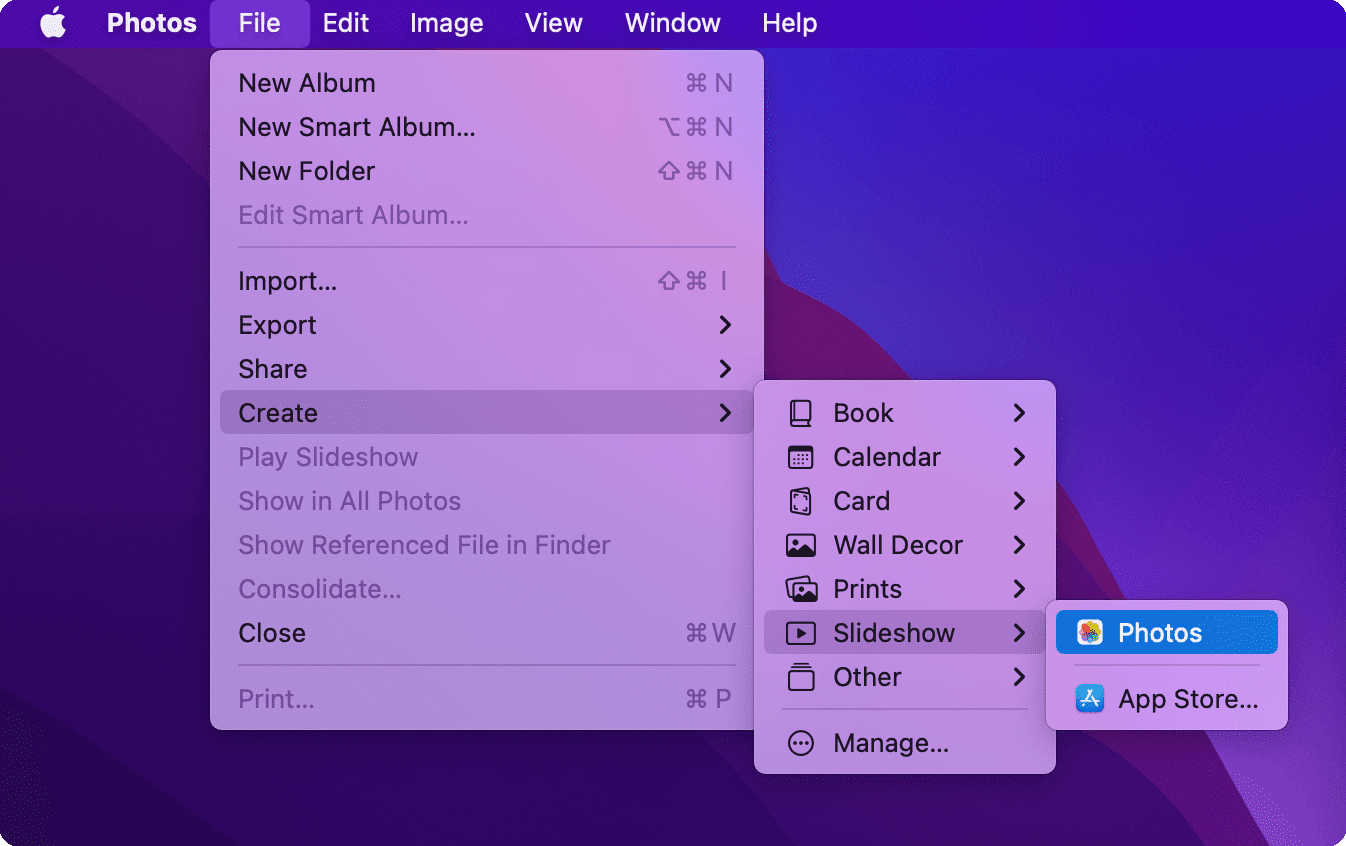
- Click File in the menu bar and select Create.
- In the Create menu, navigate to Slideshow and click on the Photos option.
- In the window that opens, enter a name for your slide show and click OK.
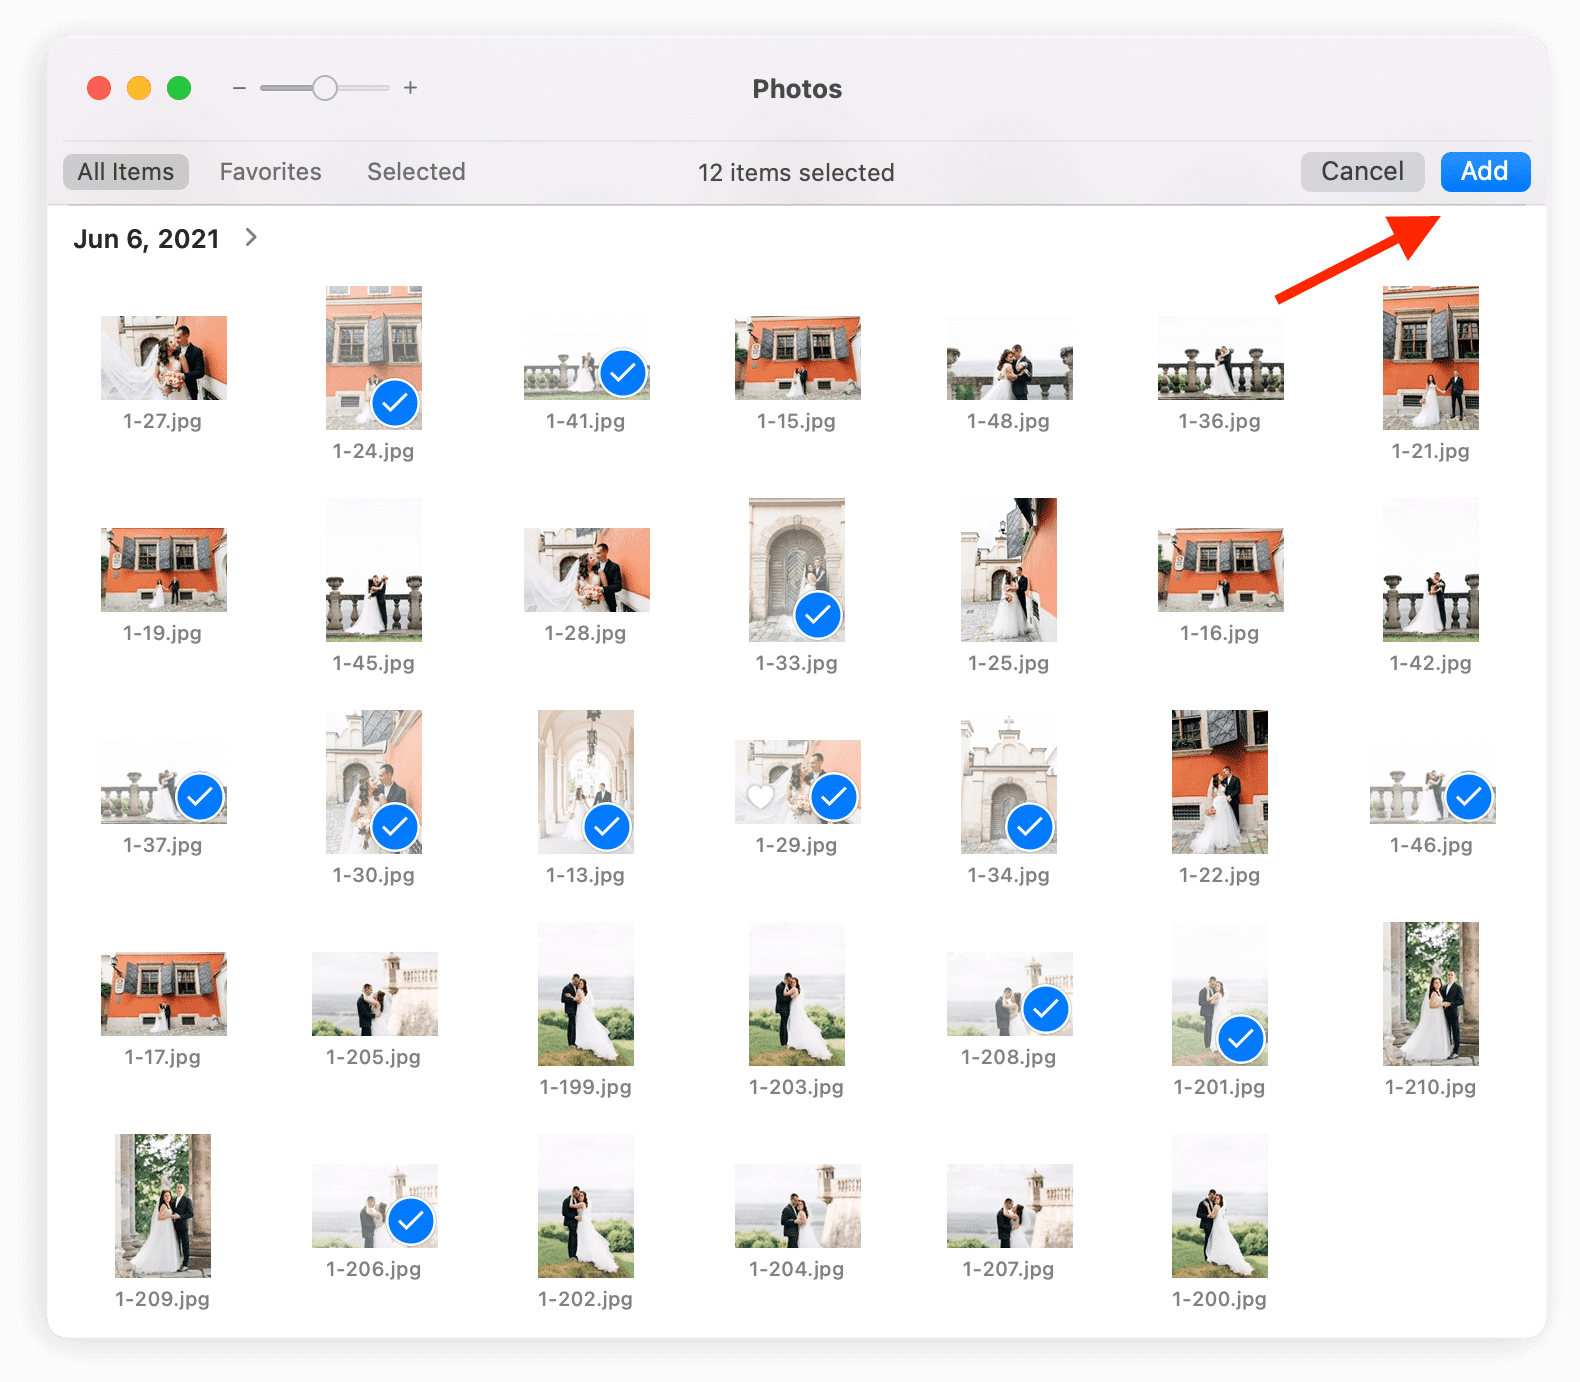
- Select photos for your slideshow and click the Add button.
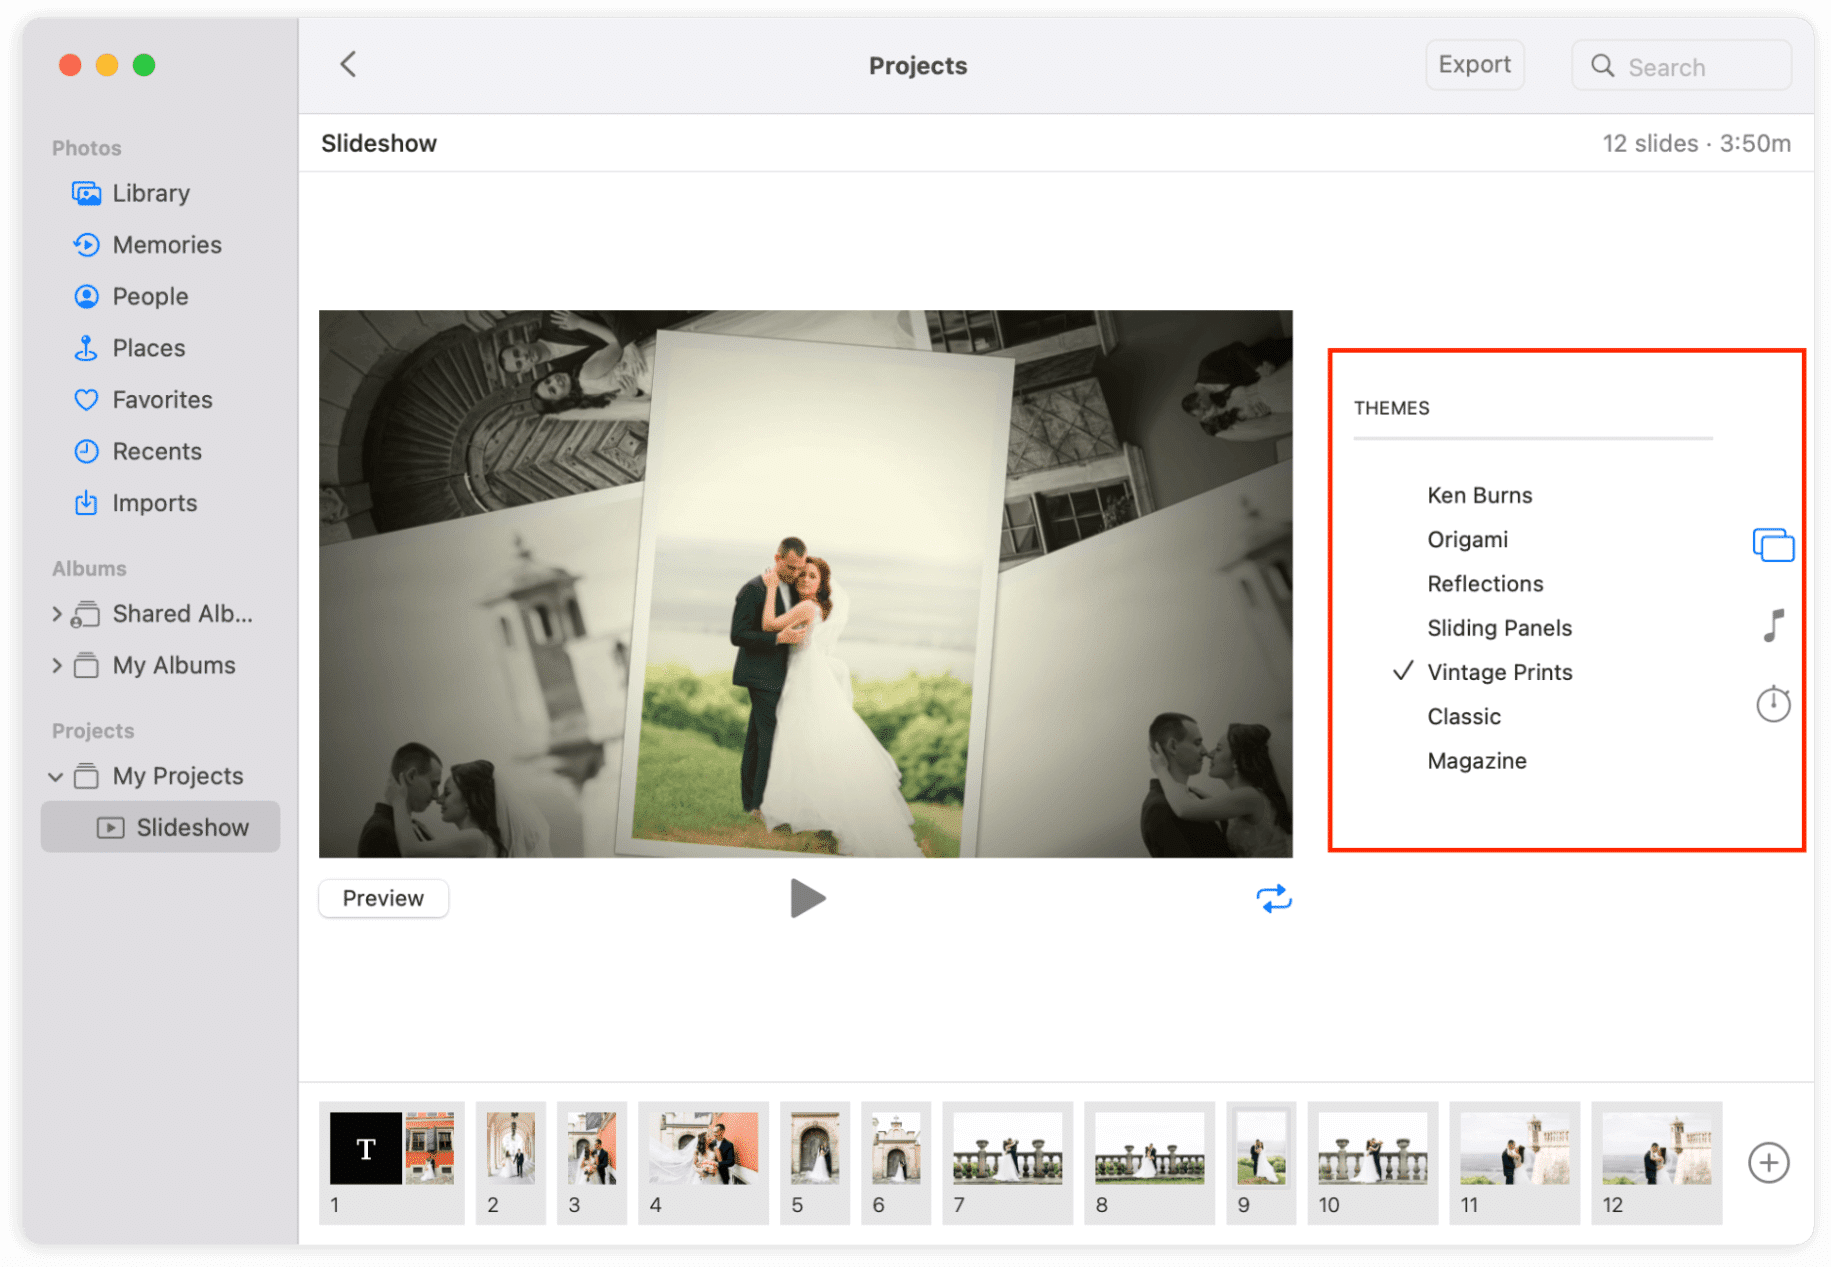
- You can also change the order of the photos. To do this, drag the slides into the slideshow.
- In the left sidebar, you can edit the Theme, Music, and Duration of your slideshow.
How to make a picture slideshow with music
If you want to customize the effects and edit the musical accompaniment for your slideshow, we recommend that you use the iMovie application. iMovie is one of the most popular video editing softwares, and it is also the best free slideshow maker for Mac.
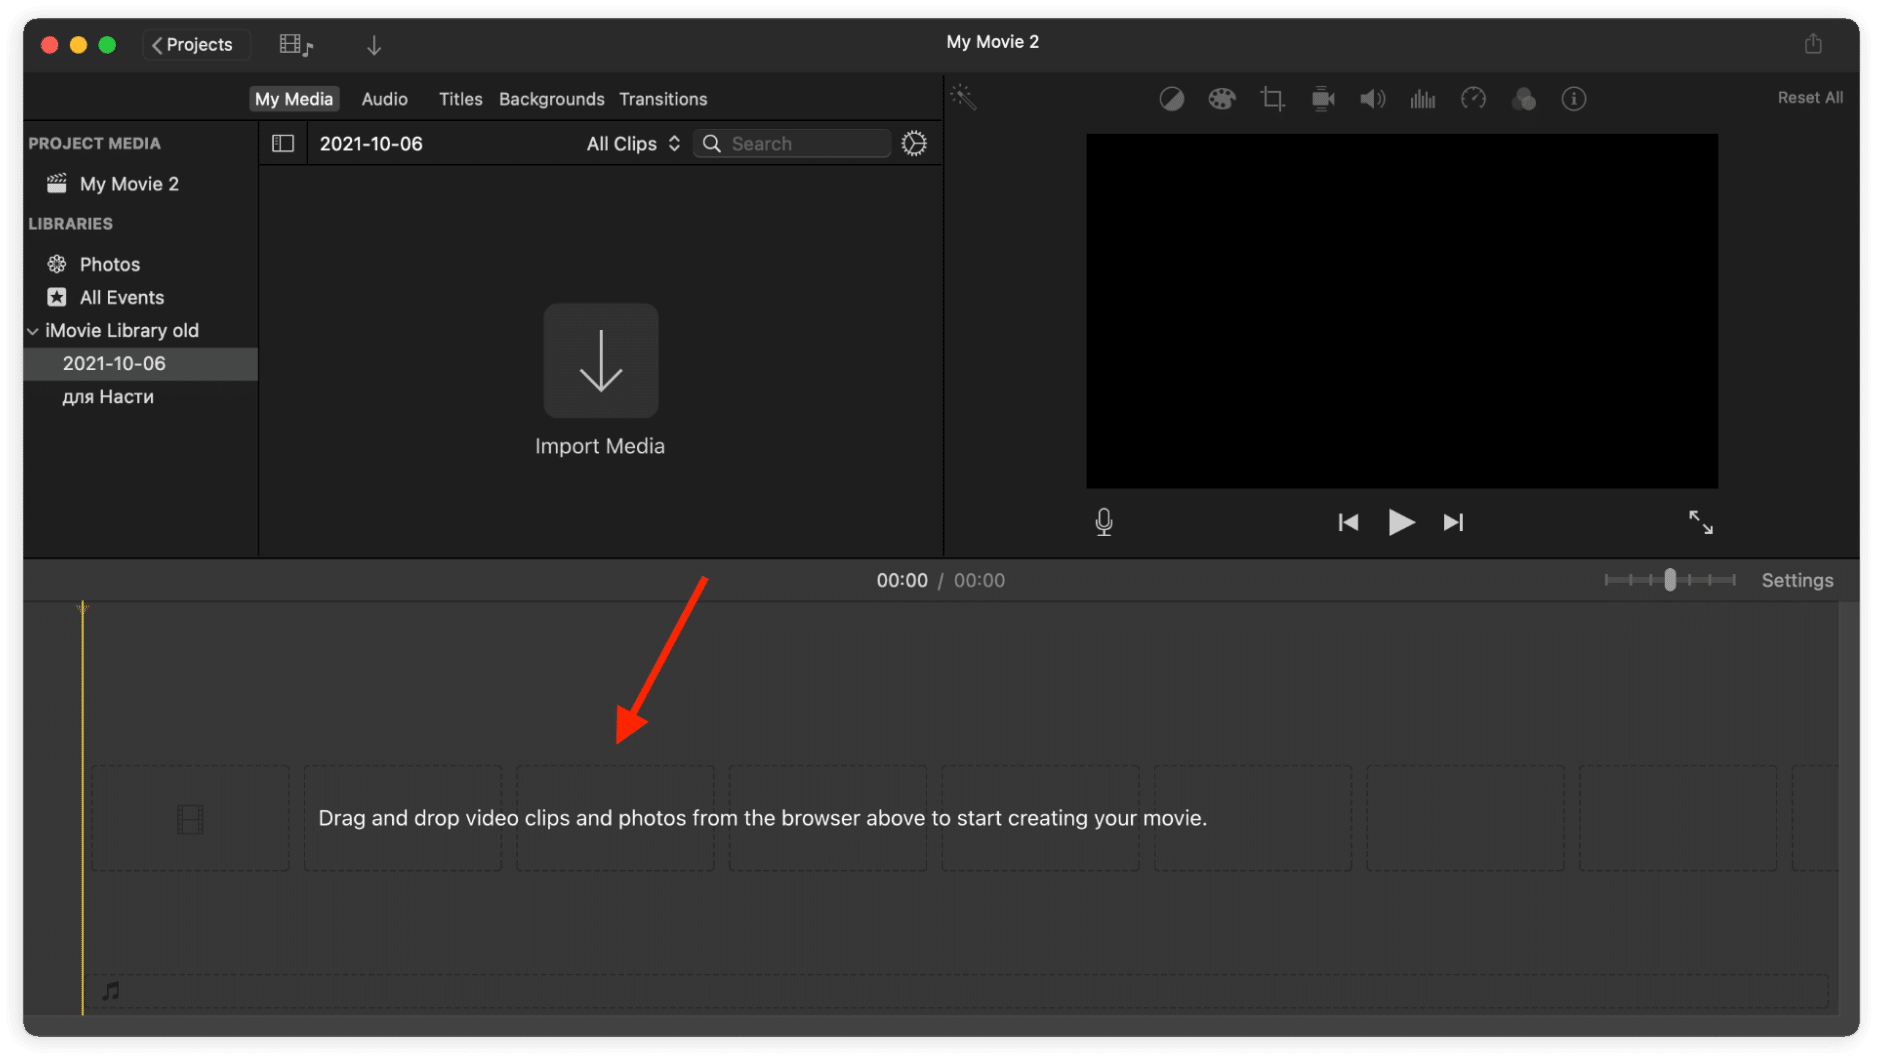
This tool can help you create a flawless slideshow. To make a slideshow with music in the iMovie app, follow these simple steps:
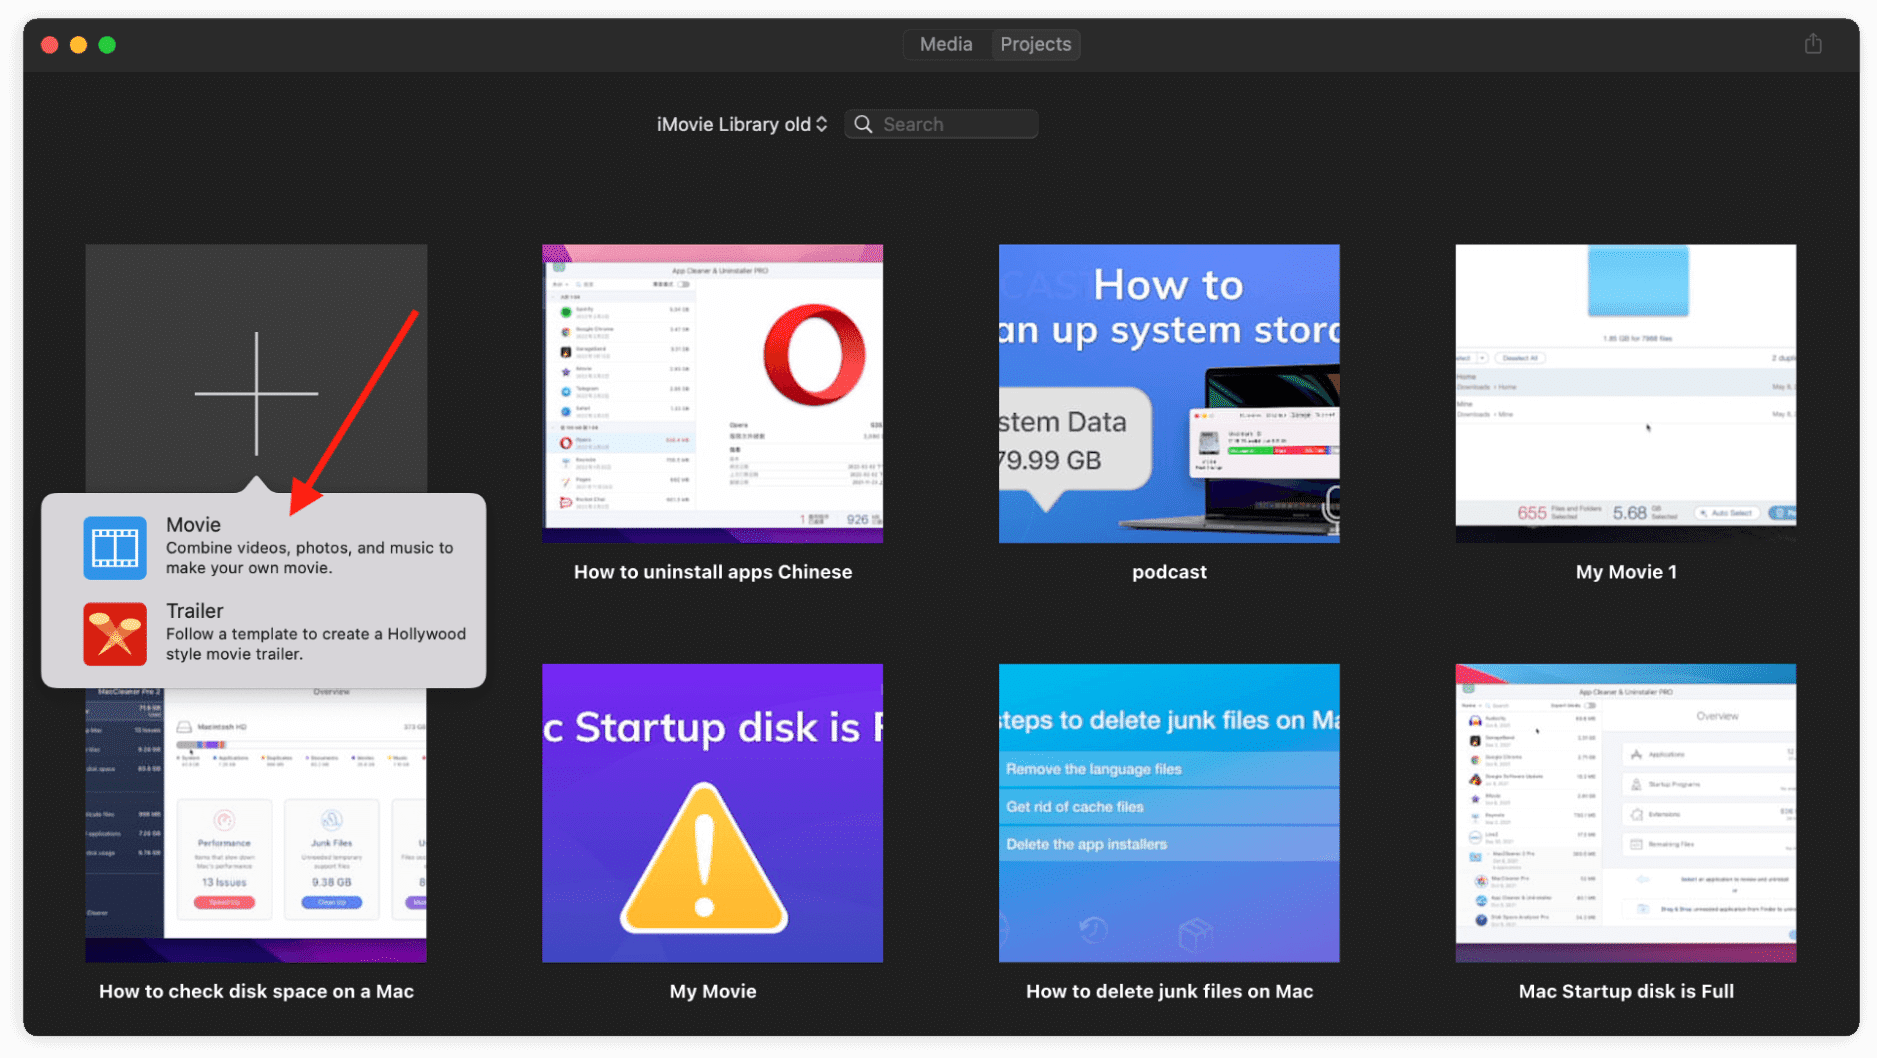
- Launch the iMovie app on your Mac.
- Click on the Plus icon and select Movie.
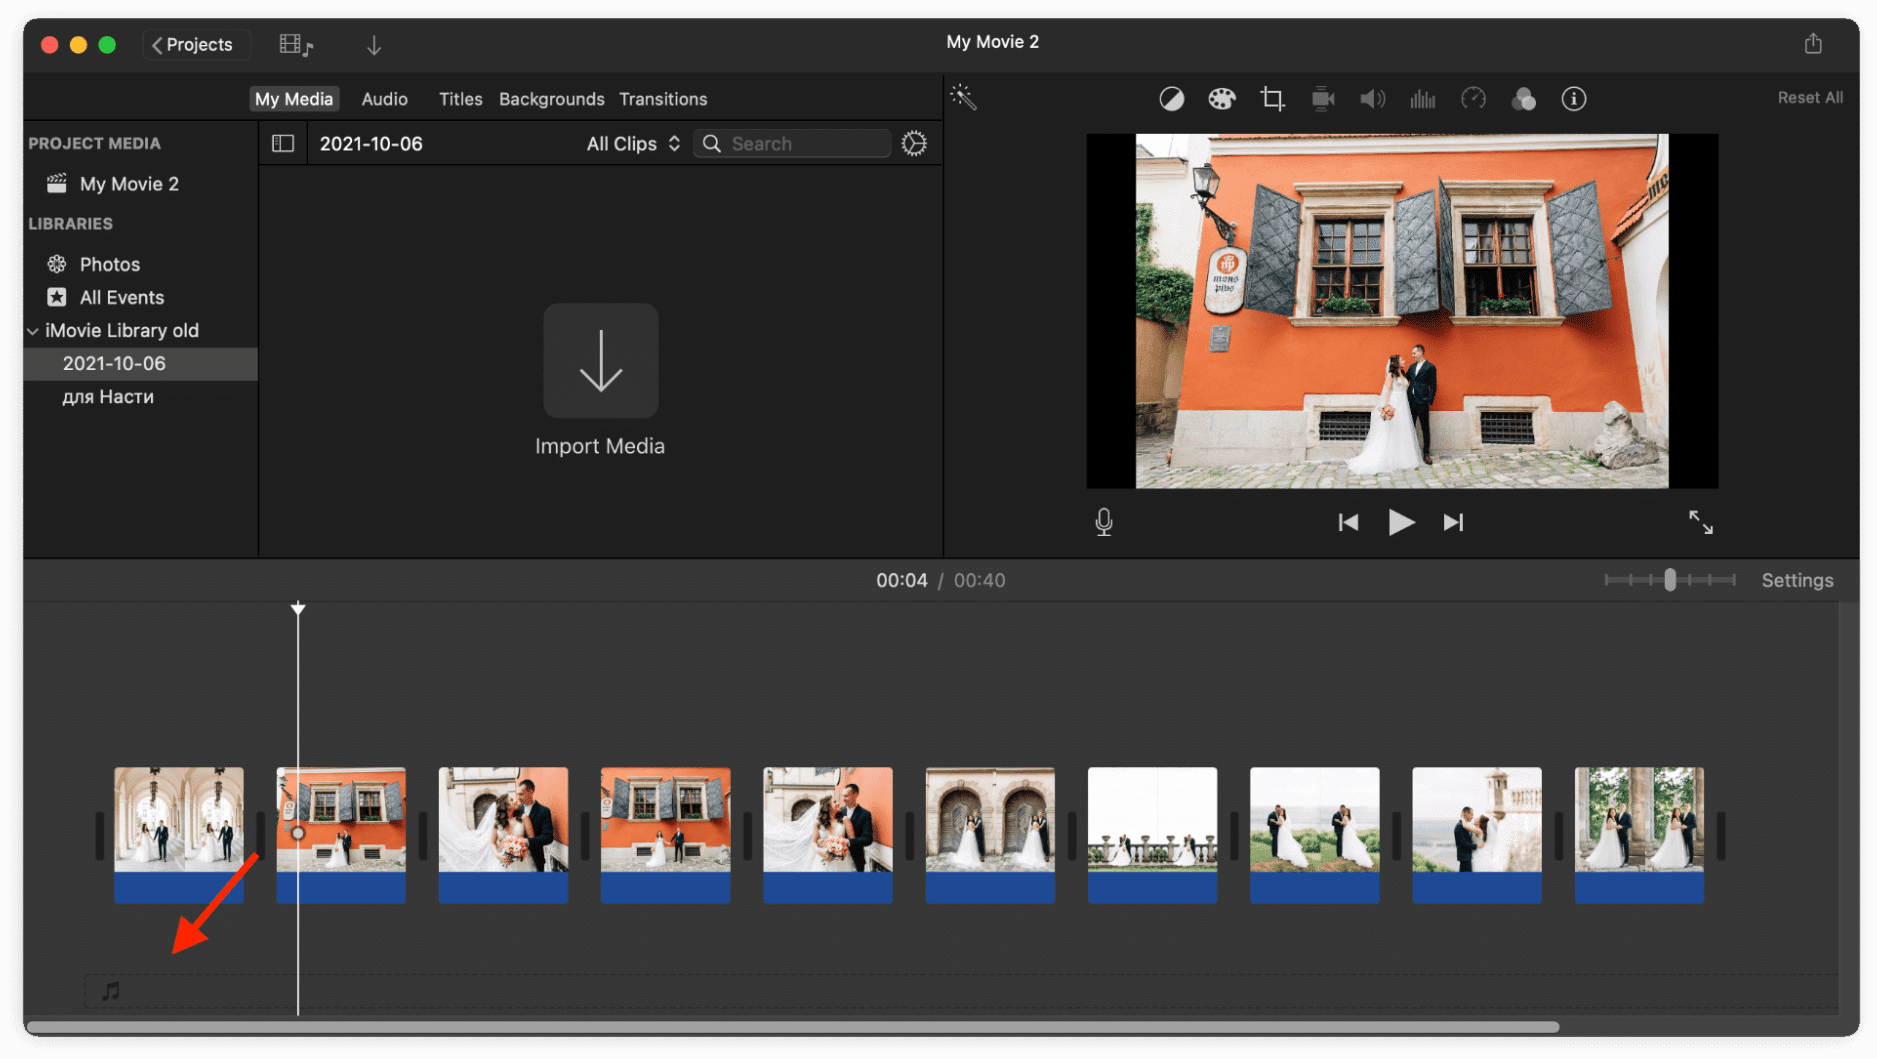
- Drag and drop all the photos you want to add to your slideshow.
- Drag and drop the necessary music to the section below photos.
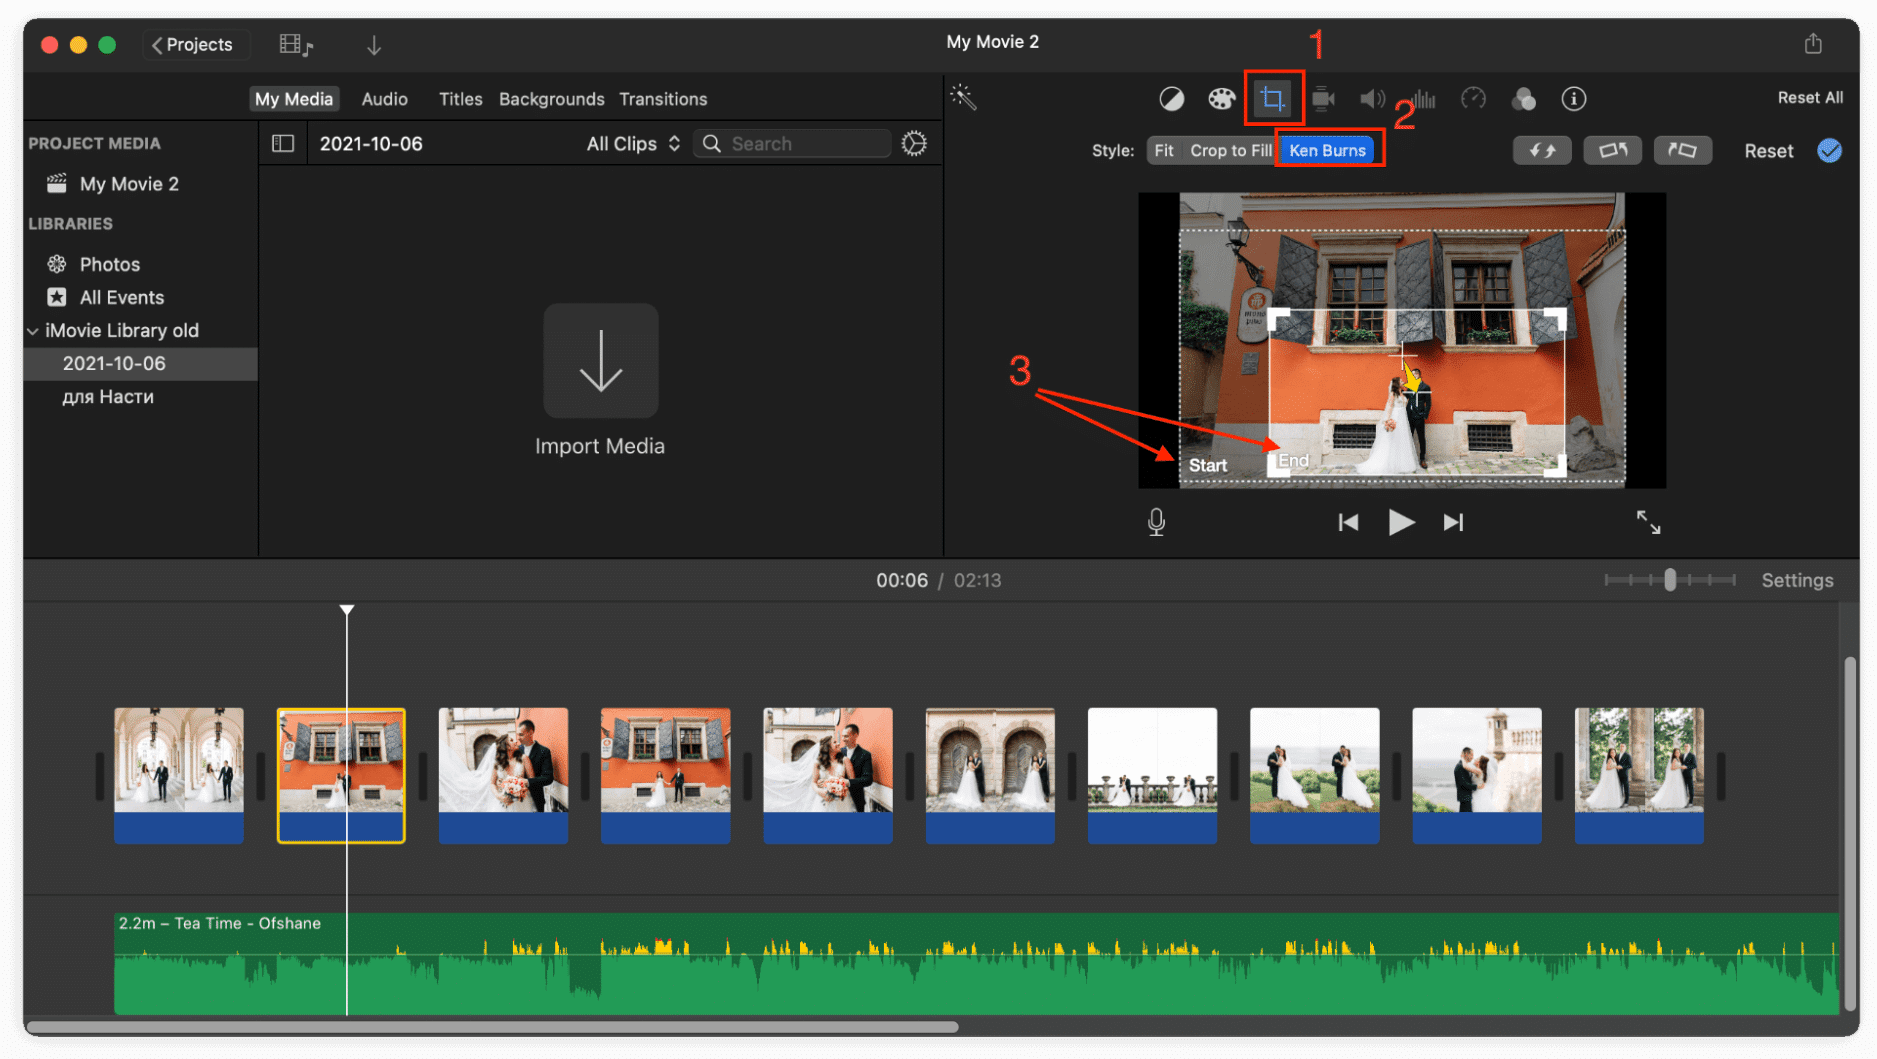
- You can add the Ken Burns effect to some of your photos. For this, select one photo, click on the Cropping icon and select Start and End dimensions for the Ken Burns effect.
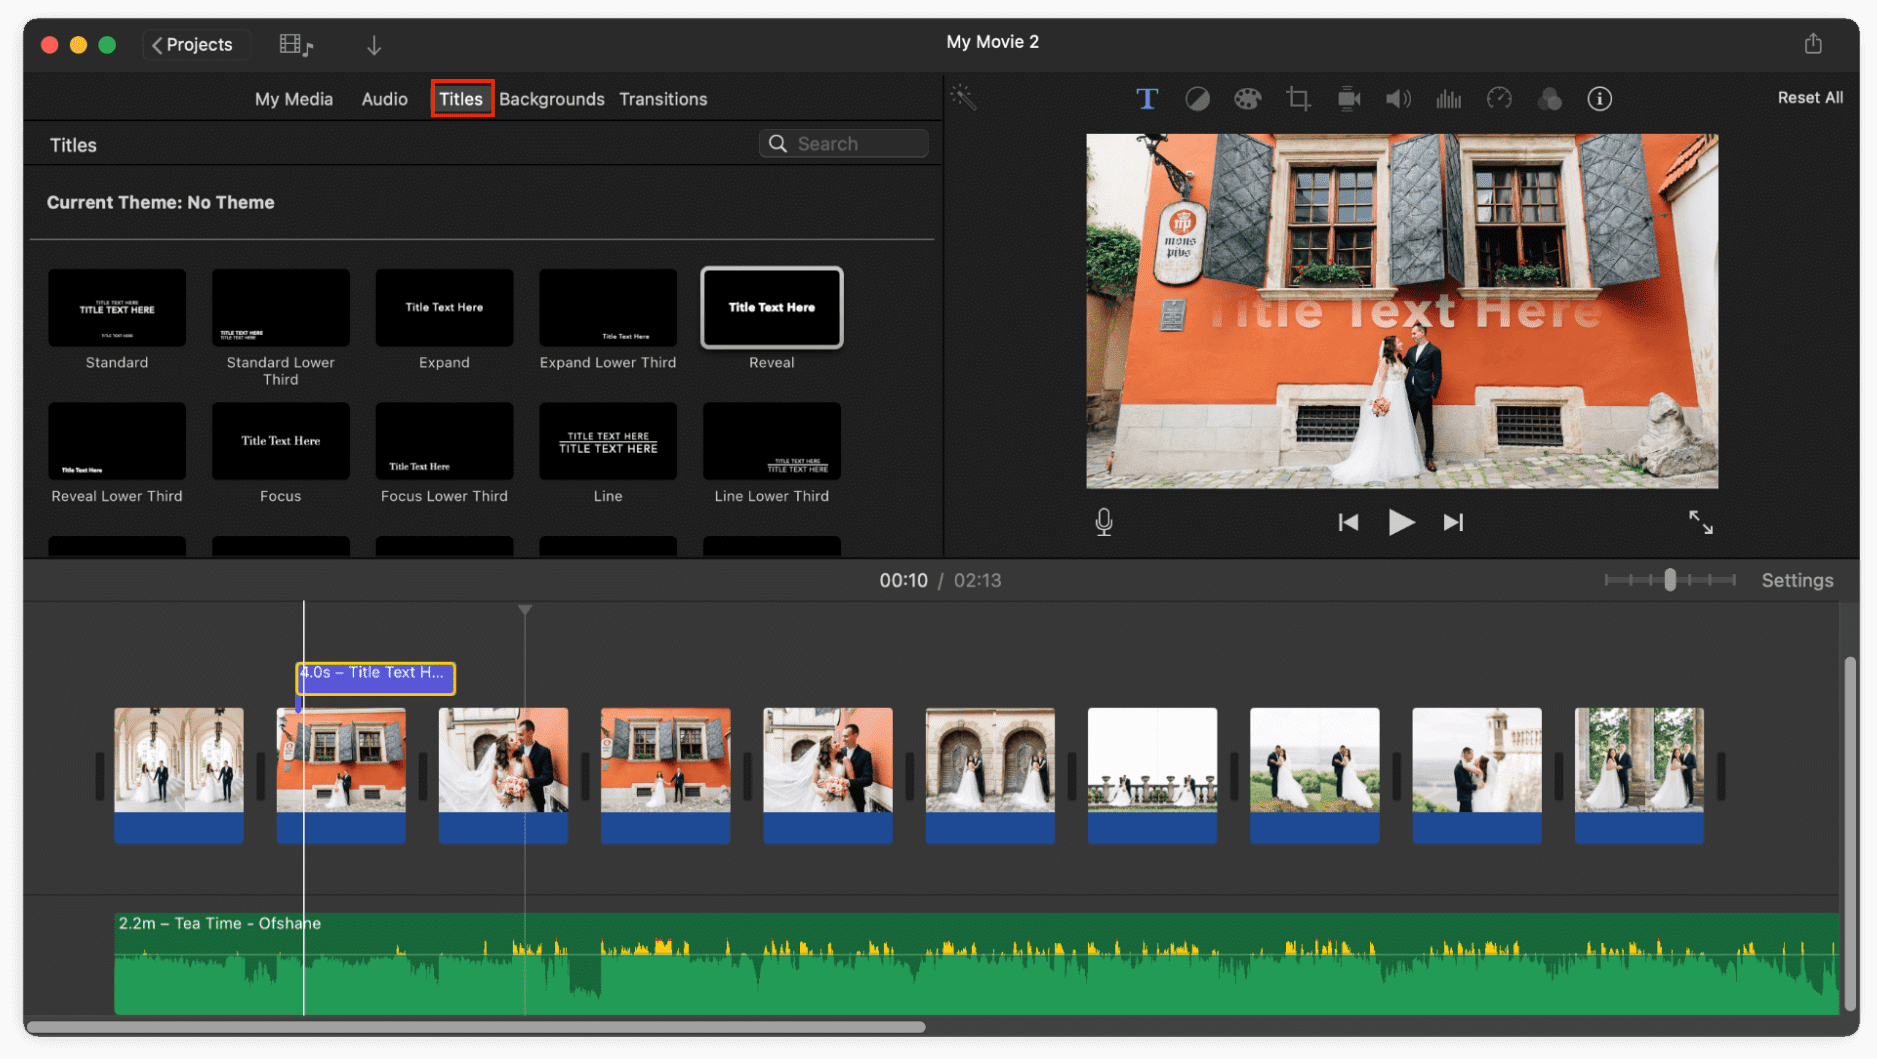
- Select Titles in the Titles tab of the app.
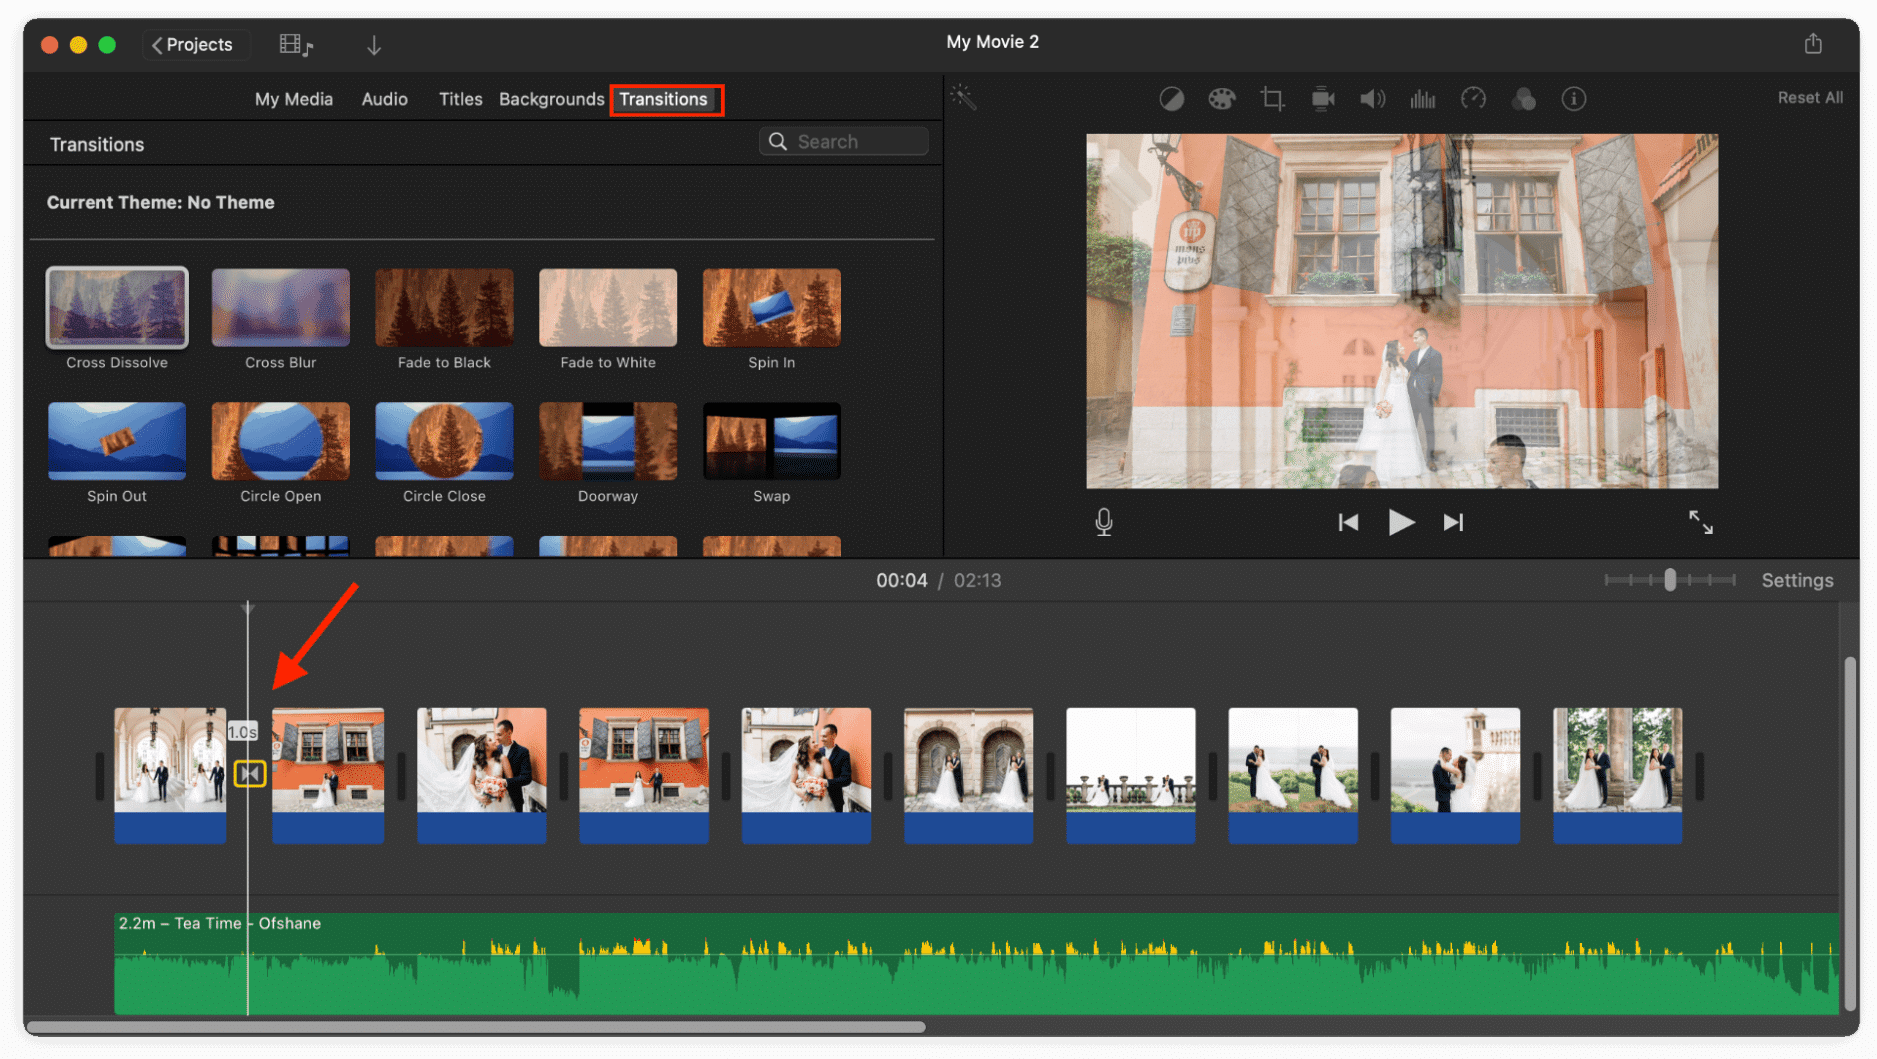
- Select Transitions in the Transitions tab and drag them to the distances between photos.
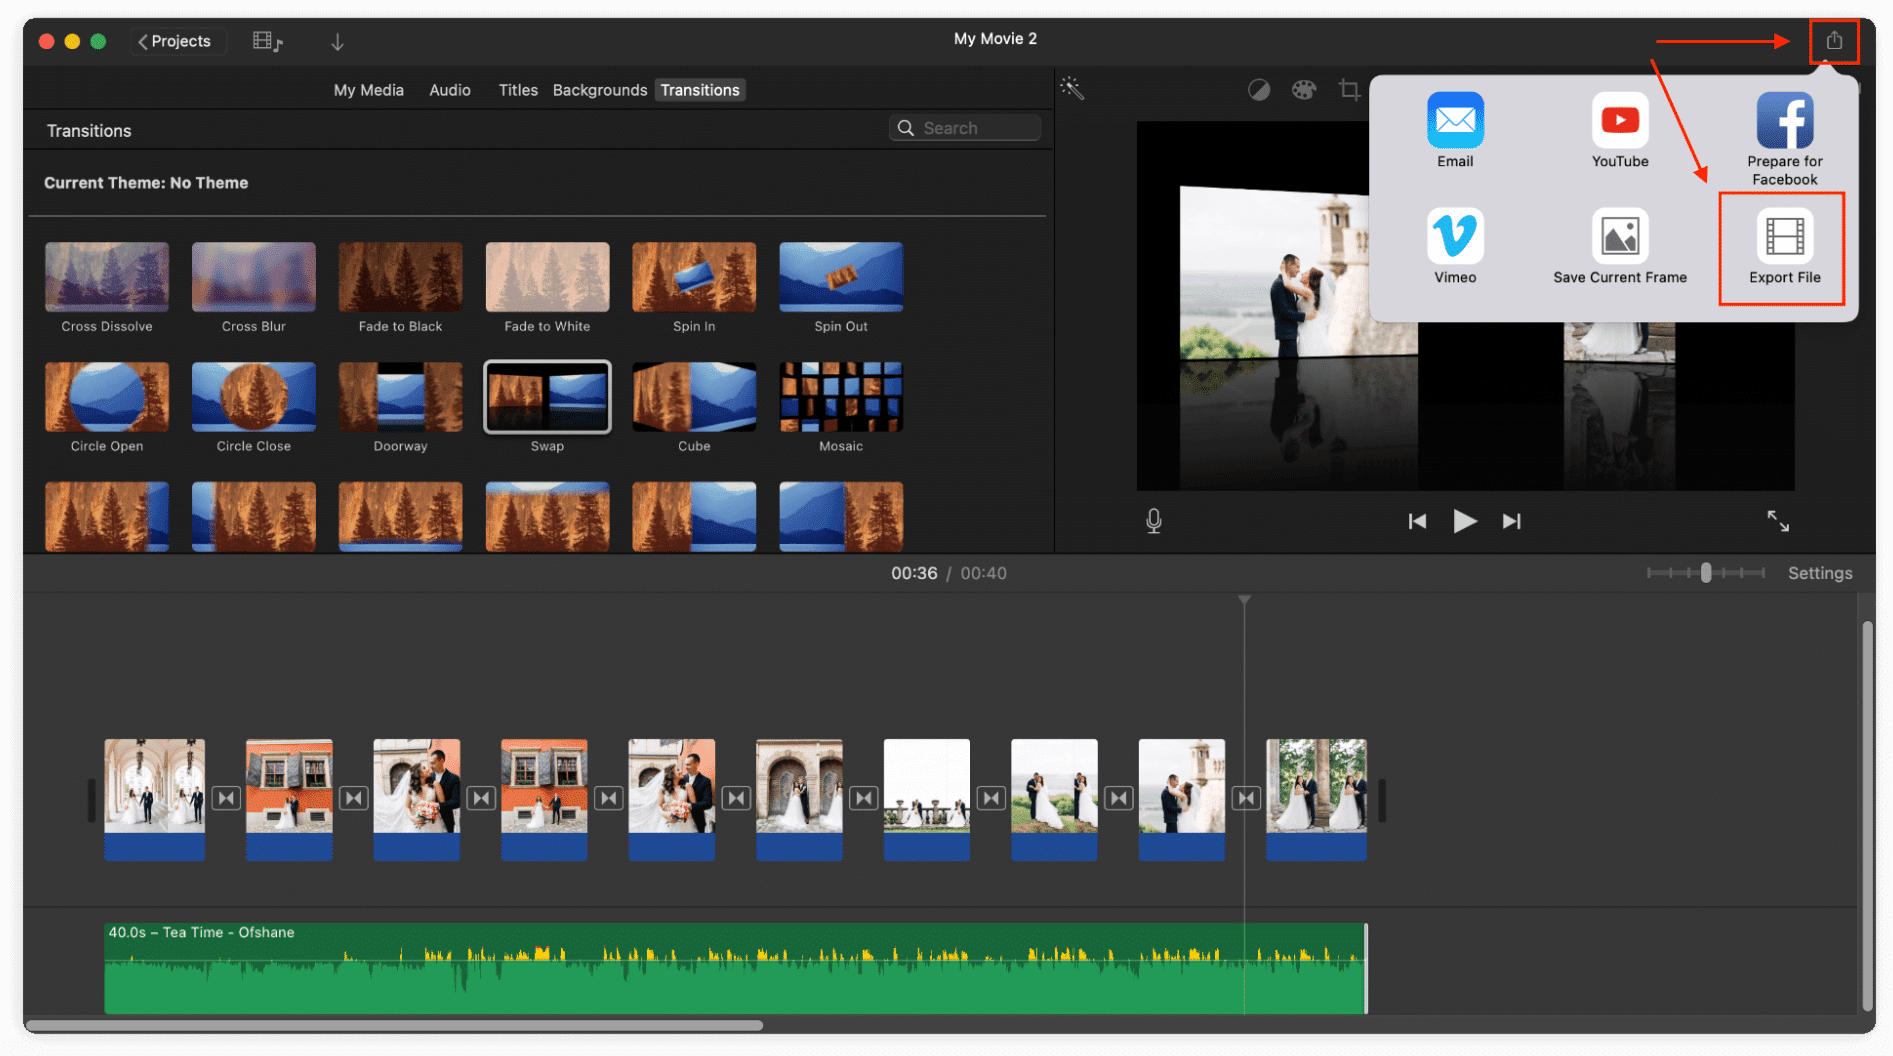
- Once your slideshow is ready, click the Share button and select the Export file option. In the opened window, select the necessary Resolutions and Quality for your video file and export it.
That’s it! Your photo slideshow is ready.
Remove duplicate photos from your Mac
When you were creating your photo slideshow, you likely found tons of duplicate and similar photos on your computer, among which you had to choose the right photo for your photo slideshow.
It’s obvious that deleting similar and duplicate photos from your Mac will make your slideshow creation process much easier, and generally speed up the process of choosing the right photos. Moreover, by deleting unnecessary similar photos, you’ll also significantly increase the free space on your computer, which will boost its performance.
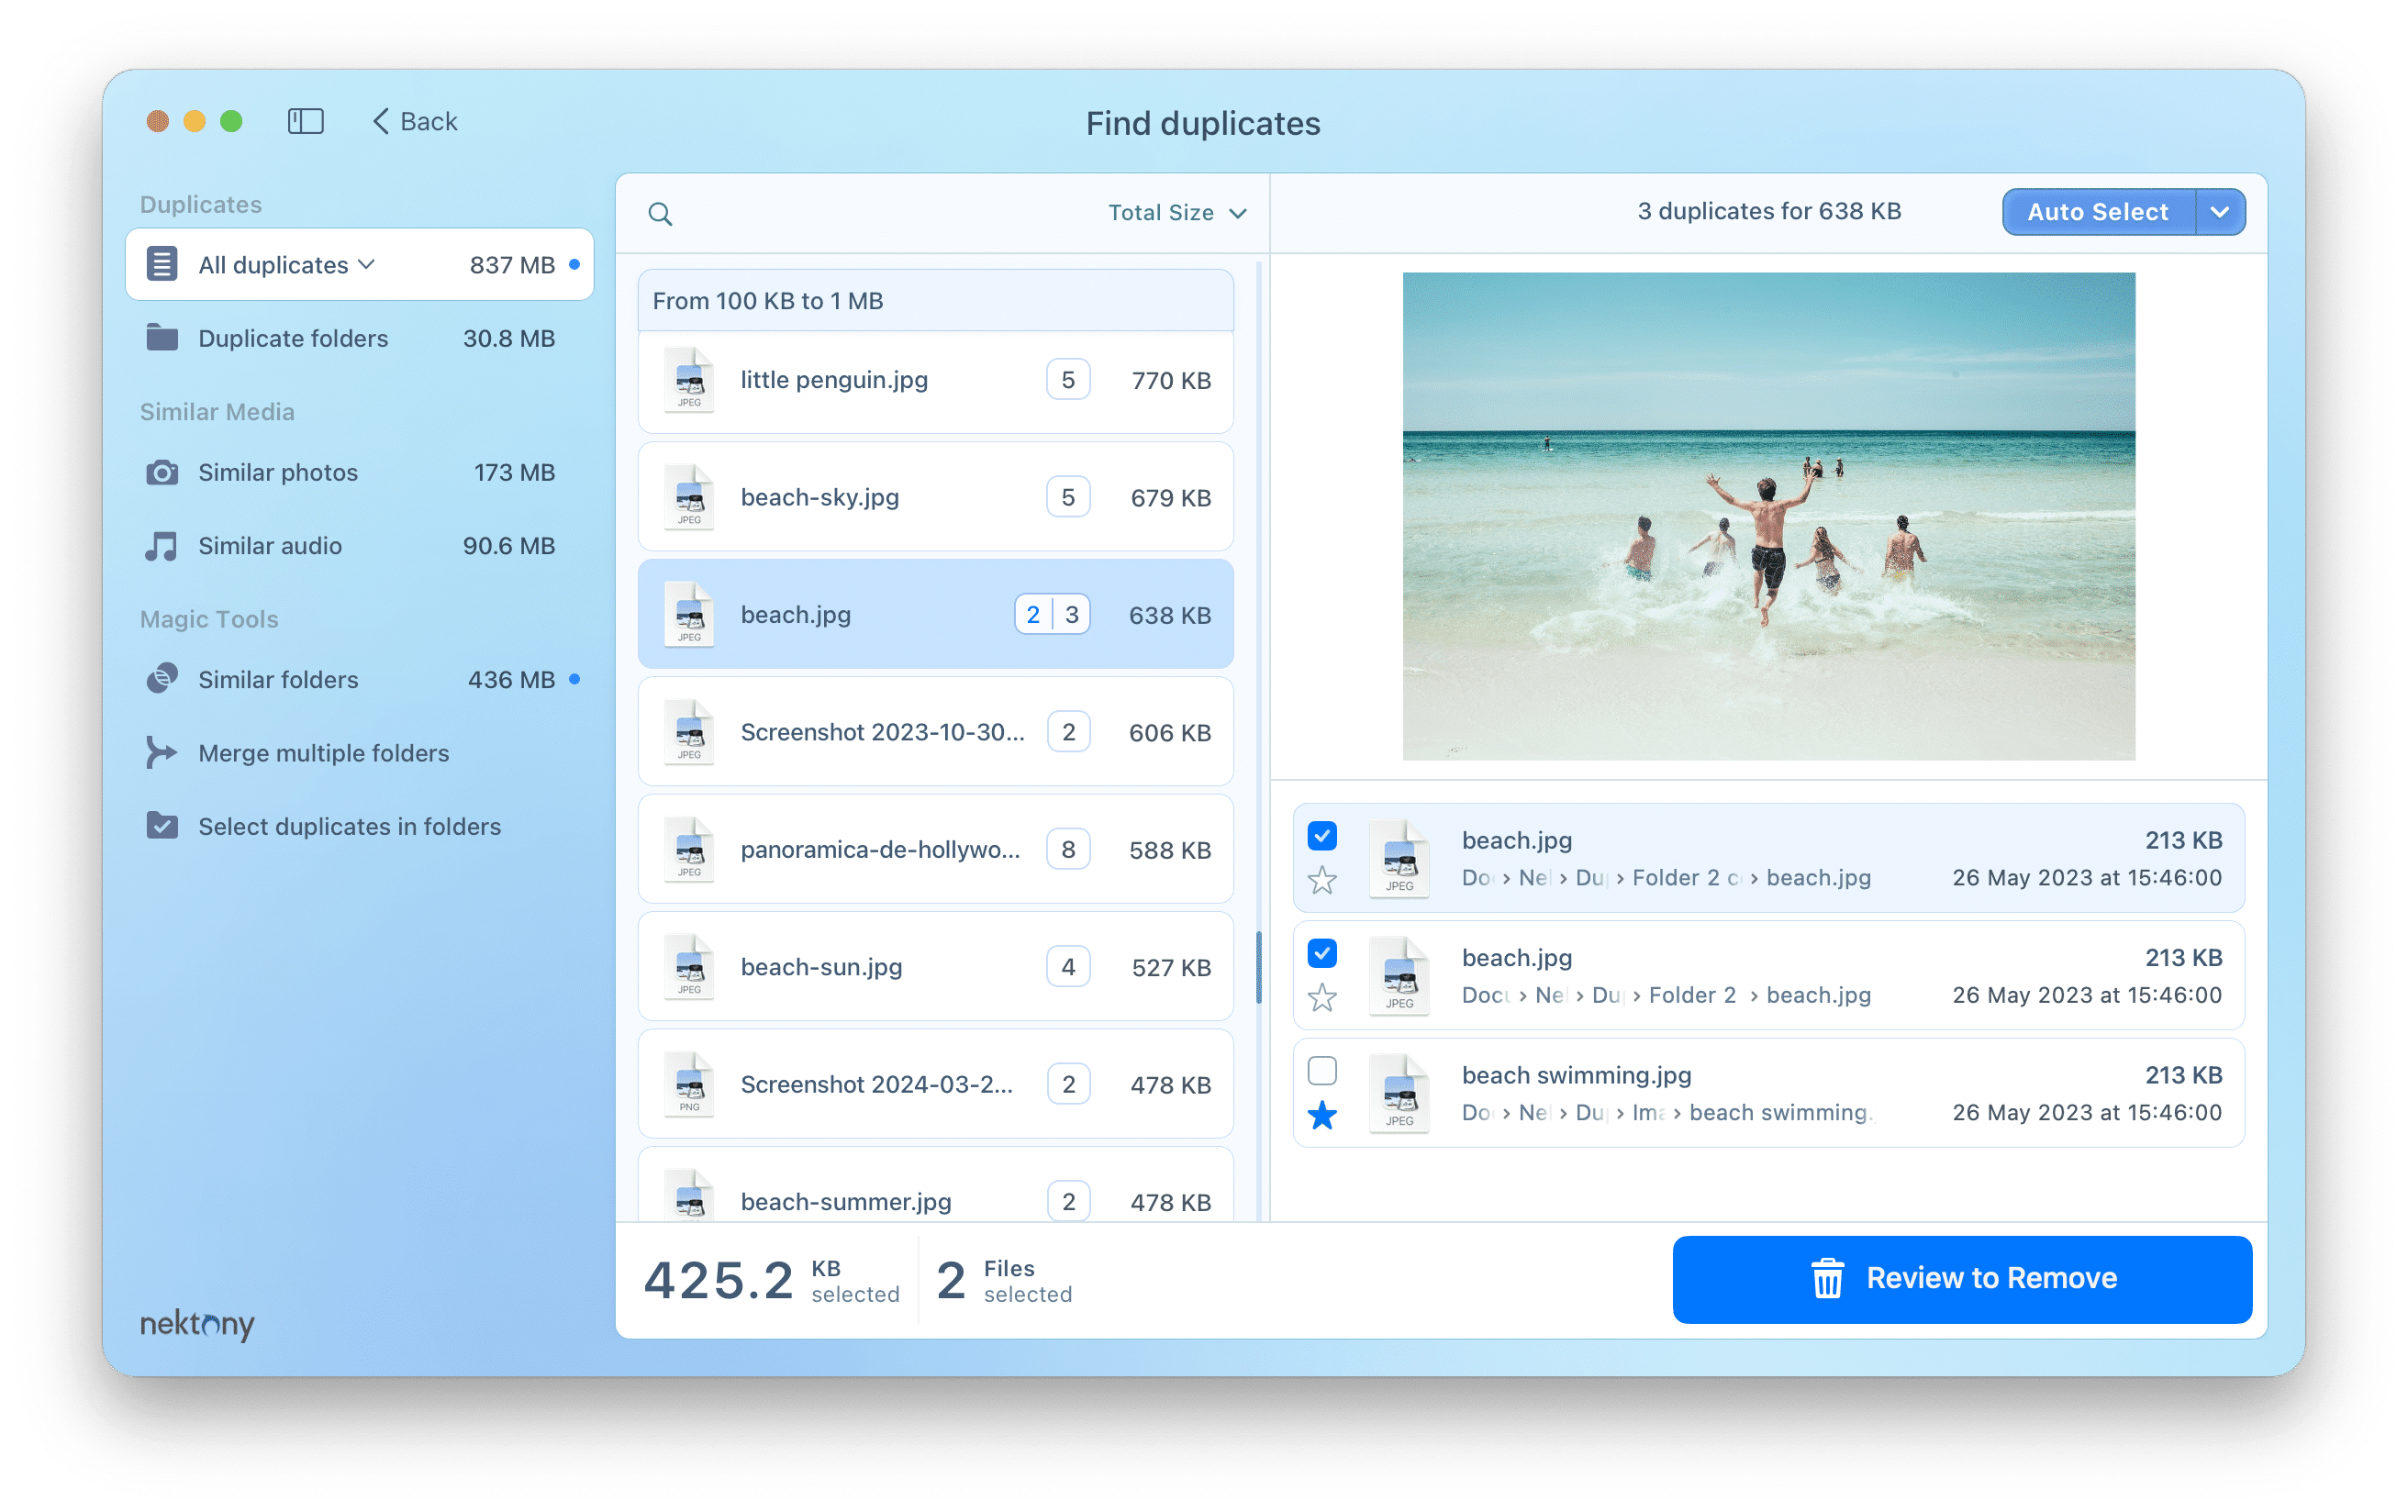
To effortlessly find and remove similar and duplicate photos on your Mac, we recommend you use Nektony’s Duplicate File Finder. This application will quickly scan your disk and group all duplicates into categories.
To rid your computer of similar and duplicate photos:
- Launch Duplicate File Finder.
- Add folders you want to scan and click Find Duplicates.
- After a quick scan, the app will show you the list of all detected duplicate files.
- Select all duplicate and similar photos.
- Click the Review to Remove button to delete all selected files.
- Confirm the removal.
Conclusion
In this article, we showed you two ways to quickly create a photo slideshow on a Mac computer. You can create slideshows using the Photos app or iMovie app. As you can see, both methods are quite easy to use, so you can choose whichever best suits your needs.
We also recommend that you get rid of unwanted duplicate photos on your computer. It’s a great way to free up space on your Mac and organize your photo folders to make it easier to work on new slideshow projects in the future. The easiest way to organize a large number of photos is to use a special Duplicate File Finder application from Nektony.
