July 30, 2025
Clean uninstall of Office 365 on macOS: Easy guide
I’ve been using Microsoft products for as long as I can remember. From school essays to spreadsheets at work, Office was always there. But over time, things changed. New tools appeared, and with AI stepping in, I realized I no longer need the full Office 365 (or, as it’s now called, Microsoft 365) subscription on my Mac.
In this guide, I’ll walk you through how to completely remove Office 365 from your Mac, including every related app and hidden file. It’s a surprisingly long list, so brew some coffee and let’s get started.
This Article Contains
A quick solution
In a hurry or don’t feel like digging through this (admittedly long) guide? App Cleaner & Uninstaller by Nektony is the fastest way to remove Microsoft 365 apps and all their support files. No hunting for leftovers – just a few clicks, and it’s done.
When to uninstall Office (Microsoft) 365
There are many reasons why users may decide to remove or reinstall Office 365 from their Mac. Some are technical, others are about convenience or simply moving on. Here are the most common scenarios:
- You used to combine work and personal accounts in one Office setup but don’t need to anymore. Separating your environments and starting fresh helps avoid syncing issues, permission conflicts, and accidental mix-ups. This is a popular case since over 2 million companies use Microsoft 365 (OneCloud stats of 2024).
- You want a newer version, but there’s no smooth upgrade path. Microsoft sometimes offers updates through AutoUpdate, but in some cases, the only way to move to a newer version is by removing the old one first.
- You’re switching to another toolset. Whether it’s Google Docs, LibreOffice, Apple’s apps, or other modern alternatives, you simply don’t need the full Office suite taking up space anymore.
- Office apps won’t open or crash immediately. This is often due to corrupted Office components or macOS system libraries. Reinstalling restores the missing or damaged files.
- You can’t activate your Office license. This could be caused by a broken link between Office and the Apple Keychain, or a mismatch in your Microsoft account. A full reset that includes clearing license data helps resolve this.
- Excel formulas, macros, or plugins don’t work. Broken Excel modules or clashing third-party extensions can be hard to diagnose. A clean installation without add-ons often brings stability back.
- Office apps slow down your Mac. Performance issues like freezing, high CPU usage, or sluggish response might be caused by bloated caches or graphics bugs. Clearing caches during reinstallation can noticeably improve speed.
Note:
If your situation isn’t listed here, scroll down to the FAQ at the end of this guide. We’ve included answers to other common questions and edge cases you might be facing.
Ways to remove Microsoft Office 365 from Mac: Comparison table
There’s no official uninstaller that completely removes all Office components from your Mac. To make a complete uninstallation, consider the following two methods, each with its own pros and cons.
| Manual removal | Using App Cleaner & Uninstaller | |
|---|---|---|
| Description | Step-by-step clean removal of Office apps, support files, licenses, update agents, and caches. Ideal if you want to control every file removed. | Automatic detection and cleanup of Office apps and hidden files in a few clicks. Perfect for quick, hassle-free removal. |
| Pros |
Pros: Removes all Office 365 components completely Fixes stubborn bugs and activation issues Full control over what stays or goes |
Pros: Finds all apps + hidden leftovers automatically Uninstalls entire Office bundles easily Extra tools to reset apps and remove old traces |
| Cons |
Cons: Time-consuming - requires searching through multiple folders Older macOS or legacy Office installs may have leftover traces Best suited for experienced users |
Cons: Needs a separate (trusted) app installed |
| Ease of use |
|
|
How to manually delete Microsoft 365 and all related files
If you want to fully uninstall Microsoft 365 (formerly Office 365) apps from your Mac, this section is for you.
We created this guide by carefully tracking all the files Microsoft Office apps generate during installation and use. Unlike Microsoft’s official instructions, our list covers not just the essential files, but every associated file we found.
Note:
This instruction was tested on macOS 15, Microsoft Excel/Powerpoint/OneNote/Word 16, and Microsoft Defender 101. However, the steps are generally applicable to other macOS versions and Microsoft 365 apps as well.
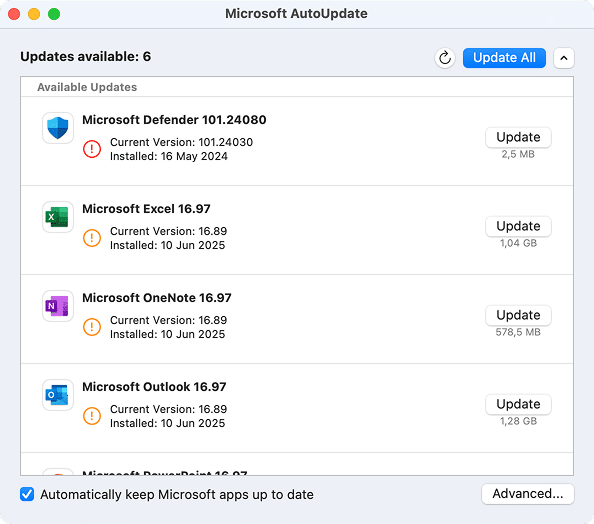
We’ve grouped the Office-related leftover files into logical categories:
- Common Microsoft service files – shared libraries, update agents, caches, etc.
- App-specific files – Word, Excel, PowerPoint, Outlook, OneNote, Defender, and even Microsoft Edge.
How to use this section:
- If you’re removing all Microsoft apps, go through every subsection below. Start with the Common Microsoft Service Files
- If you only want to remove a specific app (say, Excel or Outlook), skip directly to the relevant subsection and delete only those files. This will help avoid breaking other Office apps still in use.
Part 1. Remove Microsoft 365 apps
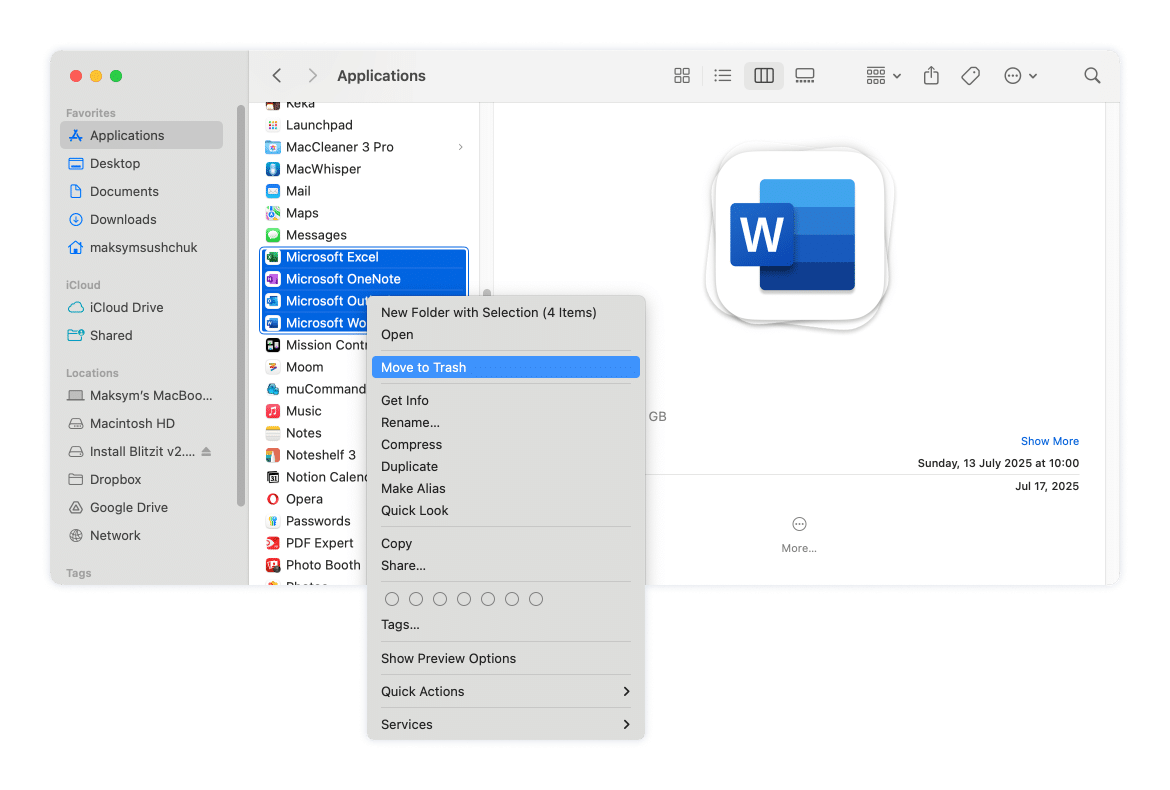
Go to the Applications folder and drag Microsoft 365 apps to the Trash.
Note:
Removing Microsoft Word, Excel, or PowerPoint from your Mac doesn’t delete the documents you’ve created with them. Your .docx, .xlsx, and .pptx files will remain where they are. Just make sure you have a way to open them, whether it’s an alternative app or the free web version of Microsoft Office.
Part 2. Remove common Microsoft service files
These files include system-wide services, shared containers, update helpers, background agents, preferences, licensing data, logs, and more.
Important:
Only delete these files if you’re uninstalling all Microsoft apps from your Mac. These components are shared across the entire Office suite. Removing them while keeping some Microsoft apps (like Outlook or Excel) may cause those apps to break or lose essential functionality.
~/Library
Copy
How to use path
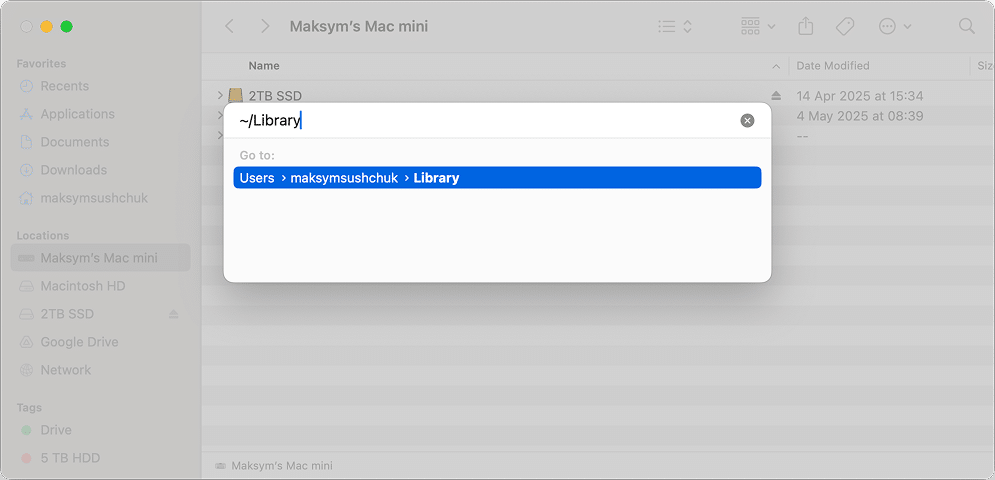
- In Finder, open the Go menu from the top bar and select Go to Folder.
- Type ~/Library into the box, then press Return to access the folder.
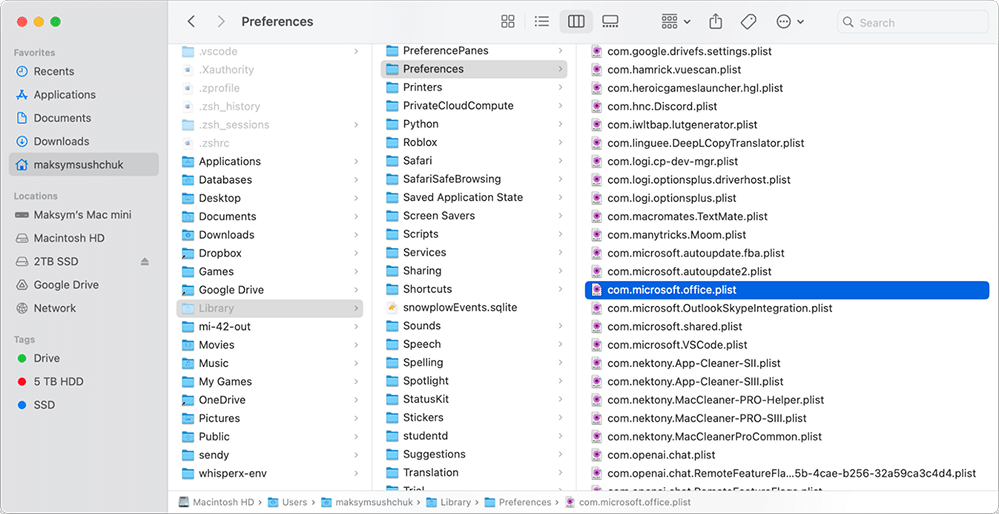
~/Library/Preferences/com.microsoft.office.plistCopy
~/Library/Preferences/com.microsoft.shared.plistCopy
~/Library/Preferences/com.microsoft.msa-login-hint.plistCopy
~/Library/Containers/com.microsoft.Office365ServiceV2Copy
~/Library/Group Containers/UBF8T346G9.OfficeCopy
~/Library/Group Containers/UBF8T346G9.OfficeOsfWebHostCopy
~/Library/Group Containers/UBF8T346G9.msCopy
~/Library/Group Containers/UBF8T346G9.com.microsoft.rdcCopy
~/Library/Group Containers/UBF8T346G9.com.microsoft.oneauthCopy
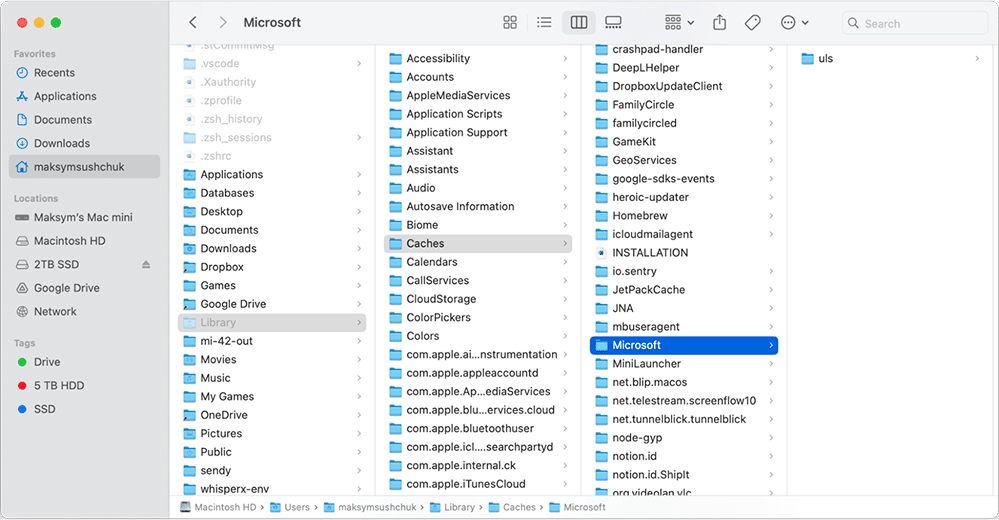
~/Library/Caches/MicrosoftCopy
~/Library/Application Support/MicrosoftCopy
~/Library/Application Support/Microsoft Update AssistantCopy
~/Library/Application Scripts/com.microsoft.Office365ServiceV2Copy
~/Library/Application Scripts/UBF8T346G9.com.microsoft.rdcCopy
~/Library/Application Scripts/UBF8T346G9.OfficeCopy
~/Library/Application Scripts/UBF8T346G9.msCopy
~/Library/Application Scripts/UBF8T346G9.OfficeOsfWebHostCopy
~/Library/Logs/MicrosoftCopy
/Library
Copy
How to use path
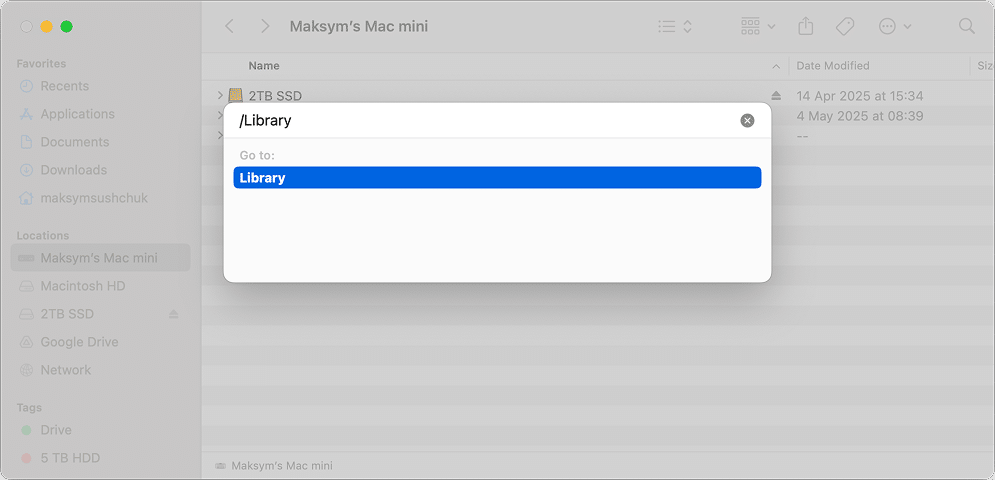
- In Finder, press Cmd + Shift + G to bring up the Go to Folder dialog.
- Type /Library and hit Enter to proceed.
/Library/Application Support/MicrosoftCopy
/Library/PrivilegedHelperTools/com.microsoft.office.licensingV2.helperCopy
/Library/PrivilegedHelperTools/com.microsoft.office.licensing.helperCopy
/Library/Automator/Office.definitionCopy
/Library/Automator/Set Document Settings.actionCopy
/Library/Automator/Add New Sheet to Workbooks.actionCopy
/Library/Automator/Get Parent Workbooks.actionCopy
/Library/Automator/Create List from Data in Workbook.actionCopy
/Library/Automator/Create Table from Data in Workbook.actionCopy
/Library/Automator/Set Word Document Properties.actionCopy
/Library/Automator/Get Parent Presentations of Slides.actionCopy
/Library/Fonts/MicrosoftCopy
/Library/Logs/MicrosoftCopy
/Library/LaunchDaemons/com.microsoft.office.licensingV2.helper.plistCopy
/Library/LaunchDaemons/com.microsoft.office.licensing.helper.plistCopy
/Library/LaunchDaemons/com.microsoft.fresno.uninstall.plistCopy
/Library/LaunchDaemons/com.microsoft.fresno.plistCopy
/Library/LaunchDaemons/com.microsoft.dlp.install_monitor.plistCopy
/Library/LaunchAgents/com.microsoft.SyncReporter.plistCopy
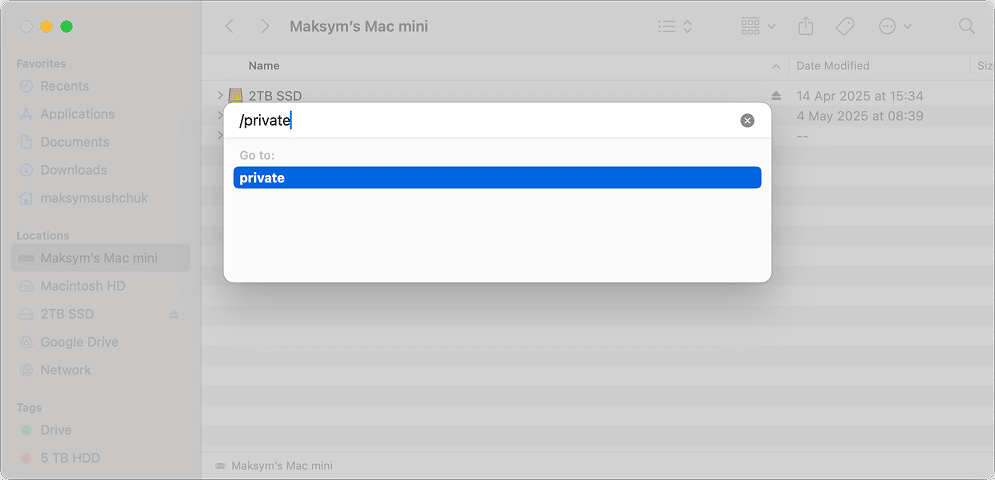
/private
Copy
How to use path
- In Finder, press Command + Shift + G to open the Go to Folder popup.
- Type /private and press Return to navigate to the folder.
Note:
The star (*) in the file path means the file can have different combinations of characters in that part of its name.
- *
/private/tmp/Microsoft Office 20Copy
- *
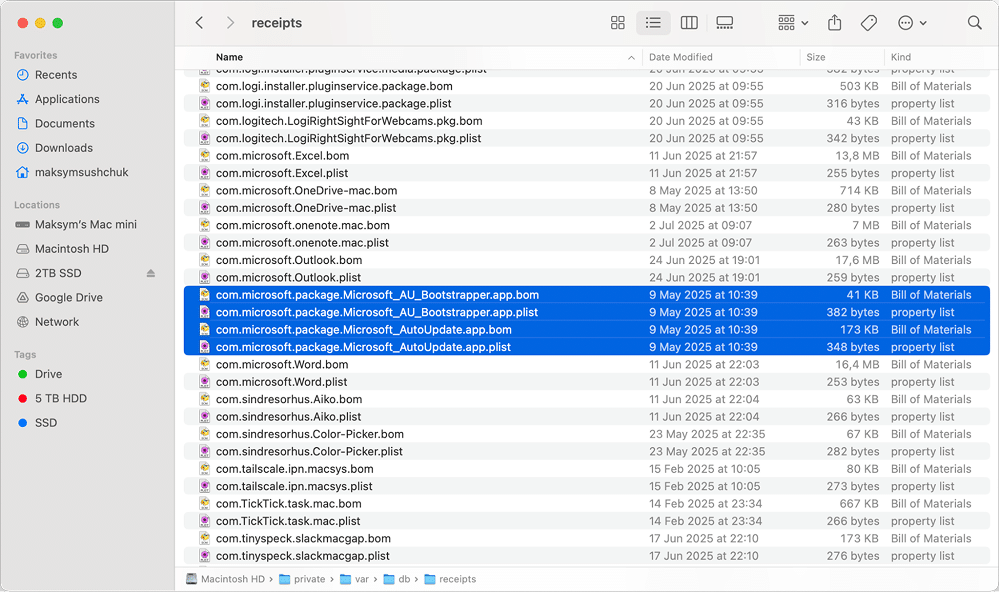
/private/var/db/receipts/com.microsoft.office.Copy
- *
/private/var/db/receipts/com.microsoft.package.Copy
- *
/private/var/db/receipts/com.microsoft.pkg.Copy
- *
/private/var/db/receipts/com.microsoft.dlp.Copy
Once these files are gone, your system will no longer carry any shared Microsoft Office components. If you plan to reinstall Office in the future, this clean state may actually help avoid conflicts or licensing errors.
Part 3. Remove separately Microsoft Excel, Word, Outlook, PowerPoint, Edge, OneNote, or Defender
Step 1. If you want to uninstall only some of the Microsoft apps, you’ll need to visit the following folders and search for Microsoft’s files mentioning those apps (e.g. “Excel”, “Edge”, etc.). Here is the list of such folders:
~/Library/Preferences/Copy
~/Library/Containers/Copy
~/Library/Group Containers/UBF8T346G9.Office/Copy
~/Library/Caches/Copy
~/Library/Application Scripts/Copy
~/Library/Application Support/Copy
/private/var/db/receipts/Copy
/Library/Automator/Copy
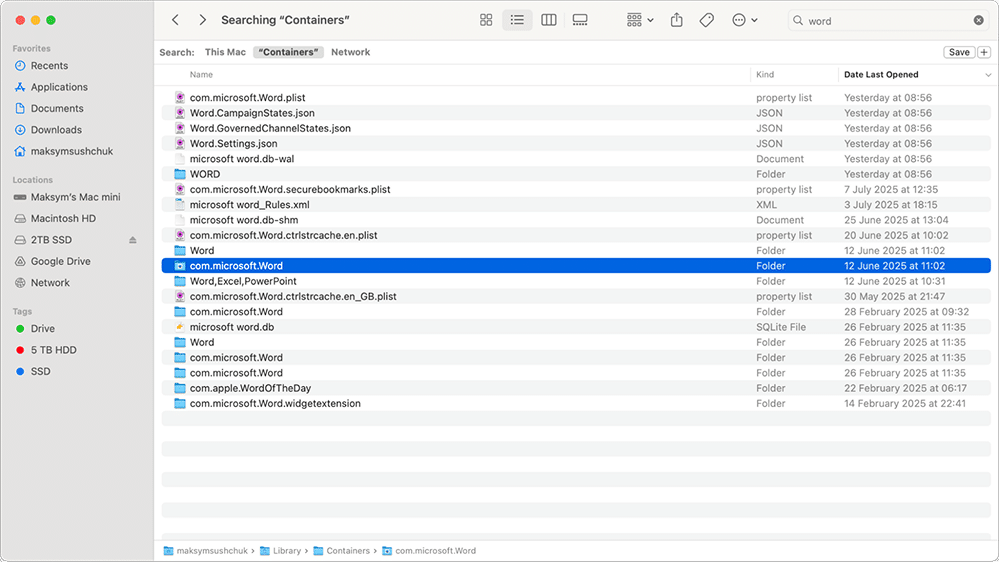
Step 2. Check these folders too if you’re uninstalling Microsoft Edge and Microsoft Defender (search not only for ‘defender’, but ‘microsoft’ as well in the case with Defender):
~/Library/HTTPStorages/Copy
~/Library/WebKit/Copy
~/Library/Saved Application State/Copy
~/Library/LaunchAgents/Copy
~/Library/WebKit/Copy
~/Library/Microsoft/Copy
/private/tmp/Copy
/Library/Logs/Microsoft/Copy
/Library/SystemExtensions/Copy
Step 3. Restart your Mac.
How to get rid of Microsoft 365 apps using App Cleaner & Uninstaller
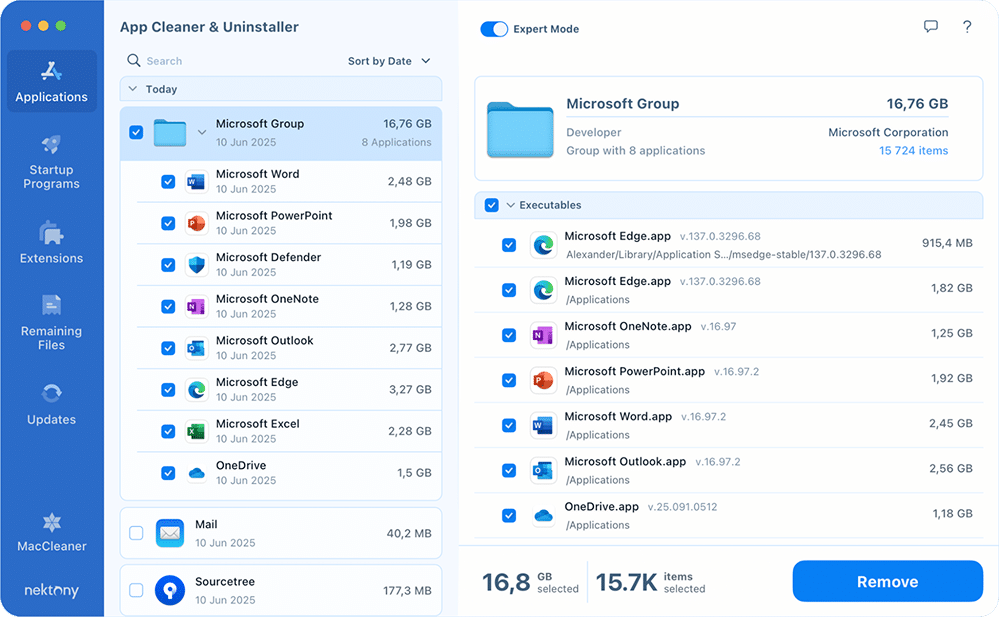
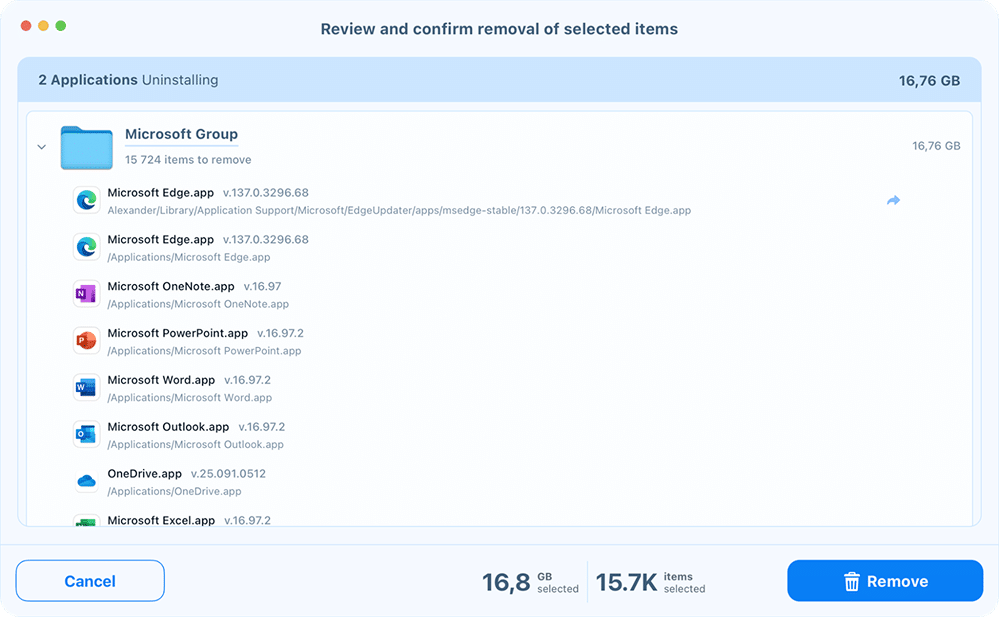
If you want a faster and safer way to uninstall Microsoft 365 apps from your Mac, App Cleaner & Uninstaller by Nektony is your best choice. It scans your system for all files related to each app, including those that are hard to find manually.
To uninstall Office apps completely
- Download and open App Cleaner & Uninstaller.
- In the Applications tab, find and select the Microsoft Office app you want to delete, such as Word, Excel, or Outlook.
Note:
To review or exclude certain files before deletion, you can enable Expert Mode at the top of the window. This will show a detailed list of the app’s service files.
- Click the Remove button.
- Confirm the removal of the selected app along with all its associated files.
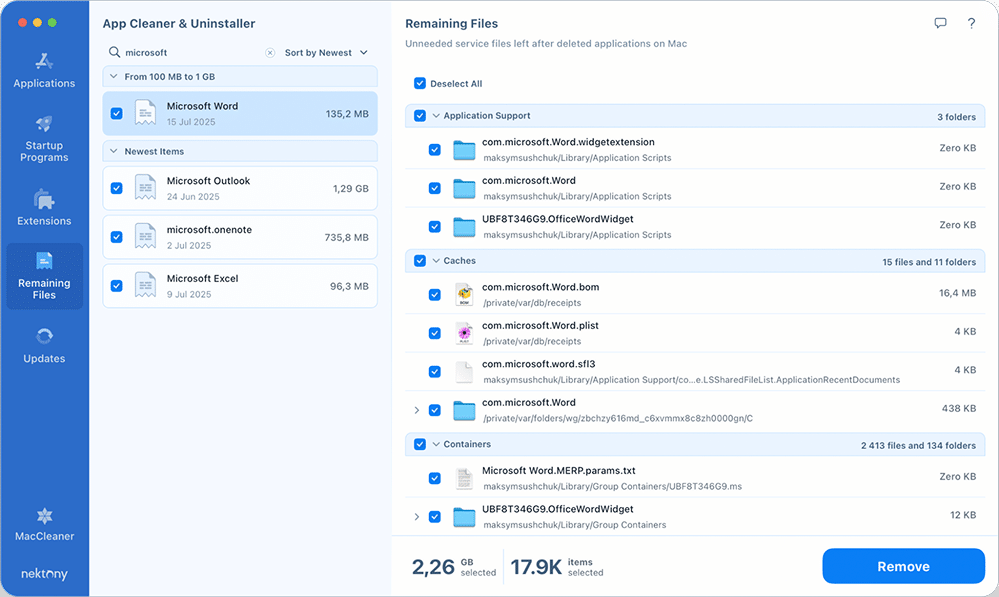
Clean up remaining files after manually removing Office
If you’ve already dragged a Microsoft 365 app to the Trash, some files may still be left behind. Here’s how to get rid of them:
- Open App Cleaner & Uninstaller.
- Go to the Remaining Files tab.
- Look for any leftovers related to Microsoft Office or Microsoft Defender.
- Select them and click Remove to clean up your system.
This helps ensure no service files are left behind to cause conflicts or consume disk space.
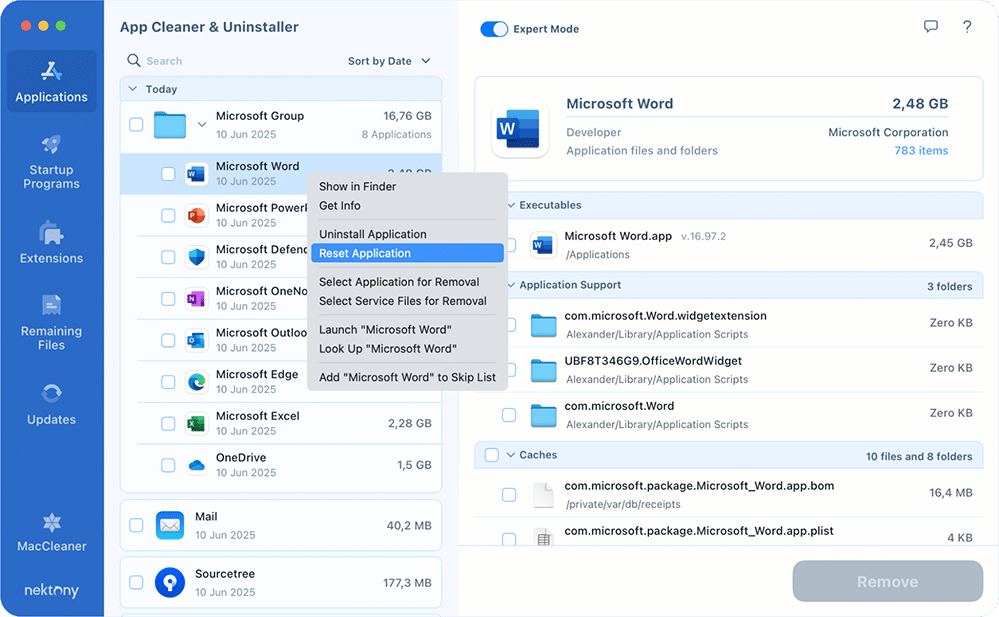
How to reset an Office app without deleting it
If an Office app is acting up and you’d rather not uninstall it completely, you can reset it instead:
- In the Applications tab, right-click the Office app (for example, Microsoft Excel).
- Choose Reset Application from the menu.
This will clear all support files, preferences, and caches, restoring the app to its default state without removing the actual application.
Resetting is a great way to try to fix bugs or account mix-ups before uninstalling and reinstalling the software.
Final thoughts
Unfortunately, uninstalling Microsoft Office apps manually is a long process that requires careful review of the files you find. Although the number of folders where residual files sit isn’t very large, you still need to make sure every file you remove actually belongs to a Microsoft folder and is safe to delete. It’s hard to enjoy such a tedious process.
Luckily, Macs and apps are designed to make things easier, not harder. And there’s indeed an app that makes Office 365 uninstallation smooth and effortless. Give App Cleaner & Uninstaller a try if you value peace of mind and prefer to spend your time doing something more meaningful than hunting down dozens of pesky Microsoft files bloating your Mac.




I was recommended this blog by my cousin. I’m not sure whether this post is written by him as no one else know such detailed about my problem. You are wonderful! Thanks!|