Help
![]()
MacCleaner Pro
Overview
MacCleaner PRO is an all-in-one software solution to free up space on your Mac and make it always run like a new computer. The program provides a clean and simple user interface. Also, the program comes with additional Pro tools for a deep Mac cleanup.

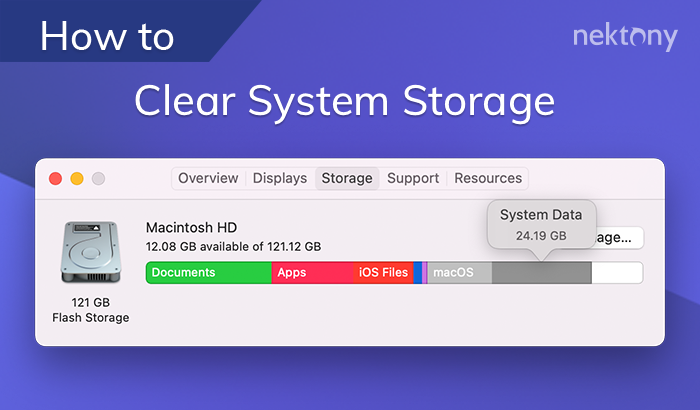
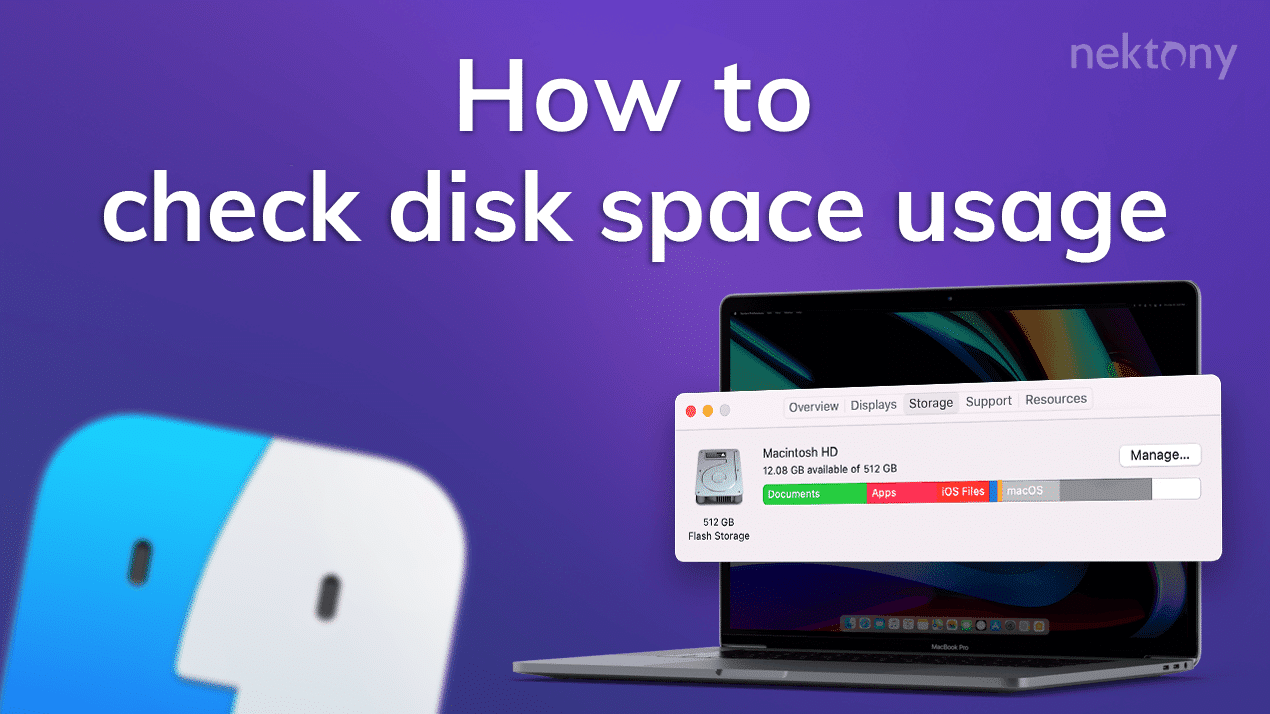
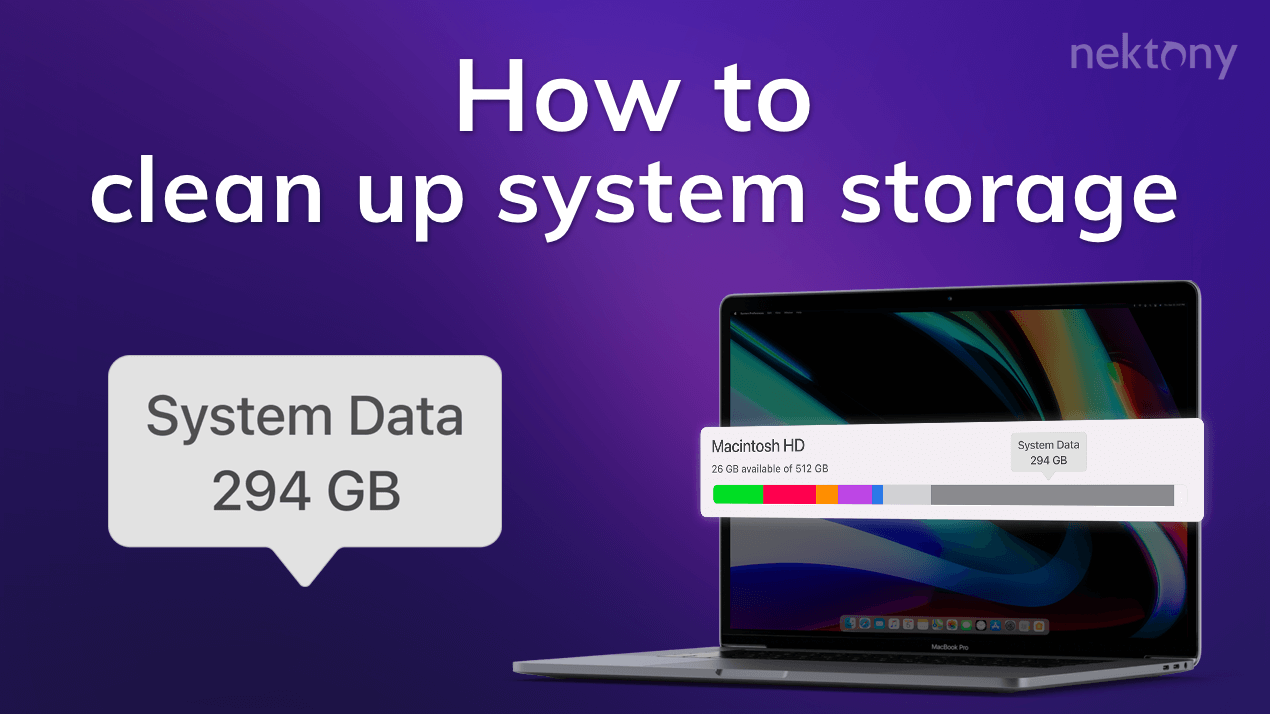
Once you launch MacCleaner Pro, you will see a bar showing your disk space usage. Here you can find out what is on your hard drive, including the volume of System storage and Purgeable storage. The bar graph is interactive. By clicking on each section, you can see all files in more detail.
Fast Cleanup Mode
In the Overview section, you can see an actionable summary of your Mac’s health, focusing on two key areas: Junk Files and Memory Usage (RAM).
Click Review and Clean Up to view the types of junk files:
- Applications’ cache
- Applications’ logs
- Installation files
- Safari cache files
- Files in the Trash bin
You can select specific categories or files and safely remove them to free up your disk space.
The application also gives you the option to OptimizeRAM by closing background processes or clearing memory caches, significantly lowering the memory usage and instantly improving system responsiveness.

Clean up Mac
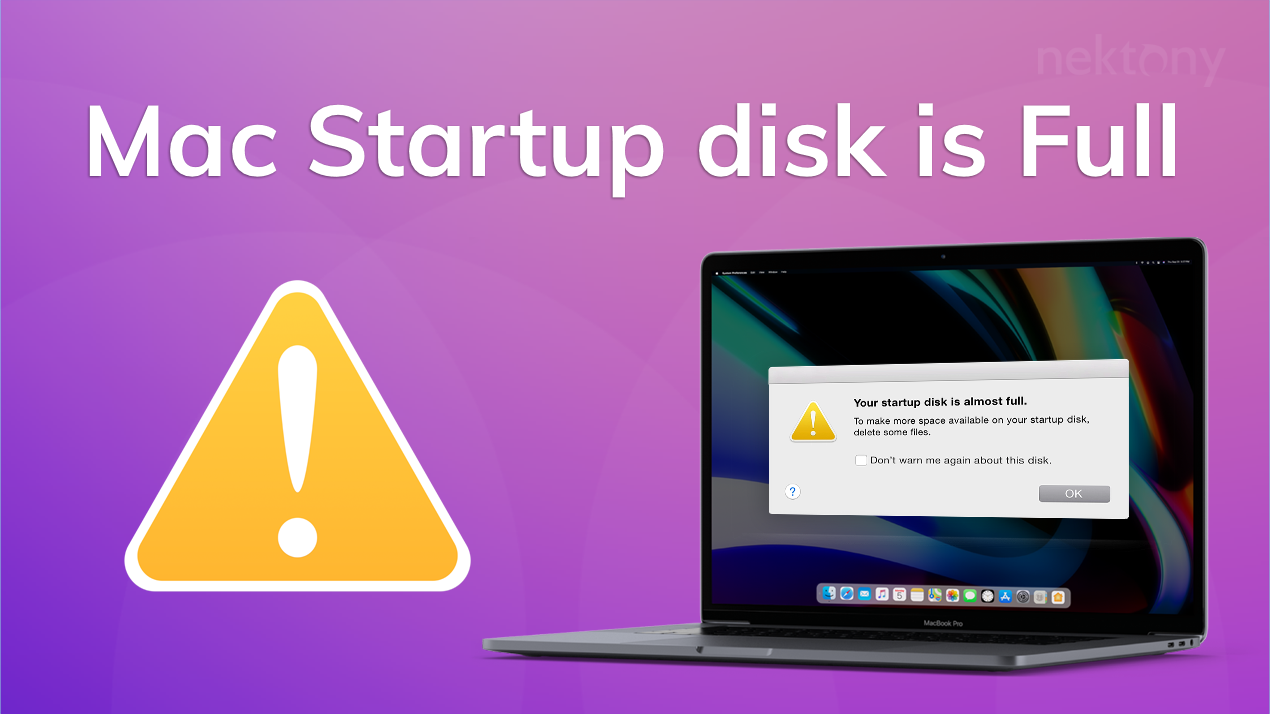
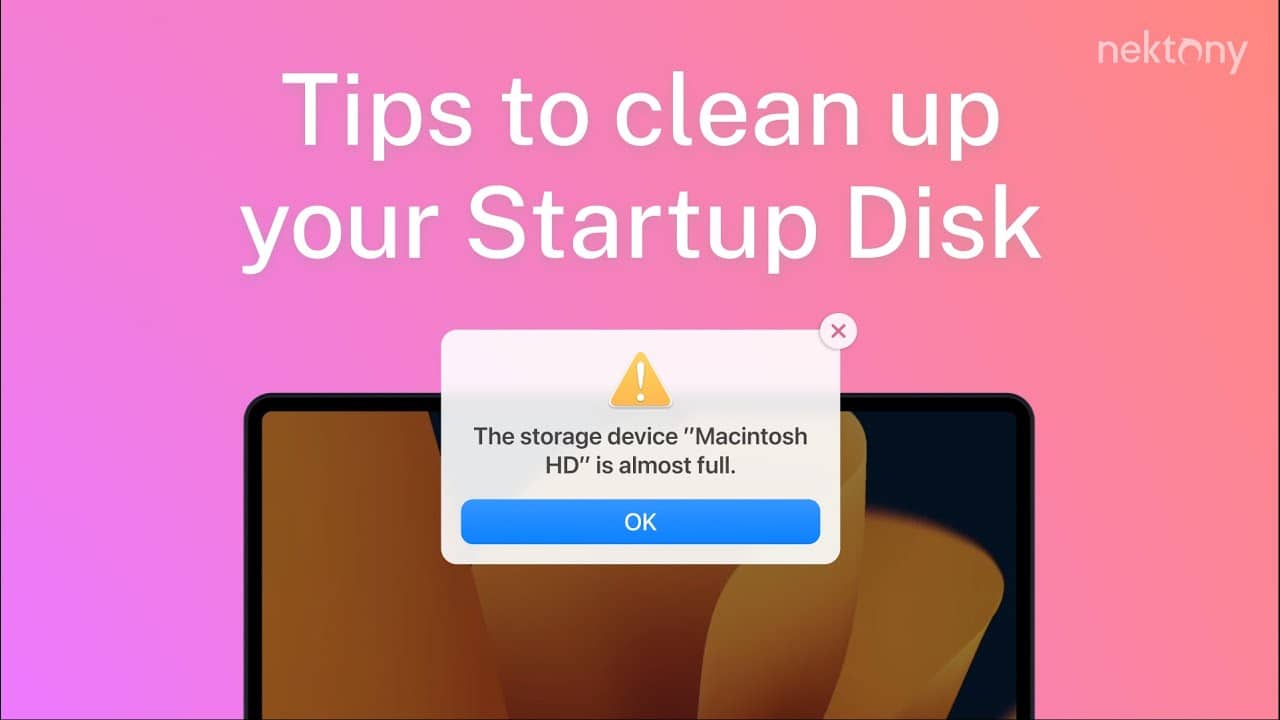
If you face a lack of free space on your Mac hard drive, your Startup disk is full, and you just need more free storage space, click Clean up in the sidebar.
Here, you can view the files that you most likely don’t need and can safely remove.
- Caches – temporary files created when you use applications on your computer. Over time, the volume of cache files significantly grows, which slows down your Mac.
- Downloads – you may download tons of files from the Internet each day and forget to remove unneeded files. The overall size of these files may take up significant space, so select and remove these “space eaters.”
- Installation files – files that are used to set up programs. Once you’ve installed a program, you don’t need these files anymore.
- Screenshot files – for different reasons, you regularly take pictures from your desktop. These pictures occupy significant storage space and it’s likely that most of them are unnecessary. So, we would advise you to take a look at them and remove unneeded screenshots.
- Language files – files for software localization. Most likely, you don’t need all the language resources and can remove the unneeded ones.
- Trash bin – files in the Trash take 100% of their previous sizes. It’s a little reminder to empty the Trash on your Mac.
- Mail attachments – these files are automatically saved on your Mac and eventually take up serious amounts of storage space. Find and remove old unneeded email downloads.
- Purgeable space – a kind of space on macOS that the system can free up when needed, and then download or generate files that were removed. Purgeable space is the storage that macOS keeps in case you want to re-download the files you removed to make some free space.

Steps to clean up your Mac with MacCleaner Pro:
- Launch the application.
- Click Clean Up in the sidebar.
- Select the junk files that you are sure you don’t need.
- Click the remove them button and confirm the deletion.
In the Clean up section, you can click each category to view files in more detail. For example, if you click Caches, you will be able to singly select browsers caches and applications caches for removal.

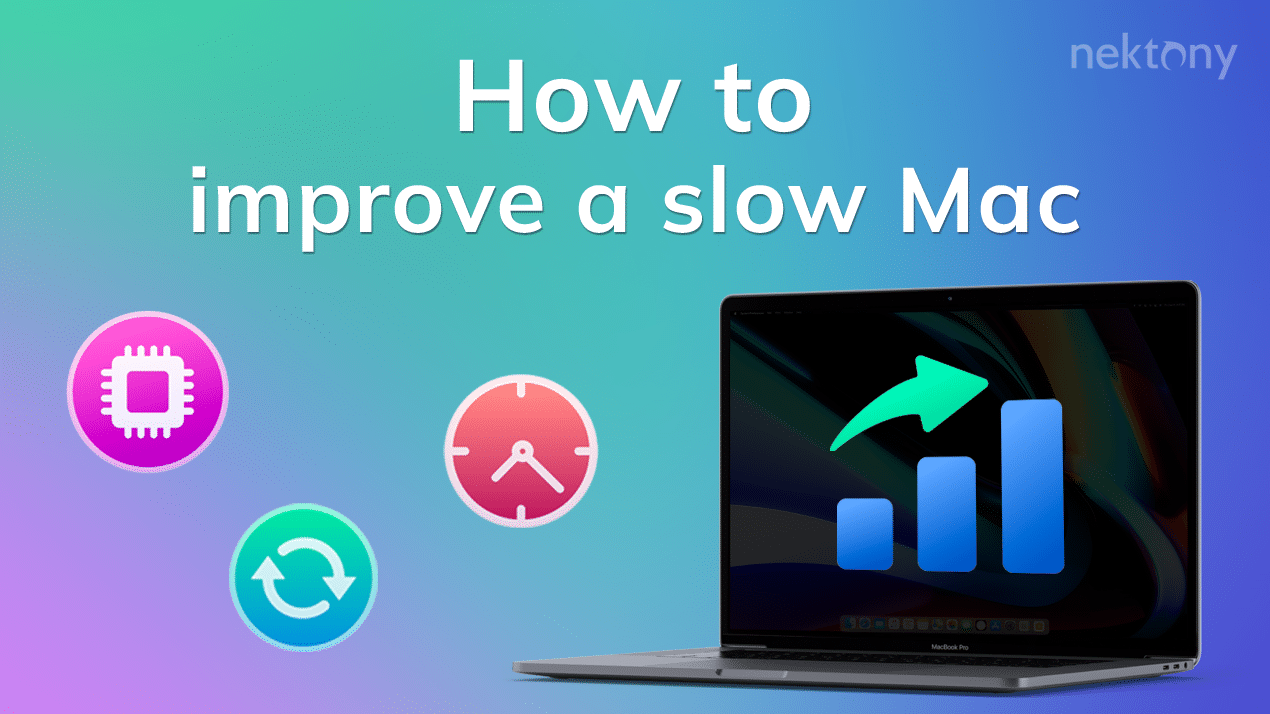
Speed up Mac
If your Mac runs slowly, switch to the Speed up section from the sidebar. Here, you can run the following tasks:
- Startup apps – stop automatically running apps at Mac login.
- Heavy applications – close the apps that require high memory usage and often freeze.
- Optimize RAM – clear inactive RAM.
- Reindex Spotlight – reset the Spotlight index to fix the search issues.
- Reindex Mail – when Mail fails to launch or some messages are missing, update the list of emails and fix all issues with your Mailbox.
- Browser extensions – small software programs that add additional functionality to a web browser but affect its performance speed.
- Internet plugins – special program components that add specific features for Internet browsing and may make your Mac run slowly.
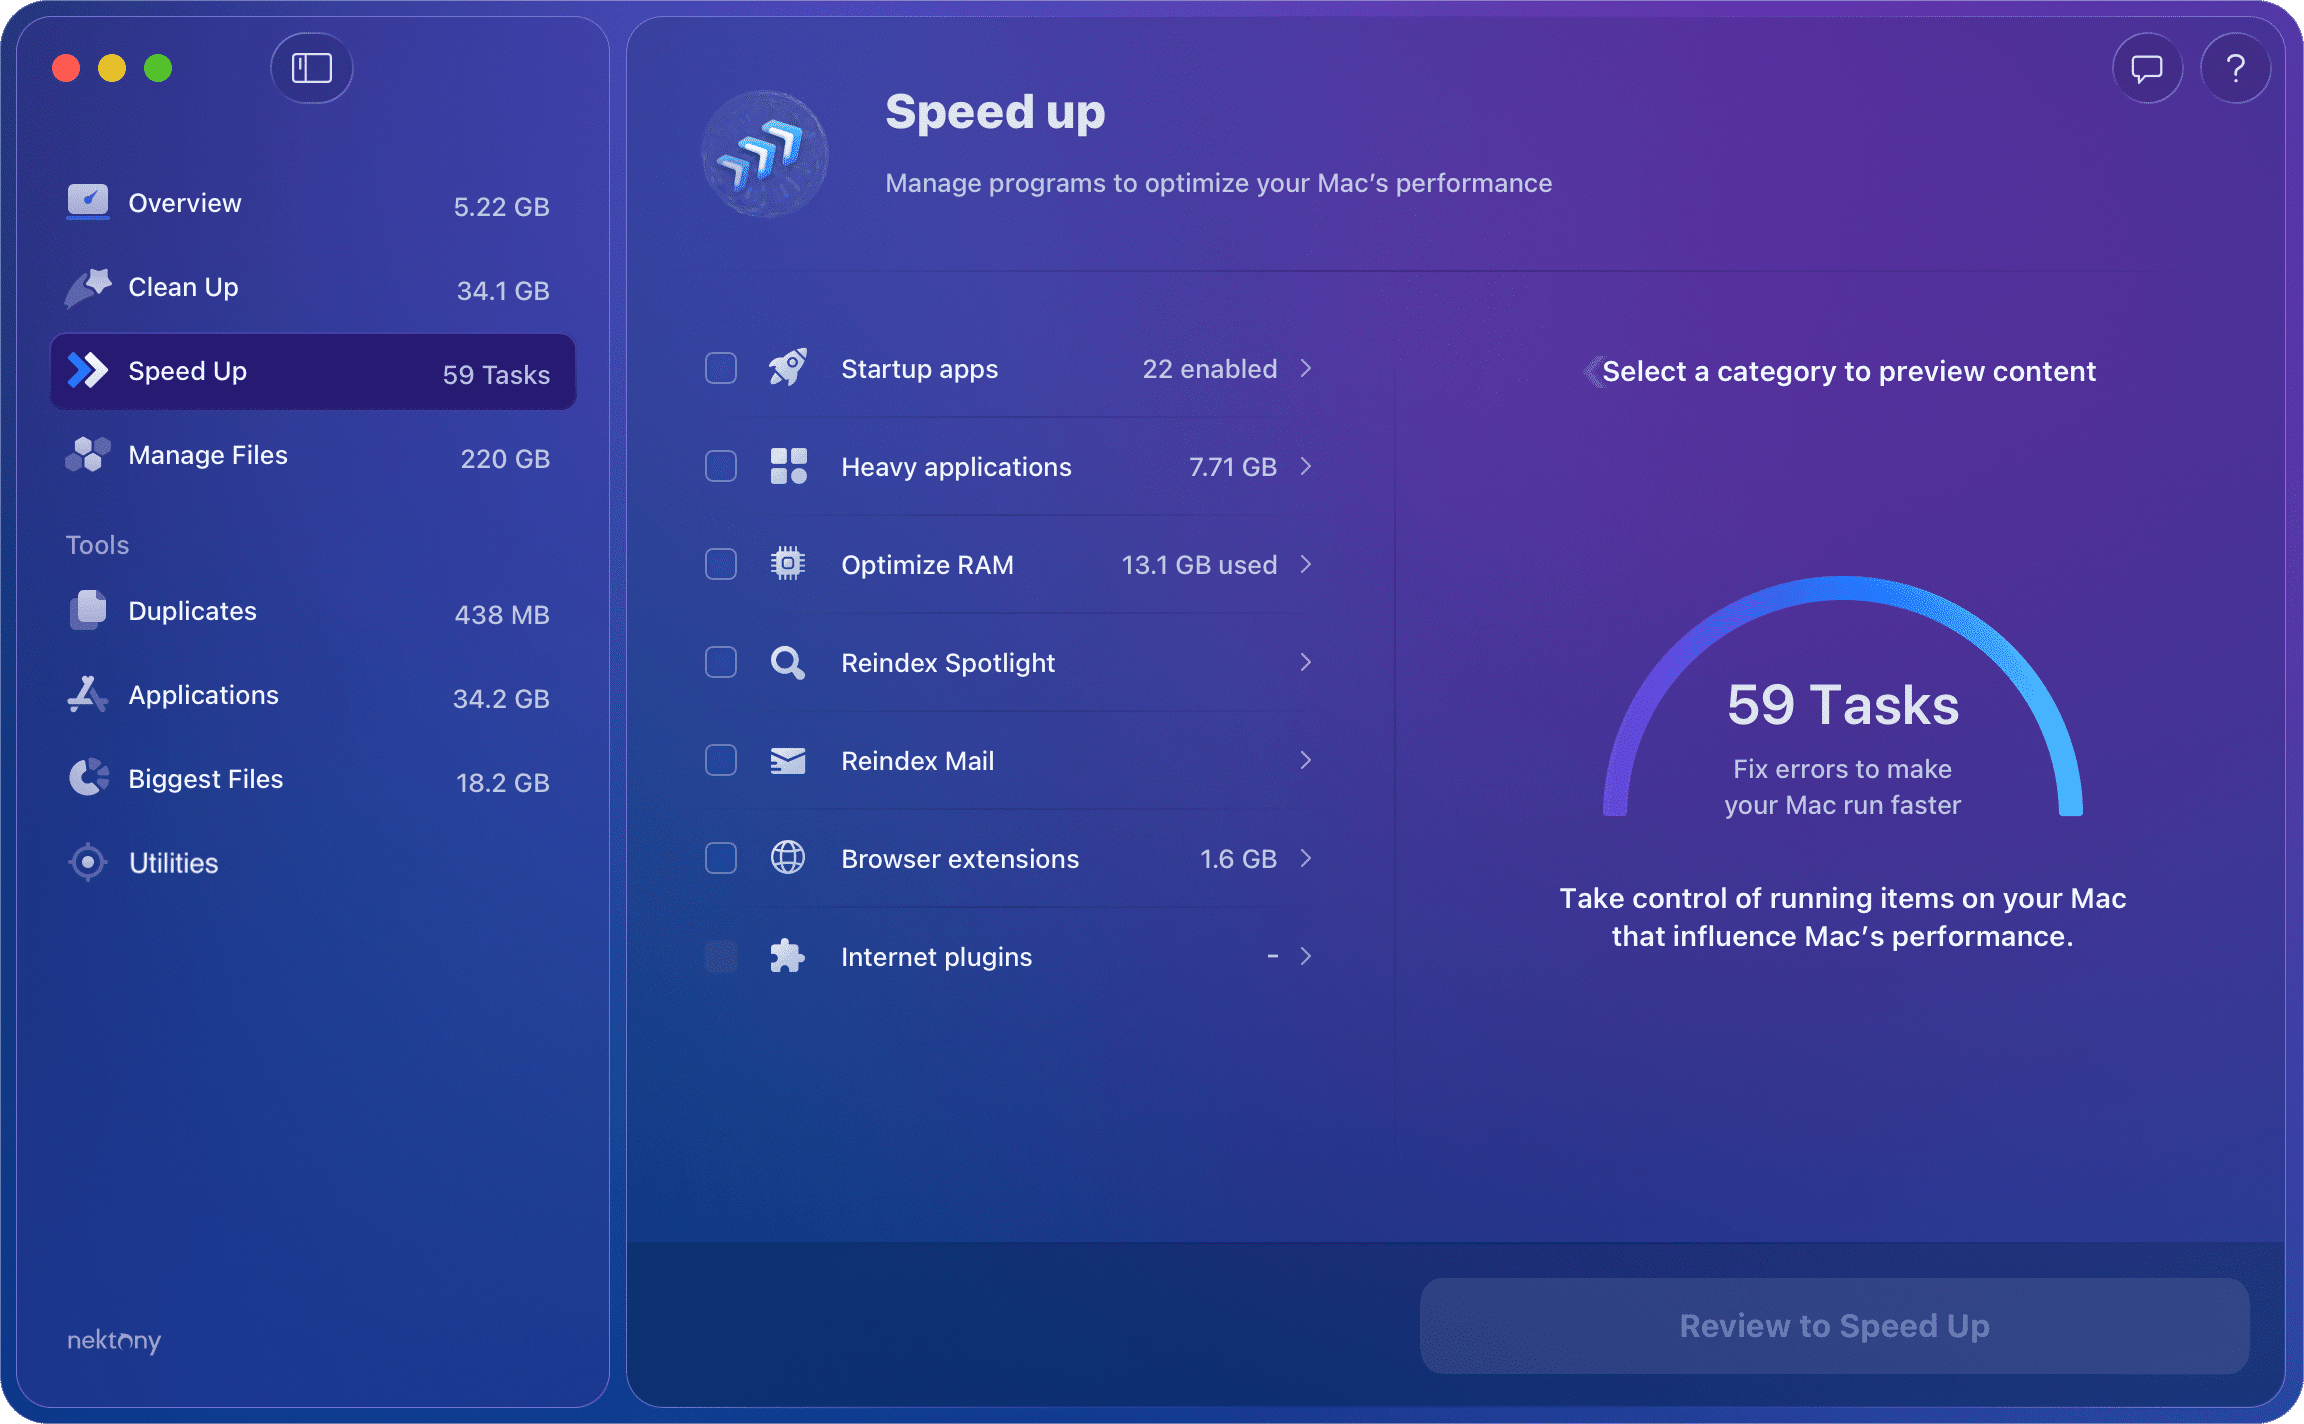
Here is how to optimize Mac’s performance with MacCleaner Pro:
- Switch to the Speed Up section from the sidebar.
- Take a look at the options that can make your Mac work faster. Select the options you want to run.
- Click Review to Speed Up and confirm the action.

For some categories, you can view more details. For example, if you click Startup apps, you will see the list of all startup programs on your Mac. Here, you can disable or enable startup programs and stop some apps from automatically running on your Mac. In such a way, you can help your Mac work faster and not waste its resources on unneeded processes.

When you click Speed Up for the selected Startup apps, MacCleaner Pro does not remove these files. It calls a command so that the system closes the selected apps and disables automatically launching them at Mac startup.
Manage disk space
MacCleaner Pro allows you to explore your files, apps, and documents to find out what is taking up your disk space. In the Manage Files section, you can browse your disk usage in more detail. Here are the categories of files you can explore on your Mac:
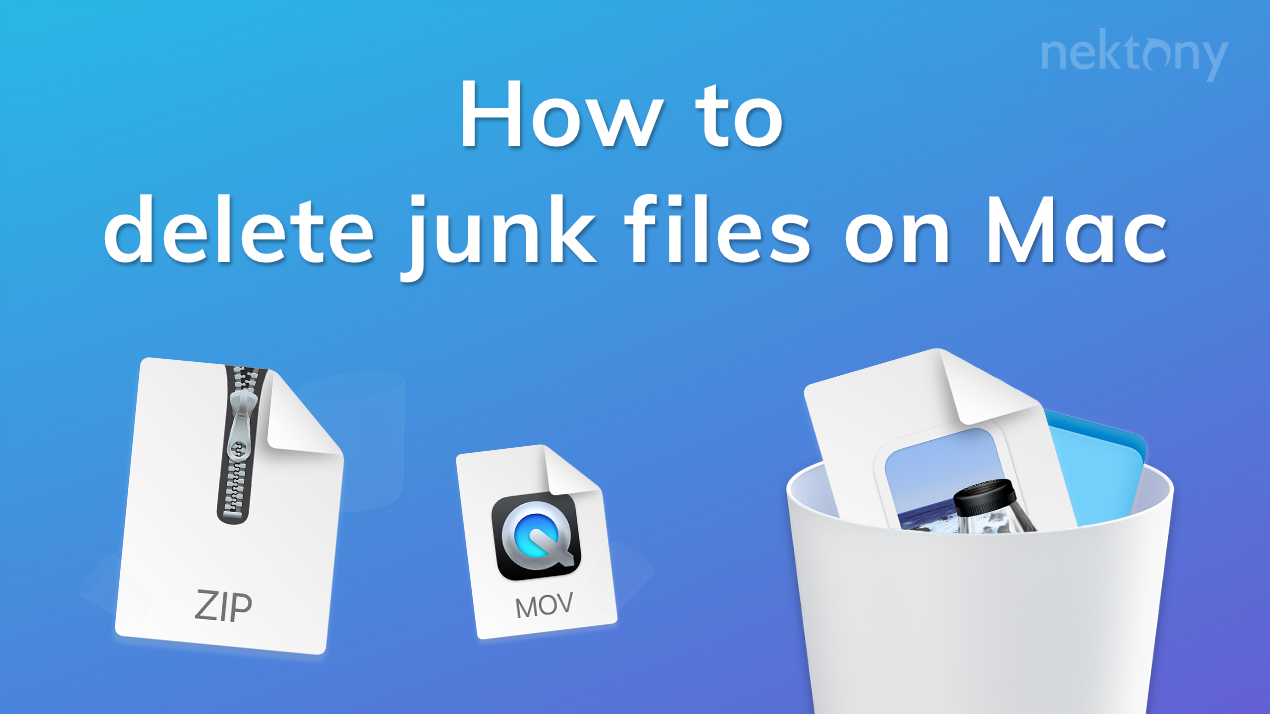
Archives
After extracting archives, most users forget to remove .zip files. These files usually take up a huge space on your disk and are likely unnecessary. Switch to the Archives category to view the list of all .zip files on your Mac. Select and remove unwanted ones.

Documents
Switch to the Documents category to view a list of your documents. Review and remove large files and folders you don’t need.

Movie files
On your Mac, you may store movies downloaded from iTunes, created with video editing apps, or transferred from your iPhone. Whatever the reason you keep video files on your Mac, you should keep in mind that these files take up huge disk space. Manually locating them may be tricky. Go to the Movie category in MacCleaner Pro, review your video files, and remove all large and unneeded ones.

Music files
As well as movies, downloading music from iTunes causes the Mac’s disk space to be filled. Go to the Music category to review a list of all music files stored on your Mac. Select unwanted songs and click to remove them.

Pictures
Pictures are another type of space consumer on a Mac. Manually searching for them takes a lot of time and it’s unnecessary since MacCleaner Pro automatically locates all pictures on your hard drive and displays them in the appropriate category.
Go to the Pictures category, review the list of all image files on your Mac, select unneeded pictures and click to remove them.

System files
There are tons of system files on your Mac that can’t be removed or shouldn’t be removed for the system to work correctly, but it’s useful to know about them and understand what is on your Mac’s hard drive. In the System category, you can view the volume of system operating files, files in the Library folder, and inaccessible folders such as the folders of other Mac users.

Home folder
Here you can view what’s in your Home folder. To analyze these files in more detail, click the blue button to launch the bundled tool, Disk Space Analyzer.
Please note that the items in the Home folder are displayed in the appropriate categories of files in the list above.

Tools
MacCleaner Pro provides special, separate applications for a deep cleanup of your Mac. These additional tools allow you to locate and remove all unwanted stuff from your Mac disk.
You can find them in the appropriate sections of the Tools list.
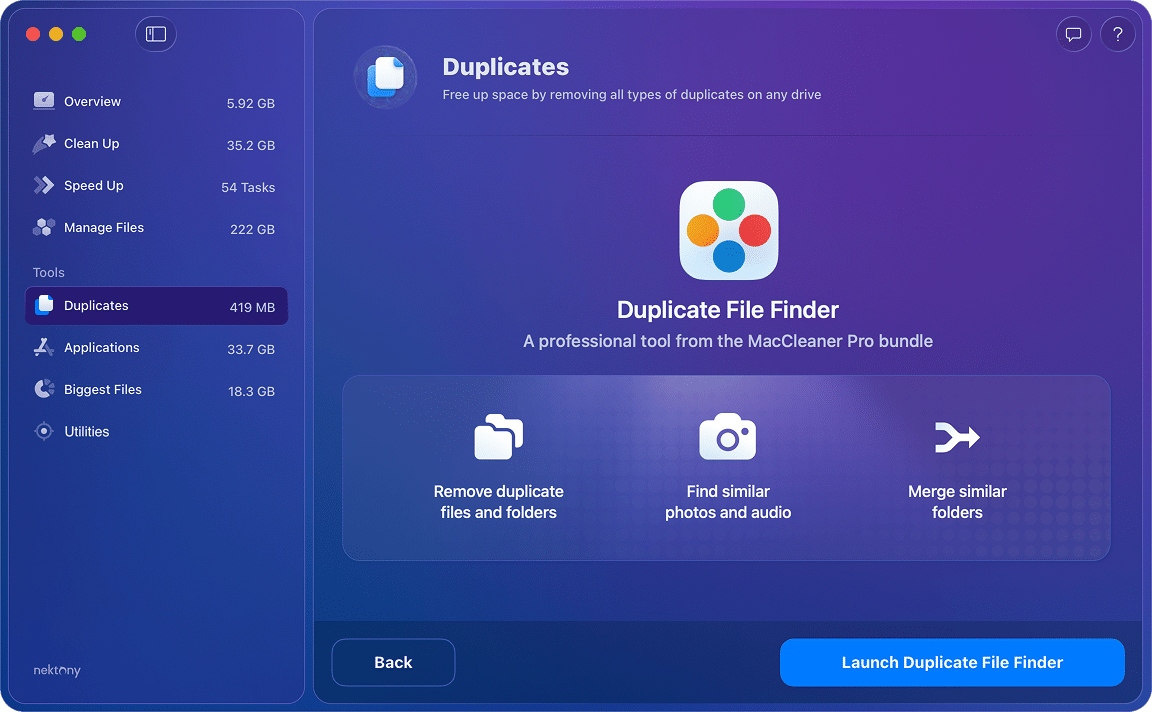
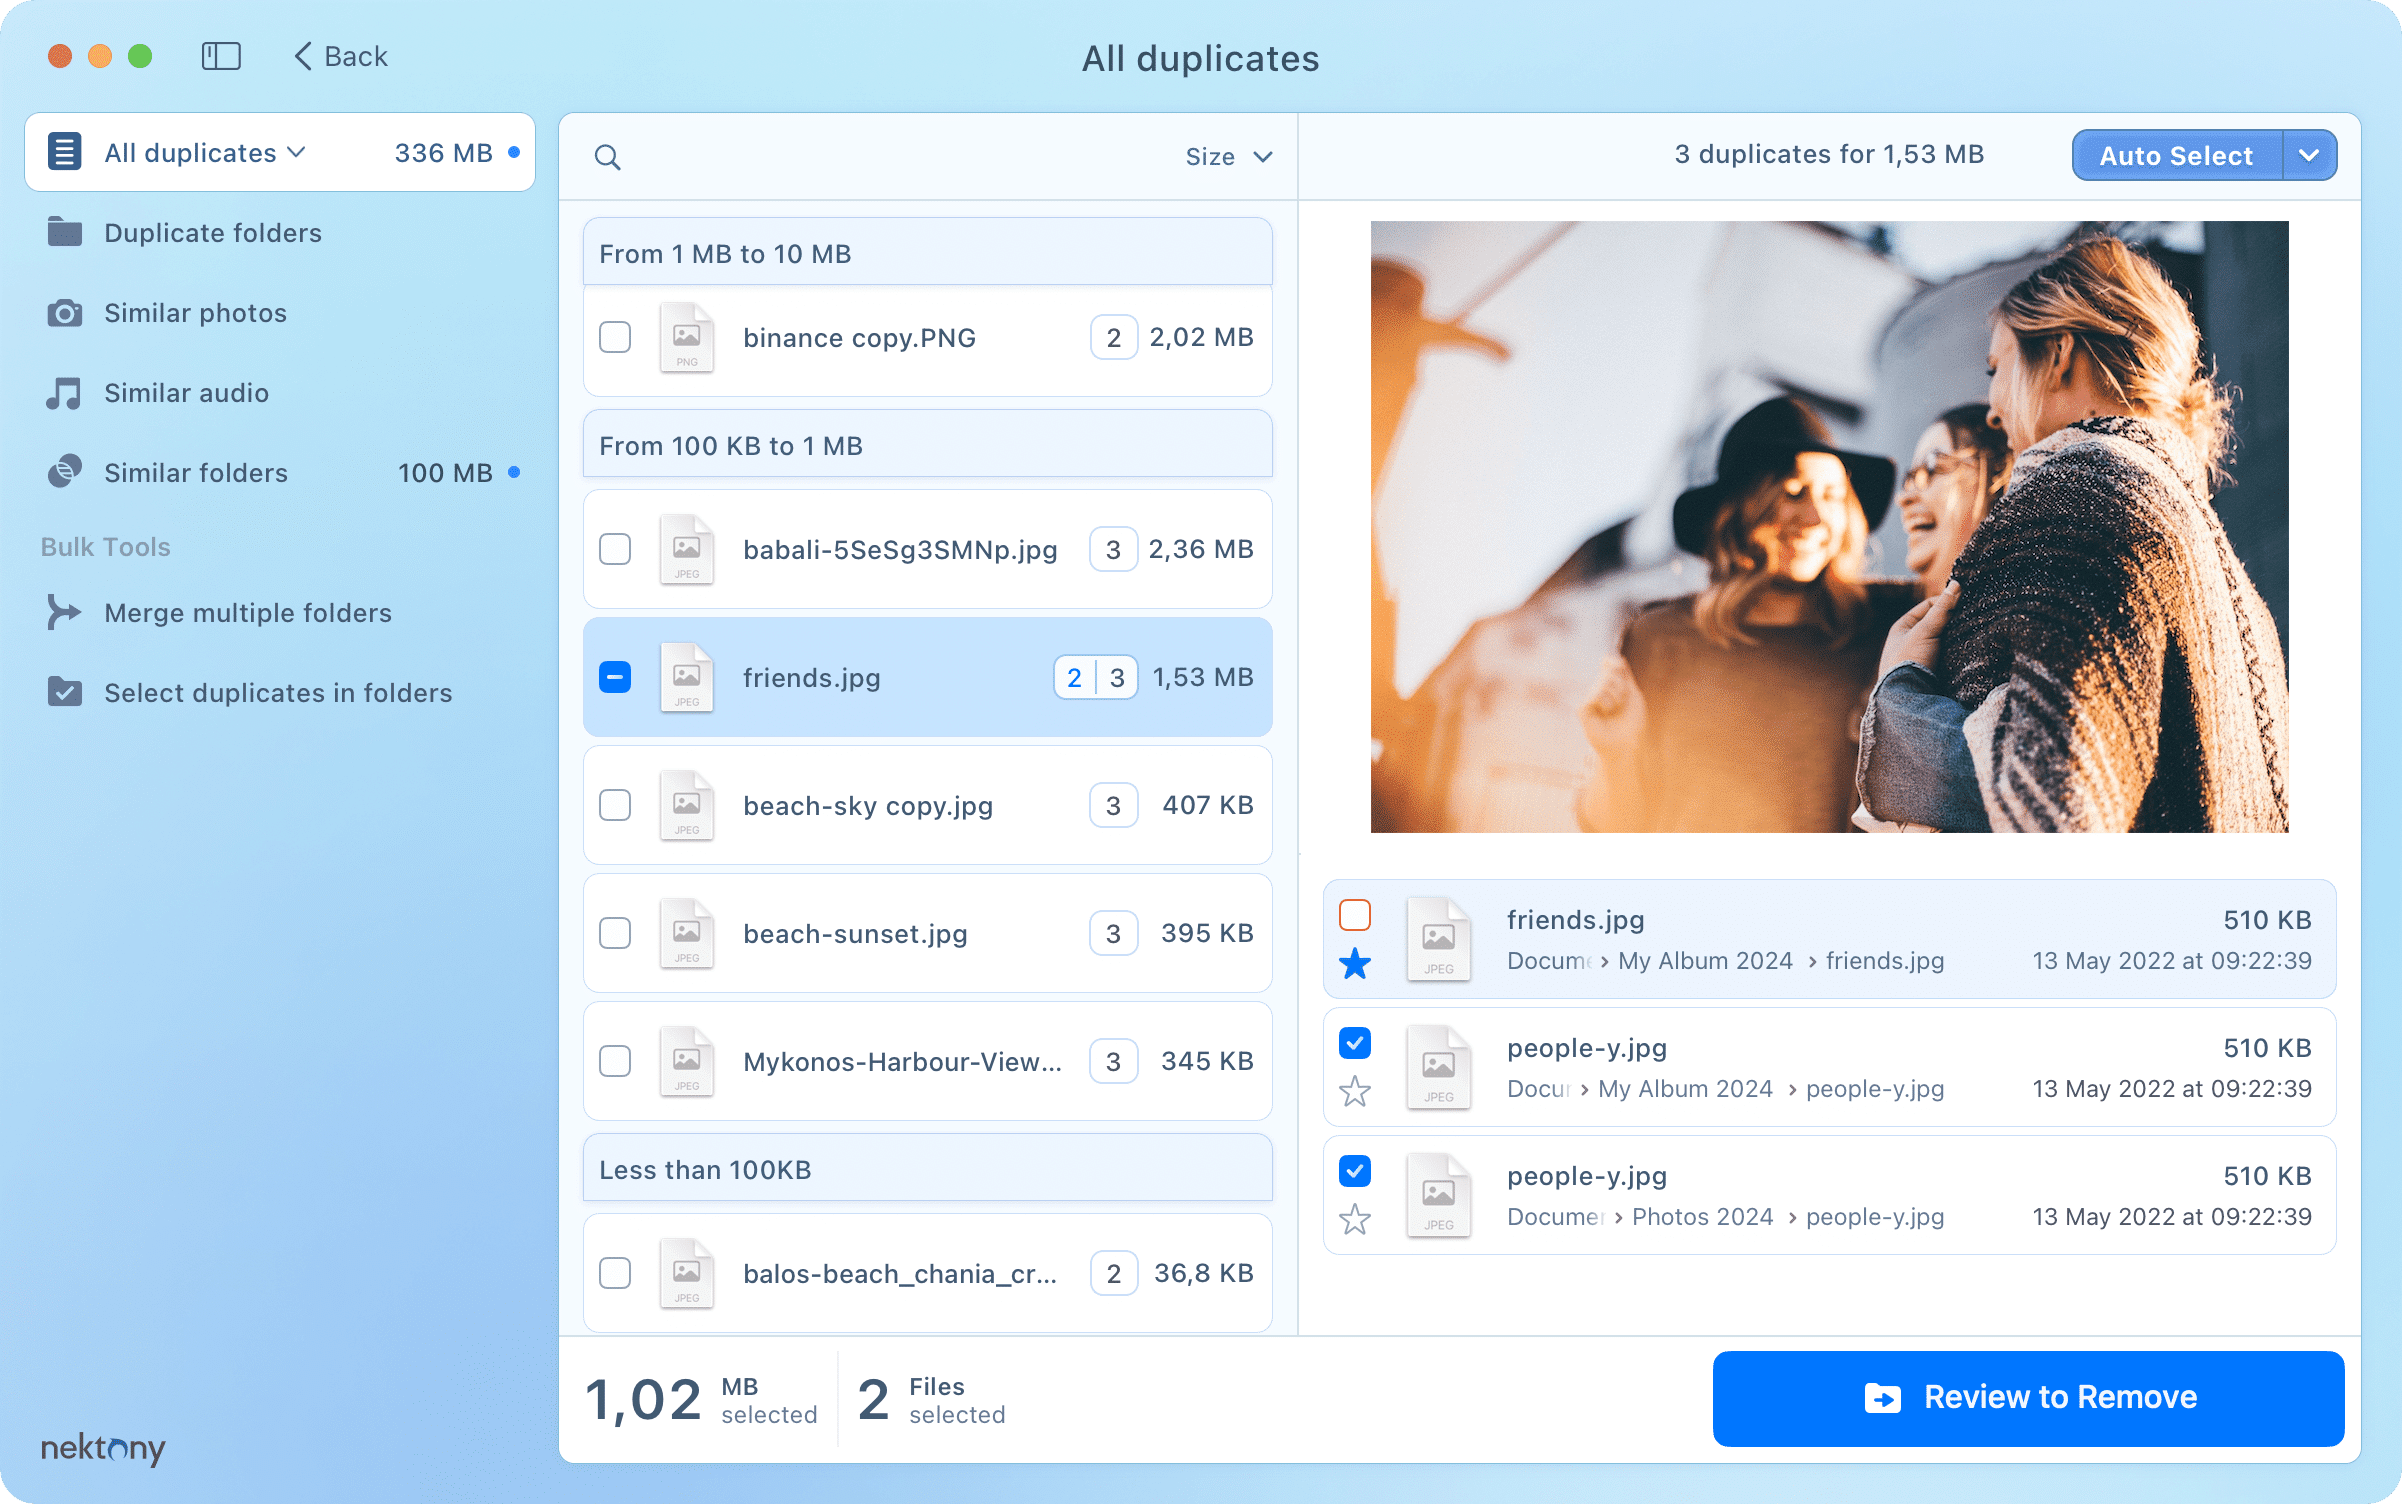
Duplicates
This section helps you locate and delete duplicate files scattered across your Mac, allowing you to quickly free up hundreds of megabytes or even gigabytes of space.
- Switch to the Duplicates section.
- Select the copies you wish to delete by checking the box next to them.
- Click Review to Remove and confirm removal.

If you wish to get more options to manage and organize your duplicates, run Duplicate File Finder, included in the MacCleaner Pro bundle. You can find this app by clicking Find all with Duplicate Finder.
With Duplicate File Finder, you get more features:
- Scan any folder or disk
- Find duplicate and similar folders
- Merge folders
- Find similar pictures and audio files
- Use the Auto Select button and configure rules for it
- Compare files
- Compare folders
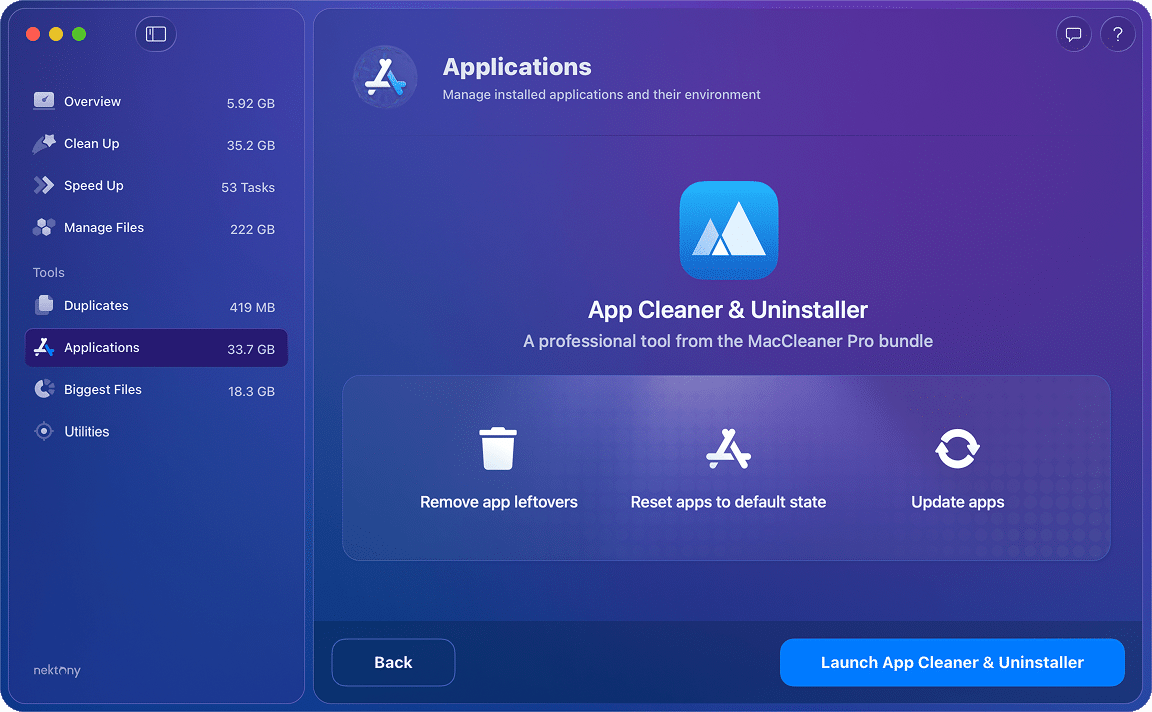
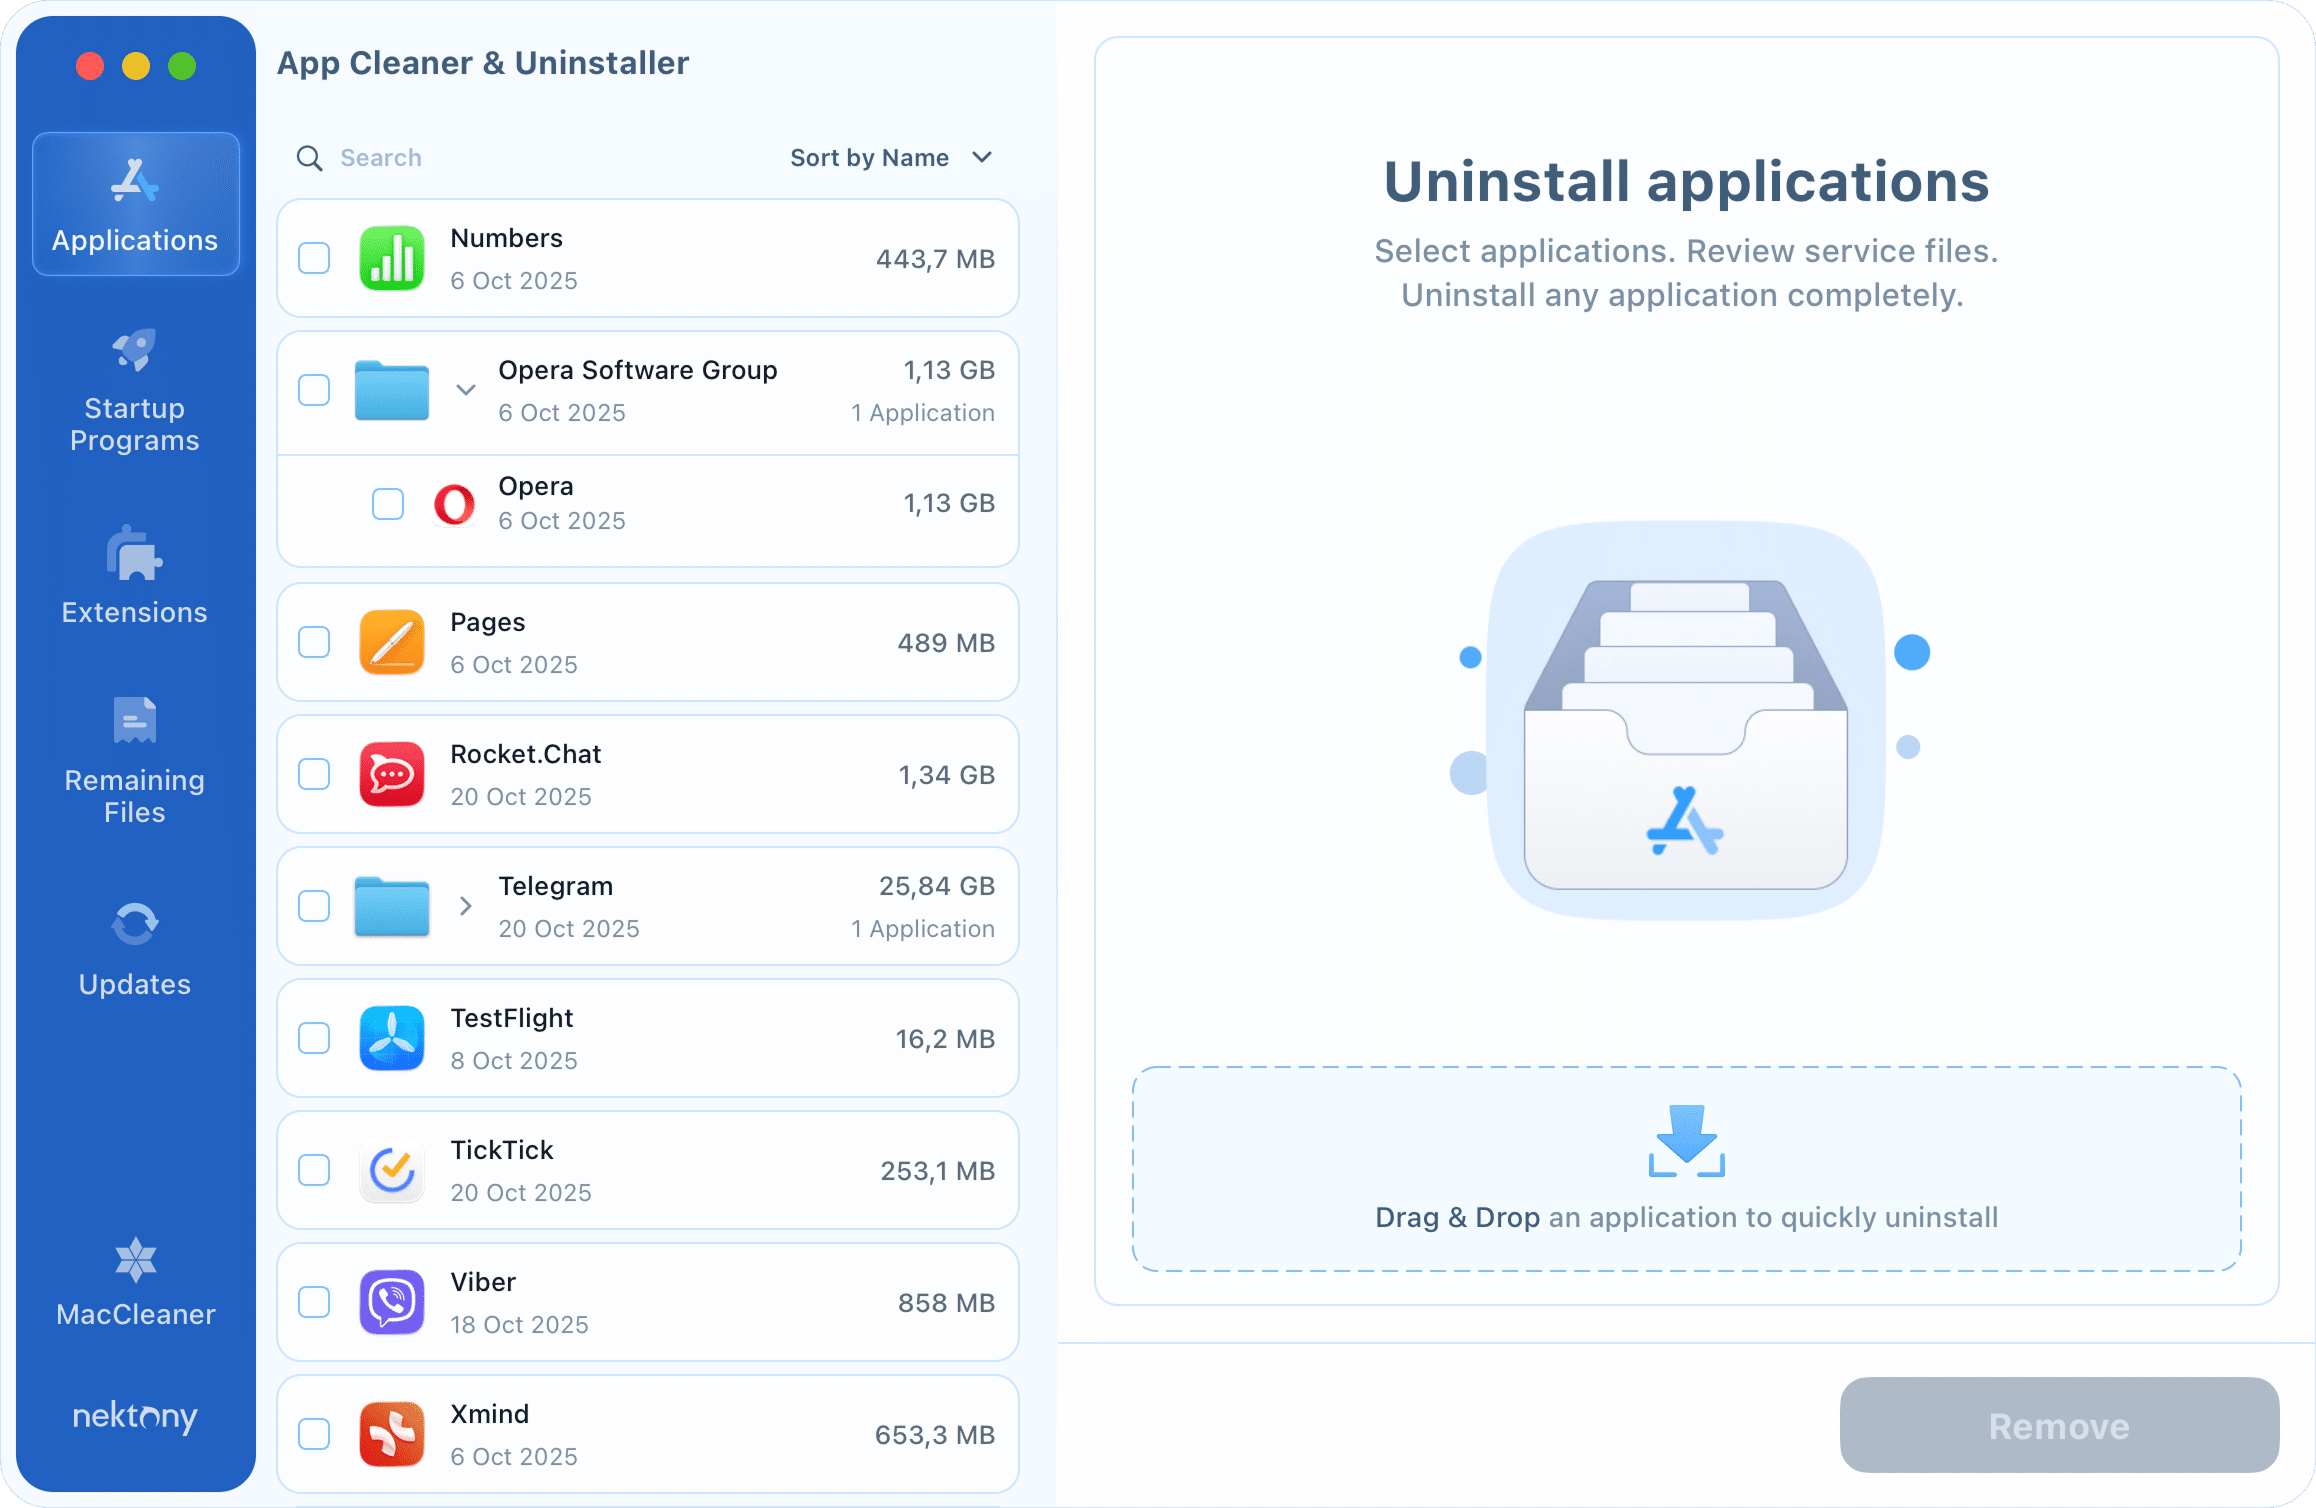
App Uninstaller
This section will help you manage the applications installed on your Mac, including completely and safely uninstalling them to reclaim the maximum amount of storage.
- Go to the Applications section.
- Select unused apps by checking the box next to them.
- Click the Review to Remove button and confirm.

To get additional features for managing your apps, run App Cleaner & Uninstaller from the MacCleaner Pro bundle. You can find this app by clicking Manage apps with App Cleaner.
With App Cleaner & Uninstaller, you get more features:
- Reset applications to the default state
- Remove the remaining files of previously deleted apps
- Update applications and stay with their latest builds
- Change file associations for different types of files
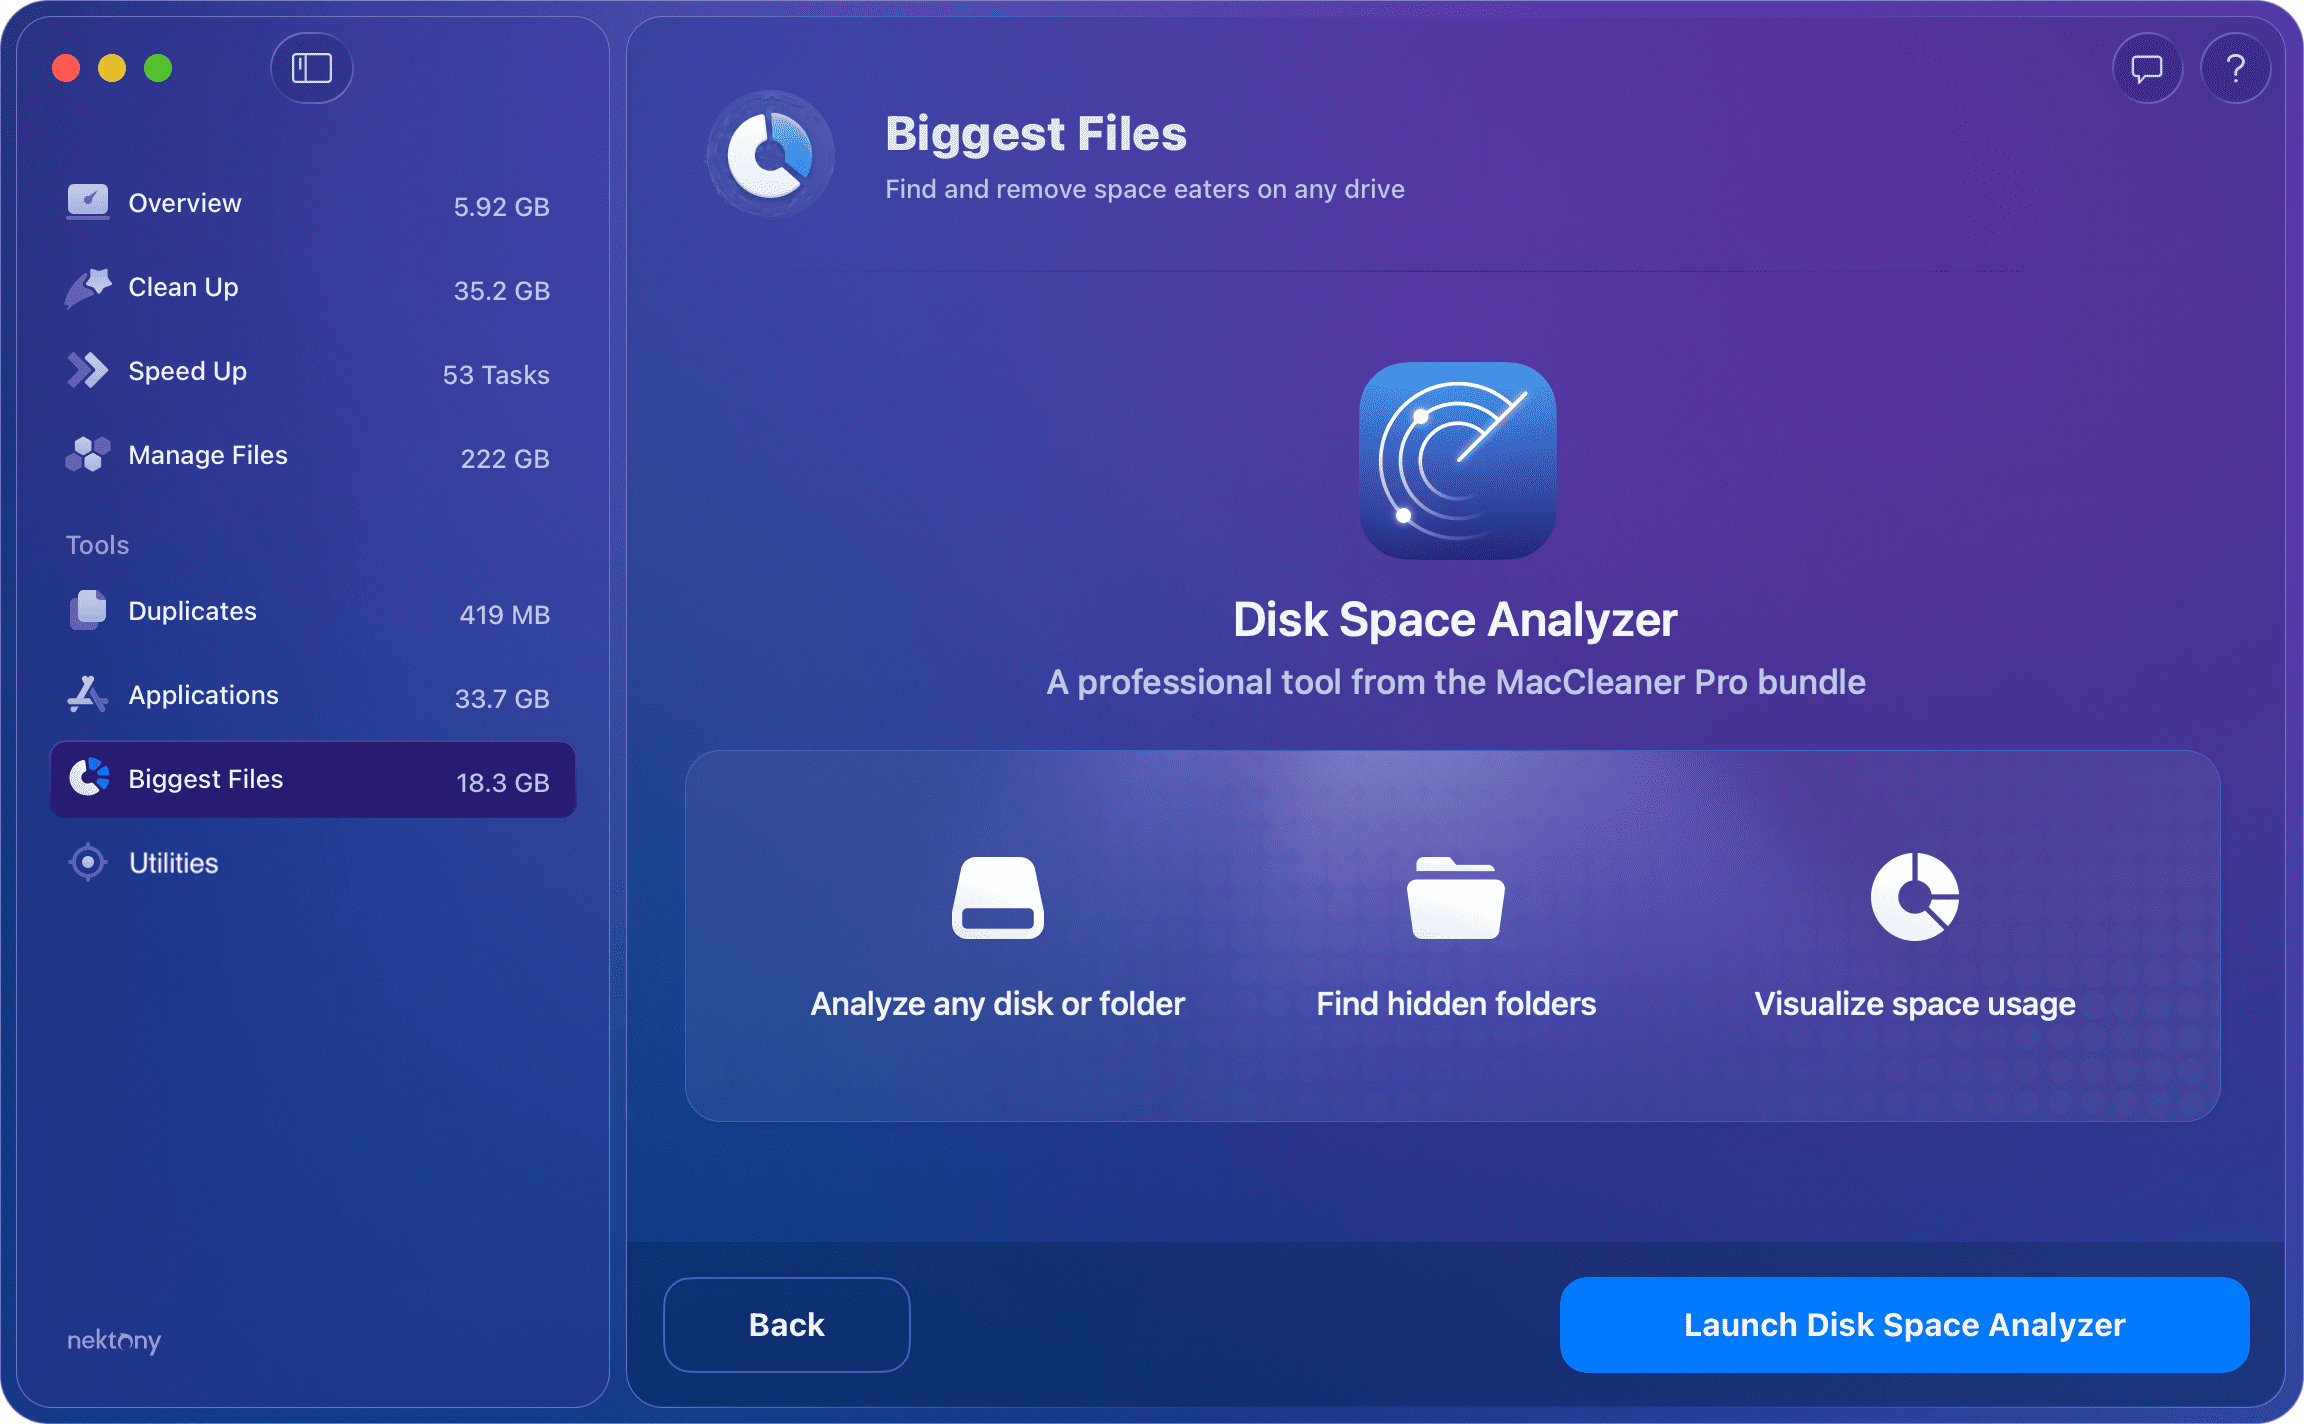
Biggest Files
To see which files on your Mac use the most disk space, go to the Biggest Files section from the sidebar. The app displays a list of files, with the largest ones listed first by default.

You can change the order of the list using the Size dropdown menu:
- Name: A to Z (Sorts alphabetically)
- Name: Z to A (Sorts in reverse alphabetical order)
- Size: Large to Small (The current default, showing the largest items at the top)
- Size: Small to Large (Shows the smallest items at the top)

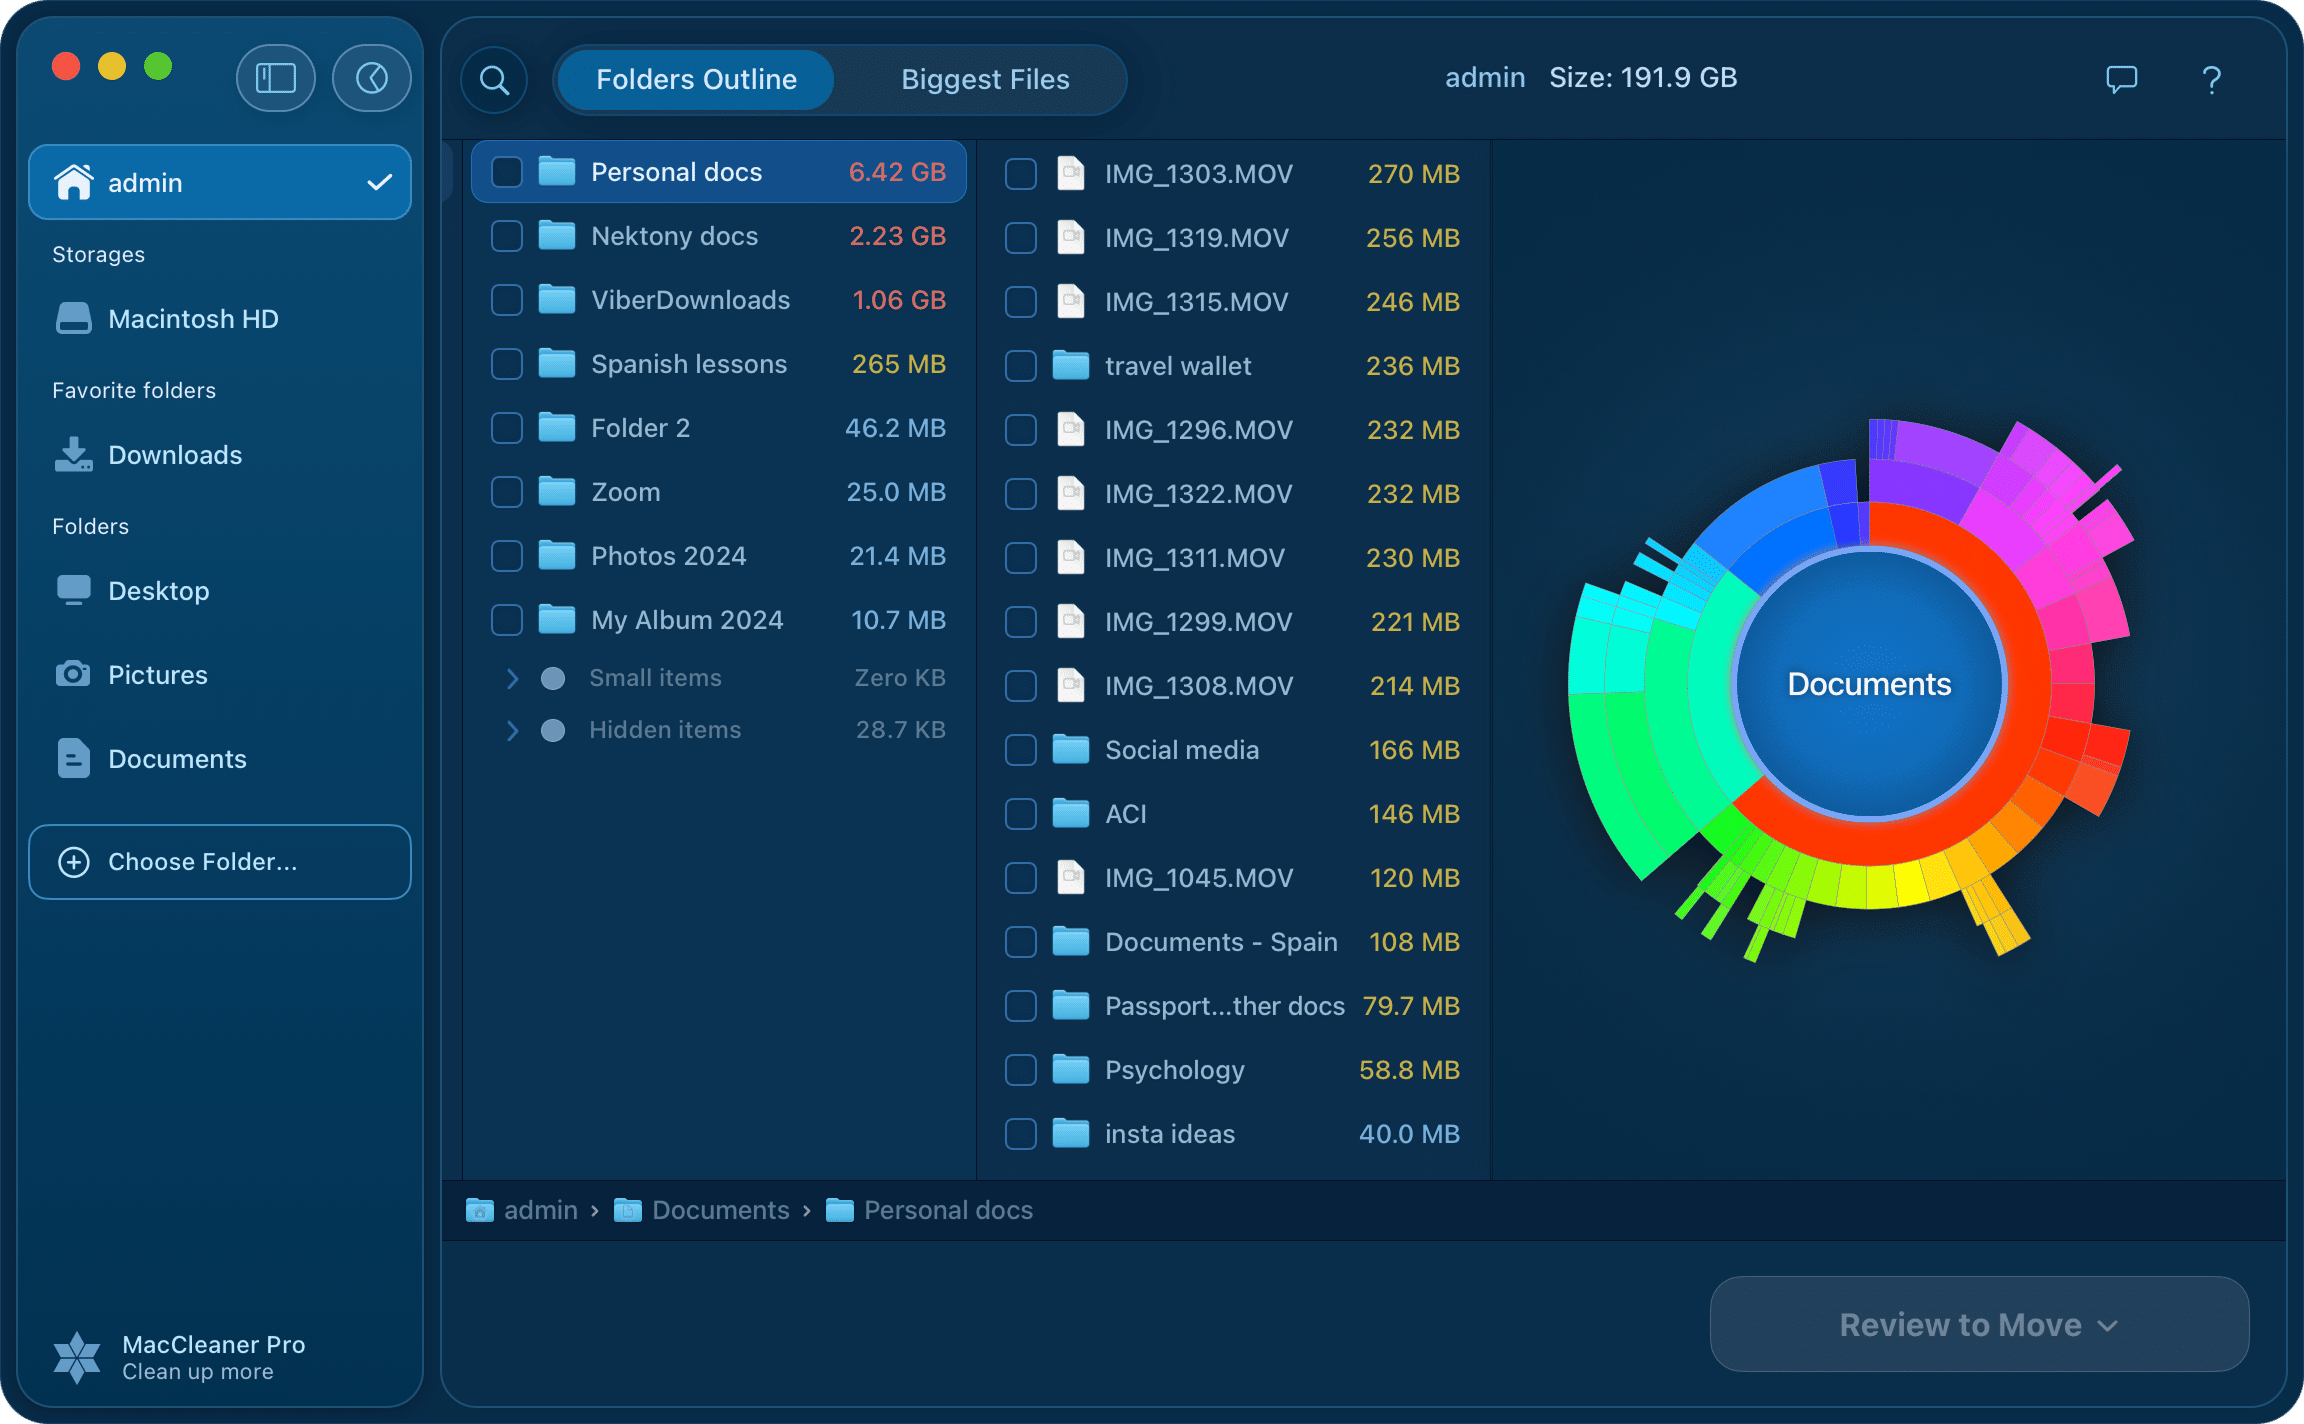
If you want a more visual, in-depth breakdown of your disk space, click the Analyze space with Disk Analyzer button. This will run an additional tool from the MacCleaner Pro bundle called Disk Space Analyzer, which provides you with more features:
- Scan any disk or folder, including external storage
- Analyze and view disk space usage in a convenient sunburst diagram
- Copy or move the bulkiest content to another disk
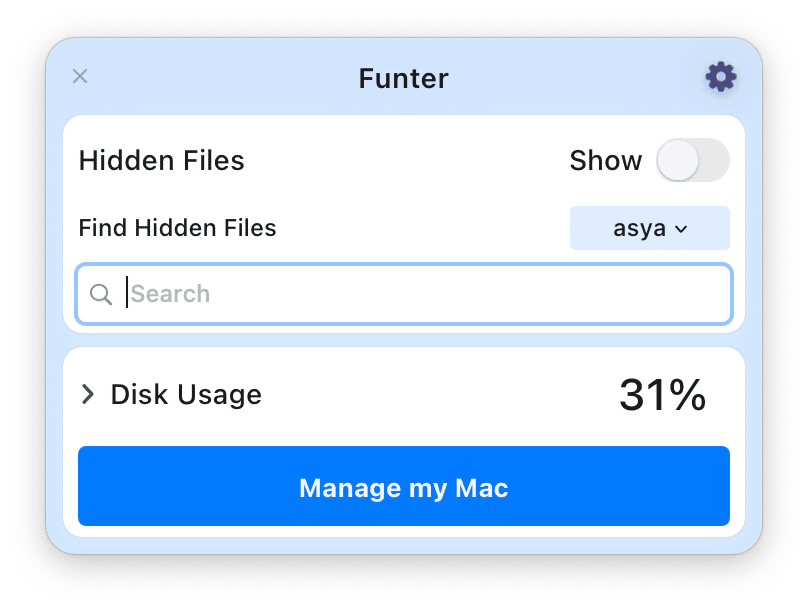
Helpers
The Helpers section provides access to specialized mini-applications that help you control and optimize specific aspects of your Mac, particularly memory and hidden files.

Funter is a tool to operate hidden files on a Mac.
Run Funter for the following tasks:
- Show hidden files and folders with one click
- Hide files and folders with one click
- Search for hidden files and folders
- Copy, move, or remove hidden files and folders
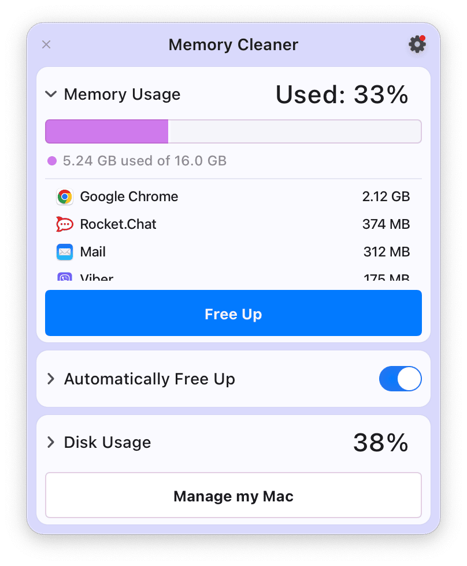
Memory Cleaner allows you to monitor and manage your Mac’s RAM. If your Mac works slowly, we recommend that you use this app.
Run Memory Cleaner for the following tasks:
- Monitor memory usage on a Mac
- Find the most memory-consuming apps in real-time
- Free up RAM with one click whenever you need
- Set up the frequency of RAM cleanup and let the app do this task automatically
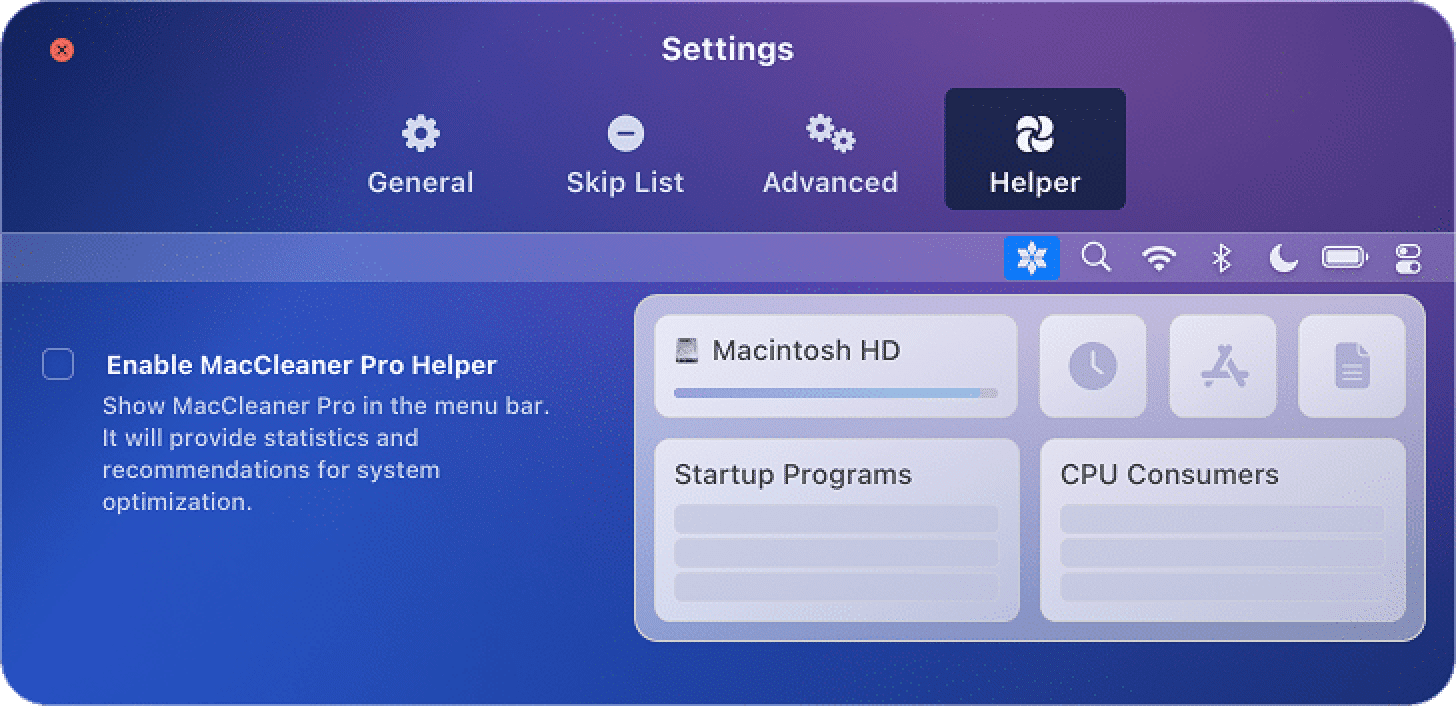
Helper
In addition to the Pro tools, MacCleaner Pro provides a helper that allows you to monitor some important indicators to optimize your system performance.
- Storage usage
- Caches
- Apps
- Top large files
- Startup programs
- CPU consumers
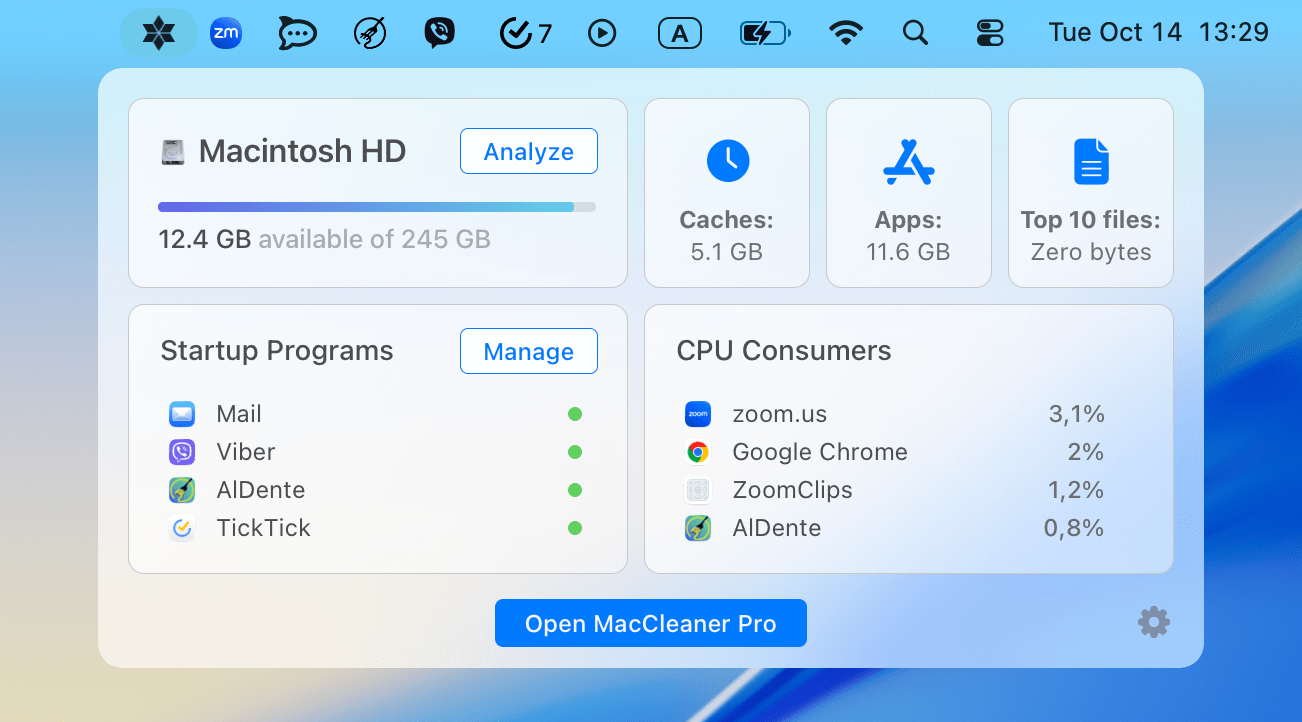
Use this helper to quickly see the information about your system and open MacCleaner Pro to operate the selected items.
To enable MacCleaner Pro helper and access it right from the toolbar, do the following:
- Open MacCleaner Pro.
- Go to its settings.
- Switch to the Helper tab.
- Check the option “Enable MacCleaner Pro Helper.”
Removal history
With MacCleaner Pro, you can view the history of which files you removed using the app. When you clean up files with MacCleaner Pro, by default, they are moved to Trash. This is done for your safety. It means that if you accidentally remove any file important to you, you can restore it from the Trash.
Follow the steps below to view the removal history and restore removed files with MacCleaner Pro:
- Go to the MacCleaner Pro’s menu and click File → select Removal History.

- You will see the Removal History window. Here you can see when and what files you removed with the application.
- If the removed file is in the Trash, you will see the appropriate icon next to the file’s name.
- To restore files, click the Trash icon or select multiple files and click the Restore button.


The files will be restored and appear exactly in the same folders from where they were deleted.
Full disk access
Since the release of macOS 10.15 Catalina, for security reasons, Apple requires that you manually grant access to your apps to operate the user’s files. That’s why, when you launch MacCleaner Pro for the first time, you will need to grant access to your folders to let the program scan your disk. You will see the following message

Click Open System Settings → in the Full Disk Access list, toggle on MacCleaner Pro.
If you don’t see the app in this list, click the plus(+) icon and add MacCleaner Pro.


If you want to remove these files, click on Grant Access and add MacCleaner Pro to the list of apps with Full Disk Access.
Automation Access
MacCleaner Pro allows you to empty Trash bins on your Mac. To scan objects from the Trash folders of all mounted drives, including the iCloud Trash, you need to grant Automation Access to MacCleaner Pro.
Here is how to grant Automation Access to the app:
- Open System Settings and go to the Privacy & Security section.
- Scroll down and click Automation.
- Switch on the toggle button for MacCleaner Pro.

Once you grant Automation Access to MacCleaner Pro, you can empty Trash folders of mounted drives and iCloud with the application.
Language
MacCleaner Pro supports the following languages:
- English
- German
- French
- Spanish
- Italian
- Ukrainian
- Russian
- Chinese (Traditional, Simplified)
The application uses the preferred language you set up for your system. To change the language, follow these steps:
- Open System Settings.
- Click General → select Language & Region.
- Scroll down and locate the Applications section.
- Click the “+” and add MacCleaner Pro to the list of apps.
- Customize the language for the app.

The system will require you to restart the application to start with the new language you set up.
Uninstall MacCleaner Pro
If, for some reason, you need to uninstall MacCleaner Pro, follow these steps:
- Open MacCleaner Pro and go to its settings.
- Switch to the Advanced tab.
- Scroll down and click Remove at the bottom of the window.

- Confirm by clicking the Uninstall button.
- Empty your Trash.


MacCleaner Pro will be removed entirely from your Mac with all of its service files.
License Key
MacCleaner Pro provides a free trial with unlimited features. After the trial period ends, you can view your disk usage and see what is on your disk, but you can’t remove unneeded files. To use the program without any limitations, you need to upgrade to Pro.
Here is how to upgrade to Pro and activate the license in MacCleaner Pro:
- Launch MacCleaner Pro and click the Unlock Full Version button.
- Click Go to Purchase. It will open the purchase page of the product’s website.

- After making a purchase, you will receive an email with the license key. If you don’t see the message, please check the Spam folder.
- Switch to the program again and click Enter License Key. Also, you can open the window for entering the license key by clicking MacCleaner Pro in the menu bar and selecting License info…
- Enter your license key from the email and click to activate it.
- In a moment, your license will be activated.


If for some reason you lose your key, contact our support team and provide the email address you used to make the purchase, and we will send you your activation key.
How-to Guides
Video Guides

Troubleshooting
When you are cleaning up the Trash bin with MacCleaner Pro, you might face an error with deleting some items from Trash. In this case, MacCleaner Pro shows the exclamation mark next to the file name in the removal confirmation window.
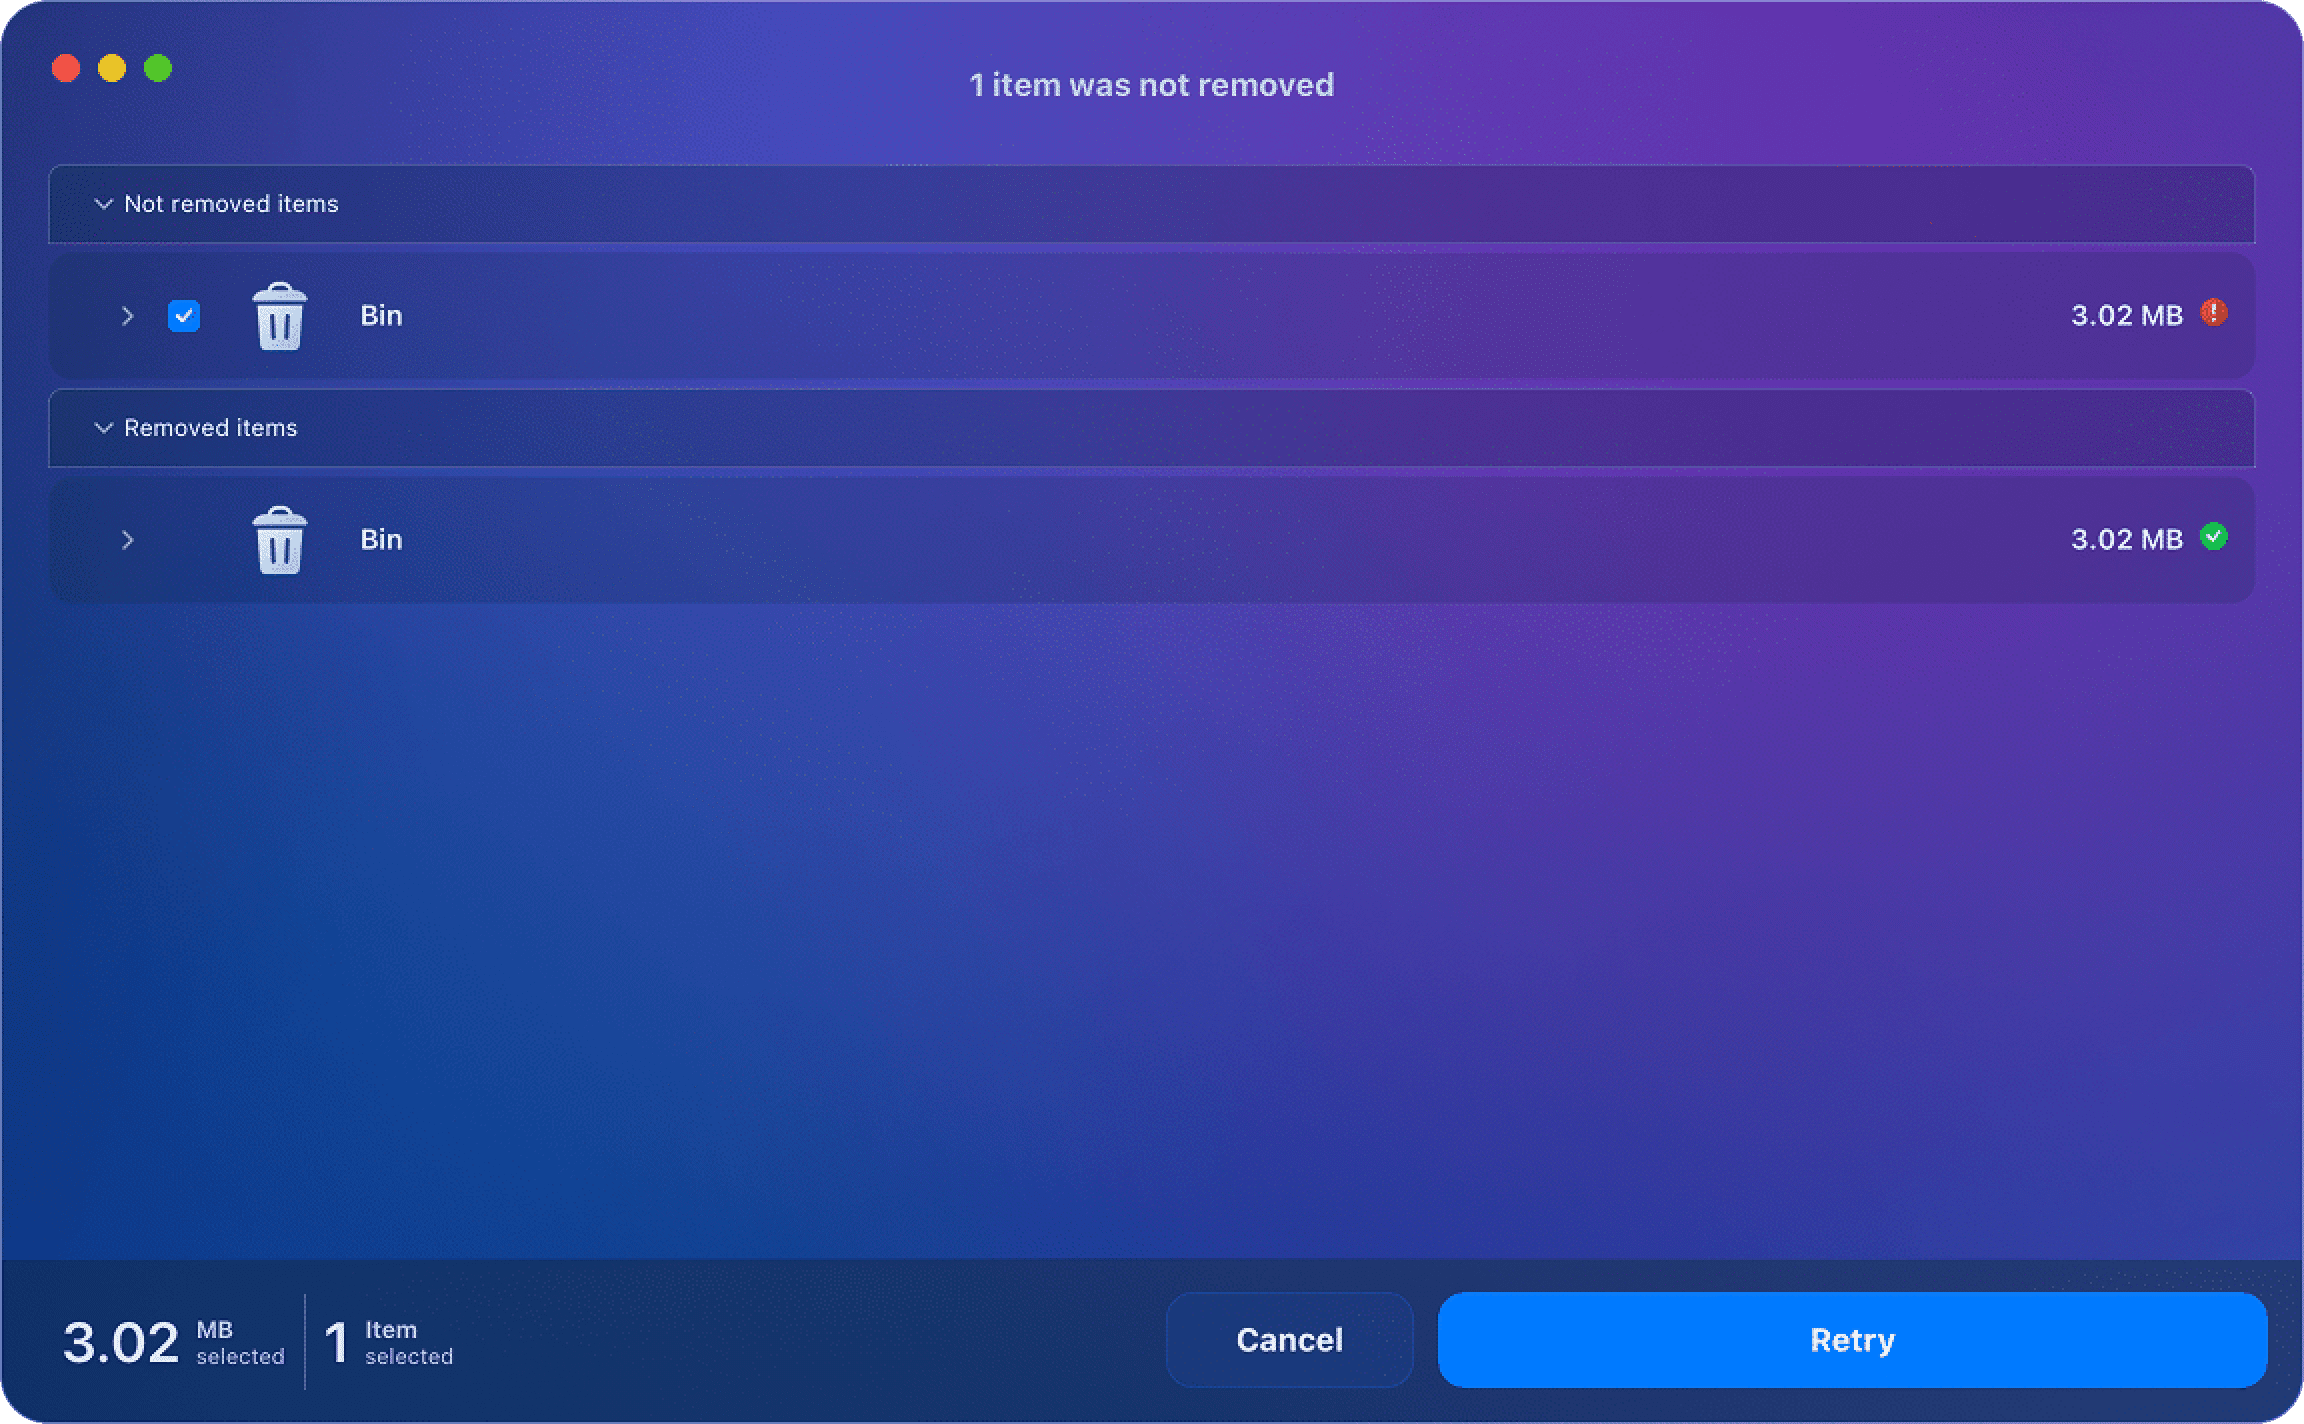
This issue might happen with the files that belonged to a deleted user and were backed up by Time Machine. The macOS system might not allow you to permanently delete these files from the Trash due to security reasons.
To resolve this problem and remove the items from Trash, follow these steps:
- Restart your Mac in Recovery Mode. For this, press the Command+R shortcut when rebooting the Mac. If you are using a Mac with an M1 processor, instead of pressing Command+R, keep pressing the power button for 5 seconds to enter Recovery Mode.
- In the startup window, select Recovery Mode.
- Go to the Menu bar and click Utilities → select Terminal.

- Type the command below to disable SIP on Mac and press Return.
- csrutil disable
- csrutil disable
- Restart your Mac.
- Delete the problematic files from Trash manually or with the help of MacCleaner Pro.


After deleting the files, don’t forget to re-enable the System Integrity Protection. For this, again restart your Mac in Recovery Mode → open Terminal, and this time type this command:
- csrutil enable
Then restart your Mac.
This will prevent the accidental removal of important system files on your Mac.
