Every new macOS brings new features and improvements to the system. And the Big Sur system brought in solid changes, especially in design. In our previous article, we shared tips on how to correctly prepare a Mac and upgrade to Big Sur. But, if for any reason you want to revert to macOS Catalina from Big Sur, don’t worry. As always, we have prepared for you a detailed step by step guide that will help you to downgrade Big Sur to the previous version of macOS.
Before we start, a quick tip to fix a slow macOS
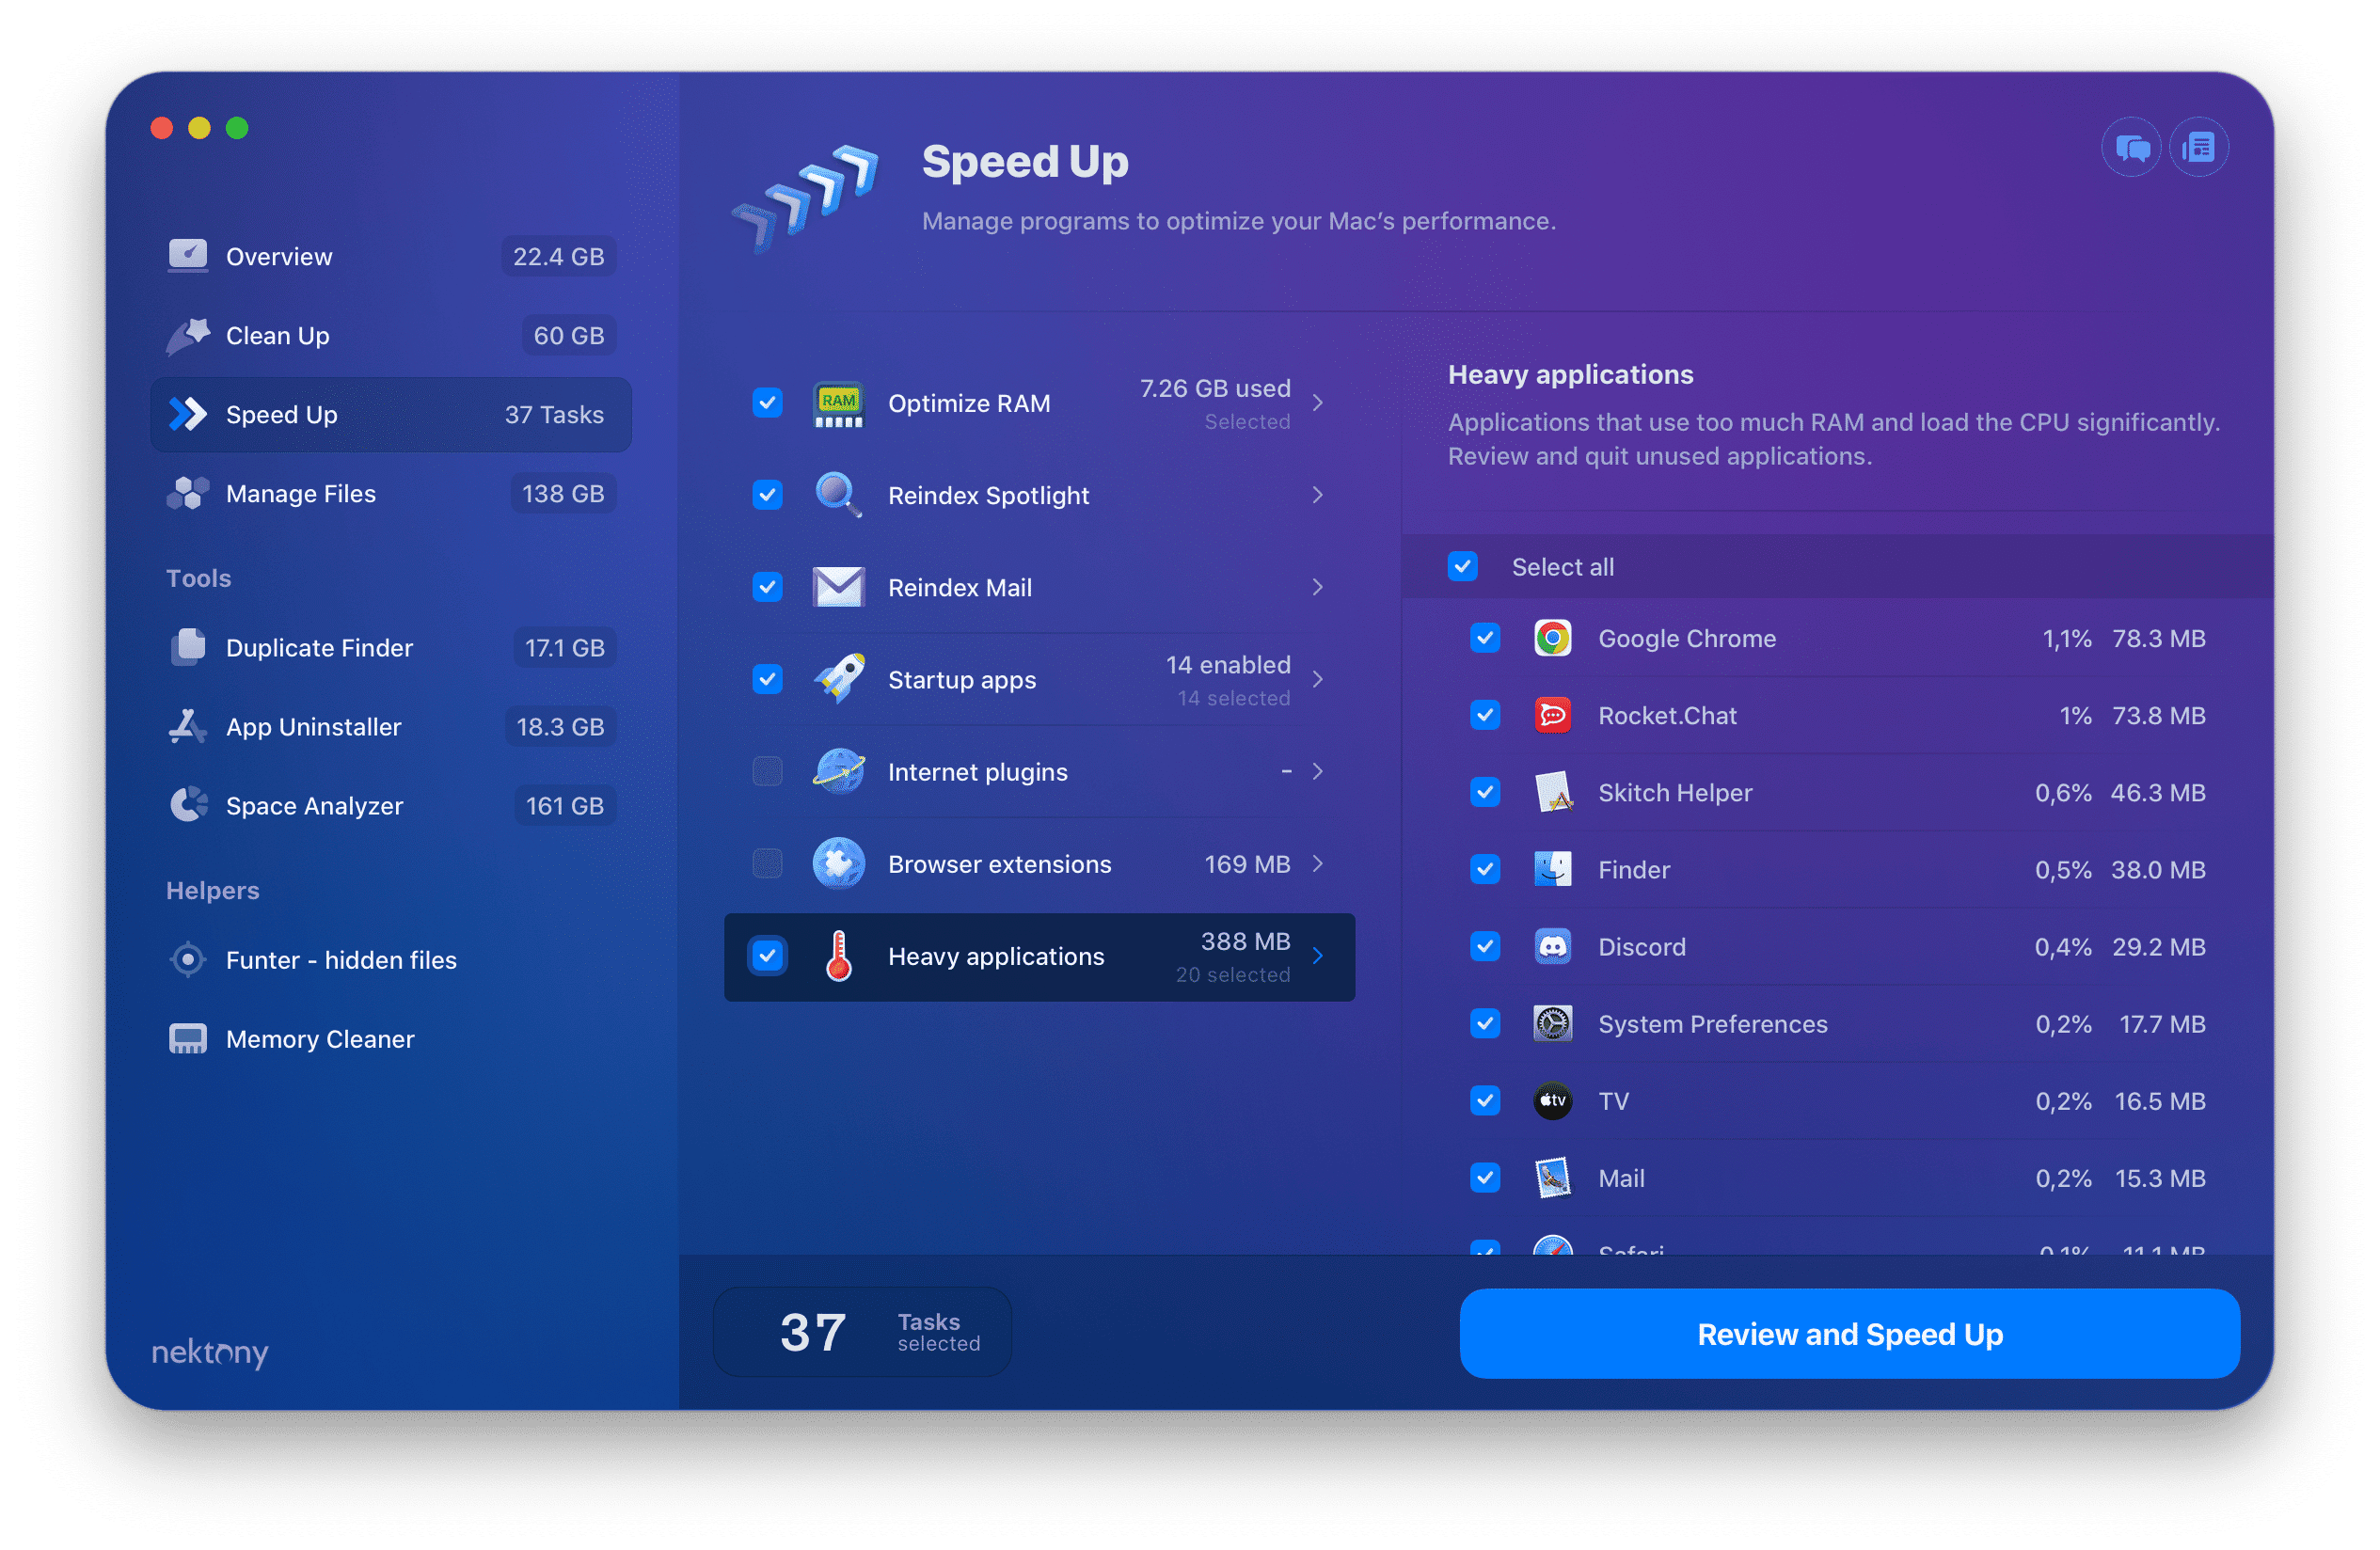
Use MacCleaner Pro to clean up all junk stuff on a hard drive and speed up your Mac.
MacCleaner Pro
Steps to revert to macOS Catalina from Big Sur on a Mac
1. First, prepare your computer for reverting to macOS Catalina.
- If you use a MacBook, connect it to a power source.
- Make sure that you have a stable internet connection.
- Disconnect all external devices from your Mac, except the hard drive you may use for making a backup.
2. Make a backup copy of your Mac’s data
Generally, we recommend that you always back up Mac’s data before updating and installing any new system on your computer. In case something goes wrong, you can always recover your important data. Also, one of the next steps will include erasing your HD on macOS Big Sur and recovering your data on another system. So never skip this step.
Transfer your data to external cloud storage, such as Dropbox, Google Drive, iCloud, or use the Time Machine and select an external disk for storing the backup copy:
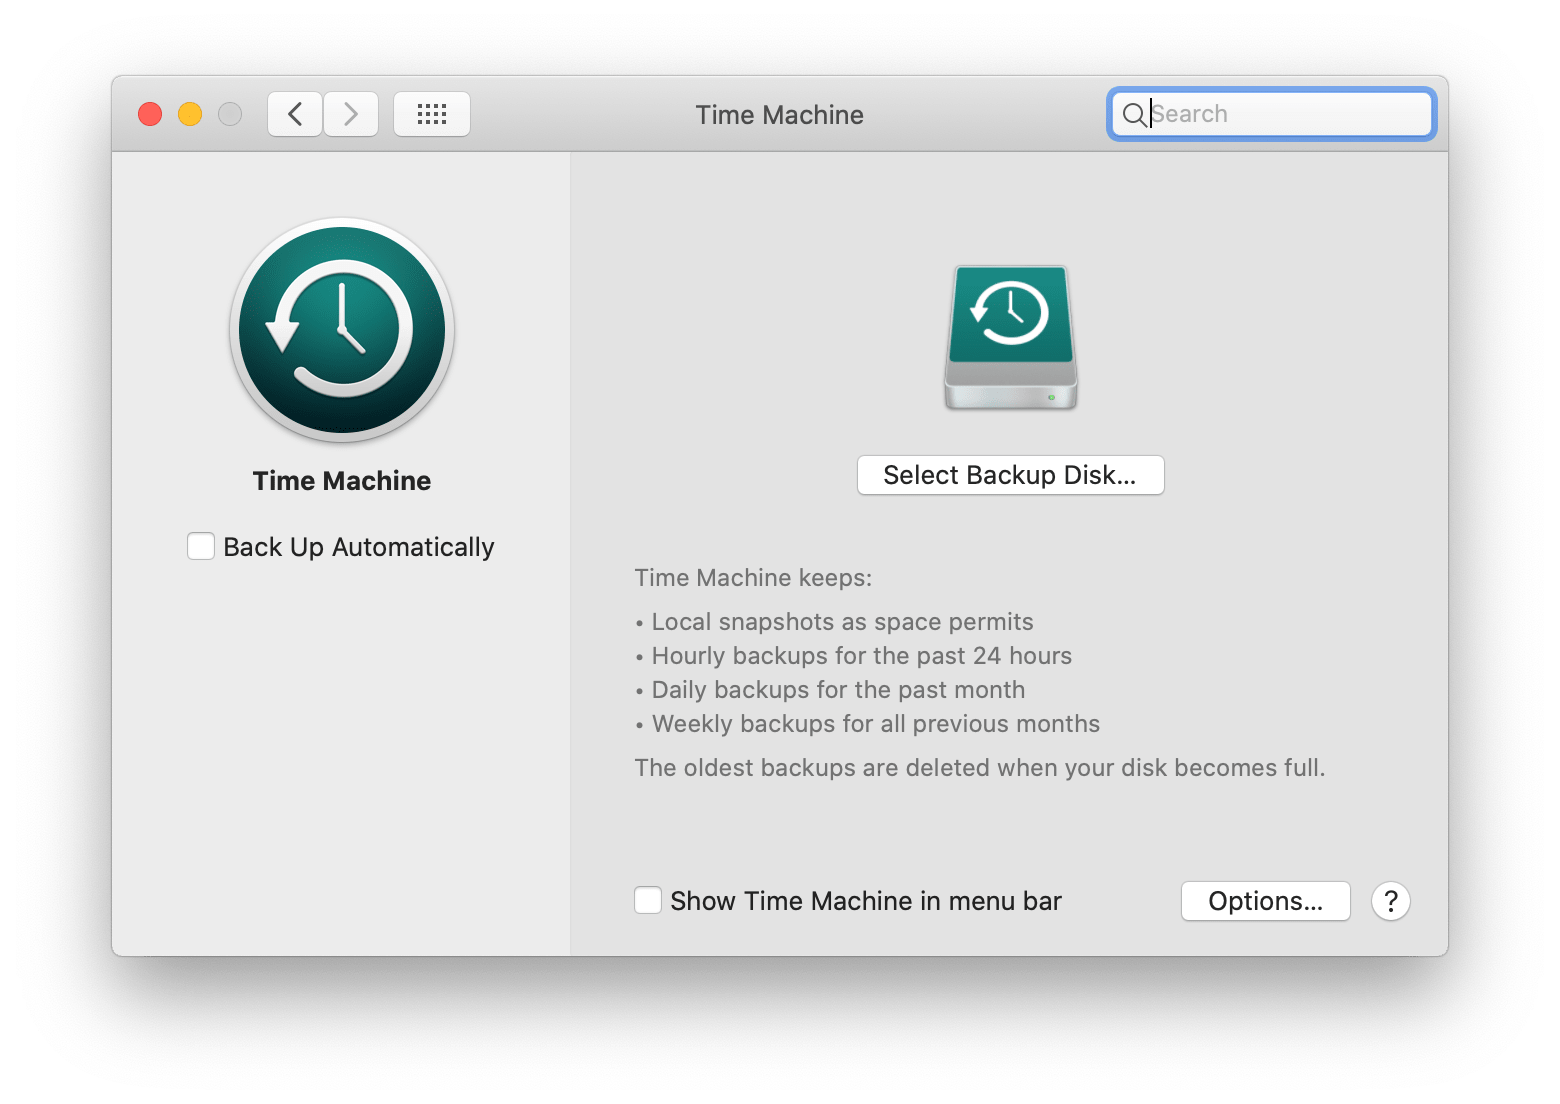
- Go to System Preferences → Time Machine
- Click on Select Backup Disk… → choose the disk and click on Use Disk.
3. Download macOS Catalina or another system you want to use instead of Big Sur
Basically you have several options for installing another Mac operating system:
- Time Machine backup. If you regularly back up your Mac, most likely, you can restore one of the previous backups and revert to macOS Catalina from Big Sur. Learn how to use Time Machine on a Mac.
- Internet Recovery. By default, Apple provides the possibility to reinstall the factory-preloaded system from macOS recovery. Learn on the Apple support page on how to reinstall from macOS Recovery.
- Bootable installer. Download in advance the version of macOS to which you want to downgrade from Big Sur. Here are the links where you can download macOS Catalina, High Sierra, or Mojave. Save the installation file on an external hard drive.
Select one of the options above and move to the next step on the way to downgrading macOS Big Sur.
4. Erase Macintosh HD
Now you need to erase macOS Big Sur for a clean installation of another system version. But let me first explain why you need to do this.
The macOS system is designed in a way so that it allows you to install a newer macOS system on the earlier system. But if you want to install an old system on an already installed new one, this process will not even start. That’s why you have to completely erase the new systems on your Mac and clean up all your files. Also, that is the reason why we asked you to back up your data before downgrading the system.
Follow these steps to erase Macintosh HD:
- Restart your Mac in Recovery mode. For this, first shut down the computer. Then press and hold the Command (⌘) + R shortcut and at the same time press the power button.
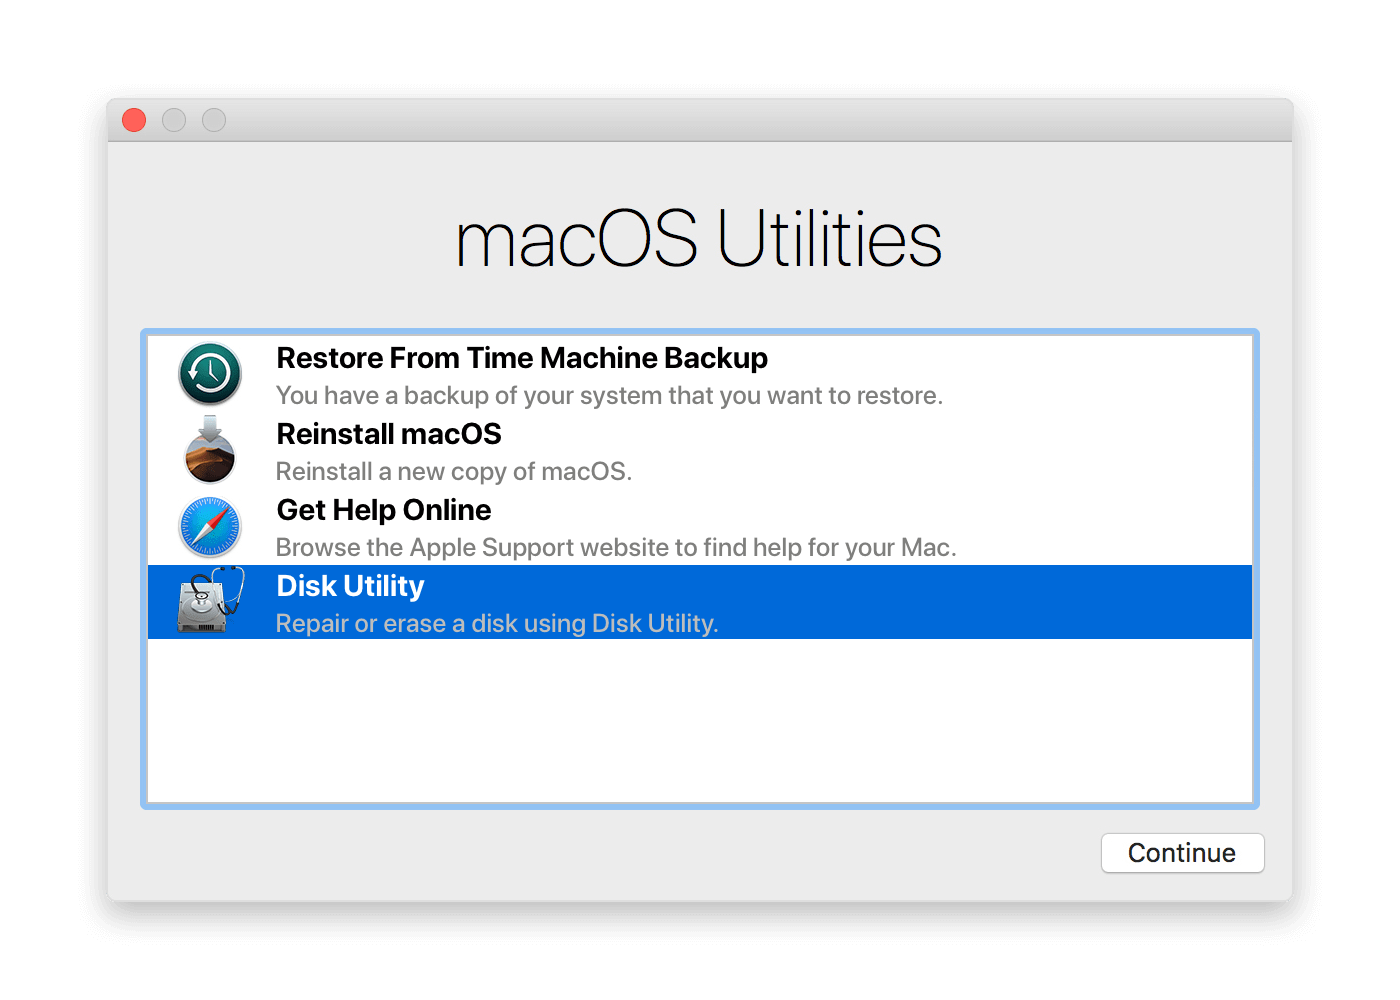
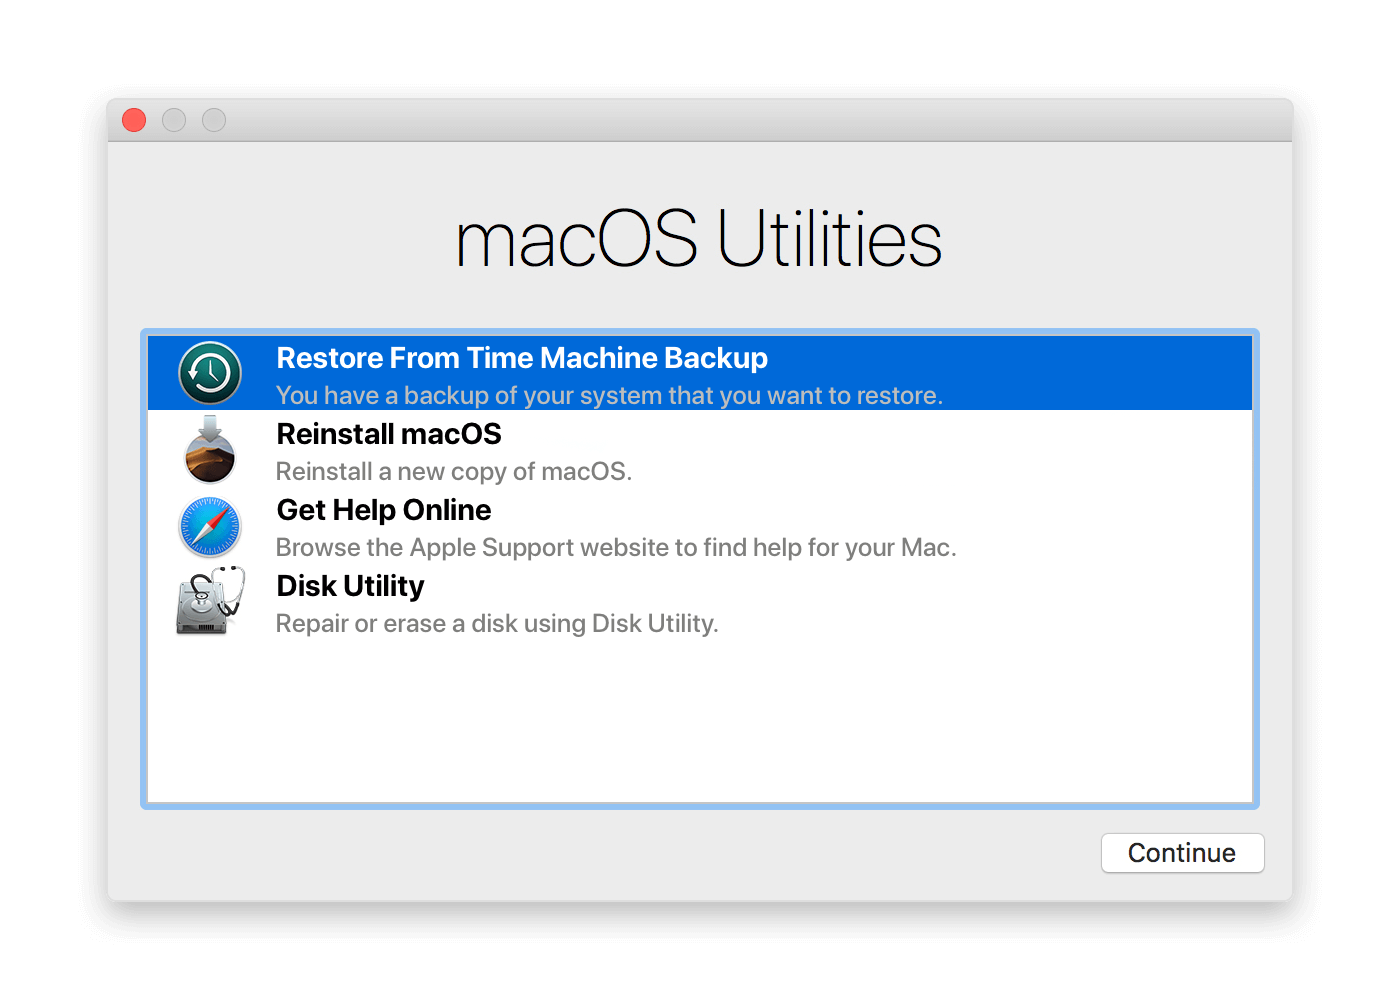
- You will see the macOS Utilities window. Select Disk Utility and click Continue.
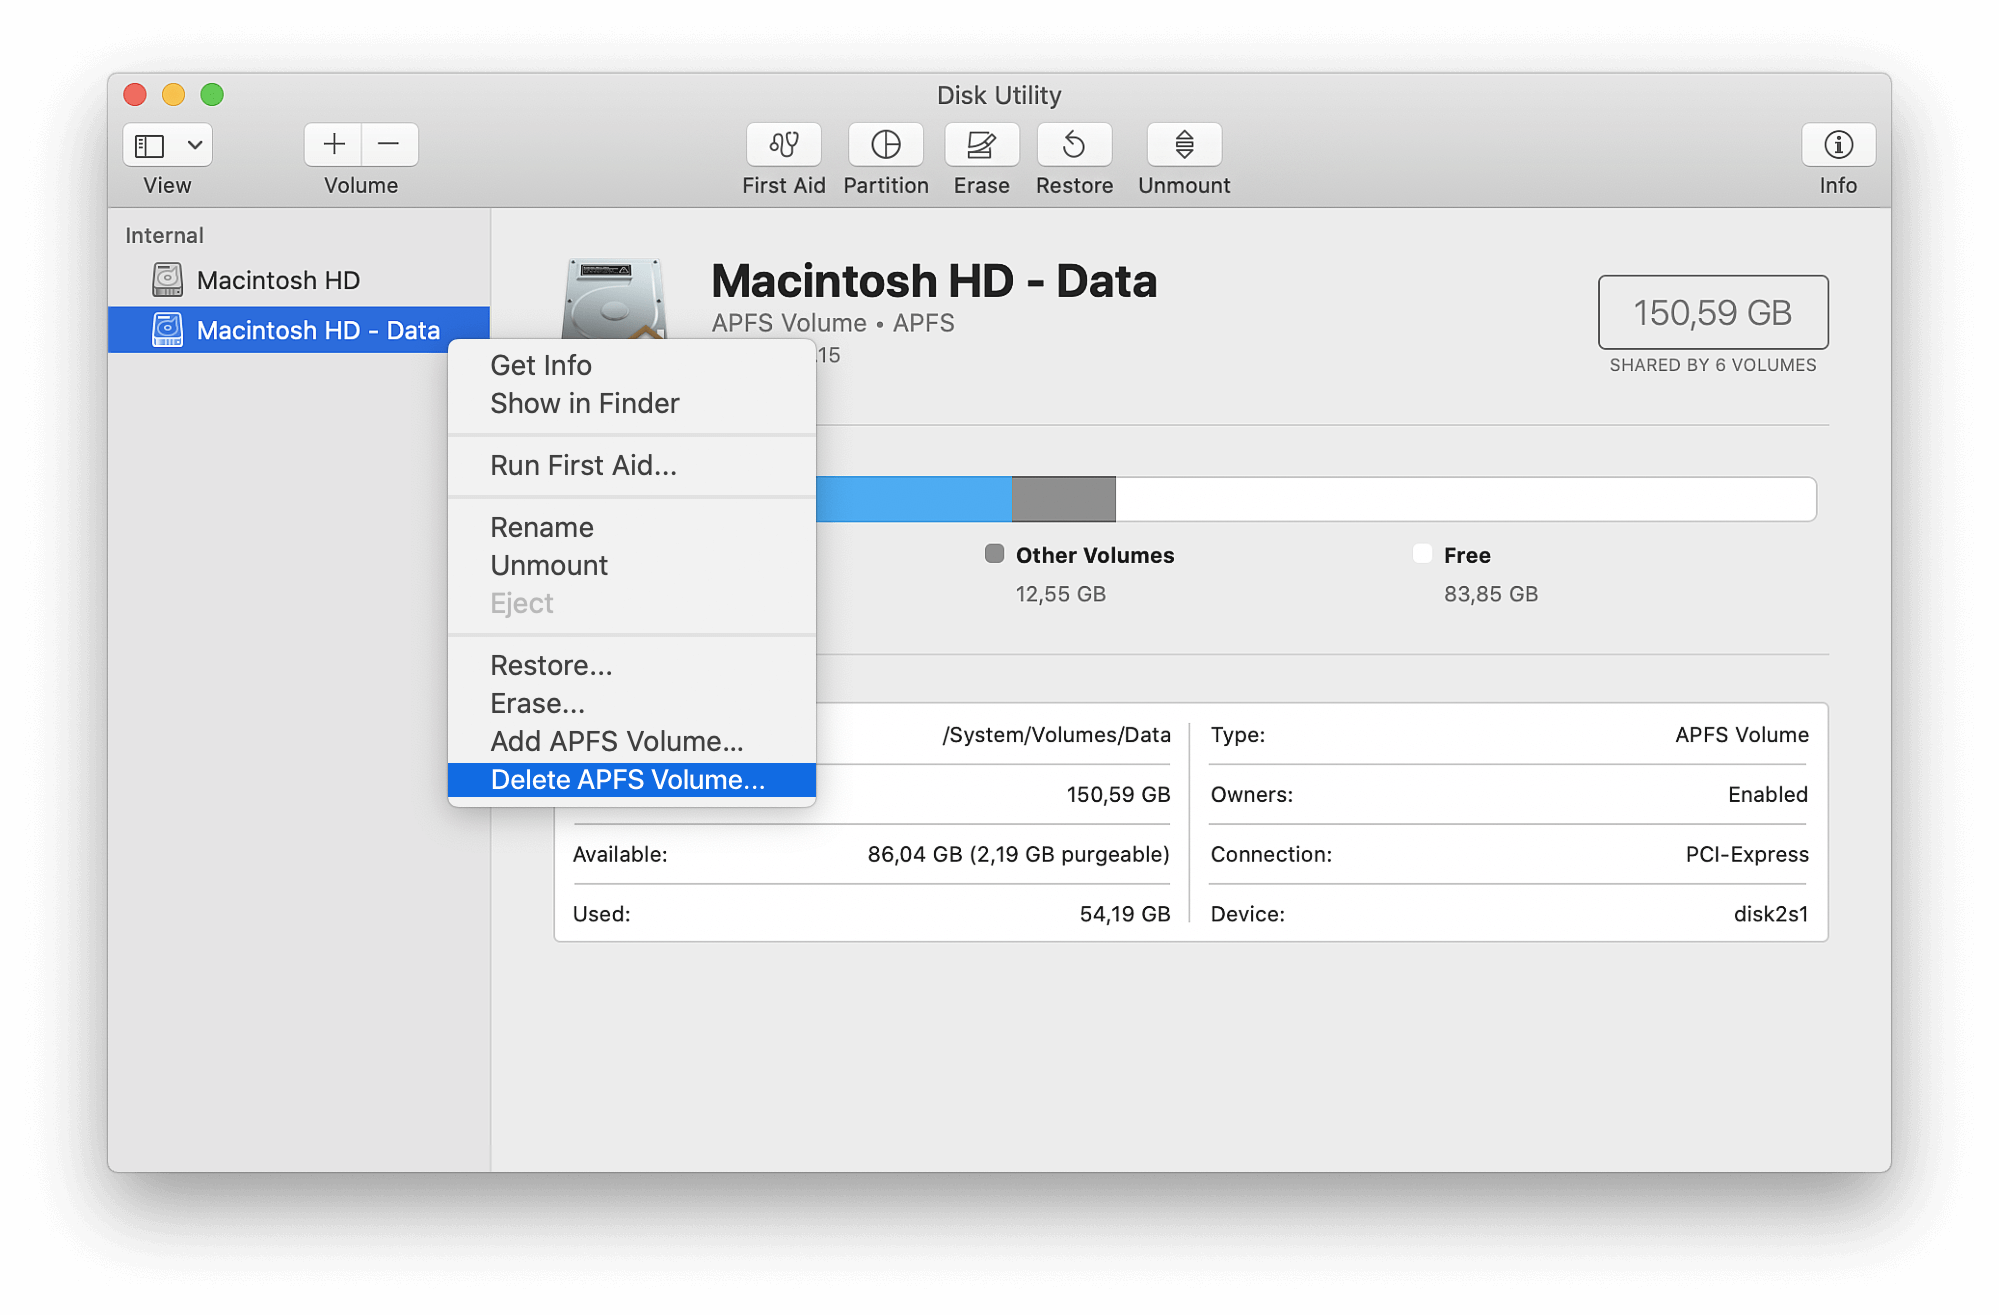
- You will be switched to the Disk Utility window. Here in the sidebar select Macintosh HD – Data volume and click to Delete APFS Volume from the context menu.
- Then, in the sidebar select Macintosh HD and click to Erase. You will need to provide a name, choose a partition map and format.
- Quit Disk Utility and restart your Mac.
5. Rewind macOS
Now you are ready to downgrade from macOS Big Sur to Catalina. As we mentioned above, you can restore the earlier macOS from the backup or reinstall it using a bootable installer.
If you use Time Machine, follow these steps to reinstall macOS Catalina:
- Connect the external drive with a backup to your Mac.
- Restart your Mac in Recovery Mode. For this press and hold the Command (⌘) + R while restarting.
- You will see the Utilities window. Select Restore From Time Machine Backup → click on Continue → confirm it.
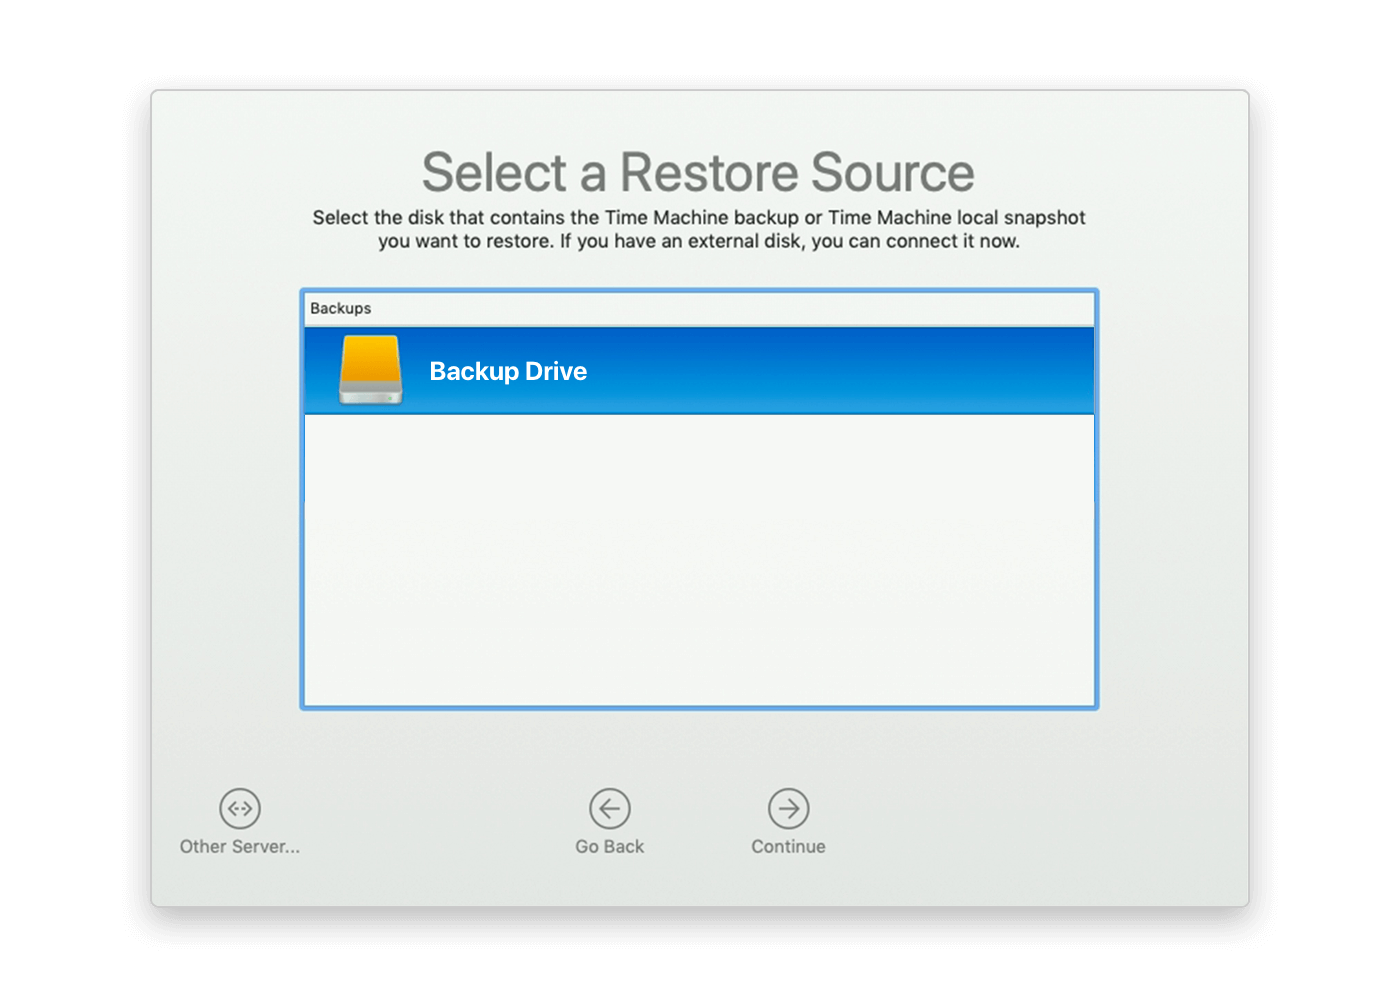
- Select your Backup Drive and click Continue → choose the desired backup version with macOS Catalina and click Continue → select your Macintosh HD (startup disk) and click to Restore.
- When done, restart your computer in the usual mode.
If you use Internet Recovery, follow these steps:
- Make sure you have a stable internet connection.
- Restart your Mac and while rebooting press and hold the Command (⌘) + Option + R shortcut.
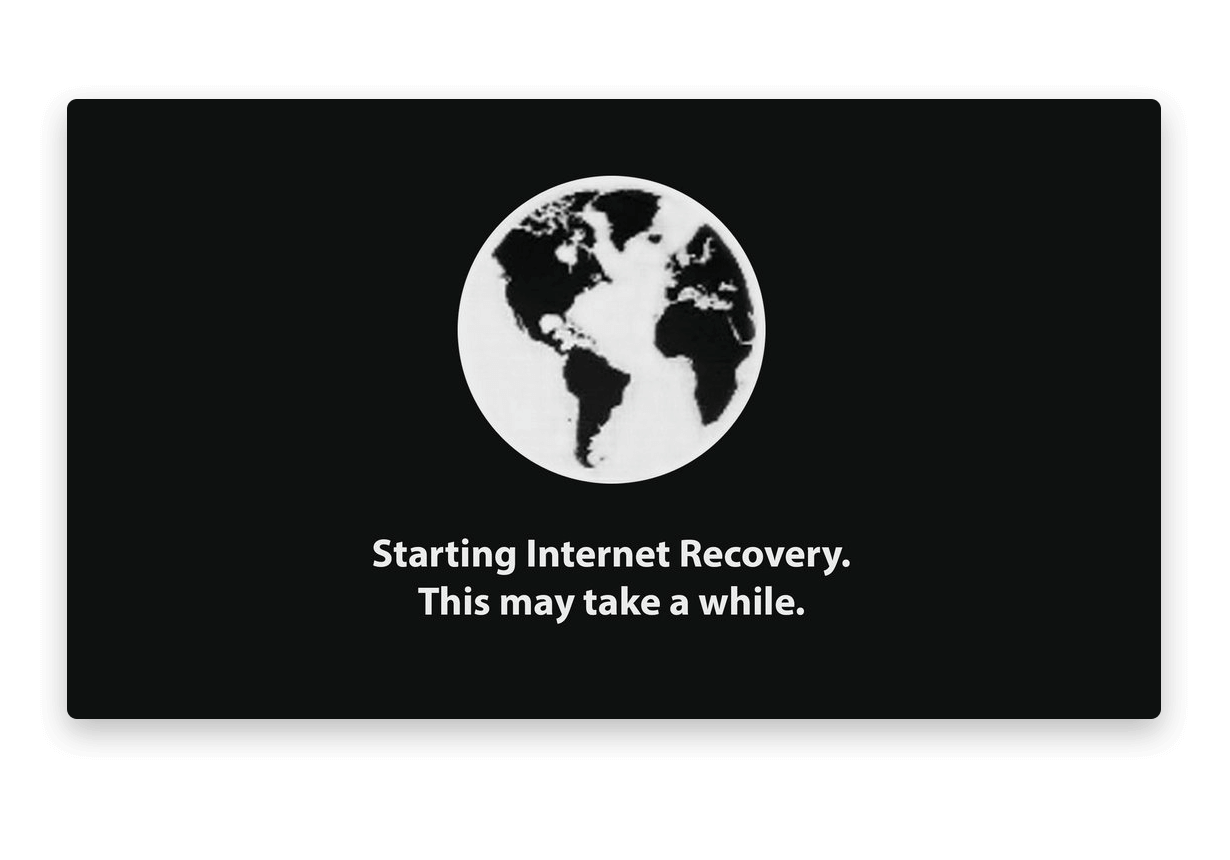
- You will see a screen with a message that Internet Recovery is starting.
- Mac will check whether the factory-preloaded macOS is available and download it. Please note, this may take a few hours.
- As soon as the macOS installation file is ready, you will see the Utilities window. Select Reinstall macOS and follow the instructions provided on the screen.
- Once another system is installed, restart your Mac.
If you use a bootable installer saved on an external drive, complete these steps:
- Connect an external drive with the installation file with your Mac.
- Restart your Mac and immediately press and hold the Option key.
- You will see an option to select your external disk as a boot disk. Select this option.
- Then you will see the macOS Utilities window. Click Continue to proceed.
- Follow the instructions on the screen to install an earlier version of macOS.
- Once it is finished, restart the computer.
A little reminder: How to make macOS Big Sur work faster
Once again, if you want to downgrade macOS Big Sur just because your Mac is slow after the update, you can fix this issue in a quicker way. Just use MacCleaner Pro to clean up your drive and speed up Mac’s system performance.
- Launch MacCleaner Pro.
- Go to the Speed Up tab from the sidebar.
- Preview and select the options for optimizing Mac speed.
- Click the Review and Speed Up button and confirm running the selected tasks.
Also read the article How to improve a slow Mac and fix any possible issues.
To sum up: How to prevent issues with macOS Big Sur
Now you know how to downgrade macOS Big Sur. It may not seem that easy, but, if you follow our instructions step by step, you will see that everything is easy. Just don’t forget to make a backup before installing another system, as it will help to recover your data whenever you want. Also, no matter which system version you use, we recommend that you regularly clean up your Mac from junk files and fix slow performance issues with MacCleaner Pro.
