May 20, 2025
Five ways to completely uninstall apps on a Mac
Deleting apps on your Mac is more than just dragging them to the Trash. In this guide, we’ll show you how to completely uninstall apps from Mac, including all their remaining files, so they’re really gone. You can do it manually or use a special Mac cleanup tool to make it easier.
Comparison table of key app removal methods
| Third-party tools | Manually | Native uninstaller | |
|---|---|---|---|
| Cost | Paid | Free | Free |
| App coverage | Supports 1000+ apps | Manual per app | 1 app a time |
| Time required |
Very fast
(~10 sec)
|
Time-consuming
(2-5 min per app)
|
Fast
(~1 min)
|
| Ideal for | All users, including beginners | Tech-savvy users | Tech-savvy users |
| Cleanup reliability | Removes all service files | Often leaves behind files | May leave tracking or marketing components |
Why deleting the .app file isn’t enough
When you drag an application to the Trash, you’re only removing the main app file. But most Mac applications store additional files in hidden folders across your system — including logs, caches, preferences, launch agents, and more. These leftover files can take up disk space and potentially affect your Mac’s performance.
Did you know?
According to Nektony’s internal data, up to 80% of uninstalled apps leave behind residual files, which can occupy anywhere from 500 MB to over 5 GB depending on the app.
For example, uninstalling professional software like Adobe Creative Suite or Xcode can leave gigabytes of leftover data in your system unless fully removed.
According to discussions on Apple Support Communities suggest that system performance can begin to decline when free disk space drops below approximately 15%.
This is why using a dedicated uninstaller or manually cleaning up these files is essential for a complete removal.
The quickest way to uninstall apps from Mac
One of the easiest ways to uninstall programs from a Mac is to use special third-party tools like App Cleaner & Uninstaller from Nektony. Such programs are designed especially to remove any program correctly and completely. The app is easy to use and it lets you complete the task with several clicks.
How to use App Cleaner & Uninstaller:
- Download and launch App Cleaner & Uninstaller.
- You will see the list of all apps installed on your computer. Select the one you don’t need.
- Click the Uninstall button.
- Confirm the removal.
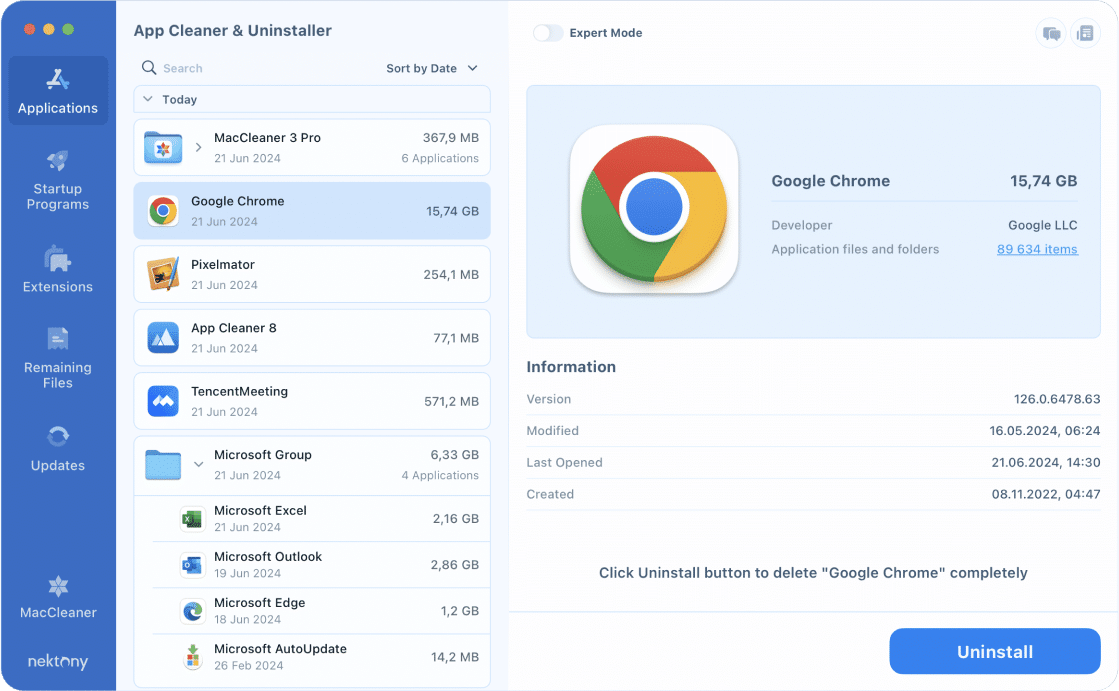
Video guide: How to use the uninstaller
1:09

App Cleaner & Uninstaller supports 1000+ Mac apps for removal. In addition, it has extra features that you can use to reset apps, clean up broken service files, find leftover files, update apps, and even manage user and system extensions.
Uninstall applications using Trash
This way takes a bit more time, and it requires understanding the macOS catalog system. The one thing you should always remember is that after moving a program into the Trash, you also need to find and get rid of its service files, which are located in hidden debris in your folders.
If you are a new Mac user, we highly recommend that you first learn about the hidden Library folder and then use this tutorial because you should be careful not to remove extra files by accident, which may damage the macOS system’s work.
Ok, let’s learn the manual way. Here are the steps you need to follow:
- Quit the program.
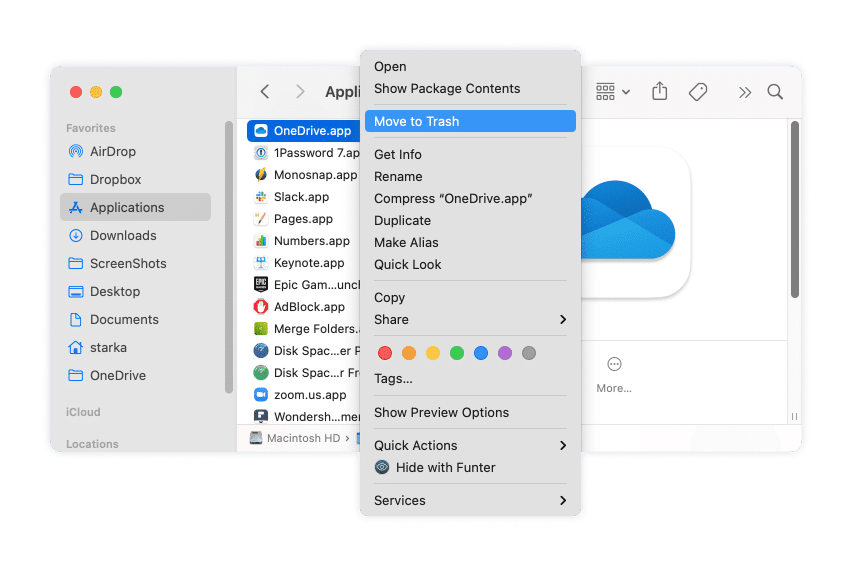
- Open Finder and go to the Applications folder.
-
Locate and move the unneeded app to Trash.
-
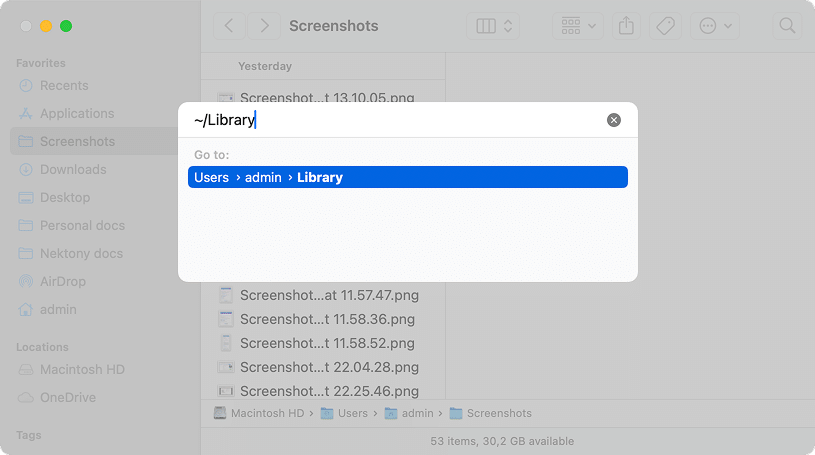
Now it’s time to find all its remains. While you are in the Finder, press the Cmd+Shift+G shortcut.
- In the window that appears, type and press Return.
~/LibraryCopy
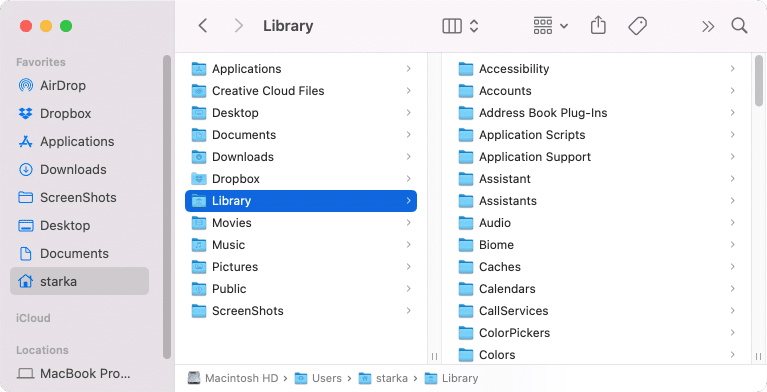
- Within the Library folder, find and delete all files and folders that are associated with the program you want to remove. This means that you should look for all items containing the name of the deleted app within the file name. Here is a list of the most common system file folders:
~/Library/Application SupportCopy
~/Library/CachesCopy
~/Library/LogsCopy
~/Library/PreferencesCopy
~/Library/ContainersCopy
~/Library/CookiesCopy
- Don’t forget to clear the Trash after uninstallation.
Once again!
You should be familiar with this folder before removing files. If you remove important system files by mistake, it may cause damage to your Mac.
How to remove apps from the Launchpad
Launchpad on Mac is like an iPhone home screen for your apps, that displays all installed apps in a grid so you can quickly find and open them without using Finder.
Here’s how to use it:
- Open Launchpad from the Dock panel. If you don’t see its icon there, find it in the Applications folder or use Spotlight.
- Press and hold the Option key.
- You will see “X” icon on the applications’ icons.
- Click the X icon of unneeded apps
- Confirm by clicking the Delete button.
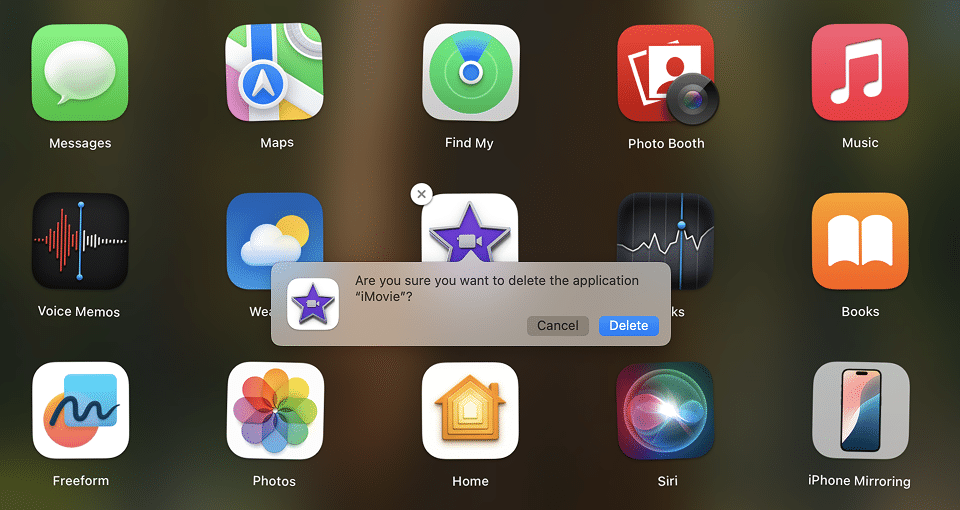
Instead of using the Option key, you can also click and hold the app’s icon to see the “X” button.
Note:
In this way, you can delete the app downloaded from the App Store. Applications that have been downloaded from websites cannot be removed from Launchpad.
Removing apps from Launchpad also doesn’t remove app service files. You will need to manually find and clean them from the Library folder.
How to delete apps using their native uninstallers
Some developers provide special uninstallers for their apps. These items are only for apps downloaded from the Internet and are used mostly if special preferences and drivers are needed.
Usually, the native uninstallers should be stored in the Applications folder in Finder but they don’t appear in Launchpad. If your application has such an uninstaller, find it in Finder (or use Spotlight) → launch it → follow the steps provided by the uninstalling process.
Take a look at the screenshot example. Here is what an uninstaller for Bitdefender looks like. Each application has its own removal steps and window interface.
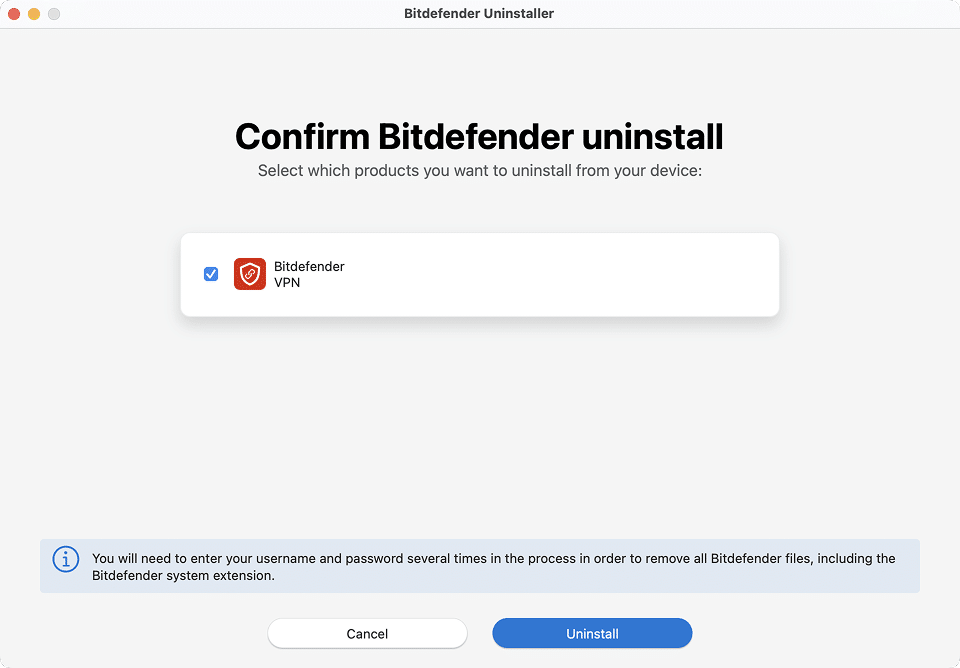
It may happen that you remove an uninstaller item accidentally. In this case, you can check the developer’s website to download it again or use one of the app’s removal ways as shown above.
How to uninstall programs on Mac using Terminal
Terminal is a default Mac application that allows you to interact with the system’s underlying Unix-based operating system through a command-line interface.
Uninstalling apps on a Mac using the Terminal app involves a few steps:
- Open the Terminal application. You can find it in the Applications folder → Utilities.
- Type the following command, but replace <app name> with the actual name of the app you want to uninstall (including the .app extension):
sudo rm -rf /Applications/<app name>.app - Press Return.
- If required, type your admin password and press Return.
For example, to remove the Firefox browser, the command would look like:
sudo rm -rf /Applications/Firefox.appCopy
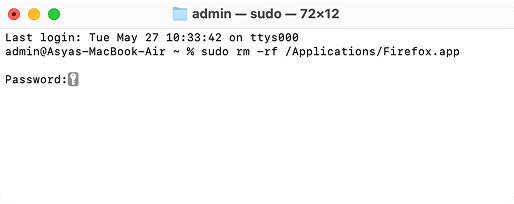
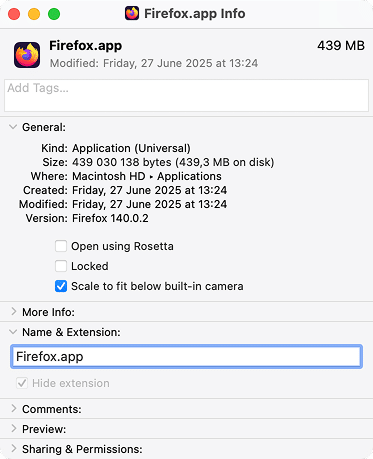
To make sure you use the exact application name as it appears in Finder right-click the app in the Applications folder → select Get Info → copy the name exactly as shown in the Name & Extension field.
/Library
Copy
~/Library
Copy
Important!
Be very careful with the sudo rm -rf command. If you use it incorrectly, you can delete all your applications – or worse, remove critical system files and lead to permanent data loss.
How leftover app files can affect your Mac
When your Mac’s available storage falls below 15-20%, system performance can slow down noticeably. Here’s how each type of leftover files impact your Mac’s performance.
| Type of leftover file | Potential Impact |
|---|---|
| Preferences (.plist) | May load settings or trigger errors if app is reinstalled |
| Caches | Accumulates over time and uses disk space |
| Application Support files | Stores large data (e.g. project files, history) |
| Launch Agents / Daemons | May auto-run leftover services on startup |
| Saved States / Logs | Can bloat storage and slow app re-launch times |


Hello, the design of your website is very beautiful and eye-catching. It is also very useful that it is mobile friendly.